How to properly slak lime for whitewashing: instructions
The choice of lime for whitewashing walls is due to the fact that this coating has antiseptic properties and does not deprive the surface of its ability to breathe. Whitewashing is quite simple without the involvement of a specialist, and the material is quite easy to work with. Lime whitewashing of walls allows you not to worry about the formation of fungus or mold. The only nuance that should be taken into account is the preparation of the composition in compliance with all the nuances. The most popular is considered to be fluff. It is a white powder that has undergone a quenching process and requires the addition of liquid and various fixatives before application. Lime is sold in two versions - slaked, in the form of a dough (paste) or powder, quicklime, produced in the form of small or large lumps, as well as granules. The latter variety cannot be used for whitewashing. And if only this is available, the mixture is first extinguished. Quicklime is used as an additive in plaster and cement mixtures to improve plasticity properties and bind the components together.
What additives are added to lime?
Before applying it to the walls, diluted lime is refined by adding various substances to it. Such additives include liquid glass, salt, soap, glue, flour, milk, egg whites and paint colors. Colors for paints go well with lime and allow you to give it any shade.
Adding linseed oil to whitewash makes it more suitable for treating very smooth surfaces that are difficult to coat with paint. Glue and salt make the whitewash viscous; after drying, it leaves no traces when touched. If you add glue or salt and color to lime, it will make an excellent material for interior work in a residential building. In terms of cost, using lime is more profitable than painting walls with water-based paint or other types of materials, and in terms of quality and disinfecting properties, it even surpasses many of them.
How to properly slak lime?
Hydrated lime, that is, slaked lime, is formed during the interaction of lumps or granules with a catalyst, which is water. A correctly carried out procedure is crucial, since, depending on the specific technique, you can get completely three different compositions: lime water, fluff - dry calcium hydroxide, suspension - lime milk.
The extinguishing process is accompanied by the release of a large amount of heat and is, in fact, a chemical reaction when a substance passes from one state to another. A person pouring calcium oxide with water must take all precautions to avoid getting burned. Along with a lot of heat, there is usually splash, so wearing personal protective equipment is a must.
To carry out cancellation according to all the rules, you need to follow a clear algorithm of actions. Each stage requires thorough execution, since it ultimately allows you to obtain high-quality fluff for whitewashing the surface of the walls. The difference between the compositions is not significant, but it does affect the quality of the work performed, so the recipe should be followed.
First stage
It is necessary to prepare the container. It should be washed well. It's best to take a saucepan. Water should only be used when cold. It is taken in large quantities. Limestone is poured into a prepared clean container and filled with water. For 1 kg of potassium oxide you need 1 liter of liquid. Additives are not always introduced, but it is thanks to the additional components that it is possible to obtain a better quality whitewash. Extreme caution must be used at this stage. The mixture will begin to heat up, bubble, and splash. Therefore, you should initially work with gloves and glasses. Otherwise, the hot solution may burn your skin and get into your eyes. The reaction takes more than half an hour. You cannot touch the composition until it completely “calms down”. Next, it is mixed with a previously prepared stick. The latter should be wooden.
Second phase
Slaked lime is not used immediately. It must be left to infuse in a cool place. The longer the preparatory solution sits, the better the adhesion properties become. The optimal holding time is considered to be from 5 to 10 hours. Some sources say several weeks, which is quite a long time. Usually a few hours are enough to get a fairly good whitewash, which will then fit perfectly onto the wall surface.
Some interesting points about lime
- If there is no lime to apply as a fertilizer, then ordinary wood ash can replace it. It can also reduce soil acidity and is rich in potassium. This type of fertilizer is applied in larger quantities than traditional limestone or dolomite.
- Many inexperienced gardeners make the mistake of replacing quicklime with regular gypsum. It is not worth introducing this element into the soil, since it has no effect on acidity. Its application is required only in highly saline soils in order to crystallize the excess salt mass.
- The frequency of use of this type of limestone directly depends on what other varieties are added to it. When adding mineral elements, adding lime is required more often than when adding organic matter. Organic matter is a strong fertilizer in itself, after which additional limestone is not required.
- Not all popular garden crops take well to lime; this fact also needs to be taken into account. Lime is categorically intolerant to potatoes, tomatoes, sorrel, peas, parsley, carrots, zucchini and pumpkin. In gardening, there are also plants that react extremely negatively to the addition of lime to the soil, among them it is worth noting aronia, gooseberries, strawberries, raspberries, and blueberries.
Extinguishing rate
Lime is divided into varieties not only according to the recipe, but also according to the time of the procedure. The quenching period is calculated depending on when the temperature subsides, that is, heat ceases to be produced when combined with water:
- fast pace - from 5 to 12 minutes;
- average pace - from 13 to 22 minutes;
- slow pace - 25 minutes or more.
The extinction period has a direct impact on the quality of the resulting solution; it is prepared with some differences. It is necessary to decide in advance at what rate the extinguishing will take place. Otherwise, the quality of the whitewash may suffer.
Slaked at fast and medium rates
The pan is filled halfway with limestone and then filled to the brim with water. Lumps or granules begin to dissolve when steam appears. Stir it with a wooden stick and add a little more liquid. They continue to dilute the substance to obtain the desired consistency even when the extinguishing has already been completed. It is recommended to pour the resulting composition into a working container in which it will be used for whitewashing. Lime that is slaked at an average rate is no different from lime that is slaked quickly. The proportions are also one to one. The difference is that dilutions are not carried out until the chemical reaction process is complete.
Slowly produced lime
The pan or other container is also half filled with potassium oxide, and water begins to be poured rather slowly. When the lime finishes cracking, continue to add liquid in small portions. The result is milk, which is carefully mixed. The disadvantage of this preparation is that not all the pieces will dissolve. It is quite difficult to eliminate lumps after the end of the chemical reaction, so they are simply removed. If this is not done, firstly, the amount of “useful” whitewash will be difficult to calculate, since lumps will create the misleading impression of a larger volume, and, secondly, the quality of the work performed will sharply decrease, since the mass will not be homogeneous.
How long does it take to slak lime?
Conventionally, lime is divided into three groups, based on its class and slaking speed:
- fast-extinguishing (5-10 min);
- medium-extinguishing (15-20 min);
- slow-extinguishing (more than 25 minutes).
Water is added immediately to quick-quenching lime. It is necessary to maintain the homogeneity of the mixture throughout the entire procedure, adding a little more water if necessary. Stirring begins from the moment steam appears and the first cracks appear in the lump lime.
Medium-slaking lime is prepared in the same way, but takes longer. The latter type of calcium oxide is moistened gradually using a watering can. If, after hydration, burnt pieces of lime remain, they are removed, and the unburnt pieces are again filled with water.
What should a high-quality whitewash be like?
You can check the resulting composition with a wooden spatula. A thick white film should remain on the instrument. This mixture is diluted with cold water, if necessary, so that the solution is homogeneous and opaque. From a kilogram of potassium oxide after slaking and diluting with cold water, approximately 10 liters of whitewash are obtained.
Be sure to check that there are no lumps in the lime. To ensure that there are no remaining small particles that did not dissolve during the slaking process, you should pass the whitewash through a mesh. You should also take into account what tool is supposed to be used to apply the composition. If you decide to use a spray gun, then the solution is passed through gauze. Otherwise, it will not be possible to carry out high-quality whitewashing.
Related article: How to paint concrete walls in a garage
How to increase the durability of the resulting whitewash?
To ensure that the whitewash not only adheres well to the walls, but also does not crumble for a long time, soap or wallpaper glue is introduced into the solution. Lime is also used for exterior wall finishing. Facades are exposed to the harmful effects of atmospheric precipitation, so it is necessary to increase the durability of the composition, which can be achieved by drying oil, which prevents the whitewash from quickly being washed off, repelling moisture. Another disadvantage of lime that worries many is the ability to stain anything that touches the whitewashed surface. To eliminate this disadvantage, ordinary table salt is added to the solution. Its quantity is 1 kg per 10 liters. The amount of drying oil is about 100 ml per bucket of ready-to-use whitewash. Laundry soap must be passed through a grater and then poured with hot water to obtain a solution, which is poured in during the preparation of the mixture. If you don’t have wallpaper or PVA glue, you can use carpenter’s glue. It should be pre-cooked in a steam bath. A similar hot admixture is added before the actual whitewashing, that is, into the already prepared lime whitewash.
Types of lime plaster
With the addition of lime, different types of mortars are prepared, including cement, gypsum and clay. We will give detailed recipes for their preparation.
Lime-sand
This type of plaster is considered an inexpensive analogue of a cement mixture and is most often used for finishing utility rooms. The proportions in this case are similar:
- to prepare a primer solution, the ratio of lime and sand is 1:2;
- when spraying it on the walls, it is equal to 1:2;
- for use as a base finishing coat 1:5.
Before preparing lime-sand plaster, the components are mixed dry, then water is added. It is better to use clean river sand, sifted before mixing.
This mixture hardens slowly, so it can be covered with polyethylene and used on the second day. It will not lose its properties.
Lime-cement
This plaster is quite durable, so it is widely used for facade and interior work. The ratio of the mixture components varies depending on the goals:
- for spraying 1:0.4:4 (cement, lime paste, sand);
- when used as a primer: 1:1:4;
- for finishing coatings: 1:1.5:1.5.
There are also ready-made dry mixes on sale, for example, the Weber Vetonit 414 brand. It is suitable for any surface, for interior and exterior use. The plaster is reinforced with microfiber, so it hardens without shrinking, and can be used as a base or leveling layer. Vetonit consumption is 1.4 kg/m2 with a thickness of 1 mm.
Lime-gypsum
Adding gypsum to the sand-lime solution allows you to obtain a more even and durable surface and speed up the hardening process. This solution fits well even on stone and wooden surfaces.
The dilution proportions are as follows:
- when spraying (lime paste, sand, gypsum): 1:0.5:2;
- for use as a base coat: 1:1.5:2;
- as a primer: 1:1:2.
It is more difficult to work with such compositions, since the solution hardens very quickly. Therefore, it must be prepared in small quantities.
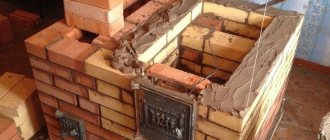
Lime-clay
This plaster is used infrequently, mainly for finishing huts, stoves and fireplaces. It is prepared in this way:
- proportions for primer (lime paste, clay, sand) 2:1.5:2;
- for mixing as a coating 2:1:3.5;
- for spraying 2:1:3.
Clay for kneading should be of medium fat content. If it is thin and the solution does not stick to the trowel, then you need to increase its amount in the mixture. If the clay is too oily, on the contrary, the percentage of sand is increased.
Table of material consumption for plastering 1 m2 of surface
Lime for whitewashing a house
Lime has been used for whitewashing a house for a long time and is one of the cheapest materials for decorating the walls of buildings. And not only at home. Lime can be used to bleach the surface of the walls of a cellar, shed, stove, or chicken coop. In addition, everyone knows that slaked lime is used to whiten garden trees in order to protect them from temperature conditions and insect invasion. But despite the simplicity and cheapness of the material (lime), you need to know some nuances when using it.
Lime slaking
Three types of lime can be purchased in stores and warehouses: slaked, unslaked, and soda lime (a mixture of slaked and unslaked lime). But for whitewashing walls it is best to use slaked lime.
Why? Because for finishing work the so-called “lime milk” is used, which is obtained by slaking unslaked lime. We will consider below how to carry out the extinguishing process correctly and safely:
- After purchasing lime (not slaked), you need to break up too large lumps, but not to the powder stage.
- Place all this in a metal container (galvanized bucket).
- Pour clean cold water into the container. After contact with water, the lime will begin to bubble and splash, so you need to close the bucket and move away.
- After 20 minutes you will need to mix the composition. At the same time, protect all exposed parts of the body, wear glasses and rubber gloves. If drops of the solution do get on your body, you need to quickly rinse the area with water.
- Complete dissolution of the lime occurs after six hours.
- After which the prepared solution is filtered through gauze (or through a nylon stocking).
- The result is lime milk, ready for use.
Some whitewash masters add salt and drying oil to the solution to increase strength and to prevent the walls from getting dirty later. The proportion is as follows: for 10 liters of solution, mix 100 g of drying oil and the same amount of salt. It happens that the solution turns out to be too thick and in order to correct this, you need to add water to the desired viscosity. In addition, you can add a little blue, which will give the house whitewash lime a snow-white hue.
As you can see, slaking lime is not very difficult. However, it is necessary not to neglect personal protective equipment, so as not to burn your skin and eyes.
Composition and properties of lime
Lime is a product of calcination of limestone, chalk, dolomite and other minerals, which are based on calcium and magnesium oxides. Previously, heat treatment of rocks was carried out manually to obtain raw materials. Today the material is produced industrially.
Related article:
How to combine necessity and aesthetics: 6 beautiful and functional accessories for the site
Slaked (fluff) and quicklime are sold in stores. The latter is a substance that, when in contact with water, releases a lot of heat. Quicklime raw materials are rarely used in gardening: they are too caustic and explosive.
In the process of slaking with water, lime acquires a neutral composition. The material has insecticidal and antifungal properties. It negatively affects the activity of pests, fungi, and pathogenic bacteria, so it is used for spraying and watering plants, whitewashing tree trunks and buildings on the site.
The raw material is alkali and is excellent for neutralizing soil acidity.
For work on a summer cottage, you can purchase the material in the form of a paste or powder, but it costs 2-3 times more than quicklime. If it is not possible to obtain a finished product, you can slak the lime at home.
Good to know: Rules for whitewashing garden trees
Whitewashing surfaces
Before you start whitewashing, you need to decide on the tool for the job. Application of milk to the surface is carried out in two ways: with a brush and with a spray bottle. In the old days, whitewashing was carried out exclusively with a brush, but with the advent of modern technologies, the process is increasingly carried out using a spray gun.
Although, if the whitewash area is small, it would be more rational to use a brush, but large areas are better treated by spraying the material. This makes it more beautiful, more uniform and more economical.
The spray gun can be replaced with an ordinary spray gun: electric or mechanical. Since the spray gun is smaller in size than a spray gun, it will be easier to direct the whitewash jet into hard-to-reach places.
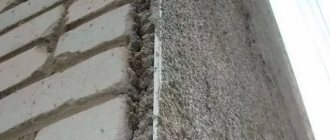
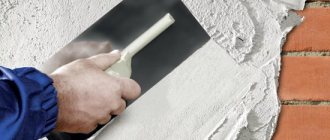
An equally important step will be preparing the surface of the walls for whitewashing. The evenness of the whitewash layer, its strength and aesthetic component depend on this. Dirt, grease stains, rust and old paint with which lime has poor contact are first removed from the surface of the walls.
All cracks are also sealed and bumps are smoothed out. Before whitewashing, all windows, doors, and interior elements are protected with waterproof materials in any available way.
Three useful tips:
- If you bleach with a brush, it will be tedious to soak it in water for a couple of hours. This will prevent brush hairs from falling out and getting on the wall, reducing the quality of your work.
- Lime milk will have better contact with the wall surface if the latter is moistened with water.
- When whitewashing the ceiling, the first layer is applied from the window perpendicular to the light. The second layer is laid parallel to the light (sun rays). This ensures coverage and prevents streaks. The lime layer does not get dirty after drying. What can’t be said after whitewashing with chalk.
Features and recommendations for whitewashing walls with lime
In order to whitewash walls and ceilings, you do not need to have special skills: almost every package of lime contains instructions for use. However, in order to get a smooth and beautiful white surface, you need to know some features of applying lime. So, before whitewashing, the surface of the ceiling and walls must be carefully prepared: remove the old coating and wash thoroughly.
In addition, in order for the lime to lie evenly and not swell, you must use the following recommendations:
- To get the best result, you should use a spray gun. In this case, it is necessary to hold the tool at a right angle. It is better to choose a spray gun that has a compressor.
- The nozzle of the sprayer or spray gun should be kept at a distance of 150-200 mm from the surface. Apply lime from a sprayer using circular, smooth movements.
- Brick walls can be whitewashed with a natural brush. Before whitewashing, the brush must be soaked in warm water for several hours.
- When working with a brush, the second layer of whitewash must be applied in the direction of the light: this way the streaks from the tool will be less noticeable.
- It is highly not recommended to use it for applying whitewash: when rolling the second layer of whitewash, the first one may not hold up, and the lime will move away from the surface.
- It is best to treat surfaces with lime in cloudy weather. So, bright sun rays will not be able to distort the perception, and the coverage will be uniform.
In addition, it is necessary to work in protective equipment. So, you should wear safety glasses over your eyes, cover your hair and skin with a cloth, put a respirator or gauze mask on your face, and protect your hands with rubber gloves.
Advantages and disadvantages
pros
- Low cost of material. Good value for money.
- Kills harmful bacteria.
- Excellent moisture resistance.
- Protects walls from the formation of fungus and mold.
- Does not crack due to temperature changes.
- Environmentally friendly.
- Can be applied to old whitewash.
Minuses
- Caution is required when extinguishing.
- A thin layer of lime is very durable when hardened. Therefore, if it gets on furniture, windows, doors, it is difficult to wash off.
How and why to slak lime for whitewashing
The content of the article:
An excellent building material with excellent characteristics became popular many years ago - lime, or as it is also called limestone. To this day, she whitewashes the house: ceilings, walls and other surfaces. Lime is the most accessible cheap building material intended for repairs. However, you can’t just take it and start working with lime; first of all, you need to extinguish it... It is on this action that the entire further process depends.
Article on the topic: Sheathing walls with clapboard cost of work
The basis for making whitewash can be different types of stone, for example, limestone or chalk. Disinfecting ability is a unique feature of limestone whitewash. Use of limestone in construction. Limestone is an excellent binder that gives limestone mortar its plasticity. Lime whitewash has made a good reputation for whitewashing various types of premises, these include rooms in a private house, garages, sheds, outdoor toilets, chicken coops and so on. It’s nice to see when the places you visit are white and clean. Lime whitewash helps us with this.
Don’t forget that even curbs and trees are whitewashed with this miracle product. By the way, it spreads perfectly on the surface; if, for example, it rained after the whitewashing process, it was thereby able to level out the layers of chalk. In order for the film to have the property of moisture on the surface, you need to know how to extinguish lime without errors and how to dilute lime for whitewashing. This process is very important, since without it bubbles, stains and all kinds of spots will appear on the whitened area.
Features of limestone, so often used in repairs:
1. Capable of imparting viscosity and strength to ready-made walls of premises.
2. Increases the resistance of concrete to moisture.
3. The low price of lime allows it to be used in various rooms, both at home and outdoors.
4. It is a good antibacterial agent in the cellar, chicken coop and other livestock habitats.
5. Protects trees from the burning rays of the sun.
Reasons why it is necessary to extinguish whitewash.
How to dilute lime for whitewashing? Why turn it off? And is it necessary to do this at all? - these questions, which are often asked by inexperienced home owners, after a while they understand the meaning of all these actions. Limestone can be slaked in several ways. The main thing is to do everything slowly, thinking about every action, then the lime will be extinguished correctly. However, first you need to understand the meaning of the concepts themselves: slaked lime and quicklime. After all, from the second solution a variety of substances are obtained, which differ in their composition and purpose. Often, when we come to the store, we purchase rather large pieces of burnt stone - limestone.
This stone has not yet completed its chemical reactions, so at this stage it is quicklime, but not lime. If you add water to the stone, a new chemical reaction will occur and carbon dioxide will be released, which will be accompanied by a considerable amount of heat. It will not cause a big fire or a small fire, but be careful as there may be burns. Observe fire safety measures one hundred percent. Construction can use fluff and limestone dough, also called milk.
Lime slaking algorithm according to the rules:
1. Prepare a wide, washed pan. We place a large amount of cold water nearby. To get fluff, pour limestone into a container and fill it with enough water. A chemical reaction will occur - the mixture will begin to bubble, splash and become very hot. This is exactly the moment when your accuracy and safety must come first so that you do not get burned. An excellent way out of this situation would be to immediately put glasses on your eyes and protect your hands with gloves. In total, this process can last more than 30 minutes. After which this substance will calm down, and it can be safely mixed with a specially prepared wooden stick.
2. Slaked lime has a special formula in which it is left untouched for several weeks in a cold room. During this period of time, it significantly increases its properties, and subsequently fits perfectly onto the desired surface.
3. According to its preparation algorithm, milk made from lime is no different from fluff milk. However, the most important thing is to choose the right proportions for mixing. In this case, it is necessary to use about 40% water for 1 part of lime from the stone. Its quantity is much less than in the 1st option. Water needs to be poured in slowly, but the main thing is that the extinguishing does not end.
Types of lime by slaking rate
Varieties of lime are divided into 3 groups. The period is calculated from the process of combining with water until the temperature subsides. Kinds :
1. Extinguishing at a fast pace - 5-12 minutes.
2. Extinguishing at an average pace - 13-22 minutes.
3. Extinguishing at a slow pace - more than 25 minutes.
Correct work with each variety separately.
1. Extinguishing at a fast pace. Fill half a pan with limestone and fill it with water to the very edges. When steam appears, the lumps will begin to dissolve. The resulting substance must be mixed with a special wooden stick that has already been prepared and a little more water must be added. When the quenching process is complete, continue to dilute the substance with water until smooth. Afterwards, pour everything into a previously prepared large saucepan or another large container.
2. Extinguishing at an average rate. The process is identical to the first grade in a one to one ratio. The pieces will also begin to dissolve, but do not stop the process, continue slaking until a homogeneous condition is obtained.
3. Extinguishing at a slow pace. Fill a little more than half of the pan with limestone stone, and slowly fill it with water. After the long process of cracking the stones, we also add water in small portions. The result is limestone milk, which needs to be mixed carefully. Unfortunately, not all parts of the limestone will dissolve in the total mass; some will remain; the best solution would be to throw them away. During this action, it is necessary to ensure that there are no calcium and magnesium oxides left in the substance, since their presence will significantly reduce the quality of the whitewash. With direct whitewashing, the result will not be a homogeneous mass, but a mass with pieces, which as a result will worsen the whole picture.
Lime in the field of protecting trees from sunlight. Lime whitewash is not just a product for indoor use; it is used in another interesting area. It serves as a protective substance for the bark of various trees from burns caused by the sun in early spring. As you know, whitewash is white, and it completely reflects the sun's rays, no matter whether it is on the north or south side of the trunk.
Building supply stores sell ready-made mixtures that are notoriously bad when used with wood. After the bark of a tree is whitened with this substance, it is protected for a short period, because after heavy rains it is completely washed off. Therefore, people who care for trees strive to make this solution themselves next time.
Related article: Designation of load-bearing walls on the building plan
For this process, you need to prepare limestone and cold water. The extinguishing should be carried out a couple of hours before the whitewashing. Do not forget to pass the substance through a fine sieve before starting whitewashing. If you use an unstrained mixture, the sprayer will clog almost the first time. But if you use an ordinary brush, there is no need to strain it. In addition to limestone itself, white clay can also be added to the solution. Lime whitewash can further protect the bark from the sun in the spring. In the case of whitewashing with milk, you can add a spray gun to it, but this is not at all necessary, so if you don’t have it, you shouldn’t run to the store. It is not for nothing that lime is the most popular material for repairs; it has also found its use in gardening. The miracle substance is added to various mixtures to increase their properties. Wood trunks are lubricated with milk, protecting them from harmful insects.
Video:
Ways to use lime
Whitened tree trunks in gardens and summer cottages are a sure sign of the approach of winter. In central Russia it is not customary to do this work in the summer. The purpose of whitewashing is to reflect the scorching rays of the sun from the bark of a tree. A layer of lime milk applied to tree trunks protects their tissues from the influence of temperature changes and promotes accelerated cleaning of the bark from dead particles.
The purpose of whitewashing trees is to reflect the sun's rays from the bark.
High quality slaked lime is used to whitewash trees. Composition of the whitewash mixture:
- slaked lime – 2.5 kg;
- water – 10 l;
- flour paste - a few spoons.
Instead of paste, you can use glue, clay, soap, or fresh mullein. Previously, milk or egg whites were added. Nowadays, ready-made mixtures are available for sale. Dyes and disinfectants in the form of copper sulfate can be added to them. But the best composition is based on the use of slaked lime with the addition of clay. Lime should be taken in lumps and slaked 2 hours before whitewashing. Freshly slaked lime helps in the fight against harmful insects, lichen and fungi.
The disadvantage of this material is its causticity. When working with lime, it is recommended to protect your hands with gloves, wear a respirator and special glasses on your face. It’s also better to have old clothes that you don’t mind ruining through carelessness. The best option is canvas work clothes.
How to slak lime for whitewashing
How to slak lime? To answer this question, you first need to understand what the substance is, what types it is and what it is used for. In the periodic table of Mendeleev, this substance is known as CaO - calcium oxide or quicklime. Limestone is one of the popular natural resources in the earth's crust deposits, used by people.
Safety precautions when slaking lime at home
Quicklime and the process of slaking it pose a threat to human health.
The interaction between calcium oxide and water is characterized by a violent reaction: a lot of heat is released, the water boils, and the mixture begins to splash in all directions. Before extinguishing lime, it is necessary to protect the skin, mucous membranes of the eyes and mouth, and protect the respiratory tract. To avoid burns, wear safety glasses, rubber gloves and long sleeves.
The procedure cannot be carried out in a room with closed windows and doors. If it is not possible to check the room, you should use a respirator or gauze bandage. To avoid getting burned by the steam, it is best not to lean over the container.
How to slak lime: tips and tools
When quicklime reacts with a small amount of water, lime paste is obtained, to which sand and other materials are added. The resulting substance is used in construction to hold bricks together as a binder.
If the mass is diluted with a large amount of water, you get a lime suspension or milk of lime. In agriculture, the suspension is used to treat the bark of fruit trees against sunburn and to destroy the embryos of parasitic organisms that cause diseases. The solution mixed with other substances is also sprayed on fruit trees and shrubs, and whitewashed borders and building walls.
To extinguish lime, do not forget about safety precautions and follow these tips:
- During slaking, lime releases heat. To prevent the container from melting, use enamel cookware.
- The fumes released are toxic to the body and can also cause atrophy of the respiratory tract, so wear a respirator.
- When slaking lime, an ebullient reaction occurs, accompanied by splashing of the substance. To avoid burns, use goggles, rubber gloves and work clothes that cover exposed areas of the body.
- Suppress lime outdoors. If there are windows in the room, open them to create conditions for ventilation.
- During the procedure, stay away from the container until steaming ends.
- When preparing the substance, use a wooden spatula.
The method of extinguishing depends on the purpose of use.
During this procedure, lime paste is used. It is obtained by mixing lump lime with tap water.
The solution is prepared in a ratio of 1:4. Water is added in small, even portions. After the rapid boiling stops, the substance should be stirred well and filtered. After 1 hour, the solution should be left in a dark room for 1–2 weeks.
To whiten trees, a lime slurry is prepared. For this purpose, lime dough is diluted with water. For 1 kg of lime take 10 liters of water. The solution is used immediately.
When slaking lime, the following tools are used:
- enamel container;
- wooden spatula;
- bucket or watering can for water.
Make sure that during the extinguishing process there are no lumps left and the substance of the ball is homogeneous. You can use a sprayer to treat walls, trees, and shrubs. In this case, do not forget to wear a respirator.