4266
From this article you will learn:
- Is it necessary to insulate a house made of aerated concrete from the outside?
- What material should be used for external insulation of the walls of aerated concrete houses?
- What technology to use to insulate a house made of aerated concrete from the outside
- How much does it cost to externally insulate a house made of aerated concrete blocks?
For low-rise construction, an increasing number of developers are choosing aerated concrete blocks. Statistics show that currently about 1/3 of all cottages are built from aerated concrete. Since this is a relatively new material, not all builders have yet understood its characteristics. For example, some people forget that buildings made of aerated concrete blocks must be insulated. In this article we will tell you how to insulate a house made of aerated concrete from the outside and what materials are best suited for this task.
Is it necessary to insulate houses made of aerated concrete?
Insulation of external walls made of aerated concrete is not a mandatory procedure, but there are conditions under which such work is carried out. For example, if the construction was carried out without complying with the standards, and the seams turned out to be wide enough, the walls will have to be insulated. This procedure must be performed if high-density material was used during the construction of the building, and the wall thickness does not exceed 30 cm.
In order to subsequently save on insulation by laying it in a thinner layer, it is recommended to build a house using special glue. It is, of course, much more expensive than cement mortar, for the production of which you can use free river sand, but the glue itself is consumed in less volume. The seams are very thin, which means you won’t have to spend a lot on a thick layer of insulation, and it will require less mechanical fasteners.
It is also important to take into account the climatic conditions in the area where you live. Insulation of aerated concrete can be carried out externally or internally. Sometimes such procedures are carried out in a complex manner. In the first case, it is possible to move the dew point beyond the walls and eliminate the negative impact on the material when the temperature drops and rises.
There is also such a thing as cold bridges. They are formed in minimal quantities during external thermal insulation.
How to properly insulate the outside of a house made of aerated concrete and how to do it yourself
Deciding how best to insulate a house made of aerated concrete should be based on the thermal insulation system used. There are three in total:
- Plastering.
- Ventilated facade.
- Three-layer wall.
Let's consider the advantages and disadvantages of each option, and tell you the principle by which the insulation and finishing of the facade of a house made of aerated concrete blocks is carried out in one case or another.
How to insulate an aerated concrete house from the outside under plaster
From the above, we can conclude that it is better to insulate the façade of a house made of aerated concrete from the outside with mineral wool, since it freely allows vapor to pass through. However, the plaster itself does not have such a high vapor permeability coefficient, so there is no big difference, and EPS can be installed instead of mineral wool. Let us note once again that the main condition for using this material is a sufficient time interval between the completion of construction and external finishing, during which the initial moisture content of aerated concrete will decrease to the standard level.
We recommend: How to choose a thermal curtain - detailed instructions on how to choose the best option
If mineral wool is used, it can be slabs made from igneous rocks (diabase, basalt, gabbro) or from glass. Accordingly, wool is called stone and glass. There are also slag wools, which are made from melted blast furnace slag, but they are quite loose and prone to clumping, so they are not suitable as a base for plaster.
To insulate the facade with subsequent application of plaster, wool with a density of 85-125 kg/m³ is needed. They are rigid and do not absorb moisture so much either from the glue with which they are attached to the wall or from the plaster.
How to install mineral wool slabs
Having decided how to insulate an aerated concrete house from the outside under plaster, you can immediately prepare the necessary tools. They will be needed if the work is done on your own. To form a warm facade using the wet method you will need:
- spatula with a blade width of 80-100 mm;
- serrated trowel with teeth no more than 1 cm wide;
- brush-brush (it is used to apply primer);
- a construction knife with replaceable blades (it can be used to cut both mineral wool and fiberglass mesh);
- plastic grater;
- a hammer drill with a drill, the length of which corresponds to the length of the dowels;
- hammer;
- mixer for mixing glue.
In addition to tools, you need to stock up on consumables. These are: mushroom dowels with a thermal head that prevents the formation of condensation on the rod and the formation of rust; glue for cement-based insulation (sometimes the same one used to install gas blocks is also suitable); primer for porous substrates, which will improve the adhesion of layers.
If you don’t have a home project with the necessary calculations, you can determine how thick the mineral wool needs to be installed by going to the website of its manufacturer. Surely you will find a program there in which you can, by entering the requested data on the type of structure and region of construction, calculate the thickness of the insulation.
What thickness of glue is needed when insulating aerated concrete?
Before you begin installing the insulation, the base must be prepared: uneven walls that need to be eliminated have been identified, chips on the blocks or other defects have been repaired. Although, when using good quality gas blocks, you usually don’t have to do all this. All that remains is to prime the surfaces twice - and you can get to work.
Glue can be applied to mineral wool in two ways: contour-beacon, and continuous, with combing with a notched trowel. Beacon - this is when glue is applied around the perimeter with a thickened roller with an open contour, and cakes of the mixture are applied inside. This method is usually used for significant deviations in the surface of the base (up to 25 mm), which could not be properly leveled during preparation. These are usually brick walls. Aerated concrete masonry is always smoother, so when insulating it, the second method of applying glue is usually used.
Whatever method is used, the surface of the slab must be completely primed with a thin layer of glue (1 mm) over the entire surface, but not reaching the edges by about 5 cm. The main layer of glue will actually be the second, so it is structured depending on the quality of the base. When installing mineral wool slabs on aerated concrete, the thickness of the adhesive usually does not exceed 4 mm.
How to glue and install mushrooms for attaching insulation
Installation of the slabs starts from the base level, and the support for the first row is a galvanized profile mounted horizontally. They fasten it to the wall with special dowels for cellular concrete.
- The ends of the slabs that will be adjacent to the profile must be protected from external influences and moisture, for which special envelopes are prepared. A strip of glue the width of the trowel is applied above the profile. Strips of twice the width are cut out of fiberglass mesh, one edge of which is recessed into the glue, and the other is left hanging freely.
- After the bottom row of slabs is glued, and the reinforcing layer begins on top of them, the ends of the mesh will need to be wrapped and sealed in the adhesive layer. Before starting the installation of the last row of slabs, similar actions are performed.
- The slabs are mounted close to each other, with the vertical joints bandaged. Doweling can only be done when the glue has dried. The number of fastenings in row zones is carried out at the rate of 5 pcs/m² - 4 in the corners with a distance of 10 cm from the edges of the slab, and 1 in the center. In the edge zones (outer corners of the building), 2 dowels are installed in the center. To do this, a hole is drilled with a hammer drill, a plastic mushroom is inserted into it, and then a metal rod is driven in.
- When going around window and door openings, the slabs are cut so that an L-shape is obtained. To prevent moisture from getting under them, a self-adhesive profile connecting to the mesh is mounted around the perimeter of the opening. This profile has glue not only on the back side, but also on the outside. After removing the protective film, you can glue a piece of polyethylene on top, which will protect the window from dirt during the insulation and plastering process.
- The opening is an area of high loads, and this applies not only to the masonry, which is reinforced in these places, but also to the finishing, which must be reinforced. To do this, use gussets made of fiberglass mesh measuring 30*40 mm, which are glued diagonally in the corners of the opening.
- The outer corners of the opening are immediately strengthened by installing a plaster perforated profile with a mesh on them, which overlaps with the mesh of the window profile on the slope, and on the other side goes onto the wall.
- All external and internal corners of the house itself are similarly strengthened. And only after the wall has been prepared in this way can you begin to reinforce the entire surface. To do this, an adhesive primer is applied in a strip whose width is 15-20 cm greater than the width of the fiberglass mesh.
- Don't forget about the envelopes at the bottom and top, which need to be folded and secured with glue. Then the mesh is rolled out and recessed and covered with a second layer of glue, after which you can begin installing the next overlapping sheet.
After a day, the glue will harden, its surface should be sanded and primed. And after another 8 hours, when the soil has dried, you can begin applying the decorative coating.
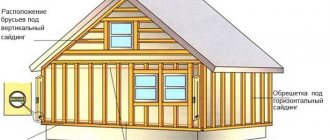
Insulation under the ventilated façade
A ventilated façade involves constructing a wall pie in which a gap is placed above the insulation so that vapors can freely leave the wall. This occurs most harmoniously when mineral wool is used in such a system. Moreover, if there is an air gap in the system, flammable materials cannot be used. All types of foam plastics: non-pressed and extruded polystyrene foams, polyurethane foams, have a flammability class of G3-G4. And mineral wool has G1 or NG - so that’s what you should choose for vinyl siding or wooden lining.
We recommend: Ceiling-pass chimney assembly: requirements, types and do-it-yourself installation
How is installation different?
The ventilated facade begins to be mounted not from the insulation, but from the elements of the substructure on which the load-bearing profiles will be hung. Therefore, first, retreating 1 m from the corner of the building, marking the points at which drilling will be carried out. The holes are cleaned of dust, dowels suitable for porous bases are hammered into them, and brackets (or direct hangers) are installed through paronite gaskets.
Then they begin to install the thermal insulation. To do this, slits are made in the slabs with a knife, through which they can be placed on the bracket. No glue is required here - the plate is simply put on hangers and secured with washers. The direction of installation is the same as in the previous case - from bottom to top, with bandaging of the joints. Additional fixation is carried out only with disc dowels, also 5 pieces per slab. The halves are secured with four dowels.
Three-layer wall
There is also such a thing as a three-layer wall, when the main masonry is faced with brick with an indentation in which insulation can be located. This technology is actively used in aerated concrete construction, however, in typical projects, insulation in such systems is absent and is provided only by agreement with the customer.
- Considering the well structure of the walls, their internal space can be filled not only with slab insulation, but also with filler or fill insulation.
Another thing is how justified this is in aerated concrete houses. In official construction, they have long stopped installing insulation under brick cladding, since it is impossible to carry out this work efficiently in parallel, and there are defects in the internal space Note: With slab insulation, problems usually arise with the accuracy of the fit - large joints are obtained through which the walls lose heat. In addition, in such structures it is impossible to glue the slabs, which can also cause cold bridges. Soft insulation initially adheres better to the base, but after a while it can settle. - Ultimately, experts agreed that the construction of three-layer walls, the middle layer of which would be slab insulation, should be avoided. In any case, when the main and decorative walls are built in parallel. If there is a need for such a system, it must be done sequentially: first the main masonry, then insulation with gluing and doweling, and only then brick cladding. Only this technology can ensure normal quality and durability of three-layer walls.
- Today it is fashionable to use poured insulation when forming three-layer walls. Their role can be played by various types of lightweight concrete: polystyrene concrete, sawdust concrete, foam concrete, as well as foamed polymers of polyurethane foam or penoizol. This is a good choice, but not for aerated concrete walls. The reason for this is the high humidity of such insulation, which itself will not really dry out through the brickwork, and will not allow the aerated concrete to dry out. For the same reason, such insulation materials are not used when installing suspended ventilated facades.
Not all is well with fill-in heat insulators either - mainly because they are capable of self-compacting over time. This means that the thermal uniformity of the walls will be disrupted, and therefore there is no point in such insulation.
What thickness of insulation to choose
If you decide to insulate your home using aerated concrete from the outside, you need not only to choose the right materials, but also to decide how thick it will be. When determining the last feature, it is important to take into account the region of construction, the final value of thermal resistance and the thickness of the walls, as well as the density of the material at their base. Last but not least, attention should be paid to economic feasibility. The material should be selected taking into account your budget and the ability to carry out work without the involvement of specialists.
But if your budget allows, and you still don’t plan to work on your own, then you can choose the insulation method in the form of spraying polyurethane foam. It allows you to create a very warm layer, which, however, will then have to be additionally protected with a layer of decorative finishing. But aerated concrete walls will already require additional protection and improvement.
Houses are built from aerated concrete, which can have a certain density. As this value increases, the thermal resistance increases. They correspond to certain regions.
For example, for Moscow this value is 3.28 m2 °C/W, while for Voronezh it is 3.12 m2 °C/W. In Magadan, the thermal resistance of the wall should be 4.33 m2 °C/W, but in Kazan - 3.45 m2 °C/W.
In order to determine the thickness of the material when insulating, you need to multiply the thermal resistance of the insulation by the thermal conductivity. If the final value was 134 mm, then you should choose a material with a more impressive thickness. For example, mineral wool is sold in 150 mm sheets. But if you plan to install a wet facade system, then the thickness of the insulation should be 100 mm, because when installing thermal insulation you will also have to apply plaster, install mesh and fasteners. At the same time, you won’t be able to save much between insulation with a thickness of 50 and 100 mm, but the work will be much more expensive.
Fasteners for aerated concrete and requirements for them
Fastening lightweight objects (photo frames, small lamps, decorative elements) to a wall made of aerated concrete can be done using universal screws or nails driven at an angle. If it comes to bookshelves, a TV, or a cabinet weighing 5 kg or more, then it’s not worth the risk. It is better to use fasteners specifically designed for aerated concrete foundations.
Steel dowels
They are made in the form of a galvanized tube with load-bearing blades. The studded structure of the latter creates good adhesion to the porous block.
There are also more advanced solutions from global manufacturers that modify traditional types of fasteners to improve their properties. An example is the fischer FPX – I anchor:
NEMA nails
Their design includes a special sleeve. Thanks to it, when entering the wall, the nail bends at an angle, which increases its tensile strength.
Frame dowels.
Used for through installation. Their load-bearing capacity is increased by wedging spiral outer ribs.
Spiral nails
When hammered, they are screwed into aerated concrete without destroying its structure. The adhesion strength with these nails is 4 times stronger than with conventional ones.
Nylon anchors
Their wide thread allows for a secure fastening. Various screws are also used along with the anchor.
Chemical anchors
They are a tube that is filled with glue made from organic polymers and synthetic resins. The mixture penetrates deep into the pores of the material. After hardening, it, together with the hardware, forms a monolithic structure of high strength.
Fasteners are more durable the larger their length and diameter. The material from which they are made is also important. Hot-dip galvanized and stainless steel fasteners, as well as those with anti-corrosion protection, are best suited for aerated concrete. It is imperative to pay attention to this property if the use of screws and nails is intended in damp, unheated rooms or on the outside of buildings. Otherwise, the metal will rust over time and will not withstand the load, and the hanging object will fall.
To avoid the risk of bending or breaking fasteners, when choosing, you should inquire about their load-bearing capacity. But information about the density of aerated concrete will help eliminate the possibility of tearing out these elements. It is designated by the letter “D” and subsequent numbers. The higher the indicators, the stronger the wall. Ideally, be guided by the data on the packaging and in the certificates, which indicate the maximum permissible loads for fasteners depending on the density of aerated concrete.
Insulation of aerated concrete house outside and inside
Insulation of the walls of a house made of aerated concrete can be carried out from the side of the premises or the facade. It is a mistake to carry out such work immediately after completion of construction. When the house was built during the cold season, moisture could freeze inside the material, which would remain there immediately after insulation, and eventually destroy the walls. Therefore, it is important to leave them for a period until the moisture has completely evaporated. This exposure can last at least 2 months. Once the walls are dry, you can begin to form the insulating layer. Insulation of aerated concrete is usually carried out:
- mineral wool;
- polyurethane foam;
- penoplex.
In order not to wait such a long time after completion of construction and begin insulation work immediately, you need to ensure that the blocks remain in a protective film at the construction site. It is better to store them in a closed, dry place.
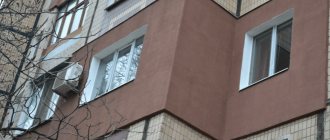
External insulation
You cannot leave an aerated concrete house completely without insulation, which is especially true when you live in a cold climate. When you have already decided that such work will be carried out without fail, you should think about whether to place the layer inside or outside. In the latter case, you do not take away free space from the internal area.
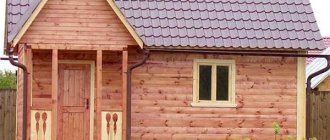
After carrying out such work, it will be possible to line the walls with any desired material. This can be plaster, siding and even facade paint. Insulating aerated concrete on the external walls also allows you to increase the energy efficiency of the house, reducing the cost of heating. After such protection, aerated concrete will last much longer, because the walls will be protected from negative influences. The house turns out to be more soundproof, and the facade is more attractive.
Insulation from the inside
Aerated concrete is often also thermally insulated indoors. The advantage here is that the work is much easier to carry out. You don't need specialists working at heights or equipment for this. But it is better not to carry out such work separately from external insulation, since the material will not be protected from the outside, it will become saturated with moisture, which will subsequently cause it to freeze and expand.
At what stage of construction is it advisable to insulate a house?
Aerated concrete shrinks, so it is not recommended to insulate it during the construction process.
There is a strong opinion that insulation of an aerated concrete block should be carried out at the stage of construction of the facility. We can agree with this, based on the fact that after construction is completed, a lot of difficulties arise related to the need to move out of the premises or damage to the landscape design. On the one hand, this is correct, but there are other aspects against such a decision.
Insulating an aerated concrete house from the outside directly during the process of removing the walls has the following disadvantages:
- Gas silicate is brought to the construction site in packaging that protects it from moisture. During installation, the material absorbs moisture. After insulation, it penetrates into the finish, condensation occurs, and fungus and mold develop.
- Aerated concrete has strong shrinkage. If a clinker brick finish is used, the difference in this indicator will cause the outer cladding to crack and fall off. This is an extremely undesirable situation, especially during the cold season.
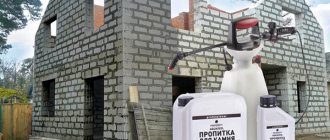
It is necessary to insulate aerated concrete walls from the outside either in the warm season with low humidity, or to mothball them and wait for such conditions to occur.
Conservation is a procedure that consists of arranging a drainage system and covering the walls with a moisture-proof film. The situation must be constantly monitored, as the protection may be damaged by wind, people, birds and animals.
The optimal time for thermal insulation is the summer, when the weather is sunny without sudden cold snaps at night. If this is not possible, you need to wait until the walls dry out and only then begin insulating the aerated concrete house from the outside.
Mineral wool
External insulation of aerated concrete can be done with mineral wool. It is sold in slabs and, in addition to thermal insulation properties, also has sound insulation qualities. The material is ready to last for quite a long time, is fire resistant and environmentally friendly. The layer is resistant to rotting, microorganisms do not form in it. But the cotton wool itself will need to be additionally protected from moisture, since it allows water to pass through, which causes condensation to occur. If the layer gets wet, it will not only settle, which means it will open spaces for cold penetration, but will also create favorable conditions for the emergence of life in the walls, which often happens in private homes. Rodents will settle in the walls, and the cotton wool itself will no longer fulfill its role.
Acrylic plaster should be abandoned as a finishing layer, as it will also contribute to the formation of condensation.
Mineral wool insulation technology
Thermal insulation of aerated concrete with mineral wool is carried out in a certain sequence. The surface must be freed from dirt and mechanical elements, seams and irregularities must be filled, and potholes must be covered with cement mortar. If you want to make your walls even more thermally insulating, it is recommended to use masonry adhesive with appropriate characteristics during the construction phase. With its help, you can form the thinnest seams that will not become cold bridges. The mixture is selected so that it is able to withstand difficult operating conditions, periods of freezing and thawing.
Before proceeding with insulation, aerated concrete must be covered with vapor-permeable plaster in the area of defects. Its application is carried out on a previously primed surface. And to fasten the mineral wool sheets, a frame structure should be formed in the area of the base.
Beacons are placed at the corners of the building. The insulation layer is fixed with glue, which must be applied to the slab at the central point and along the perimeter. In order to distribute the composition over the entire area as evenly as possible, you should use a steel notched trowel.
When insulating, mineral wool must be laid in such a way that the rows of slabs do not move relative to each other. This result can be achieved by forming cross-shaped joints. For additional fastening, a mechanical method should be used, which involves the use of dowel umbrellas. They should be located in the center and in the corners of each canvas.
The aerated concrete is covered from the outside with mineral wool as tightly as possible. In those places where the canvases are connected to each other, there should be no gaps, since they can also become cold bridges, reducing the thermal insulation characteristics of the insulation layer. It may seem to you that mineral wool has an insufficient level of rigidity. This is true, but if you plan not to form a ventilated façade, but to cover the surface with plaster, you should purchase material with a sufficient level of rigidity, for example, marked PZh-175. In this case, the products will have a rigidity even higher than that of foam sheets, while serving as a good basis for the liquid mixture.
When insulating walls made of aerated concrete from the outside, you need to apply an adhesive solution to the thermal insulation using a spatula, sinking the mesh into the composition. Next, another layer of glue is applied on top of it. Openings and corners should be secured using perforated corners. After drying, the surface is covered with plaster, but a primer must first be applied. It is sometimes replaced with putty. The finishing layer can also be paint.
Prices for mineral wool
If you plan to use mineral wool for insulation, you should inquire about its cost. So, PAROC WAS 35 can be bought for 1100 rubles. per package. The thickness of the material varies from 30 to 250 mm. Density is 71 kg/m3. The operating temperature may be less than or equal to 200 ˚С. Another offer is PAROC Linio 15, for which you will have to pay 1300 rubles. per package. The density in this case is 90 kg/m3. The thickness is 150 mm and the length is 1200 mm.
The need to insulate walls made of aerated concrete blocks
Characteristics of aerated concrete D500 and D600
Aerated concrete marked D500 and higher is used for the construction of walls. Everything below is a heat insulator that is not used for the construction of load-bearing structures. The building blocks have a cellular structure, which in itself provides good protection against temperature changes. The question of the need to insulate walls made of this material is quite logical.
The need for thermal insulation of gas silicate walls is determined by the following parameters:
- The material is highly hygroscopic. The absorbed water expands in winter and tears it apart from the inside. This leads to the wall losing thickness and strength. 5-6 years and the building will collapse.
- Even the porous structure of stones is not a guarantee against the penetration of heat or cold into the room. The thickness of the walls cannot be infinite; in most cases it is limited to 30-40 cm, otherwise it is economically unjustified.
- Harsh climate. To withstand extreme frosts, you need a thickness of walls made of aerated blocks of at least 60 cm. For this you need a foundation of the appropriate width. These are large costs that far exceed the needs.
- Price issue. Insulation materials and their installation cost significantly less than brick and foam concrete. It is cheaper to insulate the supporting structure than to increase its thickness.
Despite the advantages of aerated concrete, its thermal insulation is a technological necessity.
Expanded polystyrene
Insulation of external walls made of aerated concrete is often carried out with expanded polystyrene. Surface preparation in this case only involves removing irregularities that most often arise around the seams. If potholes appear during the construction of a house, they should be filled with cement mortar. If you still haven’t decided whether to use this particular material, then you should consider its positive characteristics, namely:
- affordable price;
- long service life;
- insignificant thermal conductivity.
After completing the work of insulating the walls with polystyrene foam, finishing materials, for example, plaster, can be applied to its surface.
Foam insulation technology
As soon as the walls have been freed from minor errors, they are coated with an antiseptic composition to prevent the occurrence of fungus and mold. This layer should dry well, a primer is applied on top of it to increase the adhesion of the materials. When externally insulating a gas block with polystyrene foam boards, an adhesive composition is applied to their back side. Ready-made powder mixtures are also suitable. Perhaps it is most convenient to work with liquid compounds or assembly adhesives, the latter of which are sold in aerosol packaging.
The outside air temperature must be suitable for the work. Typically this limit is in the range from - 10 to + 40 ˚С. There should be no wind, as the canvases have high windage and can break. You need to start working from the bottom, forming the first row. Then they begin gluing the remaining rows, moving along the perimeter. The plates should be pressed to the surface, placing them in a checkerboard pattern. Their position is checked using a level.
Adhesive for polystyrene foam
If you decide to insulate aerated concrete with polystyrene foam, you need to choose the right adhesive. When working with aerated concrete outside, it is important to take into account that the composition must be frost and moisture resistant. It should be able to withstand temperature changes well. For external work, adhesive foam, cement-polymer composition and bitumen mixture are suitable. The latter option contains a light solvent that is not capable of adversely affecting polystyrene foam. Such mixtures are very common; they are sold ready-made, which makes them easier to use.
Before use, the surface of the walls is dried and sanded. Then you need to apply a primer to the surface. The base must be freed from dirt and dust, as well as rust. It is convenient to use a comb spatula for application. With its help, an even layer of material is distributed over the back surface of the aerated concrete, and then the slab is attached to the wall of the house.
The cement-polymer composition can be used not only outside, but also inside. It is suitable for brick, cinder block and concrete walls. The glue attaches the insulation well, but requires deep priming. Such mixtures are sold in powder form, to which you will need to add water, which complicates the process somewhat.
Why is it better to insulate walls from the outside?
If you decide to build a house from cellular concrete, then you need to insulate the walls from the outside.
This will prevent the material from freezing, and condensation will not form on the walls inside the house.
What other advantages are there of thermal insulation made on the outside of the building?
- The exterior of the building's façade will have a more aesthetically pleasing appearance.
- The heat in the rooms will be retained much more efficiently.
- The walls will be protected from the destructive effects of precipitation.
- Cellular concrete absorbs moisture well, and this greatly complicates the work on finishing the facade.
Walls made of aerated concrete need not be insulated only in one case - if the house is being built in a warm region.
Penoplex
Insulation of aerated concrete can be carried out with Penoplex. It is sold in the “Wall” variety and does not absorb water at all. The material has a high level of thermal insulation and is completely environmentally friendly. It is ready to last 50 years or more with proper installation and operation.
Many people are interested in whether it is necessary to insulate the facade of a house made of aerated concrete if the walls are of sufficient thickness. The manufacturer of Penoplex claims that this procedure cannot be avoided, because even 400 mm walls are not able to provide a normal level of thermal resistance.
Why do you need to insulate?
Many builders prefer gas silicate blocks for certain reasons. First of all, construction work from such material does not require special skills. The blocks are large and light and can be joined together without any problems using a special adhesive. Objects do not need a strong foundation, and insulating the walls of a house with aerated concrete from the outside will reduce the cost of the project.
The blocks belong to the group of cellular concrete. If we compare aerated concrete with the production of slag concrete blocks, the technological process is different. In two words, a foam former – aluminum powder – is added to the mixture of cement and lime. Hydrogen is released, leaving a huge amount of voids in the block.
From the very beginning, porous blocks are characterized by weak strength to mechanical influences. To increase it, the final production stage takes place in an autoclave unit, where the blocks are subjected to significant pressure and high temperature. As a result, the material turns out to be quite durable.
From physics lessons we know that air is considered one of the best materials that can insulate heat. And the thermal conductivity index will depend on the number of pores in the block.
But there is one problem - the porous cells in the gas silicate material are open, which makes the block vapor-permeable and allows it to absorb moisture. For this reason, the answer to the question - is it necessary to insulate an aerated concrete house - will be unequivocal - it is necessary.
Another thing is what kind of protective layer to create, and is it necessary to insulate a house made of aerated concrete 300, or is it enough to line it with finishing materials?
It is no secret that the thickness of load-bearing walls, no matter what materials they are made from, will be fully determined by the average annual temperature regime of your region. As it follows from this, the average thickness of aerated concrete walls can be 30–50 cm. But almost no one is interested in the fact that in this case experts are referring to the load-bearing characteristics of the blocks. Simply put, the walls will be strong.
And, for example, questions about whether it is necessary to insulate a house from aerated concrete 400 and other grades are often kept silent.
In terms of thermal conductivity, in some regions of Russia only aerated concrete walls start from 700 mm in thickness.
Anyone who is planning construction in these regions and is thinking whether there is a need to carry out external insulation of a house made of aerated concrete if its walls are 30 cm thick, or whether it is possible to simply install a plaster layer, you need to take into account that if you insulate the facade of a house made of aerated concrete with polystyrene foam or mineralized wool, then insulation slabs ten centimeters thick will equivalently replace 300 mm thick walls made of aerated concrete material.
It turns out that half-meter walls should have a thermal insulation layer of at least 10 mm. And for walls made of aerated concrete grade d 500 with a thickness of 400 mm or less, more massive thermal insulation will be required.
In addition to the thermal conductivity indicator, there is another important feature - the concept of “dew point”. This term describes a place inside the external walls that has zero temperature. This is where the maximum amount of condensation will accumulate.
It should be recalled that aerated concrete blocks have a porous structure, and if the dew point falls on the block itself, then the moisture will freeze and thaw due to temperature fluctuations, destroying the material.
There is only one way out in this situation - try to move the point to the insulating layer. It will be less susceptible to destruction, and if it deteriorates, you can replace it faster than rebuilding walls. By the way, this explains the need to insulate external walls.
Prices for popular types of penoplex insulation
Penoplex slabs not only have excellent thermal insulation qualities, but also have an L-shaped edge, which allows the products to be effectively joined, eliminating the penetration of cold. Among the most common varieties, “Penoplex Comfort” should be highlighted, the thickness of which can range from 20 to 100 mm. For 20 insulation boards with the smallest thickness you will have to pay 1,520 rubles.
30 mm canvases are sold in a package of 13 slabs. The cost of this material will be 1326 rubles. If you have 100 mm products in front of you, then the package will contain four slabs, for which you will have to pay 1,356 rubles. If you want to insulate aerated concrete from the outside with penoplex, you can purchase the “Wall” variety. It is offered with a thickness of 50 mm, and 7 slabs will cost 1225 rubles.
Working with Penoplex
Insulation of aerated concrete with Penoplex is carried out using one of several technologies. Dowels can be used as mechanical fasteners. In other cases, these are wet methods, for example, using cement mortar, bitumen-polymer mastic, liquid nails or polyurethane foam.
The work involves five stages.
- First, the surface should be prepared by cleaning and sealing cracks.
- At the second stage, the sheathing is installed.
- The third stage is the starting bar and its installation.
- The fourth step is installation of penoplex.
- At the last stage you will need to seal the seams.
Prices for deep penetration primer
One of the important requirements that should be taken into account before carrying out insulation, regardless of whether mineral plaster is applied, polystyrene foam boards or mineral wool are installed, is the application of a primer. You can purchase NewStaR for 340 rubles. The composition is sold in a 10 liter container. After drying, a transparent film will be formed on the wall, which eliminates the ability of the material to absorb moisture. This will not only extend the life of the building, but also reduce the consumption of glue when installing thermal insulation.
If you plan to carry out work also inside, it is best to purchase “Optimist G106” primer in a concentrated version. For 10 liters you will have to pay 1900 rubles. The walls acquire the quality of moisture insulation, and such a layer can be used in conditions with high humidity. A universal composition is also the primer “VDAK-0181M” with deep penetrating ability. For 3 kg you will pay 162 rubles. This acrylic mixture is also excellent for interior work.