Houses with fireplaces, stoves, and heating boilers are equipped with chimneys used to remove combustion products to the outside. Lining a brick chimney is recommended for safer, more efficient operation. The brick has a rough surface, which favors the formation of condensation, the settling of soot and soot in a dense layer, and this leads to rapid contamination and deterioration of the chimney. Lining can be done with your own hands using a stainless steel pipe.
Preventive inspections of chimneys should be done before the start of the heating season.
Main advantages
Lining a brick chimney will provide:
- Reducing the release of condensate and discharging it into a special container or sewer system.
- Optimal level of draft, protection from smoke in the room.
- Free access for cleaning from combustion residues.
- The tightness of the exhaust duct.
- Protection against heat loss.
- Long service life, because it protects the inner surface from moisture, accumulation of soot, and soot that corrode the brick.
Sleeving methods: pros and cons of each
Lining a brick chimney is possible in one of the following ways:
For such work, you can use a stainless steel pipe.
Often the work is done using Furan Flex polymer products.
- Installation of stainless steel liners inside the chimney. This method can be called universal, suitable for any heating systems. The downside is that a stainless steel pipe has thin walls, which quickly burn out under the influence of high temperatures.
- FuranFlex is a system made of polymer materials. This method is recommended when using gas heating boilers characterized by a low temperature at the outlet of combustion products. Polymers are designed for temperatures not exceeding 250°. Disadvantages of the method: it is impossible to do the installation yourself; this requires certain knowledge and skills; the cost of building materials is high.
Article: Lining (rehabilitation) of the chimney
Hello, dear friends!
Lining (sanitization) of a chimney is the installation of a repair insert - a pipe - into an existing smoke and (or) ventilation duct, without completely dismantling it.
This insert is called a sleeve.
Installation of a sleeve in the channel is necessary whenever:
- There is an instruction on the alignment and protection of the chimney walls (liners) in the project;
- Connectable TGA low temperature;
- It is necessary to make a coaxial chimney, a gas-air system ( LAS ), to simultaneously supply combustion air and discharge combustion products into the atmosphere;
- The stove or fireplace will be used in long-burning mode;
- Large chimney length;
- The chimney is installed in the external walls;
- The chimney is long in unheated rooms and above the roof;
- Destruction of the chimney walls is observed;
- There is depressurization of the channel and a violation of gas tightness;
- There are condensation leaks on the walls.
Lining of smoke channels is also often called lining , i.e. protecting the walls of the channels from the inside from the aggressive effects of high temperatures, as well as freezing, precipitation of acids and water, both from condensing vapors and atmospheric influences. Due to the formation of an aggressive environment, destruction of both chimneys and the structures of the building in which they were installed often occurs.
These unpleasant moments often arise as a result of:
- incorrectly selected material taking into account specific operating conditions:
- Brick chimney;
- Washing out the solution;
- Low temperature boiler;
- Low temperature outside;
- Hygroscopic materials and other omissions. — design errors;
- Location in an external wall;
- Lack of thermal insulation;
- Head design;
- No condensate drain;
- Other omissions and carelessness of the designer.
— installation errors and violation of installation rules:
- Assembly direction according to smoke;
- The roof cap and sealing were carried out deviating from the design;
- Damage (jammed and scratched ends) of the pipe during installation;
- Incorrect and unreliable fastening, condensate drainage, kinks and bends;
- Leaks during docking;
- And other inconsistencies due to the caring attitude of workers and weak control on the part of the work contractor.
— Violation of operating rules:
- The use of inappropriate fuel, as well as failure of the TGA operation settings;
- Using an inappropriate operating mode (intense burning or smoldering, premature transfer to prolonged burning, etc.)
- Other negative aspects associated with the operation of the TGA or building.
— Inadequate maintenance:
- Lack of timely cleaning, inspection and maintenance;
- Failure to carry out scheduled repairs and periodic activities;
- Other violations of the Terms of Service.
Part 1. Materials for rehabilitation (liners) of chimneys.
1. Stainless steel pipes .
The most commonly used material for the repair and restoration of chimneys using the lining method.
At the moment, stainless steel pipes used for these purposes can be divided into the following three groups:
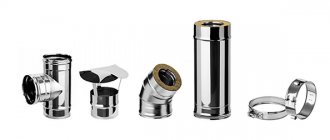
- Round pipes .
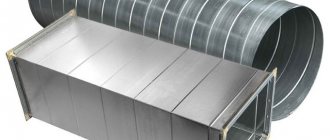
They are produced from ferritic and austenitic steel grades, with various diameters from 60 mm to 1000 mm, and thicknesses from 0.5 mm to 1.5 mm. Shaped parts are produced in the appropriate sizes, from the same steels and thicknesses. Installed in any channels and shafts exceeding the diameter of the insert.
Produced by large Russian manufacturers: Kraft, TiS, Vulcan, Ferrum, etc. and imported: Schiedel , Jeremias , BOFILL;
- Oval sleeves.
The main dimensions are 100*200 mm and 120*240 mm. Fits round diameters 150 and 200 mm. Stainless steel sheets with a thickness of 0.5 and 0.6 mm are used, mainly austenitic steels. Shaped parts are used from the same steel grades as the main ones, or a transition is made to a round section. It is installed in channels of rectangular cross-section, called “five” 140*270mm, or in a common shaft with other pipes, in order to reduce the size occupied by the box or shaft.
Manufacturers : Kraft, TiS, Vulcan;
- Flexible (corrugated) pipes.
Corrugated round pipes made of two layers of stainless steel. In this case, the grade of steel is only austenitic, but the one used outside and inside may differ. The main brand used for the production of flexible pipes is AISI 316L. Pipe diameter from 80 mm to 350 mm. Can be installed in curved channels. The turning radius is 2-3 times larger than the pipe diameter. The shaped parts are made from round stainless steel sheets.
Examples of manufacturers of flexible gas ducts: (LISFLEX) BOFILL; Tubest TS Multinox .
Note ! _ The use of flexible aluminum air ducts as smoke ducts and chimney connections is unacceptable!
2. Ceramic pipes.
Ceramics are one of the most reliable and durable options for rehabilitating collapsing smoke ducts.
It is not used for ventilation only due to its high cost. It is important to choose the right pipes and components for them.
Currently produced ceramic pipes for renovation can be divided into the following groups:
- By manufacturer: Schiedel ; Tona ; Hart ; Wolfshöher; Plewa ; Heluz ; and others;
- Shape: Rectangular and round;
- Based on materials: Fireclay and ceramic;
- By production methods: Plastic molding or isostatic semi-dry pressing;
- By connection: tongue-and-groove, or socket system;
- According to the conditions of use: those that can withstand the ignition of soot (G) or those that cannot withstand the ignition of soot (O);
- By mode of application: Dry (B) or Wet (W);
- Corrosion resistance class: W1 (gas); W2 (liquid and gas); W3 (solid, liquid, gas).
- For work at high pressure, or under rarefaction and location inside or outside a building:
N1 (leakage 2.0 l*sec/m2, at a vacuum of 40 Pa, located inside or outside the building)
N2 (leakage 3.0 l*sec/m2, at a vacuum of 20 Pa, located inside or outside the building)
P1 (leakage 0.006 l*sec/m2, at a maximum excess pressure of 200 Pa, location inside or outside the building)
P2 (leakage 0.120 l*sec/m2, at a maximum excess pressure of 200 Pa, location outside the building, when operating in vacuum mode, location inside the building is allowed)
H1 (leakage 0.006 l*sec/m2, at a maximum excess pressure of 5000 Pa, located inside or outside the building)
H2 (leakage 0.120 l*sec/m2, at a maximum excess pressure of 5000 Pa, location outside the building, when operating in vacuum mode, location inside the building is allowed)
- According to the maximum temperature of use;
- By the presence of a protective coating: Glazed and unglazed;
- By diameter: from 120 mm to 450 mm;
- For the maximum section of a straight pipe: 330 mm, 660 mm, 1330 mm;
- By weight: heavy and lightweight;
- Wall thickness from 4.0 mm to 20 mm. Shaped parts of a ceramic chimney system can be provided by the manufacturer, both ceramic and stainless steel.
Examples of chimney systems for renovation from various manufacturers:
- Schiedel KERANOVA;
- TONA tec san;
- Heluz Kerasan Plus .
3. Asbestos cement pipes.
Contained in the list of materials acceptable as chimneys, however, there are a number of significant restrictions.
The smoke temperature should not exceed 300 degrees. This implies:
- Afraid of soot ignition;
- Cannot be used for TGA operating on coal;
- It is not allowed to use it as a chimney for TGA whose flue gas temperature may exceed 3000C;
- It is not permissible to use with non-certified TGAs;
- Mandatory timely cleaning.
The material is hygroscopic. From this it follows:
- Cannot be used with condensing and low-temperature boilers;
- Do not freeze;
- It is necessary to insulate it yourself during installation;
- Difficulty in docking;
- Lack of shaped parts;
- And a number of other restrictions.
Despite all the negative aspects listed above, asbestos-cement pipe, to this day, remains the cheapest, and therefore the most widespread material for chimneys.
Attention! An asbestos cement pipe is not safe as a chimney!
Be extremely careful and careful when operating a chimney with an asbestos-cement pipe!
4. Polymer sleeve (liner) . A new composite material consisting of a fiberglass mesh - a base and a resin type of polymer impregnation.
Currently, the market for chimney products offers smoke channel inserts for removing combustion products from boilers (and other low-temperature TGAs), as well as for smoke channels applicable to fireplaces and stoves.
Distinctive features. Positive:
- There are no seams or joints;
- Low thermal conductivity;
- Not afraid of moisture and acid;
- Quick installation;
- There is no need to open the wall, even to turn it;
- It is possible to rotate at an angle of up to 30 degrees (some documents indicate an angle of 45 degrees, but for such a rotation there is a high probability of the formation of creases and kinks with narrowing);
- Minimum number of alterations of building structures, preparatory and related materials;
- Manufactured diameters from 80 mm to 500 mm;
- The maximum possible length is 60 meters;
- The chimney fittings are made of austenitic stainless steel.
Distinctive features. Negative:
- Installation requires special equipment;
- Possible narrowing of the channel cross-section;
- The participation of qualified specialists is necessary;
- Eliminates self-installation;
- There is a possibility of damage to the hose when installing fittings and pulling them through the channel;
- High cost of materials, equipment and work.
Examples of polymer inserts supplied to Russia:
- FuranFlex for gas boilers is certified as: T250 H2 0 W3 R6 C50
- FiTFiRE for low temperature boilers. European classification: T 300 P1 W1 O 50 R0.017
- FuranFlex RWV for fireplaces and stoves: Designed for smoke temperatures up to 800 degrees. Cannot be used for low temperature TGAs.
- FiTFiRE NT 1000 is similar to the one mentioned above.
5. Plastic pipes . Their use is acceptable in cases of using certified TGA and certified plastic pipes provided by the manufacturer for this purpose.
It is the fact of using only certified plastic pipes that nullifies any benefit of using plastic, because the cost of pipes made from it will be equal to a good stainless insert made of acid-resistant steel.
Sewage plastic pipes can only be used in non-combustible mines, as supply or exhaust ventilation, as well as supplying combustion air to a TGA with a closed combustion chamber.
Please note that laying plastic pipes through the building envelope will reduce the fire resistance of these load-bearing and enclosing structures to zero, and therefore the survivability of the entire building. After a fire breaks out in just one room, the flame will instantly spread throughout the entire building even before it is detected and contained. This means we end up with fire over the entire area of the building, including the floors and roof, which will greatly complicate the evacuation of people and extinguishing the fire.
The use of a plastic sewer pipe as a chimney is strictly prohibited!
Part 2. Carrying out work. Preparatory stage. Before work begins.
Installation of the liner in the smoke duct begins long before the arrival of a qualified team at the customer’s site and includes:
Drawing up an installation diagram, designing, compiling materials, agreeing on estimates and signing an agreement with the customer. This is all a preparatory stage.
The installation diagram, in a simplified version, or the design of the chimney liner, must necessarily contain answers to the questions:
- Chimney diameter (possible transitions from diameter to diameter are displayed and explained)
- The height of the chimney relative to the ridge, ceilings and connection point;
- Loads on the chimney and on the supporting fixture;
- Chimney fastening (supporting element that takes on the load);
- Condensate drainage (the direction of the condensate drainage method and the corresponding element of the chimney system are selected);
- Devices for inspection and cleaning (tees, pockets, plugs);
- Docking in TGA (exact diameters, the need for adapters are determined);
- Straightness of the laying (necessary bends, turning angles, slopes and length of each section);
- Centering and alignment of the sleeve (distance clamps, spacers, etc.);
- Sealing joints (application of sealant, clamps, etc.)
- The need for thermal insulation (type, thickness, length and volume);
- Head type and design;
- Work production plan.
At the beginning, according to the list of works and the approved estimate, the installation team collects the necessary tools, equipment, personal protective equipment and installation accessories. Next, the chimney kit is assembled, including auxiliary and fastening parts. The quantitative composition is checked against the estimate and invoices.
Before starting work, all openings must be completed, the location of the chimney fasteners must be determined, and the access paths to the pipe must be prepared both in the task and on the roof.
The necessary scaffolding and ladders are also erected, the safety of installation work is checked and safety devices are attached.
At the appointed time, installers must arrive at the work site.
First stage. Start of installation.
If the work of the preparatory stage has not been previously completed, the work listed in the preparatory stage is carried out. If necessary, the old chimney is dismantled.
After the installation of approach paths and technological openings in the mine, the channel is thoroughly cleaned using a brush, and at the same time it is checked for passability.
If necessary, the solution flows are knocked down and the channel walls are leveled through the top or additional technological openings.
A winch is attached to the mouth of the pipe to lift and lower the liner.
Components are distributed across floors.
The bottom of the shaft is leveled.
When placing the support element at the bottom of the channel, the bottom of the shaft is prepared and leveled and a ventilation hole is provided with the connection of a condensate drain.
Second phase. Installation of the main kit.
Features of installation of various inserts (sleeves).
All operations boil down to laying the sleeve to the entire height of the shaft, connecting the consumer to it, fixing it and leveling it.
However, there are a number of significant differences in the installation operations of different types of liners. The most significant of them are listed below.
Features of installation of a stainless sleeve with oval or round cross-section:
- The condensate drain, support element and tees are installed in the technological opening at the bottom of the shaft, and the entire main pipe descends from the roof;
- The pipe is fastened to the winch using rubber straps or a crimp clamp attached to the lower pipe;
- Tip: The pipe will descend into the shaft more smoothly using two cables;
- If the height of the sleeve is not high, it is allowed to hold the pipe by the upper part, with reliable fixation of the pipe elements relative to each other;
- It is advisable to connect the elements of the lid to each other without self-tapping screws. In exceptional cases, the use of stainless rivets is allowed.
- The chimney is installed on the bottom of the shaft using a floor element with a side condensate drain, or by means of a support platform through a fastening element fixed to the walls of the shaft;
- To center and level the pipe shaft in the shaft, spacer clamps and spacer structures are used;
- When arranging the rotation of the sleeve, it is necessary to make a technological opening for the entire amount of rotation, on both sides of which it is necessary to fix the sleeve;
- Application of high-temperature sealant (up to 300 degrees) is recommended for gas and liquid fuels and heat-resistant (up to 1200 - 1500 degrees), recommended for solid fuels;
- The sleeve ends above the mouth of the shaft.
Features of installing a ceramic sleeve:
- The condensate drain in this chimney system is the load-bearing element, so the entire assembly begins with it;
- A special element - a roller stand, is threaded into the hole intended for it in the condensate collector and installed on the winch cable, after which it descends 20-30 cm into the shaft; Pay attention to the direction of the condensate drain opening!
- Spacer elements are installed on the side surfaces of the condensate drain and sealant is applied. (The type of sealant is determined according to the type of fuel used.) After which the first ceramic pipe is glued and lowered below, having previously leveled the joining seam from the inside with a damp sponge
- In the first pipe, before connecting to the condensate collector, holes are made according to the template for a universal fitting at a calculated height relative to the bottom of the shaft. It is rare that the hole for connecting a consumer falls on the same pipe. Important! The fitting must not come into contact with the socket connection! Pay attention to the direction of the hole for the fitting!
- After applying the sealant to the socket of the first pipe, a cuff with spacer elements is installed, and the pipe descends 20-30 cm below the mouth of the shaft;
- The second pipe is installed, after which the extruded sealant is selected using a joint leveler and the joint is smoothed. Make sure that the holes made for the fittings are correctly oriented relative to the shaft!
- The operations are repeated until the bottom of the shaft is reached;
- The pipe should protrude from the shaft masonry to the height of the cover plate and cone.
Features of installation of flexible stainless steel pipe:
- The flexible air duct descends from the roof under its own weight. It is recommended to make a plug that is inserted inside and, having secured a cable to it, direct the air duct by pulling it down (especially important for laying a flexible insert in a shaft with a bend) .
- Connection, inspection and condensate drainage are carried out with sets of stainless round pipes made of austenitic steel;
- All fittings must be securely fastened in the shaft;
- The transition to round stainless steel pipes is carried out with a special adapter secured with a clamp.
- The pipe is cut 20-30 cm above the mouth of the pipe;
- It is better if the upper part of the flexible air duct ends with an adapter and a round insert with fastening to the shaft.
Features of installing a polymer liner:
- The polymer sleeve is lifted by a winch cable attached to the mouth of the pipe from the bottom up. It is recommended to use special equipment (winch).
- A special element with a pressure gauge and a valve for releasing air and steam is installed in the upper part of the liner;
- By pumping air with a compressor, the liner in the channel is straightened to take its shape;
- After straightening the liner, steam is injected under a certain pressure;
- Having created the required pressure and temperature, this mode is maintained for a period of time determined by the manufacturer;
- After some time, polymerization of the composite material occurs;
- After polymerization (hardening) of the liner, the mounting elements are removed;
- Connection, inspection and condensate drainage are carried out with sets of round pipes made of austenitic stainless steel;
- Shaped parts are securely attached to the wall or in the shaft;
- The transition to round stainless steel pipes is carried out with a special adapter secured with a clamp.
- The liner is cut flush with the shaft, with the final element installed at the mouth of the pipe.
Third stage. Head device.
After performing the basic installation operations, all that remains is to correctly design the mouth of the lined chimney.
Here are the basic requirements and recommendations for the design of heads:
- The sleeve, or sleeve extension, must rise above the shaft;
- A cover plate is installed around the protruding sleeve;
- In its absence, a slab is made of metal or made with cement-sand mortar with a slope away from the pipe;
- A cuff is installed near the pipe to prevent moisture from entering the space between the pipe and the shaft, or a mortar protrusion is installed with a mandatory gap for expansion;
- The mouth of the pipe is directed vertically and cut horizontally;
- It is recommended to insulate the protruding part above the roof and in a cold attic with heat-resistant materials;
- It is recommended to install an umbrella to prevent precipitation from entering the pipe, especially if the condensate drain does not have a permanent connection to the sewer;
- The use of a deflector on the chimney is not recommended;
- To increase the height of the pipe, its design and completion, it is recommended to switch to a thermally insulated sandwich chimney using factory-made parts;
- Thermal insulation of the sleeve with bulk materials is not allowed;
- To install ventilation channels, a special cuff with a cone is used, or vents are installed in the side surfaces of the shaft below the cover plate.
One of our videos as part of the project:
“The first expert channel about Fireplaces, Stoves and Chimneys”,
regarding the correct lining of a brick chimney.
Part 3. Errors when installing a chimney and lining it.
What to pay attention to.
- The use of straight pipes without a condensate drainage device, inspection and connection does not correct the problems and is a pointless waste of the customer’s funds;
- Lining the chimney at the same time as laying the walls and shaft is the most correct and prudent solution;
- Partial lining of the channel moves the condensation sites to other places and does not correct the problem;
- It is recommended to line the chimneys if the smoke ducts were laid out by masons and not by stove makers;
- The chimney can be lined with a heat-insulated sandwich chimney;
- The use of thermal insulation in the channel for the installation of an expanding gasket and to accelerate the passage of the dew point is allowed, but is not mandatory;
- Using a bend (knee) as a support is unacceptable;
- Jamming of pipe edges leads to difficult joining during installation and (or) depressurization during operation;
- Sharp jerks by the cable of the lowered flexible chimney are not allowed because creases, dents and disassembly of the chimney are possible;
- Narrowing the chimney is prohibited!
- Draining condensate from a condensate collector located in the wall will not be possible unless a pipeline is previously laid to drain it, or access to it is not provided in the form of a ventilation grille, hatch, or door;
- It is recommended to drain condensate with a hose connected to the sewer through a “U” shaped water seal, which prevents moisture from entering from the sewer and air leaks causing weakening of draft;
- Sharp turns of a flexible pipe or liner lead to bends and narrowing of the cross-section;
- The chimney must be placed freely in the shaft;
- Locking the chimney by walling it up or filling it with heat-insulating substances is pointless and can even lead to negative consequences in the form of crushing of pipe parts, collapse and self-disassembly;
- If a section of the wall in the area where the roof passes through the chimney gets wet, you should first check the tightness of the roof covering and the removal of condensing moisture from the waterproofing membrane. Most often this is a violation of the tightness of the roofing structures and is not related to the operation of the chimney;
- When installing a chimney and its liner, cleaning and inspection devices should be provided along the entire length of the pipe;
- Check the height of the chimney relative to the ridge and the wind shadow created by tall trees and other obstacles, despite the fact that the chimney existed in this form before. There may be associated deviations or problems;
- The reasons for backdraft can be not only in the height or correctness of the chimney, but also in the design of the building, wind currents and drafts created indoors in the building;
- It is advisable to carry out all work on the chimney before finishing and final roofing.
One of our videos as part of the project:
"The first expert channel about Fireplaces, Stoves and Chimneys"
about the most common mistakes when lining a chimney.
Part 4. The benefits of chimney refurbishment (liner).
A sleeved channel is better than without a sleeve because it has:
- Ideal (optimal) cross section for gas movement;
- Minimum roughness (smooth) of the inner surface of the pipe;
- Wall material that does not get wet and does not absorb moisture;
- Less thermal conductivity and flue gases are cooled less when passing 1 meter of channel;
- Greater safety in case of insert depressurization;
- Higher rate of heating of the pipe in cold weather;
- Protection of masonry in case of condensation;
- Devices for assembly and removal of condensate;
- Possibility of reducing the number of pipe cuts in the interfloor passage;
- A properly constructed head that does not absorb moisture and is protected from freezing (destruction);
- Smooth surface that is easy to clean;
- Possibility of replacing the insert.
Because of all of the above, we conclude that a lined chimney is denser, more reliable and safer.
It is also worth mentioning that when repairing a chimney using the sanitization method, it is possible to install a liner without dismantling the wall, and the lined chimney itself will be more repairable and less expensive.
The lining process will be much faster than building a new one, which will bring a positive economic effect and will have a positive effect on the cleanliness of the work and the usable space of your home!
I hope this article has answered many of your questions and you now have an idea regarding the lining of smoke and ventilation ducts.
Best regards, Alexey Telegin.
Materials and tools
The chimney liner consists of installing a stainless steel pipe inside the exhaust duct. Its smooth surface will ensure rapid heating, which reduces the formation of condensation and the release of soot along with smoke. The sleeve must be round or oval in cross-section made of stainless steel: when using solid fuel - AISI 321 or 409, sleeve thickness - 0.8-1 mm, in case of gas heating - AISI 304, thickness - at least 0.5 mm. The use of flexible stainless steel pipe is not recommended, as soot and condensation will accumulate on the corrugated inner surface.
How to install?
The chimney liner is usually installed during the construction of the exhaust duct. If installation is done later, during the operation of the chimney, the chimney is first inspected and cleaned. The tightness, operability of the structure, and the strength of the brick are also checked. The dimensions of the sleeve are calculated: section thickness, length of the pipe and outlet. The thrust force, the type of fuel to be used, and the temperature at the outlet of the combustion products are determined. With a correctly calculated diameter of the exhaust channel, the draft improves with increasing its height.
According to the rules for the production of chimney and stove works from 2005, chimney structures are installed near internal walls and partitions made of fire-resistant materials.
View “Rules for the production of pipe and furnace works” or
Key mistakes when lining
The main mistakes include:
- Partial liner (not along the full length of the shaft).
- Using a knee instead of a special support element.
- Crumpling of the edges of pipes (if we are talking about stainless steel) during transportation, connection (of segments to each other) or lowering into the shaft.
- Jerks of the cable when lowering the sleeve.
- Narrowing of diameter.
- Too sharp turns (if we are talking about a polymer liner).
- Use of bulk thermal insulation (between the sleeve and the brick shaft).
- The absence of a U-shaped water seal - if the condensate is discharged directly through the hose into the sewer.
Please note: every mistake is quite serious. If you allow them, you can complicate your task in the future (if you need to replace the liner), or worsen the operation of the boiler.
What is a spark arrester, why is it needed on a chimney, and how to make it?
How to clean soot from a chimney using potato peelings?
Related Posts
Preparation
If you line a chimney during the construction phase of a building, it is recommended that the design be as vertical as possible, in this case the smoke is better removed to the outside. The length of sections installed horizontally should not exceed 1 meter. When lining a previously installed chimney, the procedure is as follows:
- The wall in the brick channel at the location of the stove, boiler, heat generator, fireplace is being dismantled.
- Using ropes, the sleeve is placed inside the chimney channel and increased to the required height.
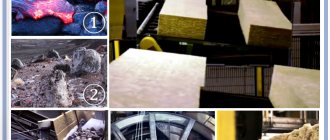
- The gap between the brickwork and the pipe is thermally insulated with non-combustible material.
- On the roof, in the upper part of the channel, a stove and an umbrella are installed to protect against moisture getting inside.
- The disassembled part of the chimney is laid back.
- A control fire is being carried out.
Sleeve installation
The construction of structures to line the smoke exhaust ducts begins from below, from the heating device. Each subsequent section of the structure is inserted into the previous one. Clamps secure the joints of the elements. Contact of the smoke exhaust with electrical wiring, water supply and gas communications is excluded. During the installation process, it is planned to equip the door for cleaning the chimney in the future. When the chimney pipe passes through the roof, the hole is insulated.
Carrying out work
Do-it-yourself chimney lining is carried out according to the instructions:
- If required, the section of the smoke exhaust structure is dismantled.
- The first sleeve is installed, then it is raised for fastening with the next element of the system. For this, a high-temperature sealant is used.
- Then the steps are repeated until the required communications height is reached.
- The space between the sleeve and the walls of the smoke exhaust system is filled with insulation.
- At the last stage, the integrity of the brick structure is restored.
If the smoke exhaust system is large and heavy, then in order to line a brick chimney, it is necessary to start work from the top.
