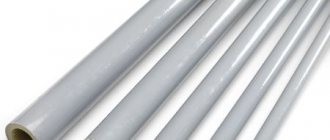
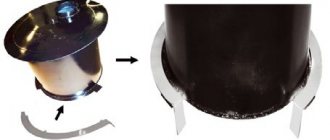
Tool for creating PE pipeline
To install polyethylene pipes with your own hands, you need to prepare the following tools:
- scissors for cutting products;
- soldering equipment;
- gas keys.
The soldering device is equipped with a set of nozzles of different diameters. Instead of scissors, you can use a jigsaw. But still, when cutting pipes, it is more convenient to use scissors, since with their help the edges will be smoother, without burrs and notches.
Installation of a pipeline made of polyethylene pipes is carried out using a gas wrench. To ensure a more reliable connection, a linen seal is used. Tools designed for laying polyethylene pipelines are sold in hardware stores. Typically, a soldering iron with attachments is offered to customers complete with scissors.
Preparation for installation work
Before installing PE pipelines, you must:
- Calculate the amount of required building materials depending on the length of the designed communication, the number of turns and corners.
- Before starting work, you need to turn off the water supply and prepare building materials in accordance with the project.
- It is necessary to lay a polyethylene pipeline from the heating boiler if an autonomous heat supply is installed in the house.
- After the dimensions have become known, they begin to connect polyethylene products and solder fittings and metal pipes.
Learning how to use a soldering iron will not be difficult even for a novice home craftsman. But at the same time, many technical points related to the process of assembling polyethylene pipelines must be observed.
HDPE pipes: installation features
Particular attention is paid to protecting the pipeline before starting installation work. It is better to lay polyethylene water supply under a concrete base (a cement screed is also suitable). Concrete copes well with its protective function; it protects polyethylene from hypothermia and overheating, which negatively affect the integrity of the material’s structure.
After taking the necessary measurements, you can begin to divide the pipe into sections of the required length. The pipe cutter tool allows you to cut the pipe as straight as possible. When using other devices, burrs may form on the pipe cut, which must be thoroughly cleaned with sandpaper. For convenience, there are marks on the pipe indicating the fitting depth. If there are bends in the pipe in the diagram, it is recommended to use a pipe bender.
When installing cold water supply, it is advisable to take care of the pipe insulation. Otherwise, condensation will form on the pipe, which often becomes the cause of mold and mildew in the room.
Important! The distance of the HDPE pipe from the wall should not be less than 2 cm.
Installation of HDPE pipes does not require special technical skills, but can only be done if the rules described above are observed. You should not start work on your own without making sure that you have at least sufficient theoretical knowledge about installation. It is best to make several test connections in order to rule out errors in the design in time.
Source
Installation by welding
The laying of communications in this way occurs in the following sequence:
- After a piece of pipe of the required size is cut using special scissors, a chamfer is removed from its edge at an angle of 45 degrees. Read on to learn how to cut a pipe at 45 degrees to get it perfect.
- The prepared section of the product is installed on the soldering iron nozzle, the same is done with the connecting fitting, which is placed on the second nozzle.
- The parts are then heated to a predetermined temperature, usually about 270 degrees, after which they are quickly removed from the attachments and connected.
- Then the docking area should cool down for several minutes. This procedure should not be done forcibly, as this will have a very negative impact on the quality of the seam.
- According to the project documentation, it is necessary to lay communications, connecting all PE pipes with fittings and heating radiators in a certain sequence. The soldering is completed at the output element near the heating boiler.
- After the system is filled with water, turn on the heating unit. All connections are carefully checked for leaks. If everything is in order, the pressure is set on the boiler and air is released from the radiators.
Connection fittings for polyethylene pipes
If, when laying a pipeline, it is necessary to install polyethylene pipes, fittings are used for this. Let's figure out how to connect polyethylene pipes for water supply so that there are no problems later. These parts are divided into types depending on the chosen method of work:
- welding of products;
- gluing;
- mechanical type threaded connection.
Depending on the pipe laying method used, fittings for polyethylene pipe products are:
- Electric welded, equipped with embedded heating parts. When the wire is heated using electricity to a certain temperature, the polyethylene begins to melt. As a result, a homogeneous dense formation is formed in those places where the transition is made from one section of polyethylene pipe to another. Modern equipment designed for welding polyethylene fittings allows you to set the required voltage and time to obtain a high-quality result.
- Compression. They are not much different from the fittings used when installing copper or plastic products. The difference lies in the material from which they are made. This type of fitting is convenient to use, since its installation does not require special qualifications - the fitting is almost ready for installation.
- Connecting elements for butt welding. For this purpose, Spigot PVC fittings (cast elements) are used. The joining process involves heating the end of the pipes to a viscous-flowing state of the material, and then they are joined under pressure. The connection point, provided that the welding technology is followed, is homogeneous with the pipeline.
- Reductive. These elements are used for the installation of PE pipes of different diameters. They are equipped with a threaded connection for quality results. Threaded fittings are used to connect polyethylene pipes to metering devices and water distribution equipment.
Thus, correctly selected fittings make it possible to perform high-quality installation of PE pipelines for water and heat supply with your own hands without special training.
Practical guide
The first connection method discussed above is often used at home. Tools that will be needed when assembling the entire structure:
- pipe scissors or hacksaw;
- special key with chain;
- fitting;
- roulette.
Note!
Often the chain wrench is replaced with a regular gas wrench or simply tightened by hand. To ensure the highest reliability, it is better to use products designed for this purpose.
Detachable connections for HDPE
The entire installation process will be as follows:
- The entire pipe is produced in coils, so it will need to be conveniently placed to simplify the task. The required length is measured and cut from the coil using a hacksaw or scissors.
- The edge that will fit into the fitting is well aligned. This must be done so that skew does not occur later and that the grip is uniform.
- The chamfer is removed under the cone, this will make it easier to pass the sealing gum.
- The coupling is unscrewed from the fitting.
- The sealing ring is removed.
- First, the coupling and then the sealing ring are put on the pipe.
- The ring must be turned so that its conical part rests against the coupling, and its edge against the fitting.
- The pipe is wetted with water or soap solution. This will help fix it easier.
- The fitting is pushed onto the pipe until it stops. In this case, you need to make sure that the rubber seal that is located in it does not wrap inside the hole. If this happens, then you need to remove the fitting and repeat everything from the very beginning.
- Before filling the pipe with soil, it is advisable to test it by applying operating pressure.
Fitting installation diagram
For an overview of the compression fitting for polyethylene pipes, see below:
Note!
Fittings with metal threads are ideal for transitioning from a metal pipe to a polyethylene pipe. This will be the key to a high-quality connection that will not fail during a pressure surge.
The butt joint is somewhat more complicated and requires specialized tools. The main one is the welding machine. It consists of the following blocks:
- Centralizer. A special fixing clamp that allows you to position two parts clearly opposite each other. Also, with the help of this element, fixation and pressure are carried out so that a high-quality seam is formed.
- Trimmer. A small tool with an electric motor that has two cutting heads. Its purpose is to process the edges so that they have an even plane.
- Hydraulic block. Designed to move two parts of the centralizer. It has a pressure gauge, which makes it possible to select the required value in bars.
- Heater. This is a kind of soldering iron that melts the edge for subsequent joining.
Butt welding machine
If you plan to do professional installation, then it makes sense to purchase such a device, otherwise it’s enough to just rent it. The sequence of actions will be as follows:
- One of the parts to be welded must be movable. If this condition is not met, then the centralizer will not fulfill its role.
- Using a caliper, check the ovality of the pipe. The diameter should be the same at any point where the gauge is applied.
- The compliance of the actual wall thickness with the declared one is checked. It must be the same for two elements. If they are unequal, then the soldering will not achieve the required strength.
- The elements are installed in a centralizer. It is necessary to maintain such a distance between them that in the open position it is possible to safely install the trimmer and the heating element.
- The clamping is carried out in pairs. The rear clamps can be tightened a little more than the front ones. It is better not to overdo it with the latter, so as not to disturb the correctness of the end circumference.
- The pressure for movement is set. In order to do this, you must first unscrew the valve to bleed the air. Next, by twisting it, the value at which movement begins is determined.
- The compression pressure on the solder is calculated. This is done according to the table, which is usually located on the unit. If it is not there, then you can use the following formula: divide the area of the pipe end by the total cross-sectional area of the cylinders, multiply the resulting result by 0.15 and add resistance pressure.
- The parts that will be welded are cleaned of sand and other dirt with a damp cloth.
- Edge processing is in progress. To do this, a trimmer is installed close to one pipe. It turns on and with the help of a hydraulic unit, two workpieces are moved. The process continues until 3–4 turns of solid chips are formed on each side.
- The pressure is released and the parts move apart.
- The cutting tool is retracted into place.
- A test docking is performed to ensure that the process went as expected.
- The ends are cleaned again. But this time you need to use alcohol or a special solvent.
- The soldering iron turns on and heats up to the required temperature.
- The timer for the planned soldering is set. It is usually also indicated in the table.
- The tip is installed between the pipes.
- The pipes are brought together to the soldering iron. It is necessary to wait until an influx of 1 mm thickness is formed. After this, the pressure is released and the time for welding is noted.
- After the welding time has expired, the soldering iron is removed. There will be 5 seconds to bring the details together.
- After docking, you will need to wait about 5 more seconds under pressure, after which it is released and the timer starts to cool down.
Butt welding diagram
The cooling process should not be accelerated by any means. Also, during this time, you should not turn the pipe or try to remove the centralizer. Otherwise, the joint will be broken, and subsequently depressurization will occur.
The video shows the butt welding process in detail:
Electrofusion welding process
Electrofusion welding is an achievement that allows seams to be joined in places where other methods are simply not applicable. The advantages of this solution are:
- high speed of ongoing processes;
- minimal probability of errors;
- high safety of the entire process;
- possibility of articulation of fixed workpieces;
- the internal diameter of the pipes remains virtually unchanged;
- simplifies the process when performing tasks with large pipe diameters;
- the advantage of working with workpieces of various diameters and wall thicknesses;
- minimal consumption of electrical energy when performing tasks.
Electric coupling
The tools you will need are:
- Special cleaning liquid. It can come with fittings or be purchased separately. The use of acetone or other solvents not intended for this purpose is not recommended.
- Oxide layer remover. Its role can be an ordinary pig or a device that is installed directly on the pipe. For larger diameters, using the second one is preferable. The fact is that it is necessary not only to create a rough surface, but to remove about 0.1 mm of material so that adhesion can occur.
- Welding machine. In this case, a special development is used. Its task is to supply a specific voltage to the coupling for a certain period of time. It is assembled using semiconductors, which explains its efficiency and high performance. On the front panel, as a rule, there is a digital display, which makes it possible to check the correctness of the entered data. The design includes a port for connecting a scanner; it is necessary to automatically enter the required parameters through the barcode that is printed on the fitting. Information about the work done is recorded in the internal memory and can subsequently be transferred to a flash drive if there is a USB port.
- Latch or positioner. For this type of connection, it has a slightly different structure than in the previous case. Its main purpose is to compensate for ovality that may be present due to the pipe being stored in a coil or under load.
- Pipe cutter In order for the edges to be flat and without jagged edges, it is advisable to use this particular tool. A hacksaw and a knife will be bad helpers in this case.
- Permanent marker. It should be white or yellow so that the applied marks are clearly visible on the pipe.
- Roulette.
Sequence of work on electrofusion welding
To achieve an ideal result, you will need to follow these steps:
- The ends are being prepared. To do this, they are cut using a pipe cutter.
- Using a tape measure, measure the total length of the coupling.
- Each pipe is marked. It should be located from the edge at a distance of half the size of the fitting plus 2 cm of margin.
- The top layer in which the reaction with oxygen has occurred is removed. To make it easier to maintain uniformity, it is necessary to apply several longitudinal lines from the mark to the end. As the tool progresses, it will be clear which part has not been sufficiently covered.
- The end will be chamfered into a cone to make it easier for the pipe to enter the fitting.
- A positioner is installed on each pipe. It is clamped until the pipe is perfectly round.
- Both the pipe itself and the inner walls of the fitting are treated with a degreasing compound.
- The coupling is placed on the pipe up to half the depth of its size. Usually there is a limiter inside that will not allow you to go further.
- The second pipe is brought in and inserted.
- The evenness of the entire plane is checked.
- The terminals from the welding machine are connected to special connectors.
- A scanner is used to read the applied barcode.
- The entire process is launched. It is important to wait not only for the welding time, but also for the complete cooling time, which is also shown on the display. During this period, you must not touch or try to change the configuration of the equipment. This can lead to poor quality articulation.
- At the end of the procedure, data about the operator, time, temperature and date are applied to the joint.
There are basic mistakes that are very important to avoid. For example, it is necessary that the pipe and fitting are not at an angle. This will cause the molten mass to simply flow out. If the ovality is not compensated, then the coupling will simply be impossible to put on, or the formation of a monolithic adhesion will not occur. If the pipe is not immersed at an insufficient level, the spiral will simply melt the material inside, but jointing will not occur.
