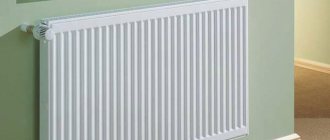
Features of installation of bimetallic heating radiators
Batteries are selected according to power for each room. When calculating this parameter, the area, ceiling height, thermal conductivity of the building walls and other nuances are taken into account. The power of the radiator depends on the number and size of sections. If we take a cast iron battery as an example, then its design is stacked. If errors were made during independent calculations, the number of sections can be reduced or increased.
When installing bimetallic batteries, it is necessary to take into account the peculiarities of their designs. Such devices can be sectional or solid. In the first option, you can change the number of sections. This trick will not work with solid radiators. If the heating device is incorrectly selected in terms of power, it will only have to be completely changed.
Bimetallic radiators come in collapsible, sectional, and solid - non-separable. Advice! The power of the heating device is calculated using the indicator 1 kW/10 m2. The parameters of each battery are indicated by the manufacturer in the passport.
From the factory, bimetallic heating devices come in a protective film, which determines another installation feature. It is not recommended to remove the packaging until the connection is completed. The film protects the painted surface of the sections from scratches.
The efficiency of heat transfer depends on the location of the radiator
If the radiator is installed under a window sill, then it is placed centrally relative to the window opening. Throughout the room, all radiators belonging to the same heating system are installed at the same level. The body of the bimetallic heating device has a special shape that improves the convection of air masses. To achieve effective heat transfer, the radiator is installed with clearances from obstacles:
- from the top end to the window sill - from 8 to 12 cm;
- from the bottom end to the floor – 10 cm;
- from the back plane to the wall - from 3 to 5 cm.
It is by maintaining the gaps that good convection is ensured. It is important to know that the radiator cannot be raised high from the floor. This will not improve convection. A high location will result in a large temperature difference between the lower and upper parts of the room.
Installation of bimetallic batteries
The installation of the heating device must be carried out strictly according to the instructions set out in the device passport.
It clearly describes the procedure for connecting bimetallic heating radiators for a specific model. It should be noted that the installation of all system elements is carried out in plastic packaging of the radiator. And this packaging cannot be removed until the entire installation process is completed.
Let's look at how to connect a bimetallic heating radiator yourself. When carrying out installation work, the following nuances must be taken into account:
- It is better to place the battery in the center of the window;
- equipment is installed only in a horizontal position;
- heating parts must be installed at the same level within the room;
- the distance from the wall to the battery should be from 3 to 5 cm. If the heating system is located too close to the wall, the thermal energy will be distributed irrationally;
- a distance of 8-12 cm must be maintained from the window sill. If the gap is too small, the heat flow from the battery will decrease;
- the distance between the radiator and the floor should be 10 cm. If you install the device lower, the efficiency of heat transfer will decrease. It will also be inconvenient to clean the floor under the radiator. But if the heating unit is located too high, the temperature readings at the bottom and top of the room will be very different.
The installation algorithm for a bimetallic radiator is as follows:
- the location for installation of brackets on the wall is marked;
- fixing the brackets. If the wall is brick or reinforced concrete, then the brackets are secured with dowels and cement mortar. If you are dealing with a plasterboard partition, then fixation is carried out using double-sided fastening;
- The battery is placed on the brackets;
- the radiator is connected to the pipes;
- a thermostatic valve or faucet is installed;
- An air valve is placed at the top of the battery.
Below are some recommendations regarding self-installation of a bimetallic heating device:
- Before starting installation, the flow of coolant into the system at the outlet and inlet should be shut off. There should be no liquid in the pipeline;
- Before installation, you must check that the battery is complete. The radiator must be assembled. Otherwise, you need to assemble the unit according to the manufacturer's instructions;
- It is prohibited to use abrasive materials during assembly. Because the battery design must be sealed. And abrasive substances can destroy the material of the device;
- bimetallic radiators use both right-handed and left-handed threads. This must be kept in mind when tightening fasteners;
- When connecting sanitary fittings, the correct choice of material plays an important role. As a rule, flax with a heat-resistant sealant is used. Tangit threads or FUM tape are used;
- Before starting installation, you must have a clearly planned radiator connection diagram. It should be noted here that the connection diagram for bimetallic heating radiators can be bottom, diagonal or side;
- When the installation is completed, the device is turned on: all the valves of the unit, which previously blocked the path of the coolant, smoothly open. If you open the taps abruptly, you can cause clogging of the internal pipe section or cause a water hammer. After the valves are open, excess air should be released using an air vent;
- You should not cover bimetallic batteries with screens or install them in wall niches. This will cause the heat output of the device to sharply decrease.
What is needed to install a bimetallic radiator
All necessary elements for installation are supplied with the battery. It is important for the owner to have a standard set of locksmith tools.
To install a bimetallic heating device, you need a mechanic's tool kit
Since installation begins with markings under the brackets, first of all you will need a pencil or marker. Horizontalness is checked with a level, clearances from obstacles are set using a ruler or tape measure. To drill holes for the brackets, use an electric impact drill or a hammer drill with a drilling function.
To directly connect bimetallic heating radiators to central heating or a home autonomous system, you will need a set of keys and a winding thread made of flax or fum tape. Depending on what kind of pipes are supposed to be connected, additional equipment will be required. If the heating is made of plastic pipes, you need a special soldering iron. The metal pipeline is welded by gas welding or electric welding.
Installation and connection of heating radiators
Before carrying out work, purchase components - adapters with hooks; a standard kit often includes dowels with screws. They also buy a thermostat and two valve or ball valves.
To drill holes, you will need a screwdriver or drill with a drill suitable for the dowel. You also need to have a building level, a tape measure and a pencil, and an adjustable plumbing wrench.
Before carrying out work, determine the location and dimensions of the battery according to the following rules:
- the heat exchanger is positioned symmetrically relative to the central axis of the window;
- it should be suspended at a distance of 100 - 120 mm from the bottom surface of the window sill;
- the distance between the floor and the battery should not exceed the range of 80 - 120 mm;
- the optimal clearance between the battery and the wall is 30 - 50 mm;
- the total length of the battery is 70 - 80% of the width of the window under which it is fixed.
To hang bimetallic radiators, use at least three brackets - two at the top and one at the bottom.
When connecting bimetallic heating radiators, you may need information about: Heating pipes - what types of modern pipes there are, and also what is best to choose when installing a heating system in a private house or apartment
Rice. 13 Schemes for connecting bimetallic heating radiators to a vertical riser in communal apartments
The diagonal connection of a bimetallic radiator with a thermostat with pre-extracted pipes is carried out in the following sequence:
Attaching Retaining Hooks
- First, markings are made on the wall. Draw a central vertical line, then symmetrically apply the radiator to the wall (the help of a second worker will be needed) and make marks with a pencil through its edges.
- Two points under the horizontal section of the section are placed at the top and one point at the bottom near the center line.
- Next, drill holes of the required diameter and install the radiator mounts on dowels with screws.
- Hang the battery and check that it is installed correctly - it should rest firmly on all brackets without gaps.
Methods for connecting bimetallic radiators
Depending on the number of pipes in the circuit, heating is of two types: one-pipe and two-pipe. The diagram and connection option for the battery depend on this. In addition, the type of construction is also taken into account: one-story or multi-story building.
Connecting bimetallic heating radiators with a single-pipe system
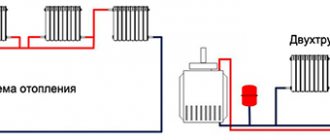
The single-pipe system is considered the most economically profitable. More often, such wiring is used for high-rise buildings, but it is also found in private houses where there is a closed type of heating with forced circulation. Bimetallic devices in a one-pipe system are connected in series. During circulation, the coolant passes through each radiator in turn.
In a one-pipe system, all radiators are connected to one pipe, which acts as supply and return
The weakness of a single-pipe system is the temperature difference. Due to the sequential passage of the coolant, the bimetallic outer batteries on the circuit are always colder. The second disadvantage is the inability to equalize the heating of each heating device. If a regulator is installed on a bimetallic battery, due to the serial connection, during regulation, the heating temperature will still change throughout the entire system.
Connecting bimetallic heating radiators with a two-pipe system
From the name it is already clear that the system involves the use of two pipes: supply and return. Each bimetallic device is connected in parallel. This scheme ensures that the coolant passes at the same temperature through all batteries. In addition, each radiator can be equipped with a regulator to set optimal heating.
In a two-pipe system, bimetallic heating devices are connected in parallel
The downside is the need to use more pipes. However, the efficiency of such heating is better. In addition, a two-pipe system in a private house is capable of operating with natural circulation without a pump. You just need to maintain the slopes of the pipeline and radiators relative to the location of the boiler.
Connection diagram
Any connection method can be used in a one- and two-pipe heating system. In the first type, the batteries are installed so that they form a single chain through which water flows from top to bottom. It is not profitable to install such a heating system in a private house, since the first radiators will heat up very well, but the rest will heat up poorly. This occurs due to the flow of cooled coolant to the last devices.
A two-pipe system is more profitable, since hot water comes from one riser, and cooled water flows into the other. This type of heating network piping is carried out in all private houses, because it allows you to maintain a constant specified thermal regime and makes it possible to control this regime.
What fittings are needed for installing bimetallic radiators
For a standard connection, you will need a set of end plugs for battery collectors with plugs and a threaded adapter for connecting pipes. A Mayevsky valve is required to bleed off the air. It is optimal to connect the supply and discharge pipes to the manifold of the bimetallic device through a shut-off ball fitting. The taps will help you painlessly separate the battery from the system if it breaks.
To isolate the radiator from the system, it is optimal to install ball valves
Depending on the wiring diagram, you may need a third ball valve, which is placed on a jumper - a bypass. From additional fittings, a regulator is used to change the heating temperature of the battery, but only in a two-pipe system.
If you plan to connect bimetallic radiators to iron pipes using polypropylene pipes, you will need adapters from plastic to metal. Depending on the circuit used, for connection you need tees, angles, detachable couplings - “American”.
Advice! The use of “American” wires when connecting bimetallic heating devices allows you to easily disconnect the radiator from the system without cutting the pipes.
Connection diagrams for bimetallic heating radiators
The quality of heating of each bimetallic device depends on the circuit in which it is connected to a two-pipe or one-pipe system. In general, there are two types of connections: bottom and side. The first option is simpler, but less effective.
Important! The wiring can be lower or upper. In the first option, one or two pipes are laid along the floor. In the second option, the supply pipe is located above the radiator, and the return pipe traditionally runs along the floor.
Bottom connection
Radiators with a bottom connection are characterized by the presence of two pipes: inlet - supply and outlet - return. Which one is which is described in the instructions for the heating device.
The bottom connection is equally important in one-pipe and two-pipe systems
In a one-pipe system, a pipeline is broken for serial connection to the inlet and outlet pipes. In a two-pipe system, the circuit pipes remain solid, and the pipes are connected by inserting tees.
Side connection
The most common connection is a side connection. Depending on the layout, pipes are connected to certain collector plugs. There are several options here:
- Diagonal connection is effective for long radiators with more than 12 sections. The coolant is supplied from above on one side, passes through the entire bimetallic battery and is discharged from the bottom of the opposite side of the device. Using a diagonal pattern, the pipeline is supplied to the plugs of the upper and lower manifold, located opposite to each other
- With a one-way connection, the supply and discharge pipes are connected to the plugs of the upper and lower manifold, located on one side of the radiator.
The scheme is convenient for apartment buildings with risers. One-sided lateral connection is in demand for multi-storey buildings where the system has risers. Attention! For a one-way connection, it is optimal to use bimetallic batteries with a maximum of 10 sections, otherwise the outermost ones will warm up poorly. - The saddle connection is used for lower pipe routing. In a single-pipe system, the “Leningradka” scheme is widely known. The pipes are supplied only to the side plugs of the lower manifold. With a saddle connection, the efficiency of a bimetallic heating device is reduced to 14%
With a lateral connection, it is customary to connect the supply pipe to the upper and the return pipe to the lower collector. In a forced system with a circulation pump, reverse connection is practiced, but the heat transfer efficiency is reduced.
In the video, do-it-yourself installation of bimetallic heating radiators to obtain maximum heat transfer efficiency:
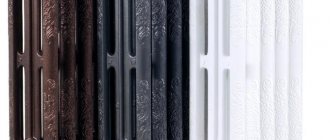
Advantages of bimetallic radiators
When installing modern individual heating systems, they are increasingly resorting to the use of cast iron batteries. This happens due to their shortcomings. Bimetallic radiators fully correspond to their name. They are composed of two different metals. One of them is most often steel, and the second is aluminum. This symbiosis gives positive results. On the one hand, heat transfer improves, and on the other, the strength and stability of the heating radiator increases. Aluminum has excellent heat transfer properties: it heats up quickly and releases heat quickly.
In this regard, steel is more inert, but its strength characteristics are higher. This means that it can easily withstand water hammer without damage. Externally, a bimetallic heating radiator cannot be distinguished from a similar aluminum one. It also consists of sections, the number of which in one radiator can be increased or decreased depending on needs. This is done using a special wrench, which is used to screw in or unscrew the nipples. Products of this type have the following advantages:
- long service life;
- mechanical strength;
- good heat dissipation;
- corrosion resistance;
- easily matches the interior;
- working with thermostats.
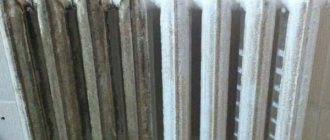
In some cases, the use of bimetallic radiators in central heating systems is allowed. This indicates their resistance to corrosion, which may be due to the presence of various salts in the carrier. Conventional aluminum radiators fail very quickly. Bimetallic heating radiators are able to withstand water hammer with a pressure of up to 40 atmospheres, this is an impressive indicator that allows you not to be afraid of unforeseen situations. An advantage is the ability to install thermal heads with devices of this type. Due to good heat transfer, a rapid change in state occurs. The appearance of radiators is easy to combine with almost any interior. The products also have their disadvantages that should be taken into account:
- price;
- low quality products.
It is important to understand that heating radiators that are made of two metals will be quite expensive, which is not surprising for products of this class. It is important to beware of fakes, because low-quality devices do not have anti-corrosion protection, which will lead to rapid failure.
Rules for installing bimetallic radiators
To successfully install a bimetallic heating device, you should follow a few simple rules:
- When tying the radiator, do not apply great force, otherwise the thread may be stripped. It is optimal to use a torque wrench to help control the force.
- For winding, use fum tape or a thin layer of flax coated with sealant. Paint cannot be used, especially if antifreeze is used as a coolant. It is dangerous to wind dry flax in a thick layer, as this will lead to the appearance of microcracks on the thread. Over time, a leak will appear. The thermostat, “American” and other auxiliary components are always placed in front of the shut-off valves
- In the piping chain, ball valves are always placed on the pipeline. From the shut-off valves towards the radiator, the remaining elements are assembled.
- The bimetallic battery is placed horizontally without distortion. Otherwise, an air lock will appear that cannot be removed through the Mayevsky tap.
Bimetallic heating devices are lightweight, but at least three brackets are used for hanging. Two elements are located at the top manifold, and one is located at the bottom.
How to install a bimetallic heating radiator with your own hands
The principle of installing a heating device in an apartment and in your own home is the same. Standard actions required:
- Markings are made on the wall according to the level. Holes are drilled and brackets are driven in. Their number depends on the length of the radiator. Typically, 3-4 fasteners are used. If the length exceeds 1.8 m, 6 brackets are required. The brackets are fastened strictly level and horizontal.
- The radiator is hung on the installed brackets. Use a ruler to check the gaps from the floor, window sill and wall. The bimetallic device is leveled horizontally. The radiator is hung on securely fastened brackets
- When the bimetallic device is aligned horizontally and securely fixed, begin piping it and connecting it to the heating system.
It is usually customary to install bimetallic radiators on polypropylene pipes or use metal-plastic. When the apartment has old wiring, the batteries are connected to the metal pipeline using pipes made of plastic pipes, if the operating pressure of the coolant allows.
How to connect a bimetallic heating radiator in an apartment
In an apartment building, the entire heating system is looped according to one circuit. It cannot be changed, otherwise the entire riser passing through the apartments of subsequent floors may stop heating. It is prohibited to change the diameter of the pipes.
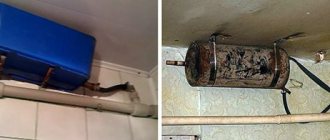
If old radiators are installed according to a bypass scheme, then when replacing them these jumpers should remain in place
An important nuance is the presence of high pressure in the centralized heating system. For this reason, it is often impossible to use metal-plastic and polypropylene pipes. To connect, you will have to hire a welder.
How to connect a bimetallic radiator in a private house
In our own homes, heating operates at low pressure. Here you can use plastic pipes without any problems. The connection diagram depends on the type of system. If the heating is of a closed type with forced circulation, you can use a single-pipe or two-pipe method, even with floor wiring.
For heating with natural coolant circulation, a two-pipe system is used, where an upper distribution is assumed
Without a circulation pump, a single-pipe system is ineffective. So that the coolant can naturally circulate, the boiler is always located at a level below the radiators. Bimetallic devices are connected to a two-pipe system with an upper distribution of the supply pipe. The return line runs along the floor. The connection diagram can be chosen from one side or diagonally.
Functionality check
Upon completion of installation work, the functionality of the system is checked. Having opened the Mayevsky tap, they begin to fill the radiator through the return line. To do this, open the ball valve on the lower manifold. When all the air is out of the battery, water flows out of Mayevsky’s tap, it is turned off. Open the second ball valve on the upper manifold.
In order for the battery to warm up, all the air must be vented while filling it with coolant.
If there is no air left in the sections, the circulating coolant will begin to warm them up. The presence of cold spots indicates air pockets. The bleeding procedure through the Mayevsky tap is repeated until a positive result is achieved.