Home / Electric boilers
Back
Published: November 26, 2019
Reading time: 4 min
1
9970
Modern electric boilers are very popular because they are very easy to install and configure. They do not require the construction of a smoke exhaust system or exhaust ventilation, or the presence of a separate room to house the boiler.
Typical modifications of electric boilers already contain all the necessary components and functional units: network pump, expansion tank, thermostat, safety group.
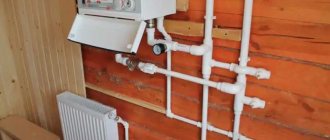
Correct installation affects the complexity of the connection. Photo source: termo-volga.ru
Therefore, connecting an electric boiler is very simple, since you will need to connect a minimum number of in-house utility networks and you will not have to select an expansion tank.
- 1 Types of boilers by heater type
- 2 Boiler selection
- 3 How to connect an electric boiler to the heating system
- 4 How to connect the boiler to the electrical network 4.1 Connection diagram for a single-phase 220 boiler
- 4.2 Connection diagram of a three-phase electric boiler to the 380 electrical network
Equipment classification and operating principle
An electric boiler converts electrical energy into heat and, depending on the design features, can be:
- TENOV;
- electrode;
- induction.
Regardless of the type, modern models are equipped with a thermostat, with which you can adjust the power of the device and the degree of heating of the coolant.
Usually it is also possible to receive information from an external sensor to control the temperature of the air mass in a specific room.
Device with heating element
Inside the container intended for water, heating elements are installed - heating elements. They can be made in the form of tubes or plates. To regulate the degree of heating, the heaters are turned on one by one.
Water enters the tank, is heated, and then transferred to the circuit. As it cools or heats up, individual heating elements turn on or off. The movement of the coolant is controlled by a built-in circulation pump.
Depending on the size and type of heating elements, electric boilers are wall-mounted or floor-mounted. You need to choose a place to install the device so that it is convenient to service.
You can choose double-circuit models of such boilers; they heat water not only for heating, but also for plumbing. Heating element devices are popular due to their simple design and relatively low price. When used correctly, they rarely break down.
In addition to water, antifreeze or oil compositions of various concentrations are used as a coolant. But the sizes of such devices are usually quite large, which limits the possibilities when choosing a place to install them. Over time, plaque settles on the heating elements, and the heating elements need to be replaced periodically.
Electrode boiler for heating
For heating, the potential difference at two electrodes and the natural resistance of water, which arises due to the salts dissolved in it, are used here. These are compact devices that can quickly heat small volumes of water.
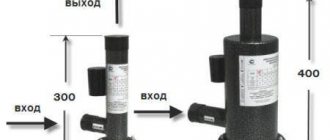
Electrode boilers are very compact and easy to install, but such devices only work with water that has a certain resistivity
A built-in circulation pump is not needed here. This is a simple device that almost never breaks. And if this happens, it is not difficult to repair it. The price for devices of this type can be called affordable.
But oil and antifreeze are not suitable for such a boiler; only water, not distilled water, is acceptable as a coolant. Over time, the electrodes wear out and dissolve in water. They need to be periodically replaced with new elements.
Induction heating device
In such boilers, the heating element is made of a dielectric housing with a coil and core wound on it. The current in the coil causes a potential difference in the core, which heats up quite quickly. Thermal energy is transferred to the coolant.
Boilers with the induction operating principle are resistant to wear, they have high efficiency and last an exceptionally long time. The design is so simple that it can be made from available materials
This is a boiler with high efficiency and a long service life. Industrial models are quite expensive, but if you wish, you can make a homemade induction analogue. Any coolant liquid is suitable, and breakdowns are extremely rare.
How to connect to the mains
Your home may have one or three phases. The difference in the number of phases allows you to evenly distribute the total load across individual threads. There is no such possibility in a single-phase line. Before powering the boiler, you need to take care of the quality of the wiring, because the power of the heaters reaches a significant 32 kW. The selection of power is carried out based on the area of the heated room and the amount of heat loss in the house.
The heater's passport indicates the parameters of the wires that are used to install an electric heating boiler with your own hands. It is worth noting that due to the high load, manufacturers recommend using copper wires. In a single-phase and three-phase line, the number of wires differs accordingly. In single-phase there are three (phase, zero, ground), and in three-phase there are five (three phases, zero, ground). The number of phases does not in any way affect the number of heating elements. A heater with three heating elements can be either single-phase or three-phase. The difference lies in the way the heating elements are connected into one network.
Boilers come in different prices and configurations. The simplest of them are equipped with:
- tank with heating element;
- heating element on/off relay;
- heat sensor.
Such primitive automation allows you to regulate the temperature of the coolant, preventing it from overheating. Cheap models do not have a pump or a complex control unit, just all the essentials. Typically such units are single-phase. Installing an electric heating boiler operating from a single phase is quite simple. To connect it to the electrical unit, two wires are supplied (phase and neutral). The ground connection can be screwed onto the housing if there is no contact provided for it on the block. At the same time, it is always possible to assemble a separate control with numerous sensors.
Phases are indicated in Latin letters
More expensive models are equipped with a circulation pump and an expansion tank. The pump also needs electricity. In addition, the heater is equipped with a lot of sensors with the ability to configure them. To do this, complex programmable control units are installed, which are responsible for the operation of both the boiler and the pump. To supply current, the block has terminals with markings on them. Phases are designated by letters:
- A or L1;
- B or L2;
- C or L3.
It doesn’t matter in what order you connect the wires when installing an electric heating boiler; you can do this in any order. We are talking only about the phases in three-phase boilers; zero and grounding must be in place.
For such boilers, additional electronic units are also installed, which can both expand the functionality of the device, for example, work only at night, and secure the entire network.
A fuse installed on each phase in front of the boiler itself will cut off the power to the heater in the event of any malfunction. There are also fuses at the entrance to the house. The boiler is powered in three phases at once; different separate flows are used for lighting and sockets. It turns out that if you do not install a fuse in front of the boiler, when the fuse trips, the entire house will be de-energized, which is very inconvenient.
The installation of an electric heating boiler is accompanied by the installation of meters with the ability to count the number of kilowatts used during the day and night. Electricity is cheaper at night, so it makes more sense to run the boiler more at night than during the day. A time relay is installed in tandem with such a counter.
Despite the wide range of various circuit diagrams for heating, houses with stove heating are still successfully operated by their owners.
You can read about the types of water heating in a private home here.
How to connect the boiler to the electrical network
Before connecting the boiler equipment to the electrical network, it is necessary to carry out a thorough check of its technical condition.
If problem areas are detected, it will be necessary to carry out repair work; if it is not possible to increase the power supply of the existing line, the reconstruction of the in-house electrical networks is carried out with the involvement of certified specialists.
Schemes for connecting an electric boiler to the network
Copper electrical wiring is used for connection; the cross-section of the wires is calculated in accordance with the data provided by the manufacturer in the instructions for the boiler equipment.
Connection to an external cable is made using specialized terminals located at the bottom of the boiler. Typically, a grounding terminal with a copper bolt is also located in this location.
When installing an electric boiler, it is essential to implement a grounding system. In this case, it is necessary to ensure that the contact between the device body and the copper bolt is strong.
A control device for adjusting the temperature schedule must be connected to the circuit. In order to protect electrical equipment from voltage surges, it is necessary to install an RCD.
Connection diagram for a single-phase boiler at 220
The 220 V power supply line of the boiler unit is protected by a differential circuit breaker made of one module, a protection unit made of an RCD with a circuit breaker.
Grounding must be connected to the boiler body. The heating element in such an electric boiler is designed exclusively for 220V, therefore, a phase is connected to one of its ends, and zero to the other.
To connect the unit to the 220 power supply network, it is necessary to lay a three-core cable and select the required cross-section and automatic protection ratings for it to ensure reliable power supply to the boiler. When choosing, proceed from the thermal power of the electric boiler.
It would be correct if the cable, RCD and circuit breakers are selected with a reserve, so that in the future, when it is necessary to replace the boiler, there is a reserve for the electrical load with a more powerful model.
Connection diagram for a three-phase electric boiler to the power grid 380
Electric boilers, which are most often used for heating homes, do not have very high power - up to 15.0 kW, since energy regulations no longer allow them. Such installations can be equipped with heating elements manufactured for 220 V.
They are connected to a 380 V network by a “star” with a common “0”. For example, three heating elements of 6 kW each create a total load of 18 kW. With this connection, the operation of any heating element is allowed, regardless of the adjacent one, that is, a choice of power of 6, 12 and 18 kW is allowed. If the heating elements are supplied at 380 V, then they are connected between the phases in a “triangle”.
Connecting an electric boiler to the heating system, diagram, installation, installation
To heat a medium-sized building, the most effective heating method would be an electrical heating system. In addition, such a system is the safest from an environmental point of view. And connecting an electric boiler to the heating system is an important and appropriate issue.
Electric heat generators have a high efficiency rate, which means they will provide the most optimal temperature in any type of room. Many modern electrical units are equipped with an adjustment system, which allows you to adjust their operating mode in the most optimal and convenient way.
Another advantage that electric heating devices have is the absence of parts that interact mechanically with each other. This reduces the risk of failure of these units several times.
If you compare a project such as a wiring diagram for an electric heating boiler with devices operating on other types of coolants, you can see some significant nuances.
As an example, let's take the connection of the Protherm SKAT electric heating boiler for heating. Only an employee from a specialized organization should connect such a boiler to electricity and the heating system.
It is best to purchase the unit in a specialized store, as it will have all the necessary documents and will be placed in the original packaging. The package can only be opened in the presence of an employee from a specialized service.
Together with the employee, you need to determine whether there are any mechanical damage or other defects on the surface of the unit. Connection diagram of an indirect heating boiler to an electric boiler
Before installing an electric heating boiler, it is necessary to remove the plugs from the pipes and check that there is no dirt in the pipes and communications. To attach the device, you will need various gaskets and sealing materials.
Choosing a place to install a thermal electric generator
It is best if the installation of an electric heating boiler is carried out in a non-residential area. The kitchen would be an excellent place for these purposes. For the generator, it is necessary to choose a place that will be convenient both for installation and for its maintenance.
If you install the generator in accordance with the standards, then it is necessary that at least 5 cm of free space remain from its sides to the wall. There must be a free space of at least 70 cm in front of the device, at least 80 cm above the device, and at least 50 cm below it.
One of the options for installing an electric boiler is on the balcony
The heat generator should only be installed on a wall that is made of non-combustible material. To hang the device, you must use a special mounting strip. Such an element should be included in the basic package of the device. The plank must be attached to the wall using 4 dowels.
If a membrane-type expansion tank is installed in the device, then the heating system is designed for a volume of no more than 500 liters.
The heating connection diagram for an electric boiler implies that another membrane-type pressure compensator will need to be installed in a larger heating system.
Connection diagram of an electric boiler to the network
Before connecting an electric heating boiler, please note that the electric boiler must be connected to the network using copper wiring.
The cross-section of the wire must be no smaller than that specified in the document that came with the device. Electrical connections of the external type device must be made through special cable terminals.
These pins should be located in the lower left corner. There should also be a brass grounding terminal with an M6 bolt.
Power cable connection diagram
When inserting an electric boiler into the heating system and installing grounding, you need to ensure that good and reliable contact is ensured between the metal body of the device and the brass bolt. Before connecting the bolt to the frame of the device, you need to thoroughly clean the connection area.
When installing an electric heating boiler into a heating system, you will need to use a room-type regulator that has a potential-free output.
If electric heating is planned to be organized for a building with a large area, then when purchasing equipment you need to choose one that provides the possibility of installing a cascade.
In order for the devices to operate normally in a cascade, the terminals of the control device must be connected to the unit that is being controlled.
If the system installation is controlled using a room-type regulator, then the control contacts must be connected to the terminals of the control device. Diagram of the electrical heating system of a two-story house
The device must be inspected visually and make sure that it is in the correct position, the water pressure in the system is normal, and all communications are connected. All this is defined in the unit documentation.
After this, the installation diagram for an electric heating boiler involves the following steps:
- It is necessary to check the serviceability of the pipeline fittings located in front of the unit. To do this, you need to switch it from the “closed” to “open” position, and vice versa.
- All pipeline fittings of the electric heat generator are moved to the “closed” position. It is also necessary to move the pipeline fittings of the water supply and heating systems to this position.
- On those pipelines that supply cold water to the unit, you need to open the shut-off valves. If you use an electric heating system, it is not recommended to use antifreeze liquids for it. This is because they have properties that can affect the operation of equipment in a negative way. Antifreeze fluids have a composition that can cause aging or rapid wear of rubber components.
- It is necessary to install a sump filter or filter before entering the unit on the return pipeline. You can install both of these elements.
- After the heating system is completely filled with water, you need to check how tight it is.
When the installation of an electric boiler with heating radiators is completed, you need to check how efficient the system sensors are. These include sensors such as: temperature controller, water pressure sensor, signal and control components of the unit, emergency temperature sensor.
During repairs to the heating unit or during unfavorable installation conditions, an electric heating unit can be connected using rubber hoses.
For the heating system it is necessary to use water with a minimum hardness level. Then the service life of the heating elements can be significantly extended.
Source: https://otoplenie-doma.org/podklyuchenie-elektrokotla-k-sisteme-otopleniya.html
Connecting an electric boiler to a heating system
Wall-mounted mini-boiler rooms with a built-in expansion tank, pump and safety group are operated in closed heating systems with forced circulation, operating under pressure. The connection is extremely simple and does not require display in the form of a diagram: the supply and return pipelines are connected to the corresponding pipes of the electric boiler.
Note. The automation of such heat generators monitors the pressure in the heating network using a sensor. If the coolant pressure is below the set threshold (usually 1 Bar), the device will not turn on.
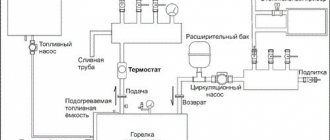
Next, we would like to present typical diagrams for connecting electric boilers to heating systems for the following cases:
- when you need to install a unit that is not equipped with its own pump and expansion tank;
- parallel operation in tandem with a solid fuel or gas boiler;
- piping with buffer tank;
- connecting the dual-circuit version of the unit to the heating and hot water mains;
- connection to an indirect heating boiler.
The safety group protects the system from overpressure and relieves excess air.
The first diagram illustrates the connection of an electrode or induction boiler to a closed-type heating network with a membrane expansion tank. A safety group is installed on the direct outlet section of the supply pipe, followed by a shut-off ball valve. The pump and filter - sump filter are equally well placed on the supply or return side.
Note. This and subsequent diagrams do not conventionally show the make-up pipeline. It should be inserted into the heating return line.
The heating element version of the electric boiler, which is not equipped with an expansion tank, safety group and pump, is connected in a similar way. If it is necessary to organize a connection to an open-type gravity (gravity) heating system, then the pipelines are laid with a slope of 3 mm per linear meter, and the circulation pump is mounted on the bypass.
The ability to work by gravity does not give the circuit a big advantage - without electricity, the boiler will still turn off
An open expansion tank is located at the top point of the network. To ensure stable gravity flow, the manufacturer of electrode boilers “Galan” recommends maintaining the height of the vertical section between the heater and the tank at 2 meters. Accordingly, the tank is placed in the attic of a private house.
Comment. Installing a wall-mounted electric boiler, whose pipes face downwards, will not allow the coolant to circulate naturally due to convection. An example is units of the Evan or Proterm brand. Heaters with side and top fittings - “Galan”, “VIN” and the like - are suitable for gravity systems.
Connection with other boilers and heat storage tank
To connect an electric heat generator together with a solid fuel boiler, use a circuit with two check valves, a surface-mounted thermostat and a room temperature controller. This connection option provides automatic “pickup” of the cooling system by the electric boiler after the firewood load burns out.
Check valves prevent the coolant from flowing into the adjacent circuit and moving in the opposite direction
The algorithm of the circuit looks like this:
- The TT boiler acts as the main one, the electrical apparatus is in standby mode.
- When a portion of firewood or coal burns, the air temperature in the building begins to decrease. When cooling reaches a user-set threshold, the room thermostat turns on the electric heater.
- An overhead thermostat detects a drop in temperature in the return of a solid fuel boiler and turns off its pump.
- After loading firewood into the firebox, heating is resumed and the thermostat starts forced circulation. Using its own sensor, the electric boiler “sees” the heated coolant and does not start working until the next command from the thermostat. The expert explains the operating principle in more detail in the following video:
Note. The piping method is also suitable for other types of boilers - gas, diesel, and so on. Please note one nuance: the electric heater is used here as a backup heat source.
Connecting to a buffer tank, shown in the next diagram, also allows you to combine several heat sources and accumulate a sufficient amount of energy in the tank. The heat accumulator is very useful in a situation where the electric heater operates at night, taking advantage of a cheap tariff. During the day, the device is inactive, and the building is heated with heat from a buffer tank.
In this scheme, you can organize the operation of the electric heater according to a schedule using a timer
The task of the mixing unit with a three-way valve is to supply the radiators with water at the required temperature, because the heat accumulator is “charged” to 80-90 °C. If the rooms have underfloor heating water circuits, a second mixing unit is made for them, preparing the coolant at a temperature of 35-45 °C (maximum - 50 °C).
Schemes with hot water supply
There are two ways to get hot water from an electric boiler for household needs:
- purchase and install a double-circuit heating unit;
- connect an indirect heating boiler to a single-circuit boiler.
In the first case, the device is connected according to the standard diagram shown in the picture. There are a minimum of difficulties here; the main thing is to correctly install the shut-off valves.
For ease of cleaning, the mud pans should be in a horizontal position.
The connection with the indirect heating boiler is carried out through a three-way switching type solenoid valve. At the command of the thermostat built into the storage tank, the element switches the coolant flow to heat water for hot water supply or heating radiators. Loading the boiler is a priority: until the tank warms up to the set temperature, the radiator network will not receive heat.
Strapping scheme
As already mentioned, correct tying is of paramount importance. In this case, it is especially important to take into account not only how to calculate an electric boiler for heating, but also its main purpose - to control the level of temperature difference of the coolant at the inlet and outlet of the boiler. Initially, the coolant, having reached a certain temperature, passes through a small circuit. And only after this hot water is distributed throughout the system, heating the radiators, and thereby increasing the air temperature in the room. From this we can draw a simple conclusion - in order to create in the system the temperature necessary for its high-quality operation, it is necessary to create several heating circuits.
To create a harness you need:
- circulation pump;
- distribution valve;
- balancing valve;
- pressure gauge;
- pass filter;
- radiators;
- pipes of different diameters;
In addition, you may need wrenches and a welding machine. Of course, a heating system with an electric boiler will not be able to function without tees, adapters, valves (safety, check, air), fasteners (couplings, bolts, nuts).
There are 4 different principles for piping an electric boiler:
- with natural circulation;
- with forced circulation;
- classic wiring;
- on primary-secondary rings.
Scheme with forced coolant circulation
Scheme with forced circulation of coolant. 1 – room temperature level controller; 2 – safety block (safety valve, pressure gauge); 3 – radiators; 4 – heating boiler; 5 – closed expansion tank; 6 – pump; 7 — tap for replenishing the amount of water in the system; 8 – anti-condensation pump; 9 – check valve; 10 – minimum temperature sensor.
Tying heating radiators with polypropylene
If the heating system with an electric boiler is based on the operation of a wall-mounted heating boiler, all the elements that it includes are also included in the piping.
Moreover, it may include, in addition to heating, also hot water supply and a “warm floor” system. It should be noted that connecting the system according to the instructions will not be a problem if you follow all the instructions exactly. However, this only applies to single-circuit systems. When installing double-circuit systems, everything is much more complicated. In this case, you can perform both direct tying and mixing. The main difference between these types of strapping is the principle of temperature control.
Electrical connection
The power supply circuits are the same for all electric boilers, the only difference is the number of phases. Devices with a power of up to 12 kW are connected to a single-phase 220 V network, more than 12 kW - to a three-phase (380 V). What you will need for installation:
- power cable with copper conductors;
- differential circuit breaker or combination of RCD + conventional circuit breaker;
- ground loop.
A VVG cable of any type is used as a power line; the number of cores depends on the number of phases - 3 or 5. Select the cross-section of the current-carrying part according to the power of the heat generator, usually this parameter is indicated in the product’s operating instructions. To simplify the task, we present the data for different boilers in the form of a table.
The rating of the differential circuit breaker also depends on the power consumption of the heater; the operating current is 30 mA. For example, to protect the power line of a 3 kW (220 volt) unit, you will need a device rated at 16 A; for a power of 16 kW (380 V), you need a 32 A difavtomat. The exact ratings are indicated in the product data sheet.
To independently connect a wall-mounted electric mini-boiler room, you need to remove the front panel, run the power cable inside and connect the wires of the corresponding colors to the terminal block contacts. As a rule, the neutral wire is indicated in blue, grounding in yellow-green. The control box of the induction and electrode boiler is connected in the same way.
Electrical connections between the control cabinet and the heating block of an electrode or induction boiler are made according to the individual diagram presented in the instructions. As an example, we give a connection diagram for the popular Galan electric boiler.
Automation diagram for single-phase 220 V network
The temperature of the coolant here is monitored by overhead sensors installed on the metal sections of the supply and return pipelines. The devices are connected in series with the contacts of the thermal relay that controls the magnetic starter. When the upper temperature threshold is reached, the circuit breaks and the starter turns off the heating.
Connection diagram for connecting the boiler to a three-phase 380 V network
Electrical installation in a single-phase network
As we have already said, you can connect the water heater to a single-phase network through a plug or a separately powered cable. There is no point in even stopping at the first option, because... Anyone can insert a plug into a socket.
As for the second option, first you need to calculate the current cross-section of the cable (if the required diameter of the cores is not indicated in the product data sheet), and then bring the conductor to the installation site of the boiler. Then everything is simple - we connect the phase, neutral and grounding to the corresponding terminals in the unit (they are marked on them). For your attention, a schematic diagram of connecting an electric boiler with a thermostat to the heating system:
How to make grounding
Laying a grounding loop near a private house is a simple matter and very useful from the point of view of electrical safety. For installation, find 3 steel rods Ø16 mm 2 m long and a strip with a cross-section of 40 x 5 mm.
Stepping 3 m away from the wall of the building, arrange grounding according to the step-by-step instructions:
- Mark a triangle with sides of 2 m on the ground and dig a pit to a depth of 50 cm.
- Sharpen the ends of the rods with sandpaper or a grinder, install them at the vertices of the triangle and drive them into the ground to their full length.
A bunch of grounding conductors (on the left in the photo) and laying a busbar into the house (on the right) - In the pit, securely connect the protruding ends of the rods with a strip by welding.
- Make a supply bus from a strip, welding it to the circuit and securing it to the base. Grab a bolt to it, screw on the copper busbar and conduct the grounding conductor inside the house, connecting it to the metal body of the electrical panel.
Upon completion, treat the welding seams and the above-ground section of the strip with bitumen and bury the hole. For more information about the grounding device for an electric boiler and home appliances, watch the video:
Useful features and disadvantages
It is also worth considering installing a universal solid fuel boiler with built-in electric heating elements. Some models even have a hob, which does not require additional external finishing.
Electric boilers can easily withstand power outages for up to 6 months. This makes them a good option in case of irregular use of the system or in case of interruptions in the supply of electricity needed to heat a private home.
The disadvantage of using an electric boiler is the need for powerful supply cables with a large cross-section.
Choosing a place to install a thermal electric generator
It is best if the installation of an electric heating boiler is carried out in a non-residential area. The kitchen would be an excellent place for these purposes. For the generator, it is necessary to choose a place that will be convenient both for installation and for its maintenance.
Electric heating boiler wiring
If you install the generator in accordance with the standards, then it is necessary that at least 5 cm of free space remain from its sides to the wall. There must be a free space of at least 70 cm in front of the device, at least 80 cm above the device, and at least 50 cm below it.
One of the options for installing an electric boiler is on the balcony
The heat generator should only be installed on a wall that is made of non-combustible material. To hang the device, you must use a special mounting strip. Such an element should be included in the basic package of the device. The plank must be attached to the wall using 4 dowels.
If a membrane-type expansion tank is installed in the device, then the heating system is designed for a volume of no more than 500 liters.
The heating connection diagram for an electric boiler implies that another membrane-type pressure compensator will need to be installed in a larger heating system.
Installation procedures
To hang the device, you need a mounting plate, which is included in the delivery package: it is attached to the wall with four dowels or anchor bolts with mandatory horizontal and vertical alignment. If this is a floor-standing boiler, then it is installed on a special stand.
The device must be grounded, inspected and made sure that it is in the correct position, the water pressure in the system is normal, and all communications are connected.
Electric heating units must be connected with a wire whose cross-section is indicated in the documentation for the equipment. Wires are carried in special protective boxes.
Scheme options
There are various diagrams: a diagram for connecting an electric boiler with heating radiators, diagrams with the possibility of installing a cascade. The latter option is used if it is necessary to heat large areas. To operate devices in a cascade, the terminals of the control unit are connected to the terminals of the controlled unit. If the installation system is controlled by a room regulator, then its control contacts are connected to the terminals of the leading equipment.
Heating apparatus piping
Tying can be carried out using a direct or mixing scheme. The direct scheme involves adjusting the temperatures with a burner, the mixing scheme involves a mixer with a servo drive. The binding is carried out as follows. The boiler manifold is installed, a pipe of the required diameter is connected to the boiler.
A three-way mixing valve is installed at the inlet, which will regulate the temperature. A circulation pump is installed on the return line and a control unit is mounted. After piping, you can fill the system with coolant and test the operation of the equipment for correctness.
Do not underestimate this stage: in reality, it is not as simple and insignificant as it might seem. Normal piping allows you to use equipment without an automation system, and this greatly reduces costs. Therefore, it must be performed at a professional level and taking into account the design features of the system and boiler.
The wiring of an electric boiler must be done by a specialist. If you still have to do it yourself, then you need already assembled distribution units. General diagram of the implementation of a heating system in a house.
Features of connection and piping of the boiler
At first glance, installing an electric heating boiler is a fairly easy, non-labor-intensive process. But in fact, as in any other case, installation of the system and the equipment necessary for its operation requires compliance with a large number of rules and conventions. The advantage of an electric boiler is that it can be installed anywhere in the system - and it will work just fine. But this is only possible if the boiler piping is correctly performed.
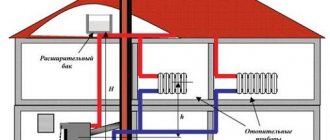
An electric boiler can be used with equal efficiency in both systems with forced and natural coolant circulation. In this case, it is recommended to place the boiler at the lowest point of the system - this guarantees the highest level of heating of the radiators. The supply pipe is located at a minimum height.
Heating system with natural coolant circulation
- Room temperature controller;
- Open type expansion tank;
- Radiators;
- Heating electric boiler;
- Additional water inlet valve.
Any heating scheme with an electric boiler must certainly take into account the presence of grounding of the boiler. The device can be connected to an electrical panel, but in no case should the zero phase be used. This is unsafe, and, in addition, the equipment itself is perceived as a short circuit.
However, a properly connected electric boiler is, of course, not enough to heat a house. Therefore, it is important to take care of the correct selection of all components, and most importantly, the correct wiring of the system.
Schematic diagram of electric boiler piping
What is the piping of an electric heating boiler? Actually, this is connecting the heating boiler to the system itself using auxiliary elements. That is, correctly executed piping guarantees an insignificant difference in the temperature of the coolant at the outlet and at the inlet. In order to achieve the required indicator, it is important to correctly place and connect the boiler. Then the coolant will be able to transfer the acquired heat to the heating elements (radiators) with maximum efficiency.
Power Supply Requirements
The rated power of electric boilers for a private home ranges from 1.5 to 36 kW.
Such a consumed load on the electrical network requires a dedicated line to connect the converter.
The power cables to it are laid directly from the metering device (electricity meter). For emergency or scheduled generator shutdown, automatic switches are used, which in parallel act as a fuse in the event of a short circuit.
It is possible to connect models with a power of up to 9 kW to a single-phase network; more powerful equipment operates on three phases.
Please note: the boiler must be connected to a grounded electrical network.
Electrical connection
Before starting work on connecting heating equipment to the electrical network, you need to perform a full check of the wiring. If weak points are identified, repairs must be made. Basic Rules:
- copper wiring is used for connection, the wire cross-section is selected in accordance with the instructions given in the instructions;
- connections to an external cable are made using special pins located in the lower left corner. There is also a grounding terminal with a brass bolt located here;
- When installing a boiler, a grounding device is required. In this case, it is important to ensure that the contact between the device body and the brass bolt is reliable;
- A temperature regulator must be included in the circuit.
To protect the electrical part of the equipment from voltage surges, it is necessary to use an RCD. When using three-phase sockets, be sure to install a circuit breaker.
Advice! It is advisable to place the emergency switch and RCD in close proximity to the heat generator in a place that is easily accessible to the owners.
Step-by-step installation process
Connecting an electric boiler requires an error-free analysis of the electrical circuit, ensuring the required power of the electrical network and strict execution of the sequence of work. If installation on your own causes difficulties, you must contact a service company that has the right to perform this type of work.
Trained and certified maintenance personnel will perform all work in accordance with the requirements of the PUE and SNiP, ensuring the safe operation of complex equipment.
In addition, in most cases, when purchasing an electric boiler, the conditions for placing it under warranty service are the manufacturer’s requirement that installation and adjustment work be carried out by specialists from service companies.
Before installing the electric boiler, the equipment is unpacked and the availability and technical condition of the components are thoroughly checked.
Installation of an electric boiler on the wall
To place the electric boiler on the wall, you need a special stand, which usually comes with the equipment. If there is no factory fastening, make it yourself according to the manufacturer’s instructions.
The process of installing the boiler body on a load-bearing wall:
- Clean the wall surface from all kinds of contaminants.
- Fire protection sheet is installed.
- Make a mark on the wall according to the mounting strip.
- Drill holes that fit the required diameter of the dowels, usually 10 mm.
- Fix the dowels in the holes.
- Hang the unit on threaded hooks, and then tighten the screws.
Depending on the model, the mounting modules may vary slightly. For example, when installing Protherm boilers, the mounting plate is first secured, and then the boiler unit is simply hung on it.
Tying according to the diagram
For heating element boilers made in a monoblock version, all the necessary boiler equipment is structurally provided: a pump, control and safety automatics, a thermostat and an air collector with an expansion tank, a distribution column.
This installation scheme along a heating line is quite simple - you just need to connect the supply and return pipelines to the appropriate fittings. The coolant is supplied to the return line through the make-up tap into the water heating system.
In modern efficient boilers, a water purification filter is installed on the water supply to the boiler to reduce the process of scale formation on the internal heating surfaces.
For conventional electric boilers that are not equipped with auxiliary equipment, it is purchased additionally by the owner of the unit, taking into account the manufacturer’s recommendations and the dimensions of the boiler outlet pipes: thermostat, kit with pump and automation. An additional tank is installed if there is a load on the domestic hot water supply.
In this case, the procedure for tying the thermal circuit is performed in the following sequence:
- First, a hydraulic manifold and an expansion tank are installed on specialized fastening devices.
- Then, according to the diagram, the coolant pipes are laid out for supply and return, with a warm water circulation pump, a water purification filter and a safety group placed on them.
Supply and connection to the network
The electrical connection circuit is almost the same for many electric boilers, the only difference is in the number of phases. Devices with a power of up to 8.0 kW are connected to a single-phase network, more than 8.0 kW - to a three-phase network.
To install an electric boiler in a private home you will need:
- copper power wire;
- differential circuit breaker or RCD set with a standard circuit breaker;
- grounding
A VVG cable of any variation is used in the form of an electric power line; the number of cores directly depends on the number of phases - 3 or 5. The cross-section of the current core is selected according to the electrical power of the boiler; as a rule, this indicator is indicated in the practical manual for servicing the unit, published by the manufacturer
The rating of the differential circuit breaker is also determined by the power of the boiler; the shutdown current is 30.0 mA. In particular, to protect the power line of a 3 kW device in a single-phase network, a 16 A protective device will be required, and for 15 kW in a three-phase network, a 32.0 A differential circuit breaker will be required. Most accurately, these parameters are indicated in the boiler passport.
Basically, all manufacturers advise connecting the boiler through a voltage stabilizer, for the reason that disruption of the automatic safety and boiler control due to sudden power surges in the network is a fairly common occurrence.
Grounding
In order to carry out grounding, you will need to lay a grounding loop next to the housing construction. To do this, you need to prepare 3 metal rods with a diameter of 16 mm and a length of at least 2 m, as well as a steel strip 40x5 mm.
Moving 3 m from the wall of the building, organize grounding in the following order:
- Mark a triangle with 2 m edges on the ground and dig a pit to a depth of 0.5 m.
- The ends of the rods are sharpened with a grinder and installed at the vertices of the triangle, after which they are driven into the ground to their full length.
- In the pit, the designated ends of the rods are firmly combined with a strip using a welding machine.
- The bus is made from a steel strip, welded to the contour and fixed to the base of the house.
- They grab a bolt to it, screw on a copper busbar and guide the grounding conductor inside the building, connecting it to the steel body of the electrical panel.
- The external side of the protection must be located in an area where under no circumstances will people be present at the time of a breakdown of the electrical network, but no further than 1 m from the foundation of the household.
Connecting an electric heating boiler
The choice of boiler type depends on the estimated cost of heating. Based on calculations, the type of heating boiler is selected. One of the options for choosing a boiler is an electric heating boiler. By the name we understand that the source of heat generation in such a boiler will be electricity.
The cheapest option is to heat your home with gas. Gas can be supplied to the house centrally through gas pipelines or autonomously, using special tanks. Find out how much gas costs with delivery here.
An electric heating boiler is not a cheap way to heat a home. However, the characteristics of the area, the lack of other heat sources (gas, wood, solid fuel) and the availability of electricity do not provide a choice.
Table for calculating the cost of heating per 1 kW/hour.
| Fuel | Cost 1kWh | Total for the season |
| Dry firewood | 90 kopecks | 80 thousand rubles. |
| Coal | 160 kop. | 140 thousand rubles. |
| Granules, pellets | 133 kop. | 120 thousand rubles. |
| Diesel fuel | 280 kop. | 250 thousand rubles. |
| Main gas | 50 kopecks | 40 thousand rubles. |
| Liquefied gas | 250 kopecks | 220 thousand rubles. |
| Electricity | 350 kop. | 300 thousand rubles. |
Power of electric heating boilers
The relative advantage of an electric heating boiler is the wide range of power of different boilers and the step-by-step power regulator of each boiler individually.
There are two power ranges for electric boilers.
- Range from 4 to 18 kilowatts;
- From 22 to 60 kilowatts.
The indicated boiler ranges assume:
- For boilers 4-8 kilowatts there are two switching stages;
- Boilers 8-18 kilowatts three switching stages;
- For boilers 22-60 kilowatts there are four or three switching stages.
Stepped power switching allows you to quickly integrate power with the outside temperature, which saves electricity consumption and reduces the cost of heating.
Also, let’s not forget that an electric boiler does not require operating costs (purchase and delivery of fuel, preparation of a special room) and practically does not require maintenance costs.
The form of use is very simple: connect it correctly and use it.
Permission to connect an electric heating boiler
As such, permission to connect an electric heating boiler is not required.
Unlike a gas boiler, for which you need to equip a special room, a furnace room, and hand over the premises to a “strict” commission, the power of an electric boiler is enough to be included in the total power of the house and taken into account when obtaining permission for the electrical power of the house, and the connection diagram for the heating boiler must be indicated in the general electrical power scheme (project) of the house.
Operating principle of an electric heating boiler
The general principle of an electric heating boiler is not complicated. In essence, this is a large electric kettle, where powerful heating elements heat the coolant in the heating system. Of course, electric heating boiler devices are much more complicated. It has an automation system and a remote control system, a temperature control system and a circulation pump.
Despite the design, type and brand of the electric boiler, they have one unifying type of work: the electric boiler must be correctly connected to the power supply .
Correct connection of an electric heating boiler
By design, an electric heating boiler is a metal cabinet. Type of boiler mounting: mounted. There is a special hole for entering the electrical power cable into the boiler, and all the electrical equipment of the boiler is located in the electrical cabinet of the boiler.
Choosing an electrical cable for a heating boiler
There are no special calculations or pitfalls in connecting an electric heating boiler to the power supply. It needs to be connected like any other household appliance in terms of power consumption and according to the standards for laying electrical wiring in the house.
Rules for connecting an electric heating boiler
To connect an electric heating boiler, a separate electrical wiring line (separate group) with its own automatic protection is planned. A circuit breaker is used to protect the boiler's electrical cable. The rating and type of circuit breaker is selected according to the power of the boiler, or rather, according to the power of the heating elements included in the boiler design.
Electrical wiring for heating boiler
The power supply of a heating boiler depends on its design and the connection diagram of the heating elements. For the consumer, all the necessary data is indicated in the boiler passport.
Power circuit of an electric heating boiler with three heating elements
The heating boiler can be connected with a five-core or four-wire cable. We look at the cross-sections of the cable cores in the passport for the boiler and in the table below.
As we see in Table 1, to power an average boiler, cables with a core cross-section from 2.5 mm (4 kW) to 6 mm (18 kW) are needed.
Table 1
In Table 2 we see cable cross-sections for more powerful heating boilers. As you can see, for powerful heating boilers with a thermal power of 60 kW, you need an electrical cable with 25 mm conductors and a 100 Ampere protective circuit breaker in front of the boiler.
table 2
Let's take a look and see a simple thermal calculation for a house. I will not show the calculation with heat losses, I will not even take into account the height of the ceiling. The simple calculation is very simple.
To heat one square meter of a house, you need 0.1 kW of boiler thermal power. That is, for a house with an area of 100 square meters. meters you need a boiler with 10 kW thermal power; for a house 300 sq. meters you need a 30 kW boiler. This means that even for a house with a larger than average area you will need an electrical cable with a core cross-section of no more than 10 mm.
Note: When talking about the cross-section of cable cores, we mean only copper cores; by core cross-section we mean the cross-sectional area of the cable core specified in the data sheet for the cable.
Laying an electrical cable for a heating boiler
The electrical cable is laid according to electrical installation standards in accordance with the design of the house. For a wooden house in pipes or openly, for a stone house in boxes or hidden.
An electric boiler is not connected through a socket ; the power cable is inserted into the boiler through factory connection holes and connected to a circuit breaker or terminals installed on the boiler body in the electrical cabinet.
Important! Any twisting, soldering, welding and other connections not provided for by the boiler design are prohibited.
Electrical boiler cabinet
The electric heating boiler has its own built-in electrical cabinet. It is equipped with metering devices, an introductory boiler circuit breaker, connection blocks, control and mode switching devices.
Heating boiler electrical cabinet
The electrical cable for the boiler power supply is inserted into this electrical panel and connected to the boiler input circuit breaker.
Steps to connect a heating boiler
Connecting the heating boiler to the power supply
In a five-wire electrical network, the phase power conductors of the cable are connected to the input terminals of the main circuit breaker of the boiler. The neutral working conductor is connected to the connector marked with the letter “N”. The protective conductor of the electrical supply cable is connected to the screw connector, which is indicated by the ground symbol.
Underground power supply to a wooden houseConnecting an electric heating boiler in a five-wire system
If the house has a four-wire network , then the phase conductors are connected in the same way, and the PEN conductor is connected to a screw connector with a grounding symbol. In this case, the grounding clamp is connected to the neutral connector N using a PV-1 wire with a minimum cross-section of 2.5 mm2.
Connecting an electric heating boiler in a four-wire system
Note: Most often, the connection diagram for an electric boiler assembled at the factory is adapted for a five-wire electrical network.
Conclusion
Connecting an electric heating boiler is done in compliance with the rules of the PUE.
If you read the instructions for any boiler intended for heating a house with electricity, you will see recommendations like “connection should only be made by professionals with the appropriate skills...”. This is true.
However, the connection itself is not as difficult as, say, a gas boiler. If you follow the PUE (electrical installation rules) and safety precautions when working with electricity, you can connect the boiler yourself.
©Ehto.ru
Related posts:
- Electrical distribution cabinets ShR and ShRS, Category: Electrical panel
- Maintenance of high-voltage equipment, Category Electrical repair
- What affects the cost of electrical installation work, Category Electrical repair
- What types of gasoline generators are there, Category Construction
- Internal electrical networks: structure and installation rules, Category: Electrical installation
- Maintenance of power transformers, Category Electrician's Handbook
- LED street lighting fixtures, Category Construction
Source: https://ehto.ru/montazh-elektriki/elektroshhitok/podklyuchenie-elektricheskogo-kotla-otopleniya
