- At the location of the water tank
- Sauna stove with boiler
- What you need to know about operation
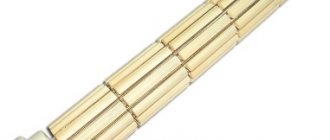
- Coil for furnaces
Having made the right choice of heating equipment, you can steam and wash without purchasing and installing a boiler. A reliable, modern, spacious heat exchanger for a bath will perfectly cope with the role of a heater: it will be able to supply the required volume of hot water to the storage tank. In this article you will learn about the options and operating features of the technical tool that exist today, practical advantages and the most popular models.
What it is
The device is used to heat water in the bath. Its operating principle is based on the physical properties of hot water, expanding and rising upward, while cold water remains below.
Typically the heat exchanger is small in size, so the liquid in it heats up quickly. Two pipes are connected to it - below and above. Thus, hot water through the upper pipe, replaced by cold water from below, rises into the tank, which can be located either in the steam room or in an adjacent room, usually in the sink. In this case, low-temperature water is constantly added to the heating device through the lower pipe without forced supply.
Options for heating water in a bath from a stove
The following models are distinguished:
1. Samovar-type container - installed on the outlet pipe of the chimney. Heating occurs due to the heat of the flue gases escaping into the chimney. A tap for dispensing hot water is connected to the fitting at the bottom of the tank. If you don’t have a washing machine, then this option will be an excellent solution for heating. We recommend paying attention to the following operating conditions:
- the use of a samovar-type tank is allowed only with bathhouse stoves;
- It is prohibited to operate an empty tank while the stove is operating;
- If you want to get a “Finnish sauna”, this option for heating water will not suit you, since if the steam room is heated for a long time, the liquid will begin to boil, which is why heavy steam is formed.
2. A samovar-type heat exchanger (small in size with the ability to connect to a tank), which can be located anywhere. It is convenient because, if available, the tank can be placed in the washing room. One of the obvious advantages over other options is that it quickly heats the water.
3. Heat exchanger, which is installed on the starting chimney.
4. Starting chimney + tank-backpack - an option with being in a steam room and the absence of controlled convection to warm up the room. The container comes into contact with the wall of the chimney pipe, due to which the liquid is heated. Among the disadvantages, it can also be noted that this model does not have protection from hard infrared radiation, and in case of strong heating, the water begins to boil.
5. Convector chimney with a heater built into it.
Features: the register is located inside a pipe from which 2 identical ¾-inch fittings with internal thread come out. Using pipes, the device is connected to a tank hanging in a convenient place.
May be:
- Built into the oven - when scale appears, it loses efficiency.
- Located near the chimney (on it) - it provides heating to the required temperature more slowly, but nothing settles on its inner surface, it is easy to access, and its repair is not difficult.
The choice depends on the user: what to give preference to, performance or ease of maintenance, saving usable space or fuel.
Modern sauna and home stoves with a heat exchanger have significant advantages:
- Compact and ergonomic, despite being equipped with equipment for heating the coolant
- high level of heat transfer from equipment, rapid heating of liquid and space
- high level of security for the entire system
- the ability to take a shower and have access to hot water at any time of the day or year
- possibility of heating residential premises
- possibility of heating additional bath rooms, for example, a dressing room
- the ability to connect not only to bathhouses, but also to home stoves to create a complete and autonomous hot water system, including for the operation of radiators, batteries and boilers in residential premises
- independence of the building from public engineering systems
- savings on utility bills
Difference by type
The simplest designs of heat exchangers are coils with ends removed from the tank: one takes in liquid at room temperature, the other releases hot liquid.
More complex ones are a system consisting of two metal tanks with anti-corrosion properties - cylindrical and rectangular in shape with connecting pipes.
At the location of the water tank
There are two ways:
- This photo shows an option for installing a heat exchanger in a steam room and a tank in a wash room.
- The second option is to install a heat exchanger with a tank inside the steam room.
Advantages of installing a heat exchanger in a steam room
- high water heating speed;
- saving free space in the steam room;
- Wide range of options for installing the tank - in a steam room or in a shower room.
Types of water tanks
Sauna stove with a built-in tank
When taking sauna procedures, there is a constant need for water. It is needed for watering stones in the stove, processing brooms, washing the body after being in the steam room, and maintaining cleanliness in the room. Therefore, it is necessary to always have a heated liquid nearby. In summer cottages, where bathhouses are often built, it is often not possible to use the main hot water supply. To solve the problem, a hot water tank is connected to the heat exchange element.
Tanks differ in design, materials used, dimensions and shape. There are models on sale that are specially designed for use in a sauna. Tanks with a water circuit are usually made of stainless steel or galvanized sheet.
Built-in
In the past, such hot water tanks were installed in bathhouses during the construction process. When the lower part of the tank was connected to the firebox, the liquid was heated from the heat of the stove. The advantage of this design is the high heating rate. The downside is a decrease in the heat transfer of the furnace unit to the air masses (since most of it is used to prepare the liquid). Water is taken from the container with a scoop or a tap is installed. The capacity of the resulting tank is determined by the size of the furnace.
Remote
The convenience of connecting an external tank to a sauna stove is the ability to choose from several locations for placing the tank. Usually it is placed in the shower room next to the steam room. A heat exchange element mounted in the furnace is responsible for heating the liquid. It is connected to the tank via brass or copper pipes. Cold liquid flows through the heat exchanger, and already heated liquid returns.
On the pipe
Here the water is heated by the heat of gases moving through the chimney. Installing such a tank is more difficult than other types, but its use has a number of advantages. The liquid heats up very quickly, and the large capacity will allow you to serve a company of 5 or more people. Water retains heat for a long time even after the stove has finished firing. Often tanks are installed in the attic. This placement is advantageous in that it allows you to leave more free space inside the room. The material for the tank body is most often stainless steel, which also contributes to the rapid heating of water. But at the same time, you need to make sure that the liquid does not start to boil (this applies to tanks of any type).
Pristavnoy
In this case, no installation operations are required to connect the tank to the heat exchanger. The container is placed against the furnace partition, the liquid in it is heated from the heat of the combustion unit.
The attached design is attractive in its simplicity, but water preparation in it is not as fast as in others. However, it is suitable for a steam room that is used by no more than 2-3 people at the same time.
Remote
On the pipe
Pristavnoy
Features of installation and operation of the heat exchanger
Installed between the firebox and convector:
- built into the oven;
- attached to the chimney;
- or built into it.
The productivity of the device with a capacity of 5 liters is enough to quickly fill a 120-liter tank with hot water. It’s easy to use – just organize a timely supply of liquid (uninterrupted operation can be ensured by using a circulation pump) and “feed” the firebox with firewood.
When installing a heat exchanger (recuperator) for a bath, the following points must be taken into account:
- the total length of pipes for water supply should be laid at 3 m, which minimizes heat loss;
- with a connecting pipe diameter of 1 inch, it is permissible not to use a circulation pump.
The longer the heat exchanger is in use, the more justified the installation is from an economic point of view.
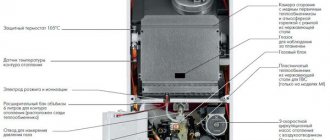
Heat exchanger - what is it
A heat exchanger is a hollow container filled with water, built into the furnace structure. The heat exchanger is connected to a system of pipes and/or tanks through which water circulates, heated during the firing of the furnace.
Depending on the design, the movement of water through the system is carried out naturally or forced (using a pump). The principle of operation of the heat exchanger of a sauna stove is that heated water enters the heating radiators and shower tank, and cold water flows into the heat exchanger and is heated. The process occurs during the entire combustion time.
There are several designs of heat exchangers:
- Internal heat exchanger - a container with water for heating is placed in the furnace firebox. The design of the container can be any - in the form of a tank that forms one wall of the firebox or a coil of pipes surrounding the combustion chamber.
- External heat exchanger - the module is placed outside the stove; it usually surrounds the stove pipe, heating up from the temperature of the hot gases discharged through the pipe during the combustion of fuel in the stove.
The water circulating in the system can be used both for heating the room and for heating water for washing. Structurally, a stove for a bath with a heat exchanger for water is no different from a conventional stove with local water heating.
To install a system with two functions (room heating and hot water), you will have to provide a water tank and correctly calculate the length and diameter of the pipes for optimal operation of the system.
The highest efficiency is achieved by a system in which the following conditions are met:
- The length of pipes is no more than 3 m;
- The diameter of the pipes is more than 1 inch - with a small clearance, the liquid will not be able to circulate normally without the help of a pump;
- Open water heating system - air access is organized into the expansion tank.
This design will not require additional energy costs (including electrical energy for the pump) and will provide room heating and hot water.
Note: to heat the room in the local heating system, you can use antifreeze - it is not afraid of low temperatures, so during long periods of downtime in winter you will not have to drain the liquid from the system. In practice, such a coolant is used very rarely due to its high cost.
Rules for installing a heat exchanger on a sauna stove
The following rules must be followed:
- The heat exchanger must consume no more than 10% of the total energy produced by the furnace, then the latter will operate with good efficiency.
- The pipes must be laid so that the water flows by gravity, that is, at a 250-degree slope on the direct supply and 30-degree on the return one.
- It is important to reserve power for cooling after fuel burns.
- It is necessary to provide a sufficient volume of water for each individual model, because if there is too little of it, it will boil quickly, which can lead to the formation of deposits on the walls and a fire hazard, and if there is too much, you will have to wait a long time before taking a shower.
How to connect a heat exchanger if the tank is in a steam room:
- The entrance to the hot water tank should be at least 5 cm higher than the upper register fitting. This is necessary for better circulation.
- The upper register is from 1.4-1.5 m from the floor, despite the fact that the podium under the stove is 15 cm. The bottom of the tank in the steam room should be at least 1.5 m, and preferably higher.
- If the tank is 0.5 m high, then we have a total installation of 2.0 m. That means there is still half a meter to the ceiling. And here the question arises: how to fill the liquid. If there is a running water supply, then water will flow without problems.
Second connection option: we place the tank lower, and place the fitting for the supply circuit on the side. But there is a nuance: if the water level is below the upper fitting, there will be no circulation. It will stand in the heat exchanger and periodically reach a boil, but in the tank it will remain cool.
If you need to place the tank in the wash room, you should follow the same principles as when placing it in the steam room.
How and how to connect the external tank to the heat exchanger
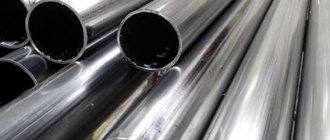
Remember that the elements in contact with the stove become hot, their surface temperature exceeds 100 0C. Therefore, the pipes must be made of stainless steel (cast iron will not work, as it is susceptible to corrosion). But ordinary pipes are allowed to be made of metal-plastic; they can even be replaced with flexible hoses. The main thing is that the diameter is 1 inch or 3/4, otherwise the circulation will be poor.
Use tangit for seals, and paronite for fittings. Feel free to replace factory elements with non-standard ones, but made of heat-resistant material. Don't forget about the drain valve - it is simply necessary to preserve the system for the cold season or to quickly remove stagnant liquid. Otherwise, during frosts, the remaining water will freeze and burst the pipes.
Review of furnaces with heat exchanger
There are built-in models of heat exchangers. Below we will look at the popular ones.
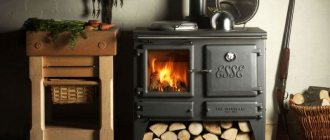
Sauna stove with boiler
Let's start with how justified such a decision is from an economic point of view. Installation of this device increases the efficiency of the equipment used. With it, exhaust gases not only fly away uselessly into the atmosphere, but also simultaneously heats water, which can then be used for bathing or other household needs. Therefore, it repeatedly justifies the fact of its installation in the long term.
Vesuvius Skif 16 VChT
Powerful and fast, with a right- or left-side location of the water heater, equipped with a mesh. It boasts a steel firebox with thick walls (8 mm), thanks to which it is not afraid of even constant exposure to high temperatures.
Tornado 20M2
Productive, heavy (125 kg). Equipped with a cast iron door, built-in heat exchanger and a spacious side casing designed for 240 kg of stones. Must be installed on a reinforced foundation. But the efficiency is impressive.
Harvia 20SL Boiler
A heater from a Finnish manufacturer, weighing 75 kg, with 40 kg of stones. Modern, with a recuperator in the form of a tank, with a remote structure and a built-in condenser, designed for a steam room with an area of up to 20 m3. It has stable legs and a stainless frame, has smooth shapes and an attractive design.
Recommended rules for installing a heat exchanger
By inviting specialists to install heat exchange equipment, the user can independently control the effectiveness of the work performed, knowing the following rules applicable to equipment of this type:
- The water tank must be selected of an appropriate volume. You cannot choose a large tank for a small stove (since a large volume of water will not have time to heat up) and a small tank for a large fireplace (since an excessive amount of heat will be generated, creating a load on the hydraulic circuit)
- Large tanks are recommended to be installed as close to the furnace equipment as possible
- The optimal ratio of heat exchanger and sauna stove is about 10%, which should go to heating hot water
- The pipes should not be secured with rigid structures: dense metal parts tend to expand when exposed to high temperatures, which will lead to deformation in the future
- Connections between pipes and other structural elements must be well sealed. For optimal sealing, select a sealant and sealant that is rated for high temperatures.
- If a circulation pump is excluded from the design, it is recommended to install the pipeline at a slope of up to five degrees, and the heat exchanger above the furnace equipment for optimal movement of hot and cold water, as well as rapid heating
- First, the water tank itself is installed directly, and then the pipeline
- It is necessary to install a drain valve at the bottom of the entire system to remove excess water
- The tank must be checked frequently to ensure it is full. An empty tank poses a danger when firing the stove, as it can heat up excessively and cause a fire.
Attention! It is recommended to use flexible stainless steel hoses, such as gas hoses, when connecting the tank to the pipeline and heat exchanger. Such pipes have a longer service life, as they are less susceptible to oxidation, deformation, moisture and high temperatures.
Installation and connection of the heat exchanger and tank in the bath
- Find a suitable location to mount the remote tank. If all the structural parts are located in one room, it is most often hung on the wall closest to the heating unit, 200-300 mm above the recuperator.
- Secure the wooden dies with dowels - these are the guides on which you will hang the tank. This is necessary so that the container does not touch the interior elements with its hot surface.
- Strengthen the assembly with brackets for greater reliability.
- Equip the remote tank with 4 pipes, then, using fittings, connect the first two with the corresponding ones at the tank (for direct and reverse water supply), close the third with a valve, and connect the shower (faucet) to the fourth.
- Install (at the lowest point) a valve on the reverse line to drain the water.
- Connect all elements and check the system for leaks.
What you need to know about operation
If you have read the instructions and purchased a heat exchanger for your bath, make sure that the following conditions are met:
- Fastening connections must be movable - this will help minimize deformation of the recuperator components under the influence of high temperatures.
- Seals must be made of heat-resistant materials.
- The capacity of the remote tank is selected so that it can accommodate the volume of water heated in 2 hours.
- It is important that full compatibility with the heating unit is maintained.
- The device should consume no more than 10% of the energy generated by the oven.
Operational safety
To prevent emergency situations, observe the following precautions:
- do not attach pipes directly to walls;
- Make sure that there is always enough water in the tank, otherwise you will quickly encounter a scale problem or even a fire hazard;
- constantly check the operation of the device and sound the alarm if it suddenly breaks down;
- Use only heat-resistant gaskets and regularly pay attention to their condition.
Recommendations from experienced professionals
When installing a heat exchanger for hot water in a bathhouse, you need to remember that:
- A remote water tank should be selected in accordance with the power of the sauna stove - a container that is too large will take a long time to heat up. In a small tank, the water will boil early and fill the washer with unnecessary steam.
- The heat exchanger must also match the furnace - too large a design will reduce the efficiency of the furnace. The optimal option is when the system takes 10 percent. on the power of the stove.
- The system pipes should not be fixed rigidly to the walls - their linear dimensions change when heated.
- For threaded connections of the system, only a sealant that can withstand high temperatures is used.
- In a system with natural heat exchange (without using a pump), it is necessary to maintain a slope of 2 - 5 degrees for the upper and lower contours of the pipes.
- The sauna tank with a heat exchanger should not be empty when the stove is fired.
After heating the system to high temperatures, it is undesirable to add cold water - a sharp drop will negatively affect the service life
A sauna stove with a heat exchanger will allow you to get maximum comfort and, at the same time, preserve the charm of this favorite traditional procedure.
The simplest heat exchangers
To make choosing a unit easier, we suggest you familiarize yourself with the following options.
Coil for furnaces
The simplest version of a heat exchanger is a pipe (made of aluminum, copper or other ductile and anti-corrosion metal), bent into a spiral or, less commonly, of a different shape. The carrier effectively moves along it by gravity if its total length is less than 3 m. It is heated by hot air, and not by contact with fire. At the ends of this design, threads are made (external) for a fitting connection with the tank.
The coil can be placed directly in the firebox, inside or outside it. Its shape can be very different, starting from the simplest U-shaped horseshoes, continuing with the already mentioned spirals with different numbers of turns, and ending with complex welded registers. The latter are done to increase reliability and reduce energy losses, but since they are large in size, they are usually placed in spacious heaters.
Rectangular tank on a pipe
This is another type - no longer an internal cylindrical container, but a structure consisting of an airtight body made of stainless steel.
The principle of operation remains the same - the heated liquid rises into the reservoir, the cooled liquid goes back. In implementation, a chimney with a diameter of Ф115mm (without the use of an adapter) or 110mm (with use) is suitable for it, and exhaust steam entering the room is almost excluded. True, the system must be sealed; it is important to replenish the structure with water in a timely manner.
Recommendations from experienced professionals
Here are some more tips on how to install a heat exchanger in a bathhouse as rationally as possible:
- If you do not plan to use a circulation pump, make the pipeline at a slope of 50 so that the liquid moves due to gravity.
- Do not take a tank that is too large and/or do not pour too much water into it, as it simply will not have time to reach a comfortable temperature in the time you need.
- Pay maximum attention to sealing - during assembly, do not hesitate to check the quality of each connection several times.
Choose durable materials and a suitable design, make the calculations correctly, and strictly follow the instructions and recommendations. A competent master knows how to make and connect a heat exchanger in a bathhouse, because correct installation will be the key to safe operation of the equipment, and therefore a comfortable bathing after the steam room.
Finally, a video about how the universal heat exchanger model works:
DIY making
Homemade copper coil heat exchanger
Making a decision to make it yourself, as a rule, indicates the presence of some tools and the skills to work with them. Ideally, you need a full-fledged workshop with a vice, welding (of two types), a workbench, an anvil, etc. If the equipment leaves much to be desired, it is possible to assemble the simplest modification - a copper spiral coil.
The advantages of this option:
- Copper is relatively easy to bend and solder.
- The coil does not contain connections subject to high heat.
- The spiral shape is simple, versatile, and does not require complex equipment to create.
- Installation of such a heat exchange device will not require major modernization of the furnace structure.
A sauna stove with such a heat exchanger will cope with everything that can be expected from it: it will ensure the operation of 2 - 3 heating radiators, and heat water in a small tank. However, the heater is responsible for the microclimate in the steam room.
Consumables
Manual pipe bender
Of the special tools for working with copper, only a gas torch is needed. A professional will need a pipe cutter, a bevel remover, and a metal brush of the required size. However, all this is replaced with a grinder, a file (rasp), and a soft abrasive sponge. You will also need a minimum of consumables:
- annealed copper pipe in a d32 coil, 3.5 - 4.5 m long (depending on the d of the chimney);
- adapter water sockets (thread-soldering) d32 * 1.25” – 2 pcs;
- ordinary low-temperature and hard copper solder for medium-temperature soldering (650 - 750°C);
- flux paste;
- soft abrasive sponge;
- propane-butane gas for medium-temperature soldering – 1 cylinder (0.5 l);
- washed, sifted fine sand – 5 – 6 kg;
- pipeline, taps, Mayevsky valves, radiators.
You need a “pipe bender” - a smooth round log. With its help, the heat exchanger for a sauna stove will take the shape of a spiral coil. The length of the log is at least 1 m, and the diameter is equal to the dimensions of the chimney at the outlet of the stove. As a rule, the parameter depends on the size of the firebox and is never less than 10 cm.
The log should be firmly secured by securing it with powerful screws/dowels between two trees or walls.
Assembly algorithm
DIY water jacket
The most difficult part of the assembly is creating the spiral shape. To do this, the pipe will have to be bent using a rigidly installed log. Unannealed copper cannot be bent, so you need to buy exactly the kind that comes in coils. The easiest way to install a “coil” heat exchanger in a brick oven (for heating) is to install it on a chimney. Algorithm of actions:
- Securely plug one end of the pipe, for example, with a sealed factory plug.
- Fill the pipe with sand, pouring water, tapping with a hammer, compacting with a “ramrod”. It can be a metal-plastic pipe or a plugged rubber hose.
- When the pipe is full, compact the filler as much as possible, then plug the other end. Try not to let the sand become loose.
- Screw a U-shaped or round clamp to the log that will hold the pipe tightly. The base “P” is perpendicular to the pipe bender closer to the end, and the circumferential location does not matter.
- Insert the end of the coil into the clamp, and slowly begin to wind the pipe onto the log.
- If a crease appears somewhere, it means that the sand in this place is not dense enough. It is advisable to start over, but, theoretically, you can try to tap the crease with a hammer.
- If the d of the chimney is 150, and the length of the coil is 4.5, you should get 8-9 turns of the spiral (no more than 35-40 cm high), as well as two “tails” of 30-40 cm each.
- Cut off the plugs, clean out the sand, and rinse the coil.
- Solder adapter sockets to the ends of the spiral.
- Remove the lid covering the heater or dismantle the damper (remove part of the chimney).
- Place the “coil” on the pipe as close to the stove as possible.
- Reassemble the chimney, taking into account the necessary sealants and windings (if any).
Now you can install and connect the remaining elements of the heating system, including an open samovar-type expansion tank, pipeline, taps, radiators, and air valves. To improve natural circulation, the diameter of the pipeline should not be much smaller than the size of the coil. Ideally, it will also be copper, of the same diameter.
A likely difficulty is a decrease in draft due to unforeseen heat removal from the chimney. The solution is to increase the length of the chimney.