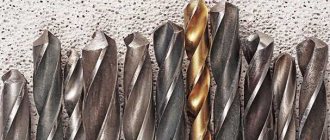
Brick firing photo
Until the 19th century, manual labor was used to make bricks. Products were dried only in the summer, and molding took place in ovens made of raw brick. About two hundred years ago, ring kilns and belt presses began to be used. This greatly reduced the labor-intensive production process. And the release of clay processing machines made people’s work even easier.
Nowadays, bricks are produced all year round. Large factories have been built for this purpose. Raw materials are extracted using open-pit mining, carried out using excavators in quarries; production plants are often built near the quarries.
The two most famous methods of producing bricks
Brick production methods photo
The most famous are two brick production technologies:
- Plastic molding;
- Semi-dry pressing.
The range of brick products is large, their shapes, physical and mechanical properties and types of raw materials are varied. However, the technological scheme of the main stages of production is general and includes the following stages:
- Extraction of raw materials;
- Preparation of raw materials for use;
- Molding of blanks (raw material);
- Drying;
- Firing of products;
- Processing them (trimming, glazing, if necessary, and others);
- Package.
Solid and hollow building bricks are often produced by the most popular method - plastic molding (extrusion). Hollow – “empty body”. In such a brick, voids (holes) make up 25–45 percent of the total volume, and in a solid brick - no more than 13 percent, or they do not exist at all.
The technology for stamping solid and hollow bricks is almost the same. The difference is in the preparation of higher quality clay for hollow ones.
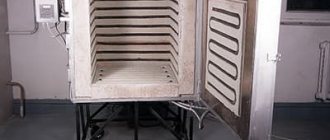
Burning
The stove begins to be heated with straw, brushwood and then firewood.
The first stage is drying. This is the most critical stage.
Heating should be done lightly, using low-calorie fuel (wood waste), until the brick gets rid of internal moisture. The presence of moisture in the brick is determined by the presence of condensation in the upper rows.
Drying can be considered complete if an iron pin placed in the oven for a couple of minutes does not fog up. With some experience, the presence of moisture can be determined by hand by placing the palm over the escaping gases.
The drying process usually takes up to 12 hours.
Once it has been established that the residual moisture has been removed, the fire is gradually increased, bringing the brick to a dark red color (observing the arch). Heating lasts up to 9 hours, then switch to high heat until the fire comes out.
The increase in heat is produced only by increasing the fuel supply. If for any reason the flame begins to escape from any place, this place is immediately covered with earth.
When fire appears in the upper part of the oven (900-950°C) - the upper rows are light red and the lower rows are yellow, the oven is “set to cool.” To do this, the combustion hole is filled with brick and coated with clay, and dry earth, brick dust or dry sand is poured onto the top of the stove in a layer of 10-15 cm.
The firing temperature regime is characterized by four stages:
- Drying : temperature 20-90°C, time 10-13 hours.
- Heating : temperature 90-600°C; time 8-10 o'clock.
- Firing : temperature 600-1000°C; time 10-12 o'clock.
- Cooling : temperature 1000-50°C; time 7-10 o'clock.
The firing temperature in the kiln is controlled visually by the color of the arch:
- Dark red, visible in the dark - 450-500°C.
- Dark red - 600-650°C.
- Cherry red - 700°C.
- Light red - 850°C.
- Yellow - 950-1000°C.
- White - 1200°C - OVERBURN!
Previously, to obtain high-quality bricks, the kiln was kept closed for up to a week and only then began cooling. This gave excellent results, since the release of thermal stress occurred very slowly.
In practice, it is enough to withstand 7-10 hours.
Cooling of the furnace begins by punching a small hole in the firebox - the size of a chicken egg; after an hour the hole is doubled, and after another hour it is quadrupled. Thus, after 6 hours you can open the combustion door and wait for the stove to cool completely.
After cooling, the front wall of the furnace is disassembled and the cage is cut, starting from the top rows. After disassembling, sorting and culling, high-quality bricks are stacked tightly next to each other.
The half-fired one is folded separately and in the future used in non-critical structures for partitions or in the upper rows of masonry.
Plastic molding
Plastic formation of brick photo
This method involves preparing a mass containing approximately 20 percent moisture. Usually they take clay and loams, which contain calcium carbides, aluminum oxides, and magnesium. Additives are also added to them in the form of waste from coal preparation and coal mining (for example, ash and slag).
Clay is removed from the quarry, placed in concrete pits, leveled and moistened layer by layer. The clay is “rested” for several days (up to 4 days). Next, it is delivered to the factory to undergo processing, which consists of removing pebbles from the mixture using special stone-extraction rollers. Everything is crushed, stone inclusions are removed. In the mixer, the mass is moistened (from 18 to 25 percent).
The purified mixture enters the box feeder. At the exit from it, the mass is met by moving rakes, breaking up large pieces and directing the clay to the runners. This is where the homogeneous mixture is thoroughly mixed, which passes through flexible rollers and enters a belt press connected to a cutting apparatus. Belt presses contain vacuum chambers in which air is removed from the clay mass. This promotes its plasticity and reduces molding moisture. The time for drying the raw material is also reduced and at the same time its strength increases.
Features of the technological process affect the strength of products. It is possible to obtain not only ordinary bricks, but also heavy-duty ones (that is, clinker).
Then the clay “sausage” is cut into pieces of equal size and placed on wooden frames. This is how packaging into frames occurs. Raw bricks still contain quite a lot of moisture, so you need to wait until they dry. The water gradually evaporates, due to this shrinkage occurs and the volume of the product decreases.
To prevent the future brick from cracking, the increase and mode of increasing temperature of both drying and firing should be regulated.
drying bricks photo
Drying of bricks is often done artificially: with the heat of exhaust steam. The temperature gradually rises, immobilized water vapor is formed in the drying chamber, which has a beneficial effect on drying, since heating the brick product in moist air ensures that the entire mass dries evenly. Finally, firing takes place in a ring or tunnel kiln, which continues until the sintering process begins (at a temperature of 1,000°C).
Firing completes the process of making brick products using plastic molding. When sent to the oven, the raw material still has about 8…12 percent moisture content. At the very beginning of placing it in the oven, it is completely dried. When the temperature rises to 550°C–800°C, dehydration of clay materials begins, during which the crystal lattice of minerals disintegrates, as a result of which plasticity is lost, and the product undergoes another shrinkage. Video of the brick production process:
What happens to the brick at this time?
— First, volatile organic impurities and additives are released (at a temperature of 200°C–800°C), the rate of increase in firing temperature per hour reaches 300°C–350°C at this time. The temperature level is maintained until the carbon burns out. If the temperature rises above 800°C, changes occur in the structure of the product.
— From this moment on, for solid bricks the rate of temperature increase is 100°C–150°C per hour, and for hollow bricks – 200°C–220°C.
— After reaching the maximum firing temperature, you need to keep it in such a state for some time so that the entire product is heated evenly. And the reverse process began - cooling, starting from 100°C–150°C and further - according to the scheme. The entire firing process takes about 6–8 hours. If raw materials were sent to the kiln, then after firing the resulting bars of baked clay, which acquired the strength of stone; waterproof, resistant to temperature changes.
Firing clay bricks
Bricks fired in private construction require a considerable amount of labor and time, but all the effort pays off. When following the technology, homemade brick surprises with its strength and durability, and can also be an artistic product. To make 50-100 red fired bricks, global work and costs are not needed. But to build a house and even a bathhouse, you need thousands of bricks, and here we are not talking about speed. Using the artisanal method without industrial kilns, construction will not go far. However, a barbecue and mini-oven, a barbecue and a brick fence, as well as repairing a brick fence with homemade red bricks are available to any individual builder. If brick production is one-time, then it is unrealistic to install an ancient brick kiln on the site, just as it is unrealistic to use household stoves. Brick makers experiment with kilns, but most often use a 200-liter steel barrel as a kiln.
For a barrel stove, you need an area without nets and green spaces, weather without rain for a day and a hole in dry soil about 0.5 meters deep. The size of the pit is much smaller than the bottom of the barrel furnace, and the iron bottom itself is cut out (or, alternatively, perforated). The barrel will rest on improvised supports made of stone, steel profiles, bricks, etc., installed along the edges of the section. Everything is done in such a way that it is possible to light a fire at the bottom and constantly add fuel, maintaining the heating temperature. Coal, wood, peat - reserves are needed for 16-20 hours of continuous burning. The bricks in the stove are laid with gaps to ensure ventilation and uniform heating; the rows of bricks are not placed one above the other, but offset or in a spiral. Protect the barrel stove from cold outside air by covering it with steel sheets. Firing is a difficult process; constant monitoring is needed, pouring coal into the pit or adding firewood so that the temperature in the stove is maximum. After about 20 hours, it is important to let the fire burn out naturally, without extinguishing it, otherwise a sharp thermal shock will negate all the work: the baked clay shard may crack.
It takes 3-5 hours for the barrel stove to cool, then the bricks are safely pulled out and tested for strength. One or two bricks have to be broken with a hammer and examined in the crack - the quality of firing can be judged by the colors. Properly fired brick, both factory-made and home-made, will be uniform in shade, red-brown in color, without blackness, spotting or gradient color transitions. The structure of the brick is checked by soaking broken bricks in water for an hour or two - and the structure and shades of terracotta should be preserved. The first batch of bricks is not always successful, but the necessary experience is still gained. Homemade bricks often differ from ready-made bricks for the better - bright, durable, suitable not only for masonry, but also for artistic and decorative cladding. It is not without reason that antique brick tiles are in demand and are offered in the most expensive collections.
Traditional clay mixtures are not the most durable raw materials, and without additional stabilization by firing, natural clay will expand and contract depending on the heat and humidity conditions of the environment, and as a result, there will be shrinkage and cracks in brick structures. To stabilize (cement) clay, various additive components are used in construction, the most common being Portland cement (ground cement clinker plus gypsum and additives, a proven and well-known type of silicate binder). But PC is an expensive material and significantly increases the final cost of the brick. Since the clay raw materials themselves are often very cheap, especially in areas where the height of natural clay layers is measured in tens of meters, and production is carried out literally from the surface, the issue of reducing the cost of clay stabilization is pressing and has long been solved by scientists. For example, waste from coal-fired thermal power plants - ash residues, dust and fly ash - is being used more and more successfully, but this is not enough. There are stabilizer ingredients that are still kept secret by foreign manufacturers.
It is impossible to build a house or even a garden path from ordinary clay, this is the general opinion and pattern. Although there are exceptions - for example, adobe bricks and blocks, as well as houses made of clay, wood chips and straw. An interesting type of house made of clay and wood is the construction of firewood - a combination of antiquity and modern technological techniques.
What kind of clay should be used for brick firing?
Clay for bricks photo
Clay is a mass of refractory and low-melting minerals. When firing occurs, the fusible minerals bind together and dissolve the refractory minerals. To determine the structure and strength of bricks after firing, it is imperative to find the correct percentage of refractory and fusible minerals, select the temperature and duration of firing. By adjusting these parameters, you can achieve the desired quality characteristics of the brick.
With increasing firing of building bricks, low-melting minerals are responsible for the glassy phase. As it increases, frost resistance increases, and the strength of the product decreases.
ceramic brick kilns
The firing regime of a kiln is a set of conditions and processes under which thermal treatment of ceramic products occurs. These conditions include: changes in temperature over time and changes in the composition of the gas composition in the furnace during heat treatment.
The components of the regime are the heat capacity of the medium, its speed and pressure.
The optimal mode of a ceramic brick firing furnace is the shortest firing mode, which takes place at minimum temperatures, and the product receives the necessary properties.
The actual operating mode of a ceramic brick firing kiln is a compromise between the optimal mode and the capabilities of the equipment.
Methods for establishing the optimal firing furnace mode
To obtain a complete picture of the behavior of a material during heat treatment, as a rule, all laboratory research methods are used.
Laboratory research:
- differential thermal analysis (DTA);
- gravimetric thermal analysis (GTA);
- thermal analysis of volumetric (linear) changes in the material – dilatometric measurements;
- determination of the mineralogical composition of raw materials.
Differential Thermal Analysis or DTA
In the temperature range on DTA of kaolin, where there are no extremes, no processes of absorption (endothermic) or release (exothermic) of heat occur.
Extremes are characterized by the release or absorption of heat.
DTA curve of kaolinite
On the heating curve of kaolin at a temperature of 110°C, a downward minimum is observed. It shows the heat consumption to remove physically bound water.
The minimum, with a beginning at 550°C and a peak at 600°C, is characteristic of the process of water loss from the kaolinite crystal lattice.
The positive peak in the range 920-980°C is caused by the crystallization of metakaolinite and the formation of a transition structure before the formation of mullite.
DTA curves
1 – montmorillonite; 2 – halloysite; 3 – illite.
DTA curve of clay material
The following characteristic peaks are observed on the DTA curve of clayey material:
- at least at 160°C – loss of physically bound water;
- maximum at 380°C – oxidation of organic residues;
- at least at 600°C – dehydration of clay components;
- minimum about 900°C – decomposition of a small amount of carbonates contained in the material.
Typical DTAs are presented in special atlases, which can be used to determine the processes occurring in the materials under study.
Gravimetric thermal analysis or GTA
The next laboratory test is gravimetric thermal analysis (GTA), which shows the change in weight when the material being tested is heated.
GTA kaolin
The mass of the laboratory sample constantly decreases during testing. The greater the slope of the curve, the more intense the processes of mass loss.
GTA of kaolin is given as an example. The first slight decrease at 80-200°C is the loss of physically bound water. A sharp decrease in the range of 500-580°C corresponds to dehydration.
Dilatometric measurements
Another research method is dilatometric measurements of the sizes of heated samples.
Dilatometric curve
1 – silica; 2 – kaolinite
If no processes occur in the sample under study, then a uniform monotonic rise during heating or a decline during cooling is observed on the curve.
If any phase or structural changes occur in the material when heated, then a violation of monotonicity and a sharp change in the direction of the curve are observed in the curve.
The curve for quartz at a temperature of 573°C shows an increase in volume characteristic of the β – α transition.
For the dilatometric curve of the ceramic mass, a characteristic “wave” is observed for the β – α transition of free quartz. Large shrinkage starting at 850°C, characteristic of the beginning of sintering, the completion of which is observed at a temperature of 1000°C.
Dilatometric curve of ceramic mass
The dilatometric curve shows linear and, accordingly, volumetric changes in the material.
In case of volumetric changes, it is necessary to regulate the heat treatment mode to reduce the influence of internal stresses.
To study raw materials, the method of temperature microscopy is used, which consists of optical examination of a heated sample. This method is not widely used, and I will not dwell on it. If you are interested, please contact the original source.
After laboratory research, it is necessary to conduct semi-industrial tests under the conditions determined during laboratory research of raw materials.
To conduct semi-industrial tests, a batch of raw materials with similar properties of the original raw materials is prepared.
Pilot tests are carried out either on special research furnaces that have all the necessary capabilities for maintaining a given firing regime, or on modern industrial furnaces equipped with special control systems for the thermal treatment of raw materials.
To determine the optimally acceptable heat treatment mode, several firings are carried out under different modes and the option with the best indicators in terms of quality, speed and efficiency of firing ceramic bricks is determined.
Results of deviations from the optimal mode or defects arising during firing of ceramic bricks
Special properties not achieved
As a rule, this happens when the specified parameters are not met. But there are situations when technological parameters are initially set incorrectly.
Deviations from specified sizes and shapes
This defect often occurs when firing conditions are not met or when ceramic bricks are exposed to maximum temperatures for insufficient time.
The second reason may be a deviation from the composition of the gas medium of heat treatment. The reducing environment in its effect on the fired material is identical to an increase in temperature and an increase in firing duration.
Cracks
- high heating rate in the temperature range at which phase transformations, modification changes, gas release, and volume changes occur;
- “pinched” placement of products in the cage, preventing the free movement of the product when heated;
- microscopic cracks or internal stresses that arose during previous firing stages;
- mass heterogeneity;
- unsatisfactory form;
- mechanical damage and air voids in the product.
Destruction of products
The reasons are the same as for the formation of cracks, but deviations from the given regime are even more significant or defects were introduced at previous stages.
Destructions occur at the following stages:
- removal of physically bound water;
- at the first stages of burning out organic inclusions, if in the first phases carbonization rather than combustion occurs;
- collapse of the cage due to high temperatures in the firing zone;
- thermal reaction of the decomposition of iron oxide.
Angobated bricks. How do you get them?
Angobe brick photo
The peculiarities of the technology for producing this brick are that the color scheme is applied to dried raw material. Firing is carried out only once. The coating is decorative, but different. The composition of engobe is white or colored clay, which is brought to the consistency of liquid sour cream. When the firing temperature is correctly chosen, the result is an even layer, opaque, matte in color. The technological characteristics of textured bricks correspond to GOST 7484-78 and reflect all the functions of the facing brick. A wide range of color choices will allow you to realize any design idea.
What is the brick making process like?
Pallet form for two raw bricks.
In order to fire a brick, it must first be made. To do this, you can use one of three possible methods:
- Unfired brick, during the production process of which chopped straw or adobe is added.
- Raw brick.
- Fired clay brick.
It is necessary to consider each technology separately.
The first type of brick requires compliance with all the rules of technology during production. If everything is done correctly, the resulting building material will compete with baked brick.
A structure built in compliance with all rules can last at least 70 years. Correctly selected wall thickness will ensure a comfortable stay in the house in winter and summer.
To make bricks yourself, you need to prepare molds for them. To do this, take boards 25 mm thick and several pieces of plywood. The standard brick size is 250x120x65 mm, so the forms must have appropriate dimensions. To ensure that such bricks adhere better to the binder mixture, conical protrusions are made in the upper and lower lids. After hardening, grooves will appear on the planes of the brick.
Diagram of the kiln and laying of raw bricks for firing with wood.
The parts of the future shape are connected to each other using nails (5-6 cm long). The cover should be easy to close and remove.
To make “homemade” bricks you will need:
- container for mixing solution (clay);
- lean and fatty clay;
- shovel;
- straw;
- water;
- forms;
- metal spatula.
The manufacturing process itself is as follows:
- Two types of clay and chopped straw are poured into the container. The proportion of components should be 1:1:5. Next, water is added and the resulting mixture is kneaded with a shovel until smooth. Here it is immediately worth noting that the strength of the resulting product depends on the quality of chopping and drying the straw. Wheat straw, or rather its stems, is best suited for these purposes.
- Next, the resulting mixture is filled into the molds. But they must first be moistened on the inside with water, and then sprinkled with cement or fine dust. This surface treatment will help in the future to easily remove finished products.
When laying out the mortar into molds, it must be compacted so that the brick has the correct geometric shape. Excess mixture protruding beyond the edges is removed using a spatula. After this, close the top cover. After some time, it is removed, the mold itself is turned over and the product is removed. But this procedure must be performed on some surface so that the brick lies on a plane.
Return to contents
Glazed bricks
To obtain a glazed brick with a shiny surface of any color, glaze (a special composition with glass ground into powder) is applied to the fired clay and fired a second time, which gives impetus to the formation of a glassy waterproof layer.
Glazed bricks photo
This surface has good adhesion to the main mass and, which is very important in some cases, has increased frost resistance . Glazed bricks are used to lay mosaic panels not only in the building, but also on the street side. The facades of the royal palaces in Babylon were lined with such bricks. The basic properties of glazed brick are similar to clinker ceramics. But if we compare it with other types of facing bricks, this one is more fragile.
During firing, all the major changes occur in the clay and glaze, after which what we call ceramics is formed. Firing is a technological process, the parameters of which have been determined by practical tests, and it must be carried out in the manner required by the fired products. It's intuitively clear what we want to take out of the oven. The scrap is expected to have ringing strength and some porosity so that it absorbs the glaze. Biscuit porcelain gives a pleasant silkiness and whiteness. Shiny glazes should have a good shine, while matte glazes should be truly matte. Nobody wants crooked and crackling glaze stuck to the shelf, and all kinds of bubbles and pinholes.
It is more difficult to formulate this understanding in the language of numbers. During heating, many of the chemical compounds that make up our raw product undergo major changes. Dehydration, phase transformations, chemical interactions, dissolution and crystallization - this is an incomplete list. There is still no complete theoretical model by which the result could be predicted in advance, and if it existed, we would need a month of research into the composition of clay and glaze to give an accurate calculation task. We are left to carry out experiment after experiment, finding out what is important and what is not, what the temperature should be, whether exposure is needed, and why everything was fine there and then, but here and now it is a complete disgrace.
But we want to obtain the intended effects and planned properties of the products, and for this we need to be able to control and manage the firing parameters, knowing the basic, most general principles.
Now specifically about these principles.
1. Types of firing, why they are needed and what needs to be controlled first of all.
2. Electric ovens and a few words about others.
Types of firing, why they are needed and what needs to be controlled first of all.
- We will conditionally divide all materials into 4 groups:
- — Porcelain is a lot smoother; when heated, a lot of liquid phase is formed in the shard. We also include stone masses here.
- - Earthenware - there is almost no liquid phase. By the way, no one produces earthenware in its previously classic version...
- — Majolica — here we will call products made from red clay, including pottery, terracotta, etc.
- — Chamotte — according to its chemical composition — any of the above materials. It differs from them in that it contains grains of already fired material bound by plastic clay.
For each group of materials, we will conditionally highlight some points that unite them.
Porcelain firing pattern.
First, the first, waste, firing is carried out. That is, dried products are fired without glaze. The temperature is chosen in the range 800 - 1000°C. After the first firing, the products acquire strength sufficient even for machine glazing (on a conveyor line). The products remain porous, but if there are cracks, they can be easily identified (by characteristic rattling) by tapping with a wooden stick. When glazing, there is no need to stand on ceremony with the product as is the case with raw materials (one-time firing). You can easily glaze products by dipping, even if they are meters in size. Products after this firing are called scrap.
Then a second firing is carried out. Before glazing and, accordingly, before the second, poured, firing, an underglaze painting is applied to the product. Technological pedants then also carry out an intermediate fixative firing so that the paints are not washed off when dipped into the glaze. Watered firing, i.e. The firing of a semi-fired glazed product is carried out at the ripening temperature of the shard. These are different temperatures for different types of porcelain (and we also included stone masses here). Real porcelain requires 1380 - 1420°C, ordinary table porcelain - 1300 - 1380°C, sanitary porcelain - 1250 - 1280°C, and stone masses - depending on what is used as flux. The second firing finally forms the structure of the ceramic and, thus, determines all its physical and chemical properties. Products after this firing (if it is not painted) are called linen.
It is very pleasant to drink tea from white porcelain cups in the countryside. Traditions dictate a different look for porcelain: with floral painting, a picture, a gold or blue border. Porcelain receives decorations in the third, decorating, firing. Conventional overglaze paints are burned at 800 - 830°C, luster paints and gold preparations - at the same or slightly lower temperature. Nowadays high-temperature decorative firing at 1000 - 1100°C has also become widespread. Painting for it is carried out with high-fire paints (intraglaze paints) or fusible colored glazes. Sometimes, to obtain bright colors, two or more decorative firings are carried out. All of them, from a classification point of view, are third. Products after the third firing are named at the enterprise’s Art Council.
Faience firing scheme
The first firing of faience is high. There are practically no fluxes in earthenware masses, therefore, during firing, a minimal amount of liquid phase is formed, or not at all, and the clays included in its composition have high refractoriness. This makes it possible to fire earthenware products immediately at the temperatures required for the shard to mature. As a rule, this is 1200-1250°C. Unlike porcelain, the shard will remain porous and can easily be coated with a layer of glaze.
And the second firing, poured, can be carried out at any temperature! That is, at the temperature required for normal spreading of the glaze: 1150 - 1250°C, if these are “faience” glazes, 900 – 1000°C, if these are lead majolica; You can apply white enamel and use the technique of painting on raw enamel. In all cases, if the glazes are chosen correctly, we will receive a product with the same strength as it was after the first firing.
The third, decorating, firing is carried out in the same way as in the porcelain scheme. If it is needed. After all, compared to porcelain, the low temperature of poured firing allows the use of glazes and paints of a wide range of colors.
Firing majolica
Red-burning clays with low refractoriness are used here. Over-burning can lead to their swelling and severe deformation. Red clays also have a narrow firing interval. For example, at 950°C it is still fragile, friable, and at 1050°C it is a densely sintered, glassy body. Of course, there are exceptions, but there and then. In principle, majolica is characterized by low firing temperatures - 900 - 1100oC. And it is precisely at approximately these temperatures that the processes of decomposition of clay materials are completed, which (the processes) are accompanied by the release of gaseous substances. This makes the so-called single firing - both the shard and the glaze - at one time extremely difficult. If you refer to the table below, it will be clear how close the firing temperatures of majolica are to the critical temperatures for ceramics. The most common technology is the first, waste, and the second, poured, firing.
The first firing mode is chosen such that all processes of transformation of clay minerals take place to the maximum extent. The incompleteness of these processes will certainly affect the quality of the glaze surface after the second firing. The temperature of waste firing can be either higher or lower than the temperature of poured firing. Usually lower, somewhere around 900 - 950°C.
The second firing mode is selected based on the characteristics of the glaze, but, of course, the temperature at which the shard begins to deform cannot be exceeded.
Fireclay firing
The main difference between fireclay masses and the above is the presence in the mass of a rigid frame made of dense grains that have already undergone appropriate firing. The grain size can vary from 100 microns to several millimeters, which is determined more by the requirements of the texture of the material rather than by the requirements of the technology. The rigid frame prevents shrinkage of the mass during the firing process. (By the way, during drying, the shrinkage of fireclay masses is not much less than that of thin plastic masses). This allows firing to be carried out at slightly higher temperatures without fear of serious deformation of the product. Often the grain material has a different composition than the plastic component of the mass. If the refractoriness of the grains is higher, the firing temperature can be increased significantly.
But in general, the fireclay firing scheme is the same as for other types of masses: first, waste, then (if necessary) poured, then (if necessary) decorative firing.
Single firing
Single firing is when a glaze is applied to a dried product and everything is fired in one step, combining waste and water firing. This is the dream of any production economist:
- energy is spent on heating only once;
- placing products in the oven and removing them is done once;
- no intermediate waste storage required;
- The cycle from raw material to finished product is halved, i.e. lower relative costs for renting space and wages due to increased productivity.
In principle, apart from very low-temperature decorative firing, any material can be fired once.
- But:
- you have to apply both the underglaze design and the glaze itself on a simply dried product, which, of course, does not have the strength of scrap;
- because of this, machine processing is excluded, and everything must be done with your hands very carefully so as not to break anything;
- glazing by dipping - the most economical in terms of glaze consumption - can be carried out only for small products, taking a long pause between glazing inside and outside;
- there is no scrap, no intermediate quality control (ovality, thin edge cracks, etc.), i.e. a higher percentage of defects is planned in advance
- Glazes must be specified for single firing.
How can we determine whether we need single or double firing? The decisive criterion for an artist or an art studio is the final result - that is, the implementation of the artistic concept. For workshops that produce more or less serial products, and for ceramic factories, economic considerations may be decisive. Here's what to keep in mind.
- For porcelain:
- Energy consumption for low-utility firing is significantly lower than the cost of high-firing. For the first, temperatures of about 900°C, an air oxidizing environment, and an electric furnace with a weak lining are sufficient. For the second - a well-lined and preferably fiery furnace. Is it worth saving on scrap?
- Porcelain glazes begin to melt at a temperature close to the maturation temperature of the porcelain shard. In the temperature range where the decomposition processes of clay minerals occur, the glaze layer resembles powder, and gases easily pass through it. Thus, there is no need to worry about glaze defects arising due to the gas impermeability of the melt. Is it worth doing waste firing?
- Porcelain masses are skinny masses that get wet quickly. Glazing raw material requires skill. Scrap needed!
- Many large products, such as tiles, often need to be spray-glazed. And when firing onto a biscuit, there is no need to glaze at all. Then why do you need scrap?!
- For earthenware:
- Recycling firing (remember, it is carried out at a high temperature) is necessary if we are going to use low-melting glazes. Otherwise, in a single firing we will not get faience, but something unfired, reminiscent of papier-mâché.
- Waste firing is not necessary if we use high-temperature glazes, which, like porcelain, begin to melt above 1100°C. In this case, they are usually applied by spraying with compressed air.
- For majolica this is the most difficult case.
- Scrap is almost always needed, and at the highest possible temperature. Many technologists of the Western school recommend firing majolica almost to a glassy state in order to burn out all the impurities and decompose everything that can decompose in the waste firing. The question is, how to glaze it later? Can. Read about this in the section on glazes.
- If you use engobes or something like terra sigilate as a coating, or if you have special glazes with a very short melting interval, you can do without scrap.
For all materials, a single firing is possible subject to carefully adjusted technology, which in the case of ceramics, two-thirds consists of the experience of the workers.
It seems that in our presentation of the problems of firing everything is already so confused that another layout is required.
What happens during the heating and cooling process.
| Interval,C | Process |
| 20 — 100 | Removing moisture from the mass. You need to heat it slowly and, most importantly, evenly. The thicker the walls of the product, the slower the heating. |
| 100 — 200 | Removing moisture from the mass continues! If the instruments show 150°C, this does not mean that the product has heated up to that temperature, especially if it is thick, especially on a thick stand. The glaze coating undergoes shrinkage. Water vapor released from the volume of the product can lead to cracking and flying off of the coating. Volatile organic compounds are released from chandelier coatings. Don't force the heat! |
| 200 — 400 | Burnout of organic substances. If for some reason there are a lot of them, good air flow should be ensured (decals, chandeliers, binders of overglaze paints and mastics). |
| 550 — 600 | Serious phase transformation of quartz. It rarely appears at the heating stage, but at the cooling stage it can lead to the so-called. "cold" cod. |
| 400 — 900 | Decomposition of clay minerals. Chemically bound water is released. Nitrate and chloride salts (if used) decompose. |
| 600 — 800 | The beginning of melting of lead and other low-melting fluxes and overglaze paints. At 750 - 800°C in the third decorative firing, the surface of the glaze is softened and paints, gold, etc. are baked in. Burnout of sulfides. |
| 850 — 950 | Decomposition of chalk, dolomite. The beginning of the interaction of calcium and magnesium carbonates with silica. These processes are accompanied by the release of carbon dioxide. In general, all transformations of clay substances are completed. Their smallest particles have already sintered and provided noticeable strength to the shard. By the end of the interval, the majolica glazes are completely melted. |
| 1000 -1100 | The intense interaction of lime and silica is accompanied by the appearance of a liquid phase (for example, in limestone faience), compaction and deformation of the shard. Beginning of softening of feldspars. Melting of nepheline-syenite. Intensive decomposition of sulfates, which is accompanied by the release of sulfur dioxide. |
| 1200 -1250 | Sintering interval for white-burning clays and earthenware mass. Dissolution of silica and kaolinite in melted feldspar. |
| 1280 — 1350 | The process of mullite formation. Mullite needles penetrate the porcelain mass, which will further provide it with high strength and heat resistance. Transformation of fine quartz into cristobalite. |
| 1200 — 1420 | This temperature range is typical for porcelain. Here, the processes of reduction of red iron oxides into more noble blue ones occur, if appropriate redox firing conditions are provided. Temperatures are high, viscosities are moderate, diffusion occurs very quickly: for example, underglaze painting loses its clear outlines. |
| 1420 — 1000 | Nothing special happens during the cooling process. Both the glaze and the mass are in a fairly plastic state, so they can be cooled as quickly as the oven allows. If glazes that are prone to crystallization are used, slow cooling or holding for 1-10 hours in this range will cause crystal growth. |
| 1000 — 700 | The oxidation of lower oxides of copper, manganese and other metals (if used) into higher ones begins. A lack of oxygen in the furnace space can result in a metallized surface. If restoration is required, now is the time for it. The reducing environment should be maintained close to room temperature, at least 250-300°C. |
| 900 — 750 | Both the shard and the glaze become brittle and then cool as a single solid body. If the CTRs are not agreed upon, a click or rebound of the glaze and even destruction of the product is possible. |
| 600 — 550 | Reverse phase transformation of quartz with a sharp volume change. Passing this interval at high speed can cause a “cold” crackling noise. |
| 300 — 200 | Phase transformation of cristoballite. It was formed if the mass contained very finely dispersed silica at 1250 - 1300°C. Do not rush to open the oven door. |
| 250 — 100 | Cooling continues! In the depths of the bet, in the thick parts of the products, the temperature is much higher than in the thin edges and than indicated by a thermocouple. Allow the items to cool evenly. |
The table describes the main processes. Therefore, now we will once again briefly indicate what is most important in firing.
- 01 First firing. We put the raw material in the oven. There is a lot of water in it, even if it looks dry. We heat up to 200 - 300°C slowly, for example in 2 - 3 hours. We provide good ventilation so that all impurities burn out. Final temperature - 900 - 1000°C. If you are not sure about the temperature, hold it for 1 - 3 hours, allowing the entire cage to warm up evenly. We carry out cooling at the same speed as the furnace cools down. We carry out forced cooling only after several experiments - there will be no cracking of glazes, since there are no glazes, but cold crackling due to quartz may occur.
- 02 Firing with glaze after scrap. We place the glazed products in the oven. The shard has already been fired for scrap, so the speed in the initial heating phase may be higher; The main thing is to dry the glaze well. Heating to the final temperature is carried out as quickly as the oven and, most importantly, the rate of heating of the products allows. At the final temperature, we hold it for 15 minutes to 1-2 hours in order to heat it evenly. If the rate of temperature rise at the end of heating is low (50°C per hour or less), we consider that the exposure has already taken place. It is better, of course, to use Seger cones here. “Shelves” (holding at a constant temperature) during the cooling stage - only for crystalline glazes and some matte ones. The rest is as in point 1.
- 03 Single firing with glaze. We take into account everything in clause 1 and clause 2. We do not force the temperature rise in the range of 500 - 900°C - all gases must be removed from the shard before the glaze begins to melt!
- 04 Firing of decals, luster paints, overglaze paints. We raise the temperature very slowly (over 2 - 4 hours) to 400°C - all organic matter must be burned. In this case, the environment should be oxidizing (air), and ventilation should be intensive. From 400 to 800°C - as fast as you like. Exposure 5 - 15 minutes.
Read below about the firing conditions dictated by the kiln.
Electric ovens and a few words about others.
Ceramics are fired in a variety of heating units called kilns. If the heat of an electric current is used for heating, the furnaces are called electric, if the heat from the combustion of organic fuel is called fuel, and usually more specifically: gas, wood, fuel oil, etc. Over thousands of years of ceramic firing, many designs of fuel furnaces have been invented, and over the last hundred years, no fewer designs of electric furnaces have been invented.
- Regardless of the type and design, the furnace contains:
- free space for placing products, for short - chamber;
- fire-resistant and heat-insulating shell, for short - lining;
- heat source - heater, burner, etc.
- a device for monitoring and regulating the degree of heating - a regulator.
Each stove can be classified according to the characteristics of the listed attributes. If you need to order a stove, be sure to indicate these features.
The volume of the chamber determines the productivity of the kiln in one firing in a batch kiln or per cycle of pushing one trolley in a tunnel kiln. In the future we will only talk about batch furnaces. The volume of the chamber can be 1 - 2 liters; Such small kilns are convenient for test firings and for making small items such as ceramic jewelry. The volume of furnace chambers, usually used in workshops and studios, ranges from 50 - 100 liters to 1 - 1.5 cubic meters. m. For factory conditions, ovens with a volume of 3 to 20 cubic meters are typical. m.
The lining and heater determine the maximum temperature that can be reached in the chamber. The higher the temperature required, the higher class the refractories must be, which, we note, immediately and sharply affects the cost of the furnace. Sometimes the chamber is separated from the heater by an additional lining called a muffle. (You shouldn’t call all small furnaces muffles!)
The regulator contains a device for measuring temperature, which is usually a thermocouple, a device for regulating the power of the heater and a control device that coordinates the action of the first two.
Below are some oven configurations.
Bonfire
| PARAMETER | MEANING |
| Camera | 10 - 100 liters |
| Lining | layer of earth |
| Thermal insulation | layer of earth |
| Heater | the warmth of burning wood |
| Thermometer | by eye by glow |
| Power regulator | throwing firewood |
| Control | own experience |
Electric furnace 200.1250.L (Termokeramika LLC), option
| 200 liters | |
| Lining | fireclay-fiber board ShVP-350 |
| Thermal insulation | ShVP-350, ShL-0.4 |
| Heater | electric, wire spirals Х23У5Т |
| Thermometer | platinum-platinumrhodium thermocouple Chamber of Commerce and Industry |
| Power regulator | thyristor block |
| Control | Software, KTP programmer |
Such different thermal devices are given here in order to gain a deeper understanding of the functions of the furnace elements.
The chamber is a workspace where products and shelves with stands are placed; from the total volume “from wall to wall” you need to subtract the volume required for heaters. And the calculation of the useful load of the chamber must be made taking into account the thickness of the shelves.
Example. The usable width, depth and height of the chamber is 40 cm. There is a fireproof plate 39x39 cm, 2 cm thick and four 7x7 cm racks, 18 cm high. How many pots with a diameter of 18 cm and a height of 16 cm can be placed in the oven? Answer: if without a shelf - 4 pcs., and if with a shelf - 6 pcs. (not 8; see picture).
Continuing with the example, let’s ask ourselves the question: what is actually more profitable - firing 4 pots at a time or 6? The answer lies in the analysis of the amount of heat required to heat the additional mass of the ammunition. If the pot weighs 300 grams, and the stove and stands weigh 5 kilograms... That is. Almost all the heat will be used to heat the fire supply! And the oven will take longer to cool down. It may happen that during the firing of six pots, two firings of 4 pots each can be carried out.
In fact, it is not only the pots and fire supplies that heat up, but also the walls of the oven. In a fire it is a solid mass of earth. It is difficult to warm it up, and it is also difficult to cool it down. A modern furnace must contain refractories with low heat capacity, low thermal conductivity and high refractoriness. The vacuum-formed fibrous material ShVP-350 is well suited for the construction of furnaces with an operating temperature of 1200°C. If the entire furnace is made of heavy fireclay bricks, it will require enormous heating and cooling time, and, accordingly, energy consumption. Such a heavy “lifting” stove will not allow you to implement high-speed heating modes if you need them for something. However, you can increase the power of the heaters.
Electric heaters come in wire and ceramic types. The wire is made from nichrome (expensive, maximum temperature is 1100°C, but remains flexible after work) or from iron alloys. The latter are often called “fechral”, and imported analogues are called “kanthal”; domestic brands have the exact name - X23YU5T or X27YU5T. Fechral operates up to 1200 - 1350°C depending on the wire diameter. After the first heating, it becomes irreversibly brittle; a heater that has burned out in one place cannot be repaired by twisting!
Ceramic heaters include silicon carbide, also known as silit, or carborundum rods: operating temperature up to 1400°C. In the last 10 years, expensive lanthanum chromite heaters with an operating temperature of up to 1700°C have been persistently advertised, which have a very long service life at the same 1300-1400°C (if they don’t break when you install a heavy stove :-)). Read elsewhere about how to calculate electric heaters. Here we recommend seeking help from specialized companies.
If heating is carried out by gas burners, any temperature up to 1700°C can be reached in the furnace space, and if oxygen-enriched air is used, up to 2000°C. Gas (and other fuel) furnaces are good because they allow firing not only in an oxidizing, but also in a neutral and reducing environment. The degree of “recovery” is regulated by changing the gas/air ratio; in modern gas furnaces this is done automatically. Wood-burning stoves, unfortunately, are more difficult to automate, but they are easy to manufacture, cheap to operate, do not require approval from the gas inspectorate, and easily produce 1200°C.
The more powerful the heaters, the faster heating they can provide. And the more careful you need to work with them. Imagine what will happen in the first five minutes to the pots if one side of them is facing an instantly hot wall with heaters, and the other is facing a cold neighboring pot. The easiest way to achieve smooth heating (or rather, uniform throughout the entire chamber) is to use thyristor power units. The output power in them is regulated according to the principle “more current” - “less current”, and not according to the principle “on” - “off”. If you have only the last control method at your disposal, then set low temperatures at the first stage (first 100°C, after half an hour - 200°C, after an hour - 300°C, and only then - the final temperature). And if there is no control device in the oven at all, do not leave it and flip the switch every five minutes (This is not a joke!)
While naming different temperatures, we still haven’t specified what we are talking about—the temperature on the heater? on the product? on a thermocouple? If a thermocouple is installed in the furnace, then the device connected to it will naturally indicate the temperature of the tip of the thermocouple. For various reasons, about which volumes of scientific literature have been written, this temperature only approximately reflects the thermal situation in the furnace. During the heating process, heaters are always hotter and products are always cooler than a thermocouple. The thermocouple shows the temperature at some point in the chamber, but what is happening in other places is unknown. Nevertheless, the thermocouple produces an electrical signal that is understandable to electronic devices, including automatic power control. From this point of view, she is irreplaceable. Long-term practice of operating a furnace provides information about where in the chamber it is hotter and where it is colder. Sooner or later we get used to the habits of this device. But for a long time (since the end of the 19th century), another method has been known to determine the moment of reaching the required firing point. This is Seger cone firing.
Firing is considered completed on a given cone if the cone, deforming during the firing process, touches the stand on which it is installed. The cone is made of masses whose behavior is similar to that of the material being fired. If in practice it is found that the best result is achieved when firing on a cone, say, 114, then all firing should be carried out on this cone, without paying special attention to the readings of the thermocouple. And no thermocouple is needed! The use of cones is extremely common in artistic ceramics in the West. And this is no coincidence...
How to determine the fat content of clay
There are primarily two ways to determine the degree of fat content:
- The first method is quite simple. The clay, diluted with water to the consistency of sour cream, is thoroughly mixed with a wooden stick. And the thickness of the clay adhering to the stick will be a barometer of its fat content. The optimal layer is 2 mm, adhering in clumps. Excessively oily clay will stick in a thicker layer, while skinny clay that is not greasy will only coat the stick with a layer of up to 1 mm.
- The second method involves kneading some clay with water until it becomes plasticine. When the clay dough stops sticking to your hands, form an even ball (5 cm in diameter) and place it on a smooth surface. Task: slowly flatten the ball with a flat board - to the middle of the diameter.
A ball of very thin clay will crumble, and the appearance of cracks at the edges will indicate a low-ductility composition. And very fatty, plastic clay will resemble a neat cake without cracks. However, products made from such clay, including bricks, are easily molded and beautifully shaped, but during the drying process they are greatly deformed and crack.