Facade panels are used for exterior finishing. Installation can be carried out either with the involvement of a specialized team or independently.
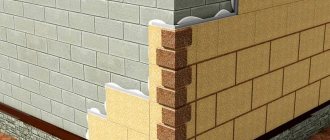
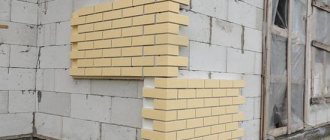
The appearance replicates the finishing with natural materials - brick, stone, etc. The strength of the material allows such panels to be installed not only on the main part of the facade, but also on the plinth.
Installing a house using facade panels is an economical and practical solution. Unlike installing metal ones, installing facade panels made of plastic is easier due to their light weight and does not require a large number of additional elements. However, installation is fraught with risks. Therefore, it is important to follow the basic rules for installing facade panels.
Facade panels
Docke facade panels are an external cladding material that was created for finishing the plinths or lower levels of buildings. In practice, it turned out that basement siding looks much more attractive if it is used to decorate the entire facade of the house.
The result is a high-quality imitation of natural stone finishing that can radically transform the appearance of the simplest home. Such qualities prompted the change in the name of basement siding, which for some time now has been called “facade panels.”
The main distinguishing quality of facade panels is the imitation of brick or stone masonry , while ordinary siding imitates different versions of wooden walls.
The level of imitation turned out to be very high, since casts from natural fragments of walls made of one or another type of finishing or building stone, brick, etc. are used to make molds.
The company's product range includes several lines of material:
- BERG (rock) . The material replicates the masonry of blocks hewn by hand from natural rock. The line has 6 color options, from light gray to dark brown.
- BURG (castle) . The basis for the development of this direction was ancient legends telling about knightly castles. The material was created to imitate the appearance of fortress walls, solid and durable. The collection has 10 color options.
- STEIN (under the stone) . There are 5 color options for the panels, representing the masonry of the hewn sandstone walls.
- EDEL (noble) . The panels have the texture of masonry made of rocks of heterogeneous size, the line is made in 5 color options, repeating the color of noble types of stone - jasper, rhodonite, quartz, onyx and corundum.
- STERN (star) . A set of realistic looking blocks of different sizes, all matched to each other. High precision in conveying the texture of the stone, there are 6 color options.
IMPORTANT!
All lines have their own panel configuration, since this is required by the specifics of the simulated stone. The differences are not too significant; they are mainly small differences in linear dimensions and, as a consequence, in the area and weight of the panels.
Types of plinth panels
Panels for finishing external walls can differ in materials of manufacture, design, and sizes. These are the main criteria for their selection.
Dimensions of individual cladding elements
Plinth panels are easy to distinguish not only by thickness, but also by size. Most often they have an approximate aspect ratio of 1:2.5. For regular façade siding, the length to width ratio is approximately 1:10. Accordingly, the individual elements for cladding the plinth are quite short.
But their width can vary significantly and range from 16 to 50 cm. Manufacturers produce such panels for the convenience of decorating a narrow strip at the bottom of the walls. Sometimes it is enough to put them in just one row.
The dimensions of the products are also influenced by the type of material being simulated. Thus, the panels “like chipped stone” will be shorter and wider than elements with a “red brick” decor.
When purchasing, keep in mind that each panel, in addition to the actual one, also has a useful size. This is the apparent height and width of the product after its installation.
Panel material
A wide range of products are made from polypropylene, fiber cement, and galvanized steel.
Useful: We are building a strip foundation for a frame house
Polypropylene should not be confused with polyvinyl chloride (PVC). Polypropylene sheathing is much more resistant to weather conditions. It is also characterized by a high degree of strength, which is achieved by casting. Finished products are light in weight, easy to clean and reliably imitate the relief of natural stone.
Metal panels are products based on galvanized steel sheets. They are also coated with a primer, an anti-corrosion compound, and have a decorative and transparent protective layer of polymers.
The metal cladding meets all the requirements for the material for the design of the base. However, it does not always reliably imitate natural material and may be exposed to moisture at the cutting sites.
The main components of fiber cement boards are cement, cellulose fiber, water, quartz sand. They are made by pressing at high temperatures or pressing with further “ripening” for a month (by analogy with concrete). Finished facades made of DSP are distinguished by a high degree of decorativeness, low thermal conductivity and strength.
Design of plinth panels
Panels for plinth cladding can imitate several dozen coatings made from natural materials. The most popular options:
- dolomite;
- granite;
- rubble stone;
- sandstone;
- rocky stone;
- clinker brick;
- aged brick.
Facade panels with large imitation stone are associated with a fortress, a castle and visually increase the dimensions of the building, creating a feeling of increased reliability.
If desired, you can use panels with imitation wood chips. This is a rather original solution. It requires careful study if the walls of the house are decorated in a different way.
The panels differ not only in the type of simulated stones, but also in the width of the seams between them. This point is important to consider if you plan to grout them. The wider the seam, the easier it will be for you to work with it.
Pay attention to the relief of the cladding elements. If it is very pronounced, be prepared for the fact that dirt will accumulate on such a coating more often.
Facade panels with insulation
As a rule, the base is additionally insulated when covered with decorative material. This is done using heat-insulating material, which is placed in the cells of the sheathing. An expensive, but time- and effort-saving alternative is façade panels with insulation for the exterior of a house.
They are a “pie” of three layers:
- The basis. Its role is played by a substrate made of OSB or moisture-resistant plywood.
- Insulation. This can be polyurethane foam, extruded polystyrene foam, expanded polystyrene. In this case, the best option, taking into account its performance properties, is polyurethane foam.
- Decorative layer. It can be made of metal, ceramics, cement, polymer composition, clinker. Polymer and clinker panels are good solutions in terms of price and quality ratio.
Thermal panels , like facade cladding without insulation, are presented in a wide range.
Features of panel installation
Deke polypropylene facade panels have technical characteristics close to most plastic cladding samples - vinyl, acrylic, etc.
Accordingly, the conditions of installation work, in particular the mandatory observance of thermal clearances, are equally relevant for Deke panels.
The fact is that a solid sheathing sheet, being tightly assembled without gaps, will begin to expand when heated and go in waves . In some cases, destruction of nail strips is possible - strips along the edge of the panel with oblong holes for fixing to the base using nails or, more often, self-tapping screws.
In order to avoid damage or disruption of the appearance of the skin, it is imperative that temperature gaps - gaps between all contacting elements of the skin - be observed. This condition is especially relevant for elements that require longitudinal joining (for example, starting strip, J-bar, etc.).
For the same reasons, nails and screws cannot be driven in/tightened all the way . About 1 mm is left between the head and the part to allow movement when changing sizes. The holes in the nail strips have an oblong shape.
The self-tapping screw is screwed exactly in the middle so that there is the possibility of slight movement in one direction or another. The only case when this rule is violated is the installation of vertical elements (for example, corner strips). For them, a self-tapping screw in the upper hole is installed at the top point so that the part does not fall down. The remaining screws are arranged according to the general pattern.
NOTE!
The size of the temperature gap depends on the installation temperature. For a hot summer day, 2-3 mm is enough, for a cold winter day - at least 6 mm.
Key rules for installing curtain panels for facades.
- The panels are mounted from left to right, from bottom to top.
- The screws must be fastened strictly in the middle of the hole, without screwing them in all the way.
- There should be small gaps between the panels, approximately 2 mm. Façade panels must not be fastened tightly together!
These rules are determined by the thermal contraction/expansion of the panels at different times of the year. It is important to ensure free movement of the panels. Otherwise, the façade of the building will “lead” and the panels will begin to move away from the walls. “YAFASAD” panels are provided with temperature notches, as well as places for fastening screws.
We have provided several design features for the convenience of installing facade panels yourself. The video will tell you about them.
Accessories
In addition to ordinary panels, additional elements are required to install the sheathing. Components, or, as they are also called, additional elements , without which it will be difficult to sheathe a house (photo below):
- Starting bar . This is a special rail with a groove for installing the bottom row of panels.
- J-bar . Serves to complete the cladding fabric, or for any design of the junction of the fabric to other planes (for example, when decorating window openings, it limits the window frame from the side of the window block).
- Corner profile . An element used to finish external corners. For Deke panels, installation of corner profiles is much easier, since they are mounted on top of the panels on both sides of the corner and cover them. They do not have a typical groove into which the sides of the panels are inserted. To ensure reliable installation, there is a starting corner profile that serves as a reference point for the corner profile.
- Curb . Used to decorate the end sections of the canvas, overhangs or other areas. To install it use
- Basic plank . Used for decorating internal corners, attaching borders, etc.
- Facade near-window profile . Serves as a support strip when finishing window or door openings.
- Internal corner . Used to decorate the internal corners of the surface.
The list of additional elements for Deke façade panels is much shorter than is the case with conventional types of siding, and the installation technology is simpler and clearer, which is also an advantage of the material.
Installation stages
Surface preparation
One of the advantages of façade panels is that they can be installed all year round. However, in severe frosts (-15°C and below), installation of plastic façade panels is prohibited. This type of cladding can be installed on any type of building.
First, you need to free the facade from decor, debris, old coating - anything that could interfere with installation. Then you need to decide where the first row of panels will be located. If the house is old, you can take the beginning of the previous finishing as a guide. If the facade is being installed on a new house, we recommend installing the facade panels from the beginning of the foundation. Next we mark the lower edge of the facade. To do this you will need a cord and a level. Use them to draw a horizontal line around the entire perimeter of the house.
Installation of sheathing
There are two types of sheathing: wooden and metal. If you decide to use wooden slats, make sure that they are treated with special impregnations to protect them from fire, pests, mold, and rot. Metal lathing is more durable, its design provides better ventilation of the facade. We recommend using the Grand Line GK profile for installation of façade panels. The optimal metal thickness is 0.5 mm.
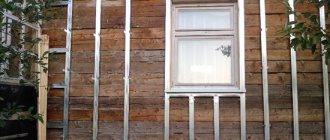
The sheathing slats are installed vertically (Fig. 1). The pitch between the axes is 300-400 mm (Fig. 2). The lathing is laid completely around the window openings, at the corners, at the lower and upper points of the facade.
Next, you need to level the sheathing with straight hangers. This is necessary to avoid deformation of the facade.
If you plan to install façade panels with insulation, place it in the spacer between the sheathing slats.
Installation of additional elements
Before installing the facade panels, it is necessary to install decorative elements. They cover doorways, windows, corners. To frame the interior corners, you will need two 7/8-inch universal J-profiles. A J-profile is also installed along the top edge of the facade to install the final row of panels.
Installation of the starting profile
The starting strip is installed horizontally along the bottom of the facade, which you marked earlier. In this case, you need to make indents of approximately 10 cm from the corners for future installation of corner strips.
Installation of the universal J-profile
To decorate corners
To arrange the internal corner you will need 2 universal J-profiles. Installation should start from the top. Fasten the screws in the special holes without pushing them all the way. Using a level, check the evenness of the profiles. Secure the additional element along its entire length with self-tapping screws in increments of 150-200 mm.
For edging the top edge
The J-profile must be secured with self-tapping screws to the sheathing in the upper part of the facade. The pitch of the screws is 300-400 mm (corresponds to the pitch of the sheathing).
Installation of corners of façade panels
To install the radius strip, you need to screw self-tapping screws into the top of the panel on both sides. Make sure that the plank hangs level and fasten the screws along the entire length of the additional element in increments of 200-400 mm. Then install the set strips into the radius strip (Fig. 3, 4, 5) and secure them to the wall with self-tapping screws (Fig. 6).
Place the starting elements along the bottom of the facade. They should be placed in increments of 300-400 mm (along the sheathing slats) (Fig. 7).
Installation of a ventilated facade
A ventilated facade is a method of cladding a house in which an air gap of at least 3 cm is provided between the outer layer - the cladding - and the inner layers - the wall, insulation and waterproofing.
This sheathing device has an important property - water vapor escaping from the thickness of the wall materials can freely exit the insulation. To put it simply, there is a constant opportunity to dry the wall and insulation.
This option allows you to increase the service life of all materials that make up the thickness of the wall and ensures high-quality performance of the insulation. For facade panels, a ventilated facade is the usual type of installation, although installation without it is possible, directly on wooden walls.
Selecting lathing for panels and its installation
The sheathing for the panels is a load-bearing structure . Its configuration is usually complicated by the presence of insulation, which must be installed between the slats. Therefore, for work, a material is selected that is most convenient to work with and is sufficiently strong and durable.
The traditional type of lathing is a system of wooden planks . This option is acceptable, but requires straight, dried planks, which should be soaked with an antiseptic immediately after installation to avoid rot, mold, etc.
A more successful option is the construction of a metal sheathing . Metal guides are used for plasterboard sheets. They are straight, the galvanized surface prevents corrosion processes, installation and adjustment of the plane is much easier than when working with wooden blocks.
In some cases, metal and wooden planks are combined, which is sometimes convenient for complex surface configurations.
Installation procedure:
- Cleaning the wall outside the house, complete surface preparation - putty, plaster (if necessary), primer, drying the surface.
- Marking the wall for load-bearing elements - brackets or straight guides.
- The sheathing for Deke panels has both horizontally and vertically directed strips. Therefore, if it is necessary to install insulation under it, you need to build your own sheathing . It is needed to install supporting strips for panels on top of it.
- The insulation is installed between the planks of the primary sheathing . A layer of waterproof membrane is laid on top of the insulation.
- The carrier is installed on the primary sheathing strips . Its thickness must be at least 3 cm to ensure the required ventilation gap. Vertical strips are used for mounting corners and sides of panels. Horizontal ones serve as a supporting surface for starting and J-planks, the upper sides of panels, and other elements of the canvas.
- The pitch of the horizontal strips corresponds to the height of the panel, the pitch of the vertical strips corresponds to half its length.
The main task when installing the sheathing is to ensure that the sizes of the panels and the distances between the planks match, and also to ensure the presence of a flat plane, which allows you to obtain the correct geometry of the sheathing sheet.
Installation technology of external wall panels
Installation must be carried out in accordance with all requirements and instructions in a certain sequence. Before purchasing materials, you must first make sure whether the facade tiles are compatible with the fastening.
Surface, tool and material preparation
The walls of the house are prepared for work in advance:
- The walls are cleaned of dirt, drains and cornices are removed. Wooden facades are treated with antiseptics against mold.
- Potholes and unevenness in the walls are leveled and primed.
- For each type of facade fastening, certain materials, fasteners and tools are prepared.
- If wall insulation and sealing are provided, then insulating materials are also prepared.
Lathing for mounting panels
To install the sheathing, install a wooden or metal sheathing. Metal is preferable - it is stronger and more durable. The sheathing is installed using brackets, profiles, and leveled. Install insulation. With smooth walls, installation of some panels (without insulation) can be carried out immediately.
Facade panel fastenings
Installation of façade cladding always starts from the bottom. First, the corners are aligned and secured, and only after that the installation of the bottom row of panels begins. Each panel is applied to the wall, measured, and attached appropriately butt-to-the-next with the next panel. The row should be even. Then the next row is installed. The entire building is clad in this way.
More information can be found here:
https://youtu.be/sc5zJUCbuFQ
Installing the facade of a house is not difficult to do with your own hands, provided you complete all the necessary steps in the assembly technology.
Did you manage to solve your problem using the recommendations from the article?
Yes!
56%
No. More answers required. I'll ask in the comments now.
28%
Partially. There are still questions. I'll write in the comments now.
16%
Voted: 25
How the panels are fastened
The panels are attached to the sheathing strips taking into account temperature changes, i.e. not tightly, but with a gap between the screw head and the part of about 1 mm . A correctly installed element can be freely moved left and right within the width of the mounting holes.
The screw head must be at least 10 mm in diameter, its length must be at least 30 mm. You cannot drill holes for self-tapping screws yourself; you must use standard mounting holes and components.
CAREFULLY!
When joining panels, they should be inserted into the grooves until they come into contact with special stops; they provide thermal gaps. Installation work cannot be carried out at temperatures below -15° , as the material becomes brittle and may break under load.
DIY installation instructions
Installation work is carried out in the following sequence:
- Installation of the starting bar . The lowest point of the canvas is determined, a horizontal line is drawn along the level, all corner starting strips are installed along it, after which the ordinary starting strips are installed.
- Internal corners, if any, can be formed using a J-bar or a specialized internal corner profile . To do this, pre-install the base strip with a shelf to the corner so that the panels on one side of the corner fit into the groove, and on the other they are attached over the nail strip. When the panels are installed, the inside corner will be inserted into the groove of the base strip and cover the joint of the planes.
- Facing is carried out in the only possible direction - from left to right and from bottom to top . the first panel is trimmed to obtain an even side line, inserted into the groove of the starting strip, aligned with the corner and fixed with self-tapping screws. The next panel is inserted into the side grooves of the previous one, into the starting strip from below, and secured from above with self-tapping screws. The entire row is laid in this way. The following rows are mounted in a similar way.
- The frames of window and door openings are mounted in the same way as corners . A J-bar is used to connect the design of the slopes and the window (door) frame.
- The canvas is completed by installing a J-bar , which forms the upper edge of the panels.
Installation of facade panels for exterior decoration of a house is simple and can be done independently. To do this, you need to familiarize yourself with the rules for carrying out work and constantly remember the need to maintain temperature gaps between parts, and do not tighten the screws all the way.
Fulfilling these requirements will allow you to complete the work with high quality and obtain a solid and stylish appearance of the house, imitating masonry at a relatively low cost.
General rules for working with the YA-FACADE facade system and the GL Decorative system
YA-FACADE panels and the GL Decorative System cannot be rigidly fixed. The products are provided with rectangular slots; the self-tapping screw must be screwed strictly into the middle of the hole, while a gap of 0.8-1 mm must remain between the head of the screw and the surface of the product. The bottom edge of the installed panel should rest on the top edge of the bottom panel. The Westmet company recommends shifting each subsequent row relative to the previous one to avoid the appearance of vertical seams.
Install the sheathing. (Fig. 1) For the installation of YA-FACADE and the GL Decorative System, the manufacturer recommends using a plasterboard profile produced by Grand Line. The profile is mounted vertically at a distance of 300-400 mm along the axes, (Fig. 2) it is installed completely around doors, windows and other openings, in all corners, at the top and bottom of the surface to be sewn. To create a flat surface for the sheathing and avoid wavy surfaces, the sheathing is leveled using straight hangers.
Attention! In February, the Westmet company offers discounts on Grand Line Standard plastic drainage systems and Grand Line GreenCoat Pural Matt BT metal tiles.
Using a chalk line, laser level, or water level, mark a strictly horizontal line along the entire perimeter of the building. This will be the lower level of the facade. Install the GL Decorative System at the corners of the building, around window and door openings. (Fig. 3, 4, 5, 6) On internal corners, use two universal 7/8” J-profiles. The technique for attaching the GL Decorative System is similar to attaching additional elements for vinyl siding. Attach the radius bar by screwing the screws into the top holes on both sides. The bar should hang on these two screws. Make sure it is installed level. Attach the radius bar by screwing the screws at a distance of 200-400 mm from each other. Do not screw the screws in too tightly (the gap should be 0.8-1 mm). Insert the typesetting strips into the radius strips and secure them. Secure the starting elements with self-tapping screws at a distance of 300-400 mm along the previously drawn line. (Fig. 7)
All vinyl façade panels YA-FASAD are installed from left to right. Cut the left side of the first panel to be installed so that it can be installed flush into the GL Decorative System. (rice. 
Insert the panel into the starting elements and slide it into the groove of the Grand Line Decorative System. (Fig. 9, 10).
Leave a gap between the YA-FACADE panels and the decorative system of 8-10 mm to compensate for thermal expansion. (Fig. 11)
Installation of subsequent panels in a row is also carried out using the installation method from right to left. The protrusions of the right panel are inserted into the corresponding grooves of the left panel. (Fig. 12).
Try to start each new row with a random, uneven offset. The trimmings obtained in this case will be used to complete the row. (Fig. 13, 14).
Installation of the last panel in a row is carried out as follows. At the vertical junction of the panels, trim the lock of the bottom panel. (Fig. 15). Measure the distance from the penultimate panel to the beginning of the front side of the accessory and add 10 mm to it. Measure the resulting result onto the panel and cut it. (Fig. 16).
Insert the last panel through the lock slot of the bottom panel from left to right. (Fig. 17). Insert it all the way into the groove of the accessory. Slightly bending the tabs, insert them into the corresponding grooves of the penultimate panel. (Fig. 18). Slide the panel to the left. Secure the panel. (Fig. 19, 20).
When you reach the top of the wall, you will need to trim the panels installed in the last row to height. Measure the distance from the penultimate row of panels to the inside of the 7/8'' universal J-profile and subtract 5-7 mm from the measurement result. Cut off the top of the panel based on the calculations obtained. Insert the prepared panel into the bottom panel lock. Slightly bend the panel and insert it into the 7/8'' universal J-profile.
Request for calculation Submit order
