No. 1 Wrong choice of radiator type
First, it is important to decide on the appropriate type of device. Today there are four types of radiators on the market:
- cast iron;
- steel;
- aluminum;
- bimetallic.
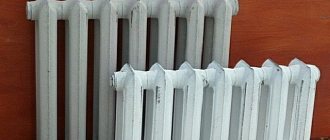
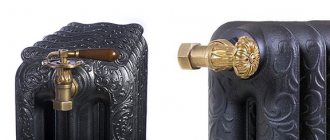
Cast iron batteries can be painted in a variety of colors, have a non-standard shape or stand out with elegant patterns, which allows you to decorate the interior. Suitable for installation in a private house or apartment, regardless of the type of heating.
In terms of functionality, this heating device will not let you down either. Cast iron is ahead of most metals in terms of heat capacity, except perhaps aluminum. The main disadvantage of this type is the high price.
Steel analogues are installed in new buildings with reduced coolant pressure or in private homes. But they cannot be used in multi-story construction and old buildings, since their operating pressure will be problematic for the devices. The advantages include low price and ease of manufacture.
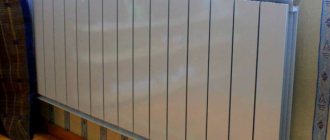
Aluminum variations are inexpensive and boast the highest heat transfer. However, they are not used in high-rise construction because they are not able to withstand high pressure.
For 9- and 16-story buildings, the best choice for installing a radiator in an apartment is the bimetallic type, characterized by a two-layer structure. The inner layer is made of steel, and the outer layer is made of aluminum. The design of the heating device allows you to combine strength with high heat transfer; the only negative is the high cost.
No. 2 Error when calculating the number of sections
To calculate the length of the battery, most people measure the height of the ceilings, the footage of the room and stop there. These values will be sufficient only for a private home, where you can set a certain temperature of the device.
In the case of central heating, when installing a radiator in an apartment, this method of calculating the number of sections is not suitable, because the temperature fluctuates on different days. If you focus on the average indicator, then the apartment will not always be warm enough.
Therefore, it is better to take one or two sections more than what is calculated. It is impossible to increase the temperature of the coolant, but it is enough to close the tap to reduce it.
How to position the battery correctly
In most areas of our country, heating radiators must be installed according to a standard arrangement under the window, and certain rules must be followed in order to obtain the maximum effect from the location of the heating device.
So, how to properly hang a radiator under a window? There are several options for installing batteries, taking into account the layout of the house:
- Installation in a niche. In houses built according to old designs from the mid-20th century, there are special niches under the windows in which a radiator can be installed. This option was used to hang massive cast iron products, and it is not entirely suitable for modern heaters, but if there are no other installation methods, then use a ready-made niche. In this case, the following standards must be taken into account: a gap of at least 50 mm must be left from the side walls and rear wall of the niche; the gap from the floor to the bottom of the radiator and from the top of the radiator to the window sill must be at least 100 mm. It is best to fill a niche with a panel with diagonal strips.
- Standard placement under the window. In modern houses, niches for heating radiators are no longer suitable, so installation is carried out on a regular wall under the window. In this case, it is important to fix the radiator exactly in the center of the installed window - thus, warm air will be more effective in cutting off cold flows coming from the window in winter. The minimum installation distance of the heating device from the floor is 50-100 mm. If the battery is raised higher, heat loss will occur; if lowered, the process of cleaning the apartment will be difficult. It is necessary to retreat at least 50 mm from the base so that the radiator performs its function and does not only heat the wall.
- Placing batteries in a house with panoramic windows. Windows that occupy the entire wall to the floor must also be separated from the rest of the room by a heat shield. In this case, the batteries are installed directly in front of the windows, and the need for the number of radiators must be calculated based on the norm - 1 radiator not 2 linear meters of glazing.
- Angular placement of the radiator. In private homes, it is often not enough to install heating just under the windows. Particularly strong heat losses occur in the corners of log houses. To eliminate this problem, it is recommended to install small radiators in 3-4 sections at the convergence of two external walls.
When installing radiators, you need to take into account the general standards for all types of premises:
- radiators are installed in places free from furniture, so as not to impede the circulation of warm air;
- During installation, vertical deviations must not be allowed - the radiator must be fixed strictly at an angle of 90 degrees to the floor;
- only external walls are equipped with heating appliances;
- to enhance heat transfer, it is recommended to install a reflective screen behind the radiator on the wall;
- when selecting a specific radiator model, you need to take into account the dimensions of the mounting location and clearance standards;
- The greater the number of cutoffs on the device, the more effective it is.
No. 3 The depth of the radiator is not taken into account
Another common mistake when installing a radiator in an apartment is choosing the wrong depth. It happens that in a particular room you need to take an option with 10 sections, but it does not fit in the allotted space. Many people reduce the number of sections, forgetting about the depth parameter, which varies from 7 to 10 cm.
The heat transfer of a device with greater depth will be one and a half times higher compared to the minimum depth. Thus, the buyer receives both a fairly high heat transfer and a smaller number of sections.
Battery Installation
Position
To ensure maximum heat transfer from the radiator, when installing it you need to follow a number of simple rules:
- The distance from the wall should not be less than 2 centimeters. The gap will ensure the unimpeded movement of convection air flows from the back of the battery;
- The distance to the window sill when installed in a window sill niche is no less than 8-10 cm. A closely located window sill will again limit convection;
- The minimum distance from the floor is 10-12 cm. The gap will provide an influx of cold air, replacing the heated air and displaced upwards.
Location of the battery in the window sill niche. The gaps between the radiator, wall, window sill and floor ensure the free movement of convection currents.
Any screens, boxes and niches limit air convection and reduce the heat transfer of the heating device. A radiator placed in a plasterboard box will deliver no more than half the rated power.
How to install an aluminum radiator on brackets?
The number and position of brackets should be as follows:
- under the upper collector along the edges (between the outermost and second sections from the edge) and additionally one bracket for every 5 sections;
With a small number of sections, only two brackets are sufficient to attach the upper radiator manifold.
- The lower manifold can be secured with a single bracket. Its task is to prevent the radiator from deviating from the vertical position.
The diameter of the hole for the plastic dowel of the bracket must exactly match the outer diameter of the dowel. The bracket is screwed into the dowel with an open-end or adjustable wrench.
Mark the holes by level. If one of the holes under the upper manifold is slightly higher or lower than necessary, bend the bracket screwed into it using any lever (steel pipe, gas wrench, etc.).
Level the radiator. Then air will not be retained in it when heating is started and water will not be retained when it is reset.
Harness
To connect the battery to the connections, adjust its heat dissipation and bleed air, you will need:
| Image | Equipment |
| Radiator plugs (solid and straight, left and right). | |
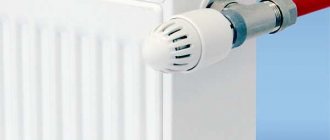
| Mayevsky crane . It is responsible for removing air when heating starts. | |
| American women. They are responsible for connecting the radiator to the connections. | |
| Valves (aka needle throttles) or ball valves. Throttling the connections makes it possible to reduce their permeability and, accordingly, the heating of the battery. Taps can be used to completely isolate the radiator from the heating system. |
The choke and the American are often combined in one fitting. The picture shows the so-called corner valve for connecting the radiator.
Typically, the kit for connecting the battery includes four through plugs (two each with left-hand and right-hand threads) and a pair of plugs (or a plug and an air vent). By plugging the necessary plugs, you can obtain a configuration for any scheme for connecting the battery to the connections.
The photo shows a kit for connecting an aluminum or bimetallic radiator. It includes three brackets, four feed-through plugs (two left and two right), a plug and an air vent (both with 1/2-inch threads).
Jumper
If throttles or shut-off valves are installed on the connections to the radiator in an apartment building, then the connections must be connected by a jumper to the installation points of the shut-off and control valves.
Why is it needed?
Without a bypass, any throttle on the supply line will regulate the flow of the entire heating riser. If you feel hot, it is not at all a fact that your neighbors above and below are facing the same problem. Frozen neighbors will very soon come to you and begin to loudly challenge your high moral qualities.
If you turn off the battery shut-off valves, the water in the riser will continue to circulate through the jumper.
Connection to liners
There are three possible battery installation schemes:
| Image | Radiator connection diagram |
| Lateral one-sided . The connections are located on one side and connected to both collectors. This scheme is ideal for radiators no longer than 7-8 sections; with a longer length, the outer sections will be noticeably colder than those closest to the liners. | |
| Diagonal . The connections are connected to both collectors, but from opposite sides. A radiator with any number of sections will be evenly heated along its entire length. The lower collector on the side of the upper supply will gradually silt up and require periodic flushing. | |
| The lower one is double-sided. The connections are connected to the lower manifold on both sides. The radiator is heated along its entire length, but the heat transfer is somewhat less than with a diagonal connection. The advantage of the scheme is that the continuous circulation of water through the lower collector eliminates silting. |
Obvious instructions: for radiators with 10 or more sections, use a diagonal or bottom connection.
Assembling connections
What does it look like to install radiators yourself? How to ensure tightness of threads?
The connection of the radiator plugs with the outer sections is sealed with standard rubber or silicone gaskets. The plug with the gasket on is screwed into the section with moderate force. The edges of the gasket should be pushed out beyond the edges of the manifold by about a millimeter.
A standard silicone gasket is responsible for sealing the connection between the plug and the radiator.
I assemble threaded connections on plumbing linen impregnated with any quick-drying paint. Instead of paint, you can use silicone sealant. Impregnation protects organic fibers from fading when heated: high temperatures dry out flax and make it brittle.
An excellent alternative to flax is Tangit Unilok, a polymer sealing thread. But FUM tape should not be used for heating: the thread wound with it begins to flow with minimal reverse stroke.
Sealing the connection between the American pipe and the radiator cap using Tangit Unilok thread. The thread is wound several times along the thread.
The American one is connected by simply tightening the union nut. The tightness is ensured by the ring gasket underneath.
The tightness of the connection between the halves of the American is ensured by a rubber ring.
#4 Do not install a jumper
Unscrupulous plumbers take advantage of clients’ ignorance and make their work easier, for example, by not installing a bypass jumper on the heating device. It is necessary to be able to shut off the battery without turning off the neighbors’ heat. In addition, if one of the other residents wants to reduce the temperature in the apartment, this will not affect those who have a jumper. However, if there is no tap on the device, then a bypass is not needed.
Assembly of aluminum heating radiators
Aluminum heating radiators - general information and characteristics
In the 80s of the twentieth century, a model of aluminum heating radiator was introduced to the world market.
Compared to such a familiar product as cast iron batteries, this type of heating device had a number of serious advantages, as a result of which it quickly gained popularity among consumers. Indeed, an aluminum heating radiator has a number of characteristics due to which it is considered one of the most convenient heating devices. Let's take a closer look at these characteristics:
- Aluminum is a material with excellent thermal conductivity, as a result of which products made from it can be used in systems with unstable coolant pressure. Half of the heat is transferred by radiation, half by thermal convection;
- Low weight - this simplifies the installation of this type of device, as well as its transportation and maintenance;
- Durability - aluminum heating radiators can withstand pressure of 16 atmospheres;
- Low cost - devices of this type are much lower than similar bimetallic or copper products;
- Possibility of regulation;
- Aesthetic appearance.
Thanks to all these characteristics, aluminum radiators quickly conquered the market and became widely used for heating rooms.
However, along with the advantages, these devices also have a number of significant disadvantages:
- Aluminum is a chemically active metal and has insufficient corrosion resistance;
- In prefabricated models, it is impossible to use any other coolant other than water with strictly maintained acid-base characteristics;
- Aluminum radiators have a tendency to air up. Therefore, it is periodically necessary to bleed air from the system;
- The threaded connection in such models is a weak point. In the event of a water hammer, the seal of the product may be compromised.
Aluminum batteries are available in two types:
- solid cast;
- prefabricated, consisting of separate sections. If desired, they can be expanded - add additional sections, or, on the contrary, remove them.
Disassembling aluminum radiators
It is usually necessary to disassemble an aluminum heating radiator in cases where:
- We are going to install a new heating system;
- You need to expand the battery or remove extra sections;
- Leaks need to be repaired or seals replaced.
In order to disassemble the product, we will need a set of wrenches, a screwdriver and a radiator wrench.
The first step is to remove the battery from its mounting location. To do this, perform the following steps:
- We stop the water circulation in the system and relieve the pressure;
- We make sure that the device has cooled down and the hot water inside it will not scald us by spilling out;
- We find the threaded connection in the place where the hose is attached to the battery pipe by means of a coupling. We select a wrench of a suitable size - with its help you need to unscrew this connection;
- We move the coupling along the pipe, remove the device and place it on a specially placed plastic film on the floor. There may be some water left inside - you should drain it. Place the radiator face up;
- We take out the special filter and immediately wash it. Otherwise, the dirt on it may dry to such an extent that it will be impossible to clean it. In this case, you will have to buy a new filter - reusing the old one will be impossible.
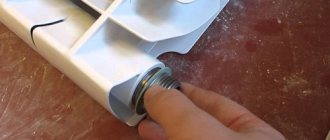
The next step will be to disassemble the battery itself into separate sections. You should know that the battery sections are connected to each other using nipple nuts - these are nuts that are empty inside with external threads on both sides and grooves for installation inside. For this purpose, we use a radiator wrench, specially designed for working with nipple nuts. If necessary, you can make it yourself. This is a spatula key with notches on the rod - the distance between them corresponds to the width of the sections of aluminum radiators. That is, by checking how many notches the key fits inside, we can find out which nipple nut we are currently turning.
Having placed the blade in the grooves of the corresponding nipple nut in the hole from above, we make a couple of turns counterclockwise. Then we take out the key, insert it into the hole from below into the grooves of the corresponding nipple nut and also turn it a couple of turns. Then we return the key to the top nut and repeat everything until the sections are separated.
Unscrewing the nipple nuts in this way is necessary to avoid distortion. In order to be able to apply the necessary force, there is a through slot at the end of the key into which, if necessary, we insert a metal rod as a lever.
After we managed to disassemble the radiator, we clean it inside, change gaskets and seals. If there is a need to expand the battery, you need to add the required number of sections.
If it is necessary to eliminate a leak, we prepare a special solution - add bronze powder to the epoxy resin and mix thoroughly. We clean the damaged area with a cable, then treat it with the prepared composition and wait 30–60 minutes until it dries completely. When working with this composition, everything should be done so quickly as to prevent it from drying out ahead of time.
After completing all necessary operations to service the product and troubleshoot problems, it is necessary to assemble the battery and install it.
Assembly of aluminum radiators
Sequence of actions when assembling an aluminum radiator:
- To reassemble the battery, place it on a flat surface. We will carefully inspect all threaded connections for cracks and chips;
- We clean each connection from debris and contaminants. If we want to add new parts, we need to clean the ends until they shine. Even the manufacturer's paint is removed - at the joints it will be a significant hindrance, causing premature leaks of the coolant. For cleaning, we use sandpaper with very fine grain so as not to leave scratches on the surface, which can also cause a leak;
- We degrease the ends with gasoline. Wash the gaskets in soapy water. Degreasing is mandatory in systems that use antifreeze rather than plain water. They have a high fluidity rate and can penetrate into the smallest irregularities;
- Now we can start connecting the sections. We put paronite seals on the nipple nut and place them on both sides of the product section. Place the key hole on top and turn it a couple of times without using the lever. Then, in the same way, we make a couple of turns of the nipple nut in the lower hole. We do this until the key stops turning, and pull it out using the lever. We do not apply much force - aluminum is a soft metal and it is very easy to damage the threads. According to this scheme, we assemble the entire product;
- We put a plug on the unused hole , and on the other side we attach the Mayevsky valve - it serves to bleed excess air from the system. Then we install the radiator and connect it to the system. We make sure that the coupling tightly connects the product to the water supply hose. After which we can supply water to the system, observing whether there are coolant leaks anywhere.
Conclusion
So, we were able to make sure that disassembling and then assembling an aluminum heating radiator is not very difficult. All operations should be performed very carefully - aluminum is a very soft metal and can be easily damaged. To complete the work, you do not need any special construction skills - just a set of simple tools, attentiveness and accuracy. Thus, if you need to service the product or need to add a certain number of sections, you can completely cope with this task on your own.
#5 Choose a manufacturer at random
Apartment owners devote most of their efforts to searching for a high-quality radiator, but do not worry about component manufacturers. You should opt for more expensive parts.
For installation you will need:
- 1-2 taps for connecting to the heating system;
- coupling for connecting two sections of pipeline;
- 2-4 through plugs;
- stub;
- air vent;
- brackets.
When choosing parts, you need to pay attention to the smallest nuances: the number of turns on the thread, the quality of plastic and brass, the presence or absence of a retaining ring. The collapsible connection differs from more expensive manufacturers by a paronite gasket with a large contact area and a thick brass nut.
No. 6 Incorrect radiator connection type
The next error is incorrect connection of the heating device. Before undertaking the installation of a radiator in an apartment, the master must know exactly what type of coolant supply is in a multi-story building. The coolant can be supplied from below or from above, depending on which type of connection is selected:
- side;
- diagonal;
- lower.
The side view is most often found in city apartments, but is used with restrictions. The number of sections should not exceed 12. Also, this type is not suitable for lower coolant supply, since the outer sections will remain cold.
The diagonal scheme is the most efficient in terms of heat transfer; it is preferable when placing long radiators (from 10 sections) and heating large rooms. This type of connection assumes that a supply pipeline is connected to the upper branch pipe, and a discharge pipeline is connected to the lower branch pipe. Or vice versa, which depends on where the coolant is supplied from.
When supplying coolant from below, a lower connection is also suitable; when using it, it is prohibited to swap the supply and return pipes. This connection looks the most neat, since the heating pipes are hidden under the baseboard.
Diagrams for connecting radiators to the heating circuit
Since the connection of heating radiators to the main line may differ, the efficiency of heat transfer depends on the circuit
It is important to choose the optimal direction of movement of the coolant through the device. Its current depends on the dynamic pressure of the liquid medium and the temperature difference in the radiator cavity
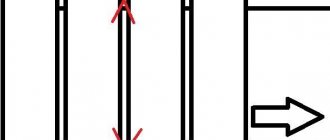
Diagonal connection
Installation of heating radiators with a diagonal connection and top supply is considered the most effective, since the devices have maximum heat transfer. This is explained by the fact that with such a connection the coolant does not encounter any obstacles on its way. The liquid completely fills the upper collector and, flowing through vertical channels, enters the lower collector. This promotes uniform heating of the entire area of the device, so the heat transfer from the battery is maximum.
Diagonal connection of heating radiators with bottom supply is rarely used. In batteries with a large number of sections, a stagnant area is formed with a coolant temperature below normal in the area of the pipe into which the return flow cuts. Losses in heat transfer efficiency can reach up to 20%.
Single-sided with top and bottom feed
The option of connecting devices to a main line with a one-way top supply is usually used for single-pipe distribution of high-rise buildings with top supply or in a downward vertical network with bottom distribution.
This scheme is more suitable for radiators with a short length. But with a large number of sections, the kinetic energy of the coolant may not be enough for the flow to fully pass through the collector. If the installation of heating radiators with a one-sided top supply is used, then you have to put up with a reduction in thermal power of a maximum of 5%.
One-way bottom connection cannot be called effective, but it is often used in high-rise buildings with single-pipe wiring. The disadvantage is the formation of a stagnation zone in the part of the device remote from the entrance. This will cause the far edge of the battery to be cooler. In this case, the reduction in heat transfer efficiency can reach up to 22%.
Double sided with top and bottom feed
Installing batteries with double-sided bottom connections allows you to hide the supply pipes in the interior as much as possible. Since the coolant hardly penetrates into the upper part of the device due to counter flows of cooled liquid, the top of the radiator warms up more slowly and worse. In this case, the reduction in heat transfer efficiency reaches 15%. But if necessary, this scheme can be optimized.
Correct connection of heating radiators eliminates the possibility of using a double-sided connection with a top supply. Only illiterate heating engineers can apply such a scheme in practice. Since the passage through the upper manifold is open for liquid, it will not rush into the lower pipe, so only the upper part of the device will warm up.
No. 9 Rewinding and taps
You should not use the silicone gaskets included in the universal kit. When the heating is turned on or temperature changes, the silicone will expand and contract, which can cause leaks. To avoid this problem, you should use tow rather than silicone gaskets.