Thanks to proper insulation of the facade, you can save on heating and extend the life of the house. But when choosing a suitable material, it is important to take into account that when using it, additional leveling and protection with plaster is required. Penoplex is no exception, so the choice of a good composition is approached only taking into account all the nuances.
Features of penoplex
Synthetic foam products from polystyrene have been made for a long time, for more than 70 years. Penoplex differs from traditional boards in its production technology, which uses extrusion. Blowing agents are initially added to the polymer, which ensures uniform distribution of cavities throughout the mass. As a result, after extrusion, a structure with closed microscopic cells is formed, the size of which does not exceed 0.2 mm.
The main qualities of the slabs are as follows:
- low density;
- light weight;
- well-defined ability to retain heat;
- minimal tendency to absorb moisture.
Despite all its advantages, the material requires increased attention due to its high flammability and poor vapor permeability. Penoplex must be used correctly, taking into account the need to ensure good ventilation of the walls and the need for particularly strict adherence to fire safety rules. To protect from external influences, plaster is applied to the penoplex.
Why plaster
Plastering is a necessary part of the finishing work, allowing you to safely invest in thermal insulation without fear of its destruction in the future.
External plaster protects the facade from wind and precipitation that can cause damage to the material. The inner plaster layer on extruded polystyrene foam can serve as an additional decorative finish.
Penoplex is a durable polymer, however, under strong local mechanical loads, dents can form on it, which can lead to cracking on the sheets. If the coating is plastered, its resistance to impacts will increase, and an additional layer of protection for the synthetic board from UV rays will appear.
Thermal insulating coating made from foam sheets has joints that are usually sealed with polyurethane foam. To form a perfectly flat surface and protect the seams from aging, plaster must be applied on top of the sheets and seams.
Advantages and disadvantages of insulating walls with penoplex from the inside
- This protection option is much cheaper than external thermal insulation, because there is no need to hire industrial climbers. You can do the installation work yourself.
- Penoplex weighs little; additional strength calculations for the building are not required.
- It does not absorb moisture and does not allow it to pass to the plaster, where condensation may occur.
- The material has a low thermal conductivity coefficient, which allows the use of thin sheets. Due to this, the usable area of the room is reduced slightly.
- The product is made from chemically inert components that are not subject to rotting. Wall repairs may not be carried out for decades.
- The density of the material is very high and can reach 35 kg/m3. It resists mechanical stress well.
- It is highly environmentally friendly and does not affect human health indoors.
- If installed incorrectly, condensation may appear on the plaster.
- Wet spots occur where the insulator comes into contact with the surface. Humidity reduces the thermal conductivity of the partition and causes its destruction.
- The heat-accumulating properties of the wall are reduced, and the temperature in the room changes quickly.
- The house is left without protection from the cold wind.
- Losses of living space can reach 5%. This is especially noticeable in small rooms.
- The insulation melts at high temperatures, but does not burn.
- Mice and other rodents love to live in the panels.
Required tools and materials
In order for the matter to proceed easily and quickly, you need to think through everything in advance, collect the necessary materials, aids, and tools.
There are different brands of plaster mixtures and priming agents that have a similar basic composition, which does not exclude the presence of small features in the nature of impurities. To decorate a wall or a room as a whole, it is advisable to stock up on a sufficient amount of material from one manufacturer. This will eliminate the possibility of incompatibility of mixtures; they will work perfectly with each other.
Advice! Prepare equipment for mixing the plaster mixture in advance. There are many options: from an ordinary long wooden spatula or spatula to a drill with a special attachment. Choose good, comfortable spatulas with an ergonomic handle that allows you to easily move them along the plane.
To improve the adhesion of penoplex to the paste-like mass of plaster, the surface is treated with a metal brush or a needle roller. Roughness will improve adhesion and ensure reliable adhesion of the composition to the insulation.
Finishing outside corners requires special perforated corners and levels to ensure proper installation. You definitely need to buy a reinforcing mesh, without which all the work becomes meaningless. In some places you will need glue to fix it. Study the composition and recommendations for use in advance. To grout the surface, you need to purchase a plastic grater with sandpaper. It is convenient to carry out the final finishing with a roller with a small dense pile.
Types of mixtures
Penoplex plaster for the facade requires strength; it should not change under the influence of precipitation. There are compositions for universal and specific purposes. When choosing, you should take into account all possible types of loads on the coating.
Multifunctional tools
The universal composition can be used at several stages of finishing work. With this plaster you can attach penoplex to the wall, then fix the reinforcing mesh on the outside on the sheets. The universal mixture can not only be used for plastering, but also for pre-priming surfaces. The product costs a little more than formulations with strictly targeted action. The higher price is compensated by the possibility of multifunctional use.
Mineral products
A cement mixture that contains sand and a small amount of polymer filler, which improves the fixation of the material on the surface, is popular among craftsmen. Often such plaster is called mineral due to the predominant amount of inorganic components. The mixture must be prepared in accordance with the manufacturers' recommendations, which often contain instructions on the need to add PVA glue to the mixture. If the accompanying documents do not specify the introduction of additional components, there is no need to do this yourself. Some plasters contain gypsum and stabilizers. Such mixtures are very plastic and stick to the penoplex more slowly.
If you don’t have enough money to purchase ready-made plaster, you can make your own compositions from two components:
- cement and lime;
- clay and lime;
- clay and cement;
- clay and gypsum.
This is not the best solution, especially since the type of clay is fundamental to the quality of the plaster. If you have suitable clay, high-quality cement and slaked lime, the mixture can turn out quite successful. Mineral compositions can be used to plaster facade insulation on the outside and putty penoplex indoors.
Acrylic
Mixtures based on acrylic polymers are intended primarily for finishing areas located in areas of high humidity and high mechanical loads. The cost of polymer plasters is higher than that of mineral compounds, but their greater resistance to external influences justifies the difference in price. Acrylic plaster masses have great elasticity, which makes them easier to work with.
Silicate
A successful combination of properties is demonstrated by silicate plasters, which do not contain polymer additives and therefore do not become electrified. Silicates allow steam to pass through well, are not destroyed by atmospheric moisture, and are not subject to microbiological destruction. This is the most acceptable mixture that can be used to plaster both external and internal walls. It is enough to properly treat the surfaces once and you won’t have problems for many years. Silicate material is environmentally friendly, does not contain harmful impurities, and guarantees the cleanliness of the surrounding airspace.
Expanded polystyrene and penoplex - what is the difference
Penoplex is a heat-insulating material developed by a company with the same name. It has high heat and sound insulating properties and is distinguished by improved technical characteristics:
- resistance to moisture - does not absorb water, does not support the development of mold and fungi;
- long service life - from 50 years and above;
- environmentally friendly, harmless, hypoallergenic;
- high density, maintaining the original shape;
- resistance to loads and temperature changes within -50...+75 degrees;
- ease of installation, low weight;
- fire safety, resistance to chemicals.
Expanded polystyrene PSB-S-15T
In fact, penoplex is an improved version of expanded polystyrene and is comparable to the latter in terms of noise and heat insulating properties. Manufacturers have reviewed the shortcomings of extruded polystyrene foam and improved the material.
The production technology of the two types of thermal insulation is also not the same. Polystyrene foam is produced by treating individual granules with steam, expanding them, gluing them and pressing them. Penoplex is produced by melting polystyrene foam granules, beating them and pouring them into a mold, followed by pressing and enrichment with other components (extrusion technology). Thus, penoplex is extruded polystyrene foam with the addition of special modifying substances.
Extruded polystyrene foam Penoplex
The differences between the two materials are:
| Index | Penoplex | Expanded polystyrene |
| Weight 1 cu. m, kg | 47 | 25 |
| Thermal conductivity, W/m*K | 0,03 | 0,03 |
| Water absorption,% | 0,2-0,4 | 2 |
| Vapor permeability, mg/m*h*Pa | 0,0007 | About 0 |
| Compressive strength MPa | 0,2-0,5 | 0,16 |
| Bending strength, MPa | 0,25-0,7 | 0,25 |
| Life time | From 50 years old | 10-40 years |
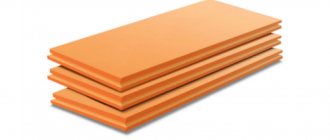
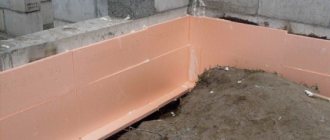
In addition, the materials differ from each other in appearance: although both of them have a sheet form, penoplex is orange with a uniform structure, and polystyrene is white, in the thickness of which individual granules are visible. Both materials can be cut with a knife, have a fairly smooth surface and can be used indoors and outdoors.
Famous manufacturers
The domestic market of plastering materials offers products from different manufacturers. The following three brands are most widespread:
- "Ceresit";
- "Ekomix";
- "Stolit."
There are imported products and mixtures of other domestic companies, the characteristics of which are always indicated in the attached instructions.
Ceresit products are presented in a large assortment, including all types of plaster: silicate, silicone, acrylic, cement. The product has good performance characteristics, is easy to use due to its elasticity, and is durable.
Ecomix plasters can be used for exterior work or to decorate interior walls. The compositions are characterized by environmental safety and resistance to moisture. Work on finishing facades using plaster from this company must be carried out in the warm season, at temperatures of at least +7 °C. Mixtures can also be used to eliminate defects: chips, cracks, deformations on old surfaces covered with plaster long ago.
The range is represented by compositions based on cement, to which stabilizers and modifiers are added. Thanks to this, the plaster has high heat resistance, does not react to high and low temperatures, and attaches well to penoplex.
Preparation of the solution
Recommendations for the preparation of commercially available mixtures are contained on the packaging and in accompanying documents. When purchasing, you can get additional advice about the features of the products and the specifics of their preparation.
When making plasters yourself, you should remember the main points. The components taken in accordance with a specific recipe must be sifted and mixed well. It is advisable to check the stickiness of the mass before starting work. If the plaster sticks too much to the spatula, it will be difficult to apply. In this case, you should increase the amount of filler. If the mixture does not stick at all, you need to increase the amount of binder additives. Using the sampling method, you should select the average fat content of the mixture, because if the viscosity is excessive, the layer of plaster may crack after drying. An insufficiently sticky mixture is not very convenient to work with and forms a layer with little strength.
Installation of reinforcing mesh
Before applying a layer of plaster, penoplex needs to be reinforced with special nets. Polymer cellular fabrics with a density of at least 140 g/m2 and no more than 160 g/m2 are best suited for reinforcement. The general rule is that the smaller the cells, the better the reinforcing properties. A high-quality mesh with suitable characteristics helps to level and strengthen the surface of the penoplex.
Note! If you plan to use cement-based plaster, the mesh must be inert to an alkaline environment.
Reinforcement should start from the corners. To do this, cut strips from the mesh, the width of which should not be more than 35 cm, and the length is determined by the length of the corner. The strip is folded in half lengthwise, a fixing compound is applied to the penoplex and the mesh is pressed against it.
The entire wall is reinforced in a similar way. First, lay a layer of fixing mixture (plaster), then press the mesh against it, smooth it out and make sure it is fixed. The reinforcing fabric should be overlapped, because areas not covered with a polymer mesh will stand out noticeably against the general background. A thin layer of fixing mixture is applied on top of the cellular coating, which ensures a tight fit and strong fastening.
Insulation of walls from the inside under plasterboard
To insulate walls under plasterboard, they do not need to be leveled. It is enough to clean the walls of old plaster, putty, mold (if any). And treat everything with an antifungal additive.
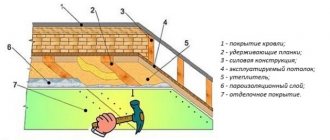
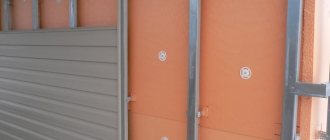
In order to insulate walls under drywall, you need to build U-shaped frames made of metal or wood. The insulation panels will be attached between these frames. Often this is mineral wool, but other materials (foam plastic, penoplex) can also be used.
Frame installation
The frame is made using wooden slats or metal profiles. First you need to mark the entire frame. Vertical profiles are attached at a distance of 60 cm from each other. They are secured using self-tapping screws or dowels in increments of 100 cm and secured with rivets.
Installation of thermal insulation
Plates
If you use mineral or other slabs, they can be glued between the frames using ceramic tile adhesive.
However, if there are frames, this is not necessary. Since fastening brackets are installed on the frames (there are 4-6 brackets per 1 vertical profile) for plasterboard profiles, they can also be used to secure the thermal insulation.
Rolls
Important! If you use mineral wool in a roll, then the roll must be taken with a “reserve”. If your ceiling height is 2.6 m, then you need to cut off no less than 2.7 m
Since the wool is deformed, the precisely cut length may not be enough.
We begin to attach the rolled mineral wool from top to bottom. It is easily pierced and fixed on brackets and hangs vertically.
The width of the wool should be wider than the distance between the profiles, so it is folded like an accordion. For tighter insulation, you can slip the edges of the wool under the profiles.
All that remains is to secure the sheets of gypsum board to the frames. Plasterboard slabs are fixed with self-tapping screws 2.5 cm long (for a metal frame), or with screws 3.5 centimeters in size (for a wooden base). Next you need to putty the seams and apply a layer of primer.
Grouting and leveling
High-quality wall finishing cannot be done hastily. The reinforcing layer must dry completely before starting the next stage of work. For final drying in winter, knocking may be necessary; in summer, 4 to 6 hours is enough. When the coating is completely dry, the surface must be thoroughly grouted before it can be plastered.
This physically demanding job is done using a plastic float with an emery coating. Grouting is carried out in a circular motion over the entire area until the surface becomes evenly rough.
How to properly plaster penoplex with your own hands - technology
To properly plaster surfaces, it is necessary to carry out work in calm weather at temperatures within +5...+30°C. The building is protected from sunlight and precipitation.
The work is carried out in compliance with the following stages:
- preparation of the base;
- applying a primer;
- preparation of solution;
- covering the base with an adhesive solution;
- fixation of reinforcing mesh;
- grouting work;
- creating a leveling layer;
- preparation of decorative plaster mortar;
- decorative finishing;
- base coloring.
Preparation of solution for the facade step by step
Preparation of plaster mortar for polystyrene foam bases is carried out according to the instructions:
- the dry mixture is poured into a container with water;
- the mass is kneaded using a mixer;
- add water if necessary;
- after reaching the required consistency, the solution is set aside for 5 minutes;
- the mixture is mixed and applied to the base
When using ready-made solutions, it is necessary to mix the composition before applying it to the walls.
Installation and fastening of reinforcing mesh for walls
The installation of the reinforced mesh is carried out in stages:
- Installation begins from corner areas.
- The adhesive composition is applied with a spatula from the corner parts.
- Apply the corners, press them, check with a building level.
- The mesh is applied to the solution, leveled, and pressed in with a spatula.
- The mesh on a flat base is fixed after reinforcing the slopes and corners. It should be overlapped by 10 cm.
- Excess adhesive is removed with a spatula.
- It is necessary to apply a primer or plaster solution over the mesh.
Plastering with penoplex
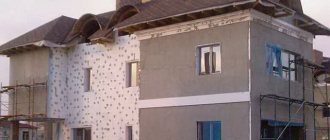
After installing and fixing the reinforced mesh solution with a spatula, apply the plaster-adhesive mixture with a layer of 2-3 mm. It is optimal to carry out work with a wide tool. After plastering all sheets, the surfaces are dried.
Grouting and leveling
After 24 hours, grouting work is carried out. Sanding is done with a grater with fixed sandpaper. Movements should be circular with light pressure.
The grain size of sandpaper is selected according to the type of subsequent decorative finishing:
- coarse sandpaper is necessary for finishing before applying the structural decorative mixture;
- fine-grained sheets are used to prepare surfaces for painting, gluing wallpaper or applying thin-layer decorative plaster.
Dust after grouting and leveling the base is removed with a dry rag.
Application of decorative plaster for external work on penoplex
After leveling the foam base, you can decorate the surfaces with a decorative solution. Finishing mixture can be used as additional protection. Before applying the decorative plaster composition, it is necessary to prime the surface. The primer is applied using a roller, corner areas are treated with a brush. The primer layer is dried.
Then the plaster is applied using the chosen technique (bark beetle pattern, mosaic, stone effect, travertine, wet silk, fur coat, etc.). Decorative finishing is selected for facade or interior work.
