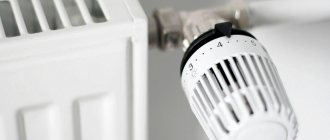
Place of radiators in the heating system
The use of radiators in heating residential premises plays a key role today. Not all residential properties, especially apartments in multi-storey buildings, can be converted to underfloor heating. Therefore, the main work of heating internal living spaces is performed by radiators or the good old batteries that are familiar to us.
Radiators transfer thermal energy from the coolant to the surrounding space. Heat transfer is carried out due to the large heating surface of the heating device. Modern models have a number of technical improvements, thanks to which it has become possible to connect in a variety of options and with any wiring diagram.
in old cast iron and steel batteries there was only one upper and one lower pipe, through which hot water is supplied and the return is released.
In modern models, in addition to the main supply and outlet pipes, there are built-in air vents. This design of batteries radically changed the quality of functionality of the heating system. If there are air pockets in heating devices, it is enough to open the drain valve and bleed the air.
In many ways, thanks to modern models of heating batteries, it has become possible to choose the most convenient connection scheme and install heating devices in those areas of the living room in which they are most effective. The quality of operation of the heating water circuit depends on correctly installed piping. The process is necessary if you are using a pipeline made from polypropylene pipes.
Important! If there are metal risers, the piping is made from other consumables. It can be metal copper pipes or metal-plastic
The use of polypropylene pipes in this case is strictly prohibited.
The reason for the incompatibility of metal pipes with polypropylene products is the presence of a threaded connection. Considering the fact that propylene pipes have a high coefficient of thermal expansion, when hot coolant is supplied, the threaded connection will lose its tightness and stability. Therefore, if you want to connect a heating radiator made of polypropylene pipes, try to use fittings, adapters and couplings made from similar materials.
the difference in diameters of pipes made of different materials should be taken into account
Methods for connecting polypropylene pipes
- Soldering. To perform this you need to have a special tool. This method is more reliable, since the two ends of the pipes and the tee used as an adapter are tightly fastened. And such fastening cannot be destroyed by thermal expansion and pressure.
- Connection using fittings. This method is simpler. The main problem is the weakening of the connection over time. This result occurs as a result of expansion when heated. A weak connection begins to let water through.
Radiator connection diagrams
How well the radiators will heat depends on how the coolant is supplied to them. There are more and less effective options.
Radiators with bottom connection
All heating radiators have two types of connection - side and bottom. There can be no discrepancies with the bottom connection. There are only two pipes - inlet and outlet. Accordingly, coolant is supplied to the radiator on one side and removed from the other.
Bottom connection of heating radiators for single-pipe and two-pipe heating systems
Specifically, where to connect the supply and where the return is connected is written in the installation instructions, which must be available.
Heating radiators with side connection
With a lateral connection, there are many more options: here the supply and return pipelines can be connected into two pipes, respectively, there are four options.
Option #1. Diagonal connection
This connection of heating radiators is considered the most effective, it is taken as a standard and this is how manufacturers test their heating devices and the data in the thermal power passport for such a connection. All other connection types transfer heat less efficiently.
Diagonal diagram for connecting heating radiators with a two-pipe and one-pipe system
This is because when the batteries are connected diagonally, the hot coolant is supplied to the upper inlet on one side, passes through the entire radiator and exits from the opposite, lower side.
Option #2. Unilateral
As the name implies, pipelines are connected on one side - supply from above, return from below. This option is convenient when the riser runs on the side of the heating device, which often happens in apartments, because this type of connection usually predominates. When the coolant is supplied from below, this scheme is used infrequently - it is not very convenient to position the pipes.
Lateral connection for two-pipe and one-pipe systems
With this connection of radiators, the heating efficiency is only slightly lower - by 2%. But this is only if there are few sections in the radiators - no more than 10. With a longer battery, its farthest edge will not heat up well or will remain cold at all. In panel radiators, to solve the problem, flow extenders are installed - tubes that bring the coolant a little further than the middle. The same devices can be installed in aluminum or bimetallic radiators, thereby improving heat transfer.
Option #3. Bottom or saddle connection
Of all the options, saddle connections for heating radiators are the least effective. Losses are approximately 12-14%. But this option is the most inconspicuous - pipes are usually laid on the floor or under it, and this method is the most optimal from an aesthetic point of view. And so that losses do not affect the temperature in the room, you can take a radiator a little more powerful than required.
Saddle connection of heating radiators
In systems with natural circulation, this type of connection should not be made, but if there is a pump, it works well. In some cases, it’s not even worse than the side one. It’s just that at a certain speed of movement of the coolant, vortex flows arise, the entire surface heats up, and heat transfer increases. These phenomena have not yet been fully studied, therefore it is not yet possible to predict the behavior of the coolant.
Strapping and connections
When choosing a radiator piping option, the following are taken into account:
- the most efficient placement of batteries;
- possibility of reducing the amount of materials;
- existing or created type of heating at the facility (one-pipe or two-pipe circuit).
It is recommended to lay pipelines with a minimum number of turns. This will reduce the likelihood of air jams and increase the stability of the network against hydraulic loads.
Heating schemes
With a one-pipe system, heating devices are connected alternately. The best option is a circuit with bypasses on each battery. They are jumpers between the supply and discharge pipes.
Shut-off valves must be installed in such areas. This option allows you to repair radiators without disconnecting the entire network.
With a 2-pipe system, the batteries are connected in parallel or in series. The supply is connected to the upper pipe, and the return is connected to the lower radiator manifold.
There are several popular schemes for connecting batteries to a thermal PP circuit:
- A diagonal option, which involves supplying heated water to the top of the heating device, and discharging it from the lower pipe on the other side. This allows the coolant to pass through all sections and heat the battery evenly.
- Side method, in which the supply and return connections occur on one side of the radiator. The pipes at the opposite end are not used to connect the radiator to the heating circuit.
- Bottom connection, which involves connecting the supply and return pipelines to the lower nozzles of the battery, but from different ends. This option is often used in cottages with a single-pipe horizontal system installed around the perimeter of the building.
When connecting radiators, the linear expansion of polypropylene during heating is taken into account. Therefore, when installing a network, ring or U-shaped compensators are installed to reduce this effect.
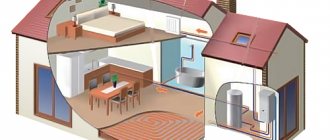
Heating in the house
At the first stage, you should decide on the types of radiators and options for their connection, since buildings should be prepared in advance for the selected type of heating. A modern space heating system includes several components.
These include:
Do-it-yourself polypropylene heating wiring without a soldering iron
You can find different versions of them in large quantities in our markets.
General instructions for installing batteries look like this:
- First select a place to place them;
- bring pipes to them;
- connect them together;
- perform a test run, and if everything is in order, turn on the heating at full power.
How to install heating radiators with polypropylene pipes with a jumper for quick shutdown
Tying polypropylene pipes instructions
Radiator piping can be done using a variety of pipes, but experts recommend using polypropylene pipes. Ball valves for piping are also purchased in polypropylene; they can be straight or angular; this option is the simplest and most inexpensive. Brass fittings are more expensive, and their installation is more difficult.
Polypropylene strapping is done as follows:
- the coupling with a union nut is inserted into the multiflex, which easily connects to any outlet;
- The pipes themselves are attached to the walls at a convenient height; they should not fit tightly to the surface; it is better to leave a gap of 2-3 cm. The pipes are secured using special brackets, which are fixed to the wall with nails or self-tapping screws.
Polypropylene piping to radiators can also be carried out when laying pipes in the wall, in which case they come to the surface only at the connection points.
Radiator piping can be done using a variety of pipes, but experts recommend using polypropylene pipes.
Battery fasteners can be very different, most often it is a pin connection that is fixed to the wall surface. Corner brackets can also be used, which also allow radiators to be suspended at the required height. For panel batteries, fasteners are supplied included; for sectional batteries, they must be purchased separately. Typically, two brackets or pins are sufficient for one section.
The taps are connected as follows:
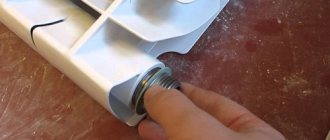
- the tap is disassembled, the fitting and union nut are screwed into the radiator;
- Use a special wrench to tighten the nut tightly.
As you can see, this process is extremely simple. To perform such work, you only need to purchase a special plumbing wrench for American women, without which it is unlikely that you will be able to simply install a faucet.
To install batteries and tie them, the following materials and tools are required:
- a set of special keys;
- seals for threaded connections;
- tow and thread paste;
- threads for carving.
Features of connecting radiators
Heating installation has some features:
- It is necessary to maintain a distance of 100 mm from the radiator to the window sill. If the gap between the batteries and the bottom of the window sill is different, then the heat flow is disrupted and the effect of the heating system will be low.
- The distance from the floor surface to the battery should be 120-150 mm, otherwise a sharp temperature change will occur.
- In order for the heat transfer of the equipment to be correct, the distance from the wall must be at least 20 mm.
At the same time, we take into account that the installation and efficiency of heating radiators is greatly influenced by the installation method: under an open window sill the efficiency of the heating system is maximum - 96-97%, in an open niche - up to 93%, in a partially closed form - 88-93 %, completely closed - 75-80%.
The heating radiator can be installed using a variety of methods; its piping is done with metal, polyethylene, polypropylene pipes
During installation, it is important to correctly position not only the pipes, but also the batteries themselves, and make the connection in accordance with all recommendations and standards. In this case, the heating system will work very efficiently and will not require repair work.
Share a useful article:
Stages of connecting heating radiators
Installing batteries in a house and then connecting them requires, depending on the project, a number of auxiliary fittings and components. In this case, the shut-off valves, if they are installed not on a thread, but by soldering, must also be made of polypropylene. For ease of use, ball valves today are available in any modification, both straight and angular.
For reference:
You can use brass fittings, but they are more expensive, and over time, the joints between brass and propylene may lose the strength of the connection.
To make a quality connection, you will need the following tools and consumables: seals, a set of keys, thread paste, mounting tape, threads for making threads.
Standard set of tools for connecting heating radiators
Tying is performed in the following sequence:
connection fittings of the “multiflex” type are screwed into the radiators - couplings equipped with union nuts;
polypropylene pipes using fastening brackets are mounted on the wall according to pre-markings with a permissible gap between the pipeline and the wall of 20-30 mm;
with hidden installation (with laying in a groove), the pipe is brought to the surface only at the points of connection to the radiators;
radiators are attached to the wall using standard brackets or universal pins;
using the so-called soldering iron (optimal power 800 W, operating temperature 2700C), a connection is made between the wall-mounted pipeline and fixed radiators, not forgetting about installing, if provided for in the project, rod thermostatic regulators.
For reference:
the heating circuit pipes must have a slope corresponding to the design, but in the absence of pre-stressed sections, which over time will turn into a weak link in the heating circuit and can be destroyed by coolant pressure.
To make the installation of radiators more clear, we suggest you watch this video.
Types of heating systems
The amount of heat that the heating radiator will emit depends not least on the type of heating system and the selected type of connection. To choose the best option, you must first understand what kind of heating systems there are and how they differ.
Monotube
A single-pipe heating system is the most economical option in terms of installation costs. Therefore, this type of wiring is preferred in multi-storey buildings, although in private buildings such a system is far from uncommon. With this scheme, the radiators are connected to the main line in series and the coolant first passes through one heating outlet, then enters the input of the second, and so on. The output of the last radiator is connected to the input of the heating boiler or to the riser in high-rise buildings.
Example of a one-pipe system
The disadvantage of this wiring method is the impossibility of adjusting the heat transfer of radiators. By installing a regulator on any of the radiators, you will regulate the rest of the system. The second significant drawback is the different coolant temperatures on different radiators. Those that are closer to the boiler heat up very well, those that are further away become increasingly colder. This is a consequence of the serial connection of heating radiators.
Two-pipe wiring
A two-pipe heating system is distinguished by the fact that it has two pipelines - supply and return. Each radiator is connected to both, that is, it turns out that all radiators are connected to the system in parallel. This is good because the coolant of the same temperature enters the input of each of them. The second positive point is that you can install a thermostat on each of the radiators and use it to change the amount of heat it emits.
The disadvantage of such a system is that the number of pipes when laying out the system is almost twice as large. But the system can be easily balanced.
What kind of piping can be made from polypropylene pipes
The piping for a home heating system can be very different. The thing is that the consumer is always trying to reduce the amount of consumables, while simultaneously trying to install radiators in all heated rooms.
It should be said right away that these are relics of the past. Unlike expensive metal pipes, polypropylene consumables are much cheaper and easier to install. therefore, it is not worth saving on the length of the pipeline. Choose the type of harness that will bring maximum benefit in your case. The only reasons that may influence the choice of type of harness are the following factors:
- what heating circuit is used (one-pipe system or two-pipe);
- what type of radiator connection you have chosen (diagonal, side or bottom).
As a rule, when using any heating scheme: single-pipe or two-pipe, you can use any type of heating radiator connection.
According to experts, pipeline laying must minimize the number of bends. A smooth highway remains resistant to hydrodynamic loads. The number of zones in which air can accumulate will be reduced in the pipeline.
There are specific features for piping a single-circuit and double-circuit heating system using polypropylene pipes.
- Typically, such a system uses a series connection of radiators;
- A bypass is always installed in front of the battery, connecting the supply pipe and return pipe. During normal operation of the heating system, the bypass is not activated. When carrying out maintenance work or in the event of an emergency, the water supply to the radiator is stopped. The coolant circulates freely through the bypass.
- Both parallel and serial connections of batteries are used;
- Both radiator hoses are connected to different pipes. The upper one is connected to the supply pipe, the lower pipe is connected to the return pipe. Typically, radiators are connected in parallel in two pipe systems, so installing bypasses is not required.
Tying polypropylene pipes with radiators is done in two ways: soldering and using fittings. Radiators are installed and connected using a soldering iron and American-style plumbing wrenches.
What kind of binding could it be?
The main stage of installing a heating system in a house is tying the heating radiator with polypropylene. During this process, you need to install parts that allow you to regulate heat transfer.
Shut-off valves
There are several types of shut-off valves that are suitable for piping heating radiators:
- Chokes with thermal control capability. To adjust heat transfer, you need to set the parameters. After this, the mechanism will work automatically. Regardless of what temperature changes occur outside, the same temperature regime will be maintained in the room. Throttle is a valve designed for manual adjustment of heat transfer. The temperature begins to change two hours after changing the valve position.
- Valves are a part that is installed in front of the battery. Designed to shut off the coolant supply.
Fitting
To connect the battery to the pipeline, you need to use the following fittings:
- American couplings with which shut-off valves are connected. If there is a union nut, you can quickly dismantle the heat exchanger.
- Triple couplings - suitable for connecting pipes for supplying coolant simultaneously with control valves.
- Tees that have vias.
The choice of connecting part depends on the complexity of the water supply system.
Connection fittings
Tools
To assemble a polypropylene heating system you will need a set of tools:
- special soldering iron for welding plastic;
- a tool for removing the reinforcing layer from tubes - a shaver;
- key with hooks for installing shut-off valves;
- scissors for cutting polypropylene.
Additionally, you will need measuring and marking tools.
Stages of connecting heating radiators
Installation of radiators with polypropylene pipes is carried out in several stages:
- Marking the laying of tubes and battery installation locations.
- Fastening heat exchangers to the wall. For small models, two brackets are enough, for large ones - one per section.
- Installation of shut-off valves.
- Pipe connection.
- Installation of jumpers, compensators.
The last stage is connecting the pipeline to the battery. To make the joints more airtight, you can use sealants that are resistant to prolonged exposure to high temperatures.
Advantages and disadvantages of single-pipe and two-pipe heating systems
The main difference between the two heating schemes is that the two-pipe connection system is more efficient in operation due to the parallel arrangement of two pipes, one of which supplies the heated coolant to the radiator, and the other removes the cooled liquid.
The single-pipe system circuit is a sequential type wiring, due to which the first connected radiator receives the maximum amount of thermal energy, and each subsequent one heats up less and less.
However, efficiency is an important, but not the only criterion that you need to rely on when deciding to choose one scheme or another. Let's consider all the pros and cons of both options.
Single pipe heating system
- ease of design and installation;
- savings in materials due to the installation of only one line;
- natural circulation of coolant, possible due to high pressure.
- complex calculation of thermal and hydraulic parameters of the network;
- the difficulty of eliminating errors made during design;
- all network elements are interdependent; if one section of the network malfunctions, the entire circuit stops working;
- the number of radiators on one riser is limited;
- it is impossible to regulate the flow of coolant into a separate battery;
- high heat loss coefficient.
Two-pipe heating system
- possibility of installing a thermostat on each radiator;
- independence of operation of network elements;
- the ability to insert additional batteries into an already assembled line;
- ease of eliminating errors made at the design stage;
- to increase the volume of coolant in heating devices, there is no need to add additional sections;
- no restrictions on the length of the contour;
- coolant with the required temperature is supplied throughout the entire pipeline ring, regardless of the heating parameters.
- complex connection diagram compared to a single-pipe;
- higher consumption of materials;
- installation requires a lot of time and labor.
Thus, a two-pipe heating system is preferable in all respects. Why do the owners of apartments and houses refuse it in favor of a single-pipe scheme? Most likely, this is due to the high cost of installation and the high consumption of materials required to lay two highways at once. However, one should take into account the fact that a two-pipe system involves the use of pipes of a smaller diameter, which are cheaper, so the total cost of installing a two-pipe option will not be much more than a single-pipe one.
Owners of apartments in new buildings are lucky: in new buildings, unlike residential buildings of Soviet construction, a more efficient two-pipe heating system is increasingly used.
Choosing a location and method of installing a radiator
Options for connecting heating radiators depend on the general heating scheme in the house, the design features of heating devices and the method of laying pipes. The following methods of connecting heating radiators are common:
- Lateral (unilateral). The inlet and outlet pipes are connected on one side, with the supply located at the top. The standard method for multi-storey buildings, when the supply is made from a riser pipe. In terms of efficiency, this method is not inferior to the diagonal one.
- Lower. In this way, bimetallic radiators with a bottom connection or a steel radiator with a bottom connection are connected. The supply and return pipes are supplied from below on the left or right side of the device and are connected through the lower radiator connection unit with union nuts and shut-off valves. The union nut is screwed onto the lower radiator pipe. The advantage of this method is that the main pipes are hidden in the floor, and heating radiators with bottom connections fit harmoniously into the interior and can be installed in narrow niches.
- Diagonal. The coolant enters through the upper inlet, and the return is connected from the opposite side to the lower outlet. The optimal type of connection ensures uniform heating of the entire battery area. In this way, correctly connect a heating battery whose length exceeds 1 meter. Heat loss does not exceed 2%.
- Saddle. The supply and return are connected to the lower holes located on opposite sides. It is used primarily in single-pipe systems when no other method is possible. Heat loss as a result of poor coolant circulation in the upper part of the device reaches 15%.
https://youtube.com/watch?v=olrD9qxCAhM
WATCH THE VIDEO
When choosing a location for installation, several factors are taken into account to ensure the correct operation of heating devices. Installation is carried out in places least protected from the penetration of cold air, under window openings. It is recommended to install a battery under each window. The minimum distance from the wall is 3-5 cm, from the floor and window sill - 10-15 cm. With smaller gaps, convection worsens and the battery power drops.
Typical mistakes when choosing an installation location:
- The place for installing control valves has not been taken into account.
- A small distance to the floor and window sill prevents full air circulation, as a result of which heat transfer is reduced and the room is not heated to the set temperature.
- Instead of several batteries located under each window and creating a thermal curtain, one long radiator is chosen.
- Installation of decorative grilles and panels that prevent the normal spread of heat.
Coolant circulation methods
Coolant circulation through pipelines occurs naturally or forcedly. The natural (gravity) method does not involve the use of additional equipment. The coolant moves due to changes in the characteristics of the liquid as a result of heating. The hot coolant entering the battery, cooling, acquires greater density and mass, after which it sinks down, and a hotter coolant takes its place. Cold water from the return flow flows by gravity into the boiler and displaces the already heated liquid. For normal operation, the pipeline is installed at a slope of at least 0.5 cm per linear meter.
Scheme of coolant circulation in the system using pumping equipment
For forced supply of coolant, the installation of one or more circulation pumps is required. The pump is installed on the return pipe in front of the boiler. The heating operation in this case depends on electrical power, but has significant advantages:
- The use of small diameter pipes is allowed.
- The line can be installed in any position, vertically or horizontally.
- Requires less coolant volume.
Video instruction with advice from a specialist
Hello! I have the following problems with heat: 1) In the corner apartment in the children's room there are two supply and return pipes. The supply pipe is fiery and the return pipe is several times colder. The radiators are connected to the return line, is this correct or not? Can I connect radiators in addition to the supply and run them along a cold street wall? 2) There is no radiator or pipe in the toilet at all, although the wall is also cold (outdoor). 3) In the bedroom there is only a pipe (return) with a radiator battery connected to it, and through the wall in our kitchen there is a supply. Is it possible to somehow combine two rooms and install them in two rooms with a supply pipe?
In our 9-story building, the heating system is built like this: one supply pipe goes from bottom to top. Radiators are connected to it on all floors in parallel with jumpers. The coolant enters the radiator from below, and the upper outlet from the radiator is connected to the same pipe. Only part of the radiator warms up. How to properly connect a radiator so that it warms up completely?
Good afternoon. The nine-story building has a two-pipe heating system in every room. In one room, the heating supply pipe runs upstairs past all the radiators. Accordingly, all the radiators from the ninth floor are connected to the return line, and my battery on the second floor is generally almost cold. Tell me whether this connection is natural, or is it just a mistake made by the mechanics?
Hello! Please tell me how correct your data is in determining an effective method for connecting a radiator? And what sources can you refer to to obtain the above data? Thanks in advance everyone!
Embed the valve into the jumper (which is not entirely legal if there are valves on the radiator) or reconnect the radiator in a diagonal pattern. On propylene it is simple and fast, compact and quite aesthetically pleasing. The top insert (outlet) is transferred instead of the top plug opposite. Do not forget that the thread direction of the plugs is mutually opposite.
Obviously, you have a single-pipe heating system in your house, in which some rooms are connected to the pressure line, and other rooms are on the return line. This is a moronic Soviet system - the return water is already cooled and cannot heat the room. But you may be fined for installing additional batteries, because... such alteration of the project is not permitted
Selection of materials
The popularity that polypropylene pipes have gained. associated with a number of their positive qualities:
- Their price is significantly lower than their metal counterparts.
- High durability due to the fact that the plastic does not rust, and there is practically no sediment deposited on it.
- Does not need painting.
However, it should be taken into account that not all types of polypropylene pipes are suitable for heating systems. The fact is that they must have a reinforcing layer that prevents significant thermal expansion of the pipeline.
Reinforced polypropylene pipe
Moreover, it is desirable that the reinforcement layer be aluminum, since fiberglass reinforcement leads to saturation of the coolant with oxygen. This in turn causes rusting of the metal surfaces of boilers and other heating supply elements. Pipes that have aluminum reinforcement and are suitable for heat supply systems are marked PN25.
Note! When choosing pipes, you should pay attention to the uniformity of their wall thickness. To do this you need to look at their cut
As for the diameter, the optimal parameter is 25 mm.
In this case, it is also necessary to purchase fittings, which include:
Single-pipe and two-pipe radiator connection diagram
Heating system options
An autonomous heating system (in a private house, small cottage) allows you to choose from two possible options for installing a heating system.
This:
- Single-circuit (single-pipe) - classic, which has been used for a long time and everywhere.
- Double-circuit (two-pipe) - more efficient in operation, with the ability to regulate heat transfer.
Note! When choosing polypropylene as a material for installation, metal pipes should be completely abandoned. A high-quality heating system requires only polypropylene pipes. Combining is prohibited here.
Single-circuit heating system
The radiator is connected to polypropylene pipes in a single-circuit system in series.
We recommend that you read: Polypropylene pipe reinforced with fiberglass - a guarantee of reliability
Schematically, a device of this type is simple:
- A pipe coming from the boiler (supply) is connected to the upper inlet of the radiator.
- The cooled coolant outlet (return) is connected to the lower one.
Supply and return are carried out through one pipe. In a one-story building, this is a horizontal pipe around the perimeter of the system. In apartment buildings this is a vertical riser pipe.
The subtlety of installing a single-circuit system is that you need to install a bypass here.
A bypass is a pipe (jumper) built between the supply and return with a valve or check valve. A bypass is necessary to autonomously disconnect one battery from the circuit while the system is running (for example, for repairs).
Dual circuit system
With a dual-circuit system, the batteries are installed in parallel. The coolant is injected from the outlet from the main supply pipe. The return occurs according to the same scheme, through a second (separate) pipe. A separate input for each radiator eliminates the need for additional parts in the form of a bypass. A shut-off valve (valve) is installed on the inlet, which shuts off the supply in case of need.
A double-circuit heating system is approximately 10% more efficient in heat transfer and is considered more modern.
To attach the battery to the wall, you will need brackets or special hooks. For light radiators, 2 supports are sufficient. The number of brackets for heavy batteries is calculated from the need for 1 mount for three sections.
Note! Radiators are always installed under windows. This improves the circulation of warm air from the radiators and prevents the room from cooling. Cold air from the windows descends onto the radiator and, heating up, disperses throughout the room.
Where to put radiators
Traditionally, heating radiators are placed under windows, and this is no accident. The rising flow of warm air cuts off the cold air that comes from the windows. In addition, warm air heats the glass, preventing condensation from forming on it. Only for this it is necessary that the radiator occupies at least 70% of the width of the window opening. This is the only way the window will not fog up. Therefore, when choosing the power of radiators, select it so that the width of the entire heating battery is not less than the specified value.
How to place a radiator under a window
In addition, it is necessary to correctly select the height of the radiator and the location for its placement under the window. It must be placed so that the distance to the floor is around 8-12 cm. If you lower it lower, it will be inconvenient to clean, if you raise it higher, your feet will be cold. The distance to the window sill is also regulated - it should be 10-12 cm. In this case, warm air will freely go around the obstacle - the window sill - and rise along the window glass.
And the last distance that must be maintained when connecting heating radiators is the distance to the wall. It should be 3-5 cm. In this case, rising currents of warm air will rise along the back wall of the radiator, and the rate of heating the room will improve.
We connect the heating radiator to polypropylene pipes
In the private sector, in old housing stock and in new buildings, work is currently underway to re-equip heating systems. Old heating equipment, steel and cast iron heating radiators are replaced with new devices. Modern industry produces bimetallic, steel heating devices with improved parameters and characteristics. Accordingly, in parallel, the old steel pipelines through which the coolant circulates are being replaced with new consumables. Today, polypropylene pipes are taking the lead in creating a heating circuit.
Accordingly, in view of such a large-scale modernization of heating systems, reasonable questions arise. How is a polypropylene water circuit installed at home? What does it look like to connect a heating system radiator to polypropylene reinforced pipes. Let's look in detail and consider what it means to connect polypropylene consumables to heating sources in detail.
What shut-off valves can be used
The owner always has a choice between:
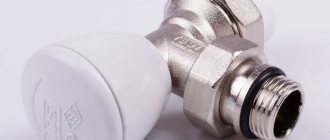
- Ball valves.
- Shut-off valves.
- Valves.
The first ones only allow you to block the pipe. It is impossible to regulate the coolant supply and heat transfer of the radiator with them. Its installation means that the harness can either be closed or completely open.
Shut-off valves are most often installed on the outlet fitting. They allow you to change the cross-sectional area of the outlet pipe. This is not very convenient to do, since you need to remove the cover and tighten the spindle with the spool with your own hands. The reliability of this valve is better than the one described above. It is usually mounted together with the valve.
The valve allows you to limit/increase the coolant supply. Many of his models are handmade. However, there are those that can be either manual or automatic. To automate, the valve handle is unscrewed and the thermostatic head is fixed in its place. It analyzes the temperature in the room and changes the operating mode of the radiator. Often such a head may have an external thermostat.
In residential buildings of the old stock, both in the private sector and in apartment buildings, work is currently underway to re-equip heating systems. Physically and morally worn-out heating equipment (steel and cast iron radiators, pipelines, shut-off valves) are replaced with new heating systems. Outdated devices have been replaced by more advanced heating units, for example, bimetallic heating radiators with improved characteristics. Steel pipes, a familiar and durable material, are still in demand when installing heating circuits, but worn-out steel pipelines are increasingly being replaced with new materials, in particular, polypropylene, a polymer widely used in the production of pipe products.
Polypropylene pipes with connecting fittings of various configurations
Despite the fact that polymer pipes have been used in construction for decades, many homeowners who still use steel pipelines and are planning to modernize their heating circuits have questions about the technology for the upcoming installation - how to install polypropylene lines in their homes conditions, what does it look like to connect a heating system radiator to polypropylene reinforced pipes? To partially answer them, let’s take a closer look at how polypropylene pipe materials are connected to heating radiators.
