For a beginner, building a stove with your own hands can be an overwhelming task in our age of developed industry and high technology. The cost of construction work, especially if it requires some special knowledge and skills, is high.
It is quite understandable that many developers try to make do on their own. Where your own qualifications are lacking, advice from friends or specialized reference publications help.
The disadvantage of this approach is that not all in-demand professions are very common. Often the problem arises of finding a specialist in a particular field. Alas, some types of work are already so scarce that they have passed into the category of art or are striving to do so.
Therefore, they become overgrown with some myths and inaccuracies, which are extremely difficult for a non-professional to weed out. Furnace business has ceased to play an important role, so many of its nuances, which were quite recently understood by every resident, escape the field of vision of a modern person - there is a lack of daily practice.
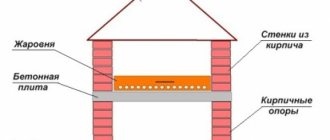
The big picture
Furnace drawings can be found in abundance on the Internet or on the pages of monographs devoted to this matter. That's not the difficulty. It can be much more difficult to choose the optimal project that best suits the specific conditions, requirements and expectations of the developer.
And observing the subtleties of technology can be an overwhelming task for a beginner - as in many traditional crafts, experience plays a big role in the stove business. Too much in the technological chain is tied to some kind of tactile sensations and intuition. These nuances are almost impossible to teach remotely - too much is transmitted only through personal contact between master and student.
Fortunately, now the load on stoves is no longer as heavy as before, when they were the main way to heat a home during the cold season. Now these structures play the role of fun or an additional, backup heater. Consequently, the former thoroughness of their installation is no longer so in demand.
A stove that is not used so often and not with such intensity does not require careful adherence to technological subtleties when laying. Although, of course, you should still strive for this.
In cities, stoves are no longer installed - engineers have long come up with more advanced and cheaper ways to warm a home. But outside the city limits, in a dacha, a stove that is simple in design and unpretentious in maintenance may still be in demand.
Design selection
Before you finally settle on any design, you need to clearly localize the range of tasks facing the future furnace system. What is expected from it, how often they plan to use it and for what purpose. And then make a choice.
Traditionally, all stoves are divided into two main classes based on functionality. The design can be:
- heating;
- heating and cooking.
The difference is clear from the name of each class. Heating stoves are highly specialized and can only heat. True, everything in their design is subordinated to the fact that they perform their task as efficiently as possible.
The heating and cooking design is already considered universal. You can still cook food on it. It doesn’t matter what exactly is added to the ability to heat the home: oven, bread chamber, stove, smokehouse. The important thing is that the stove has become dual-purpose.
In the dacha sector, heating and cooking stoves are the most popular because they are simple and practical - as a rule, this is the only stove in the house, and therefore versatility does not interfere with it.
Also, the increased popularity of suburban areas, if not created, then revived a class of stoves, rare to this day, intended only for cooking. They are now united under the very vague and widely interpreted name “barbecue”.
Although it would be more correct to classify them as a group of stove complexes, since they can include not only a primitive barbecue, but also an additional set of services, limited only by the desires and capabilities of the owner. And they cannot be classified as any single furnace organism - this is really a complex created from a unique set of furnace modules.
Accordingly, a country stove can equally well be placed on the street (a garden grill stove) or designed exclusively for the home, so there is simply no universal step-by-step instruction - the indoor and outdoor varieties of stoves are only partly related, but structurally they are completely different types. Therefore, their masonry technology is slightly different - one of them requires increased moisture resistance, for which cement is added to the masonry mortar, which slightly reduces the fire resistance of the massif.
About home stoves
They don’t just put stoves in the house. This is a tool. And the main requirement for it is this: to compensate for heat loss at home. Accordingly, the size of the stove must correspond to the living space it heats.
In theory, hoping that the dacha will be used only in the warm season and very slightly in the off-season (late spring-early autumn), you can slightly reduce the required indicator and build a smaller stove than would be required according to theoretical calculations. But practice shows that in 99% of such cases there is a temptation to visit a house in the middle of nowhere at least once a year. As a result of trying to heat too large an area, the small stove cracks - its power is initially insufficient.
And almost always a small furnace structure is operated with constant overload - often such forcing occurs involuntarily, unconsciously. They are simply trying to create comfortable living conditions, at least for a while. So the result is quite natural: the masonry cracks and collapses quite quickly.
The point here is not the depravity of the chosen design or violations in construction technology. The reason is that the dimensions of the furnace do not correspond to the tasks assigned to it.
In villages today you can find many different stoves, including outdated, archaic designs. And it is important to understand that the age of a circuit does not always indicate its quality. Unfortunately, many ancient stove fantasies are not suitable for repetition in modern realities in a number of ways.
An article about how to properly fit a stove into the style of your home.
For example, the once popular Dutch woman was once (in the 17th century) a truly revolutionary idea. But a lot of time has passed since then, and this scheme today is very inconvenient from the point of view of safety and ease of use. The large length and total number of successive smoke circulations lead to intense soot precipitation and the appearance of cracks in the furnace mass - the difference (gradient) of heating of different parts of the structure body is too large.
The traditional Russian stove also does not always meet the conditions of a country house - first of all, because it takes up too much space. In addition, a body of this design, even if we are talking about an improved one, is too massive. As a result, there is a large thermal inertia.
That is, the stove will have to be heated for a long time to warm up. Although it will take a long time to cool down. But this may turn out to be pleasant and necessary if you live permanently, but with irregular visits it will only get in the way and irritate.
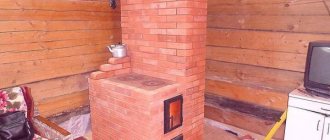
Probably, the optimal choice for a summer resident will be the so-called Swede - a simple universal brick stove with a hob for one or two burners, limited by a cooking chamber and an oven powered by a firebox connected to the stove. Structurally, the Swede is a slightly modified standard kitchen hearth with a heating panel.
What distinguishes the Swedish from the basic idea is the cooking chamber - a niche above the stove. Accordingly, a certain volume is formed above the cooking chamber (the so-called niche in which the stove is enclosed), which can also be used somehow. Sometimes stove makers place a dryer there, but it is more practical to include this array in an active unit involved in heat transfer.
It is precisely this scheme that will be discussed below. Moreover, the order is not so complicated and is quite understandable for a beginner.
Which brick is better to build a stove from?
It is necessary to distinguish between ordinary heat-resistant bricks and stove bricks. Firstly, the latter can withstand temperatures above 1000 degrees. Secondly, if it is cooled sharply, cracks do not form in the structure.
Four types of stove bricks are used to build stoves:
- Quartz. This brick is the result of firing sand and clay.
- Carbon - consists of graphite.
- Fireclay. Best suited for a fireplace. But its unique thermal insulation qualities cannot be discounted. It can withstand temperatures up to 1600 degrees. At the same time, it does not crack and does not lose its qualities. The only negative is the yellowish tint.
- Basic - used when you need to fold a metallurgical furnace.
In reality, there are no strict rules regarding the choice of materials for masonry during construction. Nevertheless, there are some recommendations that are best followed, the main one concerns fireclay bricks. It must be placed in the hottest places, namely in the area of the firebox and chimney. For all other zones, the grade must be no lower than M-200.
Attention! The best brick for the stove is considered to be M-500.
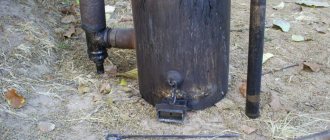
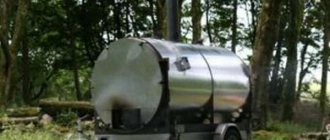
Outdoor stove - wild home
A garden stove only conditionally has outdoor status. In fact, the open installation of a brick stove leads to its rapid failure - any moisture in the masonry (even capillary) frozen in winter will lead to ruptures. Therefore, barbecues are placed in gazebos or under a separate canopy to protect them from precipitation.
At the heart of any garden stove complex is always a kitchen stove in one variation or another. This may be a blind repetition (with the exception of the masonry mortar - cement is added to it) of a typical kitchen fireplace, but more often (for simplicity of execution and saving materials) the need to warm up the room is simply ignored and all elements that carry only a heat-storing load are removed from the structure. The bottom line is only pure functionality: some kind of kitchen element for heat treatment of food and a smoke oven (although this is sometimes sacrificed, although extremely rarely).
The versatility of an individual element of the furnace complex is, as a rule, avoided. Only if this promises benefits to the layout plan - there are more services in a smaller area. If you need to add functionality, then as a standard a new block with such a service is added. The only exception, probably, can be considered the Russian stove included in such a complex. But it itself is already universal from the very beginning.
One more moment. No matter how much it is planned in advance, in life the decision to cook this or that dish on a stove complex is almost always spontaneous. Therefore, it is worth considering that starting the furnace takes a minimum of time and does not require any preliminary complex manipulations. This is a stone in the garden for those composers who try to combine all the achievements of culinary thought in a Russian oven.
Very convenient in theory and extremely clumsy in life is a variation invented by someone, according to the recommendations of which a cast-iron stove with burners is built into a low hearth, and a welded barbecue box is perched on top of it all. And, before using the stove or furnace of the furnace, you have to drag back and forth a completely heavy iron brazier and every time look for a place for it. It is much easier when there is a separate, specialized module for such tasks.
Video description
How to lay a small stove, watch the video:
Direct flow type
There is nothing particularly difficult about how to make a direct-flow furnace. But it is very important to strictly adhere to all requirements and be sure to choose a quality stone.
Used for heating small rooms. A strong foundation is needed. Design dimensions 51x64 cm (WxD).
The arrangement of the furnace is as follows:
- For the foundation, crushed stone is poured into a layer of up to 20 cm and filled with mortar. Each stage must be carefully aligned. You can lay the stone only after a few days.
- The depth of the structure is 2.5 stones, the width is 2. There is no blower chamber; instead, holes are drilled in the door.
- Only the 6th row will cover the door. The general procedure is very simple, you just need to observe the dressing.
- From the 8th row, the structure is narrowed using halves of ¾ pieces of stone. Firebox outlet 12.5x25 cm.
- The 9th row is laid with a whole brick, similar to the 7th.
Laying a direct-flow furnace Source blog-potolok.ru
- The next row is placed edge flush with the inner edge.
- Then again, flat (4 pcs. ¾ and 2 pcs. whole), narrowing the smoke channel.
- Next, the stones are edge-on, there is a brick in the middle of the channel, the structure rises 5 tiers.
All other channels are laid flat. On the last 2, the channel is narrowed in halves to dimensions of 12x12 cm. The valve and pipe are installed last.
See also: Catalog of companies that specialize in the installation of stoves and fireplaces, grill houses and gazebos.
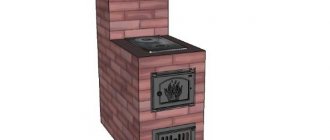
For heating
Let's look at how to build a brick stove for heating. For example, let's take a stove 51cm x 90cm x 2m 38cm (WxDxH).
The following materials will be required:
- sand/clay/brick (18/9 buckets/390 pieces, red, solid);
- doors (cleaning and blowing doors);
- roll of waterproofing roofing felt (60cm x 1m);
- one valve and grid 40x25 cm;
- one pre-furnace steel sheet 70x50 cm.
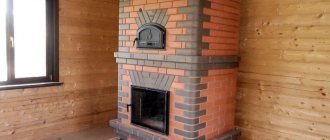
Brick stove-fireplace for heating Source svoimirukami.lesstroy.net
The masonry process is as follows:
- The base protruding in the first row is laid. Be sure to check the horizontal level with a level. The hardest thing to work with is the corners. It is recommended to install template posts at the corners from bottom to top.
- Two stones with beveled edges are placed at the end.
- The air vent door is installed and secured.
- On the next 2 tiers an ash chamber is made.
- The fire chamber is laid out and a grate is installed.
- The firebox door is placed from the 7th to 8th tiers, beveled bricks are placed at the back (they improve the draft inside the stove).
- At 9 the firebox door is closed.
- The smoke exhaust and fuel chamber are placed from rows 10 to 16.
- The cleaning door is installed on the 17th row.
- Smoke circulation channels are made on 18-30 rows. The walls must be smooth; the inside of the walls must be rubbed with a wet rag.
- On the next two tiers, the roof of the furnace is made.
- The last 2 tiers are laid out for the chimney.
Laying a heating stove Source eurolain.ru
How to make a brick stove for your home with your own hands, if the room is small, is described above. The main thing is to adhere to all requirements and rules. Upon completion of the masonry, the structure must be left to dry. After seven days, a test fire is required.
Economical option
If your budget is limited and the room itself is small, then such a design will be a real salvation. There are many fairly simple designs for economical stoves. You can try making them yourself or order installation. But in any case, you need to understand how to lay a brick stove with your own hands. Even if you don’t do the masonry yourself, knowing how to build a stove will allow you to control all the work.
Heating stove Source i.ytimg.com
Materials and other general points
First, let's talk about stoves as a typical phenomenon, without particulars. What must be observed, regardless of the layout, size and location:
- foundation. It’s better when the stove in the house has its own, independent of the foundation of the house. But laid to the same depth as the foundation of the walls. Although the option with a common grillage and covering slab is also quite acceptable. For a barbecue, it is better if the gazebo and oven are based on a common stove. Two layers of waterproofing are required. The first is at soil level, the second is at the finished floor level or slightly below;
- solution of red clay and quarry sand. Normal fat content - the ratio is selected experimentally. For laying fireclay bricks, mortar is used - this is a ready-made mixture of fireclay (ground shards of fired ceramics) and refractory clay. It is worth adding cement to the barbecue masonry mortar - about one trowel per bucket of masonry mortar;
- brick. They use solid, red, ceramic, wet plastic molding. The brand is no lower than M150. A higher frost resistance class is better - no less than 50. In critical places (firebox and first smoke circuit), it is better to replace ceramic bricks with fireclay bricks. Any stove masonry is carried out exclusively on soaked red brick. Fireclay is only rinsed from dust;
- The permissible thickness of the masonry joint is 1–5 mm for red ceramic and 1–3 mm for fireclay refractory. Fireclay and ceramic bricks should not be tied together in an array;
- Imported cast iron with fine grain can be put into place immediately. Domestic casting with large grains (means that the casting went into an earthen mold, and not a metal mold) is better (not necessarily) to be annealed before installation to eliminate internal stresses - heat to about 250 degrees and leave to cool without forcing the process;
- It is not permissible to operate the stove immediately after laying - the structure must be completely dried. It's better if this happens naturally. Another thing is that you don’t always have such a luxury - not everyone has the opportunity to wait a month and a half or two until the array is completely free of moisture. So, more often they use artificial drying, for which they heat the stove daily with small portions of absolutely dry fuel - literally a bunch of wood chips. The firewood is placed in a hut in the firebox - this will give a high, but not hot flame.
Simple and economical furnace laying
There are several options for how to build a brick oven with your own hands for a house with a stove, step by step and correctly. First of all, you must first determine what the main purpose of the structure is - heating or for cooking. You may choose an option with the additional elements listed above or a direct-flow design. The main thing in resolving this issue is the purpose of the future design.
Design of a small stove Source avatars.mds.yandex.net
Designs with weak gas revolutions do not provide high heat transfer. They are mainly used for small areas - up to 16 m² and garages.
With hob
How to make a stove of this type is described below. The simplest model is small in size - 78x53 cm (WxD) and allows you to place one burner. You can use red brick, but it must be selected very carefully - only smooth and without cracks. This will save on the purchase of fireproof stones.
For the solution, take clay/water/sand (4/1/8 hours). The amount of mortar is determined in accordance with the amount of brick. If the seam is 3-5 mm, then it will be enough for 50 pieces. stones.
The process of laying a slightly smaller stove is as follows:
- A base is prepared that is approximately 10 cm wider than the future structure; the first brick on the base is placed at floor level. With an underground of 0.5 m or more, a hole is not needed.
- Formwork is made 74x61 cm, roofing material is placed on top (in two layers) and concrete is poured. Construction of the structure begins in 7 days and not earlier. It is necessary that the foundation dries well, otherwise the structure will simply sag, may tilt and crack.
Foundation for a stove Source bricks.su
- The depth of the structure is 3 stones, the width is half as much - 1.5 (76x39 cm). The stones are adjusted first without mortar. The layer of mortar for the bottom row is no more than 5 mm.
- On the next tier a hole is left for the blower door. Fastening occurs with wire, its ends are laid in the seams. They leave a gap between the metal and the stone.
- 4 tiers of stones are laid on edge, a firebox is created, and a smoke circulation is created at the back. One stone is placed at the back without using mortar; it must be removed to clean the chamber. Two stands are made in the chimney; they hold the partitions.
- The 5th row is laid flat, leaving a hole for the door, there will be channels at the back.
- From the 8th the door is closed. A brick with a beveled end is placed in the back of the firebox.
- After the 9th tier, a cord (asbestos) is laid, it is used as a sealing material for joints.
- On the 10th, the firebox is covered with a stove.
- Row 11, a valve is placed in the pipe, the pipe is sealed with a cord.
On the next 2 tiers the walls of the pipe are made. How to build a brick oven with your own hands for a house with a small stove - stick to this design and everything will work out. But we must remember that there are a number of nuances and emerging difficulties that need to be resolved immediately. If you make mistakes, you will not get the desired result. Therefore, it is better to contact a specialist.
Swedish oven
There are a lot of Swedish women. Every stove maker has at least one variation of such a stove in his arsenal. The differences between most of them lie in small, insignificant details, but each author tends to attribute a lot of originality and innovation to his own vision of the issue.
In fact, it's not like that. Everything is almost the same. Therefore, the debate that it would be correct to arrange the chimneys this way, and that any interference in their relative position is akin to desecration of sacred objects, is fundamentally wrong. The Swedish stove is a stove that allows for a free approach to layout without loss of efficiency.
In the first rows, the Swedes display an ash pan, a channel under the oven and a passage connecting the lower and lift channels. They install cleaning doors and one blower.
It is better to bevel the corners of the brick protruding into the internal channels so that the resistance to gases is minimal and less turbulence is created.
The oven is placed one row below the firebox. The oven cabinet is made independently - the industry does not produce the required size.
The firebox must be lined with edge-on masonry or longitudinal brick halves. This will help even out the heating of the array.
The partition between the firebox and the oven is a row below the stove - through this layer, gases from the firebox escape under the stove above the oven, and then go around it, and already under the oven they are directed into the vertical smoke circulation system.
When laying the side walls of the chamber above the stove, make sure that they do not pinch the cooking floor plate - otherwise, the expanding metal will either burst or tear the brickwork.
The niche above the stove is covered with steel corners. It is worth saying that sometimes doors are installed in it. It’s very convenient, because it not only allows you to isolate the chamber from the kitchen space, but also creates some semblance of an oven, only a large one. Although such a step is possible, it is not required.
Before exiting into the pipe, the gases in the chamber above the stove are forced to pass through dividers, which also act as racks supporting the ceiling. At the same time, they increase the heat storage capacity of the furnace.
The stove is covered with three rows of masonry - this is the standard safe overlap thickness for household stoves.
The stove can be slightly adjusted to the parameters of the room in which it is installed. Simply add or remove rows of the same type above or below the slab.
To support the thesis about the existence of a large number of Swedish women, we show a video where the basic scheme is approximately the same, but implemented a little differently.
Heating and cooking stove "Shvedka"
Simple garden BBQ oven
And it makes sense to consider this design in detail, step by step, with an explanation of the main points of the scheme.
Materials:
- corner 32 : 1.7 m for earthenware - 1 pc., 1 m for barbecue ceiling - 4 pcs., 1.25 m for countertop ceiling - 4 pcs.;
- stove brick - 1300 pcs.;
- half door 130x140 mm - 1 pc.;
- combustion door 240x280 mm - 1 pc.;
- single-burner cast iron stove for cauldron 705x530 mm or 600x600 mm - 1 pc.
Additionally:
- asbestos or basalt cord (you can use kaolin wool) for attaching the fire door;
- knitting wire;
- clay;
- cement;
- sand;
- sheet asbestos (one sheet) or kaolin wool - for installing a slab under a cauldron;
- metal grill.
Garden barbecues have recently become popular among owners of summer cottages. Most people are content with store-bought metal variations of these outdoor stoves. It’s simpler this way, it doesn’t require the construction of any special canopy to protect the structure from bad weather, and less space needs to be allocated on the site.
Meanwhile, many people prefer something more stationary and monumental. We will talk about a brick barbecue oven.
The very concept of “barbecue” is polysemantic. This is a dish cooked on coals (the shish kebab we are used to is also, in fact, a variation of this dish), and the culinary process itself, and an oven specially adapted to a specific method of culinary processing.
Most often, this is the name for an outdoor stove complex in the garden, equipped with a barbecue, which does not prevent it from being installed in large kitchens in cottages (or on the veranda). Moreover, by today’s standards, a stove is not always required to have a heating function - an outdoor barbecue, as a tool, is very utilitarian and is more “tailored” specifically for cooking.
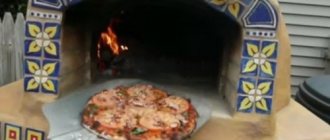
This does not prevent you from equipping the design with all sorts of additional options. The barbecue can be equipped with Russian ovens or “Pompeian” pizza ovens, stoves with ovens or smokehouses - everything, right down to washbasins and cupboards. It depends on wealth, rampant imagination and the availability of free space.
The most common set can be considered a grill, a cutting table and a stove for a cauldron. We will consider this configuration in the version that is easiest for independent execution. Let's just add a woodshed - a niche for firewood under the grill.
Furnace location and foundation
The entire system weighs over five tons, so it is important to understand that an appropriate foundation will be required. Of course, this massiveness is to some extent compensated by the large supporting surface. And still the foundation must be strong.
It is important to protect the masonry from rain and other troubles, especially from getting wet in the fall and freezing in the winter. So, whatever one may say, in our climate it is better to hide the barbecue in a gazebo. The degree of closure of the latter remains at the discretion of the owner. The main thing is that there is a roof.
This restriction on location also has its advantages - a slab shared with the gazebo can be used as a foundation. The main thing is to provide reinforced reinforcement when pouring it at the site of the future stove, compared to the rest of the gazebo floor.
If the gazebo does not have a concrete floor as such, then you can cast a separate platform on a sand cushion or use the option with screw piles. It is important to remember the wish: either the stove and the gazebo do not play, or they do it together, synchronously. In a word, this is what happens on a slab foundation.
Composition and preparation of the solution
It is customary to lay stoves on a clay mortar with a thickening agent made of sand (for red clay) or fireclay (ground shards - for refractory clay). But with a barbecue there may be difficulties due to the street location.
Cement-based mortar is more suitable for the street. The downside is that it does not withstand fire very well. The solution is a compromise: add cement to the clay-sand mixture in the oven, about a trowel per bucket of mortar. But above the roof the pipe is still laid on cement-sand.
Sand is taken from quarries. River or sea water is not suitable - its grains have a rounded shape, which has a bad effect on the strength of the solution. Sand must be sown through a mesh with a mesh size of up to 3 mm.
The clay is taken ordinary red. It is pre-soaked until small lumps disperse. Then filter through a sieve with a mesh of approximately 2 mm to remove any stones and debris.
Next, the fat content of the clay and the need for sand are determined - the proportions necessary to obtain a normal solution. Typically these ratios range from 1:1 to 1:6 (clay:sand). It all depends on the fat content of the clay, which, in turn, depends on the geology of the deposit. Simply put, clay has its own fat content in each place.
A solution that is too greasy will crack due to severe shrinkage. Skinny (loam) does not hold firmly and crumbles out of the seams.
There are many methods for determining fat content, but we can recommend this tactile method: we make several samples in different ratios and rub everything between the fingers (thumb and index). The winner is the lot where solid grains will be felt, but the feeling of fat and oiliness will not disappear.
If you come across greasy areas without grains of abrasive, then it’s worth adding a thinning agent. If the grains do not slide well under your fingers, then add clay dough.
Final quality check: throw a fist-sized lump of solution onto a sheet of iron (the bayonet of a shovel, the side of a bucket, or something similar). The result should be a cake 3–5 mm thick, as is the optimal masonry joint for the oven. Dry the cake in the shade for twenty minutes to an hour.
Then we try to pick it out from a sheet of iron. It peels off like a pancake from a frying pan - you need sand. It crumbles like dry soil from a shoe - add clay. It comes off with difficulty and has no cracks - you got the proportion right.
The solution can be prepared in advance in a large container and covered during breaks to reduce water evaporation. But cement is added directly to the bucket immediately before laying: a trowel on a bucket, that is, a handful per ten liters of solution.
For fire-resistant bricks (if there is one in the structure), you should use fire-resistant masonry mortar. It’s easier with it - it’s sold dry in hardware stores. The same amount of cement is added to it.
Features of purchasing bricks
The easiest way is to buy fireclay bricks. It's pretty much the same everywhere. It's more difficult with red ceramic.
You should only take a solid one (without any holes or voids) and only plastic molding. Please check with the seller for this specification. And avoid the dry-pressed variety.
Next, pay attention to geometry and integrity. No cracks, no deformation. When tapped, such a brick produces an even, ringing sound, without any admixture of hoarseness or dull tones. Its brand is usually M150 and higher.
And we especially pay attention to such a line in the specification as “frost resistance”. A good brick can withstand at least 50 winter-summer cycles. More is better.
Clinker, for example, holds 100 and above, but it “bites” in price. So, if there is no particularly free budget, then we take at least 50 cycles. But from such bricks you can build the entire array of barbecues.
As a last resort, in critical places we use fireclay bricks instead of red ones. But it’s also worth noting that it’s not cheap. It also doesn’t like humidity—it crumbles over time, like old polystyrene foam.
As already mentioned, before laying the red brick, be sure to soak it - immerse it in water and keep it there until the air bubbles disappear. It's about three or five minutes. Then we take it out and let the excess water drain. It's about a minute. And only then do we build masonry from it. The soaking stage is mandatory, otherwise the masonry will be fragile.
Fireclay requires less preparatory effort. It is simply rinsed from dust.
If two types of bricks are used in the masonry of the massif (fireclay and red), then dressings are not made between them. And the array of chamotte hidden inside the red one is made 3–4 centimeters lower. This is done because when heated, the expansion coefficient of these types of building stone is different.
All doors are attached to strands of twisted knitting wire or using riveted metal plates - clamps. The frame of the combustion door is pre-wrapped with a basalt or asbestos cord soaked in a clay solution. You can use kaolin wool. They do this in order to compensate for the same CTE when heated - the linear expansion of the metal is several times higher than that of any type of brick.
These are the main points. Then only patience, accuracy and hard work.
Making a stove with your own hands
Selecting a location
To build a good heating structure, you need to choose the right place. The following standards must be taken into account:
- There should be more than 37 cm from the smoke duct to the wooden structures.
- The minimum distance of the pipe from the ridge is one and a half meters. The height above the ridge is half a meter.
- If there is 1.5-3 meters from the pipe to the ridge, it can be placed flush with it.
It is best to put the stove in the middle of the house. This will ensure uniform heat distribution and ease of use.
Materials and tools
In addition to bricks, you will also need a number of other materials to build the stove. These include:
- clay,
- sand,
- fittings
These are the basic materials without taking into account the components, but you also need to take care of the vent doors, the vent, the firebox, and so on.
To build a good stove you need to mix the right solution. It is best to use special refractory clay; in extreme cases, red clay can also be used. Sand grains should be no more than 1 mm. The optimal ratio is achieved experimentally. Usually it is 1 to 1 or 1 to 2. Plus 25 percent of water from the total volume of clay.
Metal objects play a fundamental role in the construction of the furnace. To put together a decent structure, you need doors and half-doors, grates, cast iron dampers, latches and views. If necessary, all these elements can be made with your own hands, but you will need to purchase iron sheets.
Of course, you won’t be able to build a stove without good tools; you will need:
- hammer-pick specially for the furnace,
- Master OK,
- ruler-rule,
- wash brush,
- roulette,
- plumb line,
- level.
With this simple toolkit you can build any stove.
The process of building a stove
For the foundation, a pit is dug, backfill and a reinforced frame are made. The resulting structure is filled with concrete. Before you put the stove together, make sure you have diagrams of the bricks in front of your eyes.
It is very important to maintain order when working. Otherwise, you won’t be able to build a high-quality stove. The slightest deviation in the design will lead to one of the channels being blocked. The result is more than disastrous. Instead of coming out through the chimney, the smoke will go indoors.
The first row is laid along the cord. Each subsequent masonry is checked using a level. Angles are controlled by body kits. After the masonry is completed, stove equipment, for example, burners, is installed. The pipe comes out at the very end. To find out in more detail how to fold the oven, watch the video below:
In order to fold the stove in accordance with current standards, the distance from the inner wall of the chimney to the nearest structure must be at least 38 centimeters. When installing a cast iron stove, the gaps on the sides must be at least 5 millimeters.