Miniature stove made from a can
This stove option is perfect for those who like to relax in nature. The finished product has minimal weight and takes up very little space in a hiking backpack. Despite the simplicity of its design, a stove made from a can is very convenient and productive - you can boil a liter of water by spending a few small dry branches.
Miniature stove made from a can
Moreover, such a homemade stove can work not only on branches, but also on leaves, cones and even hay. You definitely won't remain hungry!
The first stage is preparation of components
Prepare three tin cans of different sizes in advance. Canned food containers are perfect. From the largest can you will make the body of the stove, place a medium-sized can in the body, and from a small container you will make an impromptu burner.
Cans
Additionally, prepare scissors, a block, an electric drill and a felt-tip pen.
Wood block
The second stage is making a template
First step. Insert a wooden block vertically into the largest jar and, approximately at the level of the lid, mark a couple of lines on the wood at a distance of about 8 mm.
Insert a wooden block vertically into the largest jar and, approximately at the level of the lid, mark a couple of lines on the wood at a distance of about 8 mm
Second step. Cut a rectangular recess according to the markings, such a size that the upper edge of the container can freely fit into it.
Insert the block into the jar and draw two lines with a marker approximately at the level of the lid
Drill a hole according to the markings
Third step. Place the block so that the can rests steadily on it, and the upper edge of the large can is held in the previously prepared recess in the block.
We put the jar on the block
The third stage - preparing a large jar
First step. Draw a line over the bottom edge of the largest can. This line will serve as a marking to create ventilation holes. The line can be drawn with an ordinary felt-tip pen.
Making the markings
Second step. Drill holes along the marking line. The optimal number of holes can only be selected experimentally. Excessive ventilation will cause fuel to burn too quickly, and if there is insufficient draft, the stove will simply not be able to operate normally.
Making holes
Therefore, make a small number of holes to begin with, and then, if necessary, drill them after the initial tests of the stove.
Stage four - preparing the middle jar
Drill holes under the top edge of the middle can
Drill many holes in the bottom of a medium-sized container. Select the size and number of these holes so that the loaded fuel does not fall out in the future. As a result, the bottom of the jar will look like a sieve.
Drilling the bottom of the middle can
Fifth stage - stove assembly
Place a medium-sized jar into the largest container. The connection should be quite rigid, but not tight - a small gap is required between the walls of the two cans for air circulation.
Insert the middle jar into the large one
Stage six - making the burner
To create the burner, use the smallest tin can.
Cut off half of a small can, make holes closer to the edge, as well as one hole in the bottom
First step. Prepare holes in the side of the jar in the same way as you did with previous containers.
Second step. Cut out the bottom of the can using tin snips.
Third step. Carefully align the edges of the burner and clean them with a file.
Stage seven - checking the stove
Stacking the wood chips
Load the wood chips into the middle jar and set it on fire.
Take the main part of the stove (a middle container inserted into a large one) and load fuel into it (cones, wood chips, leaves, small branches, etc.). If possible, load dry branches directly from trees into the oven, because... Fuel from the ground may be damp.
The smallest part is the burner. We put it on top
Light the load and let it warm up. At first you may not be very good at it, but very soon you will learn how to light a stove with just a couple of matches.
We heat up the food or put on the kettle. The camping mini-stove is ready
Let the fuel burn intensely, place a burner on the stove, and a saucepan, kettle or other container on it.
An improved model of a supercharged mini-stove
Ordering a mini-stove
- 1st row - the wall of the Russian mini-stove is laid out with whole bricks, with the obligatory bandaging of each seam.
- Rows 2-5 - the blowers of the main and small fireboxes are laid out, separately the columns on which the brick arch will be placed. On these same rows you can immediately attach the doors to the blower.
- Row 6 – bricks are cut into a cone directly above the grate, and each firebox has its own grate.
- Rows 7-8 – doors are secured to both fuel chambers.
- Row 9 – the beginning of the narrowing of the outlet channel at the exit from the main firebox. The septum, in turn, expands.
- Row 10 - built so that there is an outlet channel approximately 75-80 mm wide along the back wall.
- Row 11 – construction of the hearth continues, and the front wall is additionally fixed with corners.
- Row 12 – the channel is closed with a cast iron hob.
- Rows 13-16 are laid out completely according to the drawing, and row 15 is made from a metal sheet to connect the side walls.
- 17th row - the connections of the side walls are also duplicated with a metal sheet and a base is made for the over-pipe. Additionally, grooves for the strips are cut.
- Row 18 is the beginning of laying the hob, which is traditionally made in the shape of an arch. It rests on bricks at an angle of 10 degrees, which are additionally secured with clay mortar.
- Row 19 - the ventilation duct is laid and the laying of the chimney begins.
- Rows 20-21 – laid out according to the pattern.
- Rows 22-24 - bricks are cut down to form a collection channel, which should be square.
- Rows 22-25 - the construction of the chimney continues with a gradual decrease in the clearance so that in the end there is only 1 brick.
- Row 27 - according to the picture
- Rows 28-29 - connected by a horizontal channel and vertical on both sides, and covered with a sheet of metal.
- Rows 30-32 - according to the drawing.
As you can see, the mini Russian stove “Economka” is built quite quickly and simply. There are no complex brick transitions with increasing and decreasing cross-sections and channels, there are no separate chambers, as in a traditional oven, which is why it can be built in just a few days.
The process of constructing a small-sized furnace
The small-sized oven occupies only 0.4 square meters.
It is laid out from bricks placed on edge or flat. If you know the basic rules for building a stove, then you won’t even need a diagram or preliminary calculations to build it. Due to the relatively light weight of the mini-oven, it does not require a foundation, but in this case a thick, durable board, well secured to the joists, should be used for the floor.
Order of masonry
- The first stage is traditionally choosing a place and preparing it for the construction of a furnace. To do this, you need to lay a piece of plastic film, roofing felt, hydrosol or glassine measuring 78 by 53 centimeters on the surface. Pour dry sand on top of the litter (layer thickness 1 cm) and level it.
The first row of bricks is laid out on the sand (12 bricks are used without fastening) strictly horizontally, which can be checked with a level. On top of the first row we thinly apply a clay solution and install the blower door. Pre-wrap the door with a piece of asbestos cardboard or wrap it with cord. Secure it with wire.
- We are laying the second row of our stove.
- We lay out the third row of fireclay bricks. We install a grate on it, which will be located strictly above the ash pit.
- In the fourth row, the bricks are laid edgewise. And inside the chimney, a stand is mounted on which the internal partition will be installed. When laying the back wall of the stove, do not use clay, but use so-called knockout bricks (for this they should protrude slightly outward).
- The next essential element of any stove is the firebox door. Wrap it with asbestos cord before installation. We secure the door with wire, use two bricks for temporary fixation: one on the back, the second on the first, and install the door on top of them.
- We lay the bricks in the fifth row flat, following the contours of the fourth row.
- We place the bricks of the sixth row on edge, and then rub the walls of the oven with a damp rag.
- For the seventh row, we again lay the bricks flat. At the same time, in order to ensure a connection between this and the next row, you need to start with three-quarters. Then place two bricks on edge and begin building the back wall.
Laying a Russian stove: technology and construction tips
In order to build a simple Russian stove you will need from 1.5 to 2 thousand bricks. The bricks are laid in rows. A standard stove includes 25-31 rows (excluding the chimney).
Any stove is placed on a foundation, which can be represented by either a reinforced concrete slab or brick (depending on the weight of the future stove).
It is better to lay the first row of the stove with waterproof, heated bricks. The walls of the furnace are one brick thick, and the front part of the cooking surface is half as thick. Wood formwork is usually placed in the oven opening. When laying the vaults of the oven and furnace, it is best to use wedge-shaped bricks. They can be easily made with your own hands, since production involves processing ordinary bricks.
Step-by-step instructions for making a mini-oven
Taking into account the layout of the mini-oven for the dacha, let's get to work.
Masonry from 1 to 12 rows
The first row is laid out, and in the second it is necessary to provide space for the blower door. The rows must be coated with the solution. Before installing the blower door, it must be wrapped with asbestos, and the door will be secured with wire.
Next, a row is laid out using refractory bricks and a mixture of refractory clay.
During the laying of the row, a grate is installed. Starting from this row, right up to the masonry, it should be done with refractory bricks.
A firebox door should be installed in the row, with which the same work should be done as with the door for the blower (wrapped with asbestos, secured with wire).
We lay out the row according to the layout. Each layer must be coated with a solution. 8, 9, 10, 11 and rows are laid out in accordance with the layout.
Masonry from 13 to 24 rows
From the row we begin to form the combustion chamber and vertical channels. The main thing here is to carefully follow the procedures, otherwise you may violate the correctness of the design.
On the 15th row it is necessary to lay out a layer of clay-cement mortar. It will strengthen the bottom of the cleaning chamber, after which you can install the door itself.
Masonry from 25 to 35 rows
Further up to the row we lay the masonry in accordance with the instructions.
In the 25th row, the bottom surface of the second cleaning chamber should be sealed, also laying this row with clay-sand mortar, and then install the door.
Next, we lay the bricks in accordance with the order, forming a chimney channel.
In the 28th and 32nd rows, two valves should be installed, with the help of which the draft will be regulated.
Next we begin to raise the chimney pipe, as shown in the layout.
If everything is done correctly, after completing all the work you should end up with a compact model like this.
This model has the following dimensions: 51 cm width, 89 cm depth and 2.38 m height. Even beginners can make such a stove. In addition, if you do not have experience in the furnace business, then it is not recommended to make more complex models, since you can get confused in the procedures and damage the integrity of the structure, which will affect the quality of its operation and service life.
Small size and the ability to quickly and efficiently heat are the main reasons for the construction of small-sized brick stoves. These characteristics are achieved in a variety of ways, differing in masonry and design options.
What is this article about?
Features of a mini Russian stove
The mini Russian stove is really small in size, the dimensions of such a standard model are no more than 1x1.3 m, and therefore there is a place for it even in a one-room building with a small area. This device does not have a bench, but it has two fireboxes:
- the first - a large firebox is located closer to the front wall. It is used for heating in the autumn-winter period and for baking various dishes;
- the second is small, located behind the first, closer to the back. It is used for cooking during warm weather seasons. In this case, less fuel is consumed, and cleaning and maintenance of the device is easier.
Combustion chambers are needed not only for cooking various dishes, but also for heating the room. During the heating season, only one of them can work or both chambers can work simultaneously. Fuel can be added directly through the cooking section.
Such a stove also has its own peculiarity: internal channels, which are designed to supply hot gas to the fuel chambers and remove carbon monoxide to the street. During the combustion of the furnace, all flue gases flow from the larger firebox into the 1st compartment of the heating chamber.
Then they pass through the 2nd compartment and, bypassing the underside, move to the back wall of the cooking section, burn there and at the same time heat the stove. The smoke formed during this process, through four passages located at the top of the cooking section, enters the collection channel, and from it into the chimney.
A small firebox does not have special channels for removing smoke; gaseous substances from it pass into the main combustion chamber, and only then go outside.
The small Russian stove also includes a ventilation duct, which is closed as necessary using a valve.
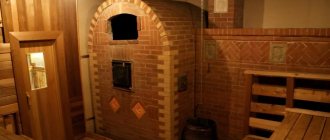
An example of a small Russian stove
Swedish cooking oven
A small combined structure, equipped with a hood, is intended not only for heating, but also for cooking.
Strict adherence to the order, the use of a plumb line and a building level will ensure the construction of a geometrically correct, functioning structure. Excessively thick mortar joints or the presence of voids in them are not allowed. It is recommended to monitor the cross-sectional parameters of the smoke channels to avoid their narrowing.
Upon completion of work, the finished oven is cleaned of dust and excess solution and left to dry for several days. High-quality materials, compliance with work technology and fire safety measures will ensure a long period of its impeccable service.
All lovers of country holidays dream of a stove in their cozy cottages. As you know, a brick stove is the oldest universal design for heating rooms. Its effectiveness and high performance have been proven for centuries.
It is not at all necessary to build a serious bulky structure. Sometimes a small-sized stove is enough, which you can build with your own hands. Models may differ in shape, size, type or design of the chimney, but in general, their construction will not take you much time and will not require serious stove-maker skills.
Russian stove in the house: pros and cons
It is important to consider the advantages and disadvantages of the design.
It has many advantages:
- the heat flow is characterized by low density, and the heating surface area is very large, therefore the heat is always soft, the air does not dry out, and the effect has a healing effect;
- a well-designed and built Russian stove ensures a warm rest on the stove bench, even when the temperature in the house is low;
- part of the heat flows is transferred to the foundation and adjacent soil layers, drying them - the risk of swelling and subsequent deformation is reduced;
- with good heating, the heat lasts for several days, so after a long working day or several days of absence the owner will not freeze in the house;
- food cooked on a stove has a special taste and aroma - even simple dishes become tastier;
- There are several fuel options - firewood, straw, peat, reeds, dung.
This structure is well suited for houses where people live permanently.
Its main disadvantages include:
- costs of materials - for a similar amount you can build a fireplace and 2 Dutch stoves;
- long heating - it takes 3-4 hours, and the room warms up to maximum 2-2.5 times longer;
- a complex device, this applies to smoke channels, combustion chamber, vault layout.
The size of the modern Russian stove has become more modest.
Today they prefer more compact designs with a stove, often abandoning beds.
For clarity, before construction, you can make a model from boxes with your own hands.
Previously, the structure did not warm up below. Flooding solved the problem. The Russian stove with heating is attractive due to its uniform heating and the possibility of partial kindling on non-cold days.
Types of mini-ovens
Steel furnaces. This type of mini-ovens is inexpensive and easy to install, but the service life of such a model will be short.
Cast iron stoves. The cost of such stoves is quite high, but they can last a very long time, but only if they are not exposed to sudden temperature changes.
Brick mini-oven. This type of stove is the most popular today and there are reasons for this:
- Keeps warm for a long time
- Possibility to do it yourself
- Available fuel
- Possibility to make a stove or oven
- High reliability
Thanks to the availability of the material and ease of execution, even a novice stove maker can make a mini-stove with his own hands.
Most often, a mini-oven for a summer residence is made with or without a cooking plate. It is the second option that we will consider in more detail.
Modern Russian stove with your own hands: recommendations
In order for the stove to be reliable, attractive and serve its owners for a long time, it is important not only to follow the instructions for laying rows, but also to know some of the tricks that experienced stove makers use in their work.
.
So that the masonry is strong and reliable, and the stove is efficient and safe, it is necessary:
- Select high-quality bricks without chips and cracks, which must be soaked before laying.
- In places where cast elements are installed, a technological gap should be left between the brick and the plates for metal expansion.
- Every 5-8 rows, make a fire-proof cutting in half a brick. If there is not enough space for bricks, then for cutting you should choose materials with low thermal conductivity (vermiculite, supersil, calcium silicate).
- Joints in masonry should be made no thicker than 7 mm.
- To organize the firebox, it is better to use refractory fireclay (yellow) bricks, which can withstand temperatures up to 1600°C.
Before you start installing the stove yourself, professionals advise studying the relevant literature and, if possible, observing the stove maker at work. Preparations for work should be approached responsibly and thoroughly, because an incorrectly assembled stove can cause fire hazards and endanger the life and health of all residents of the house.
A simple baby brick oven for the home
Beginner stove makers are advised to pay attention to just such a simple brick stove. The finished structure is small in size - the total occupied area is no more than 0.5 m2
Set for laying a mini brick oven
Start by preparing the devices necessary for the construction of the unit in question. You will need the following:
- red stove brick;
- fireproof brick;
- fireclay and building clay;
- sifted fine sand;
- roofing iron;
- roofing felt;
- doors for combustion, cleaning and ash chambers;
- grate;
- stove for one burner;
- valve;
- steel pipe;
- plumb line;
- yardstick;
- protective gloves;
- trowel;
- level.
Ordinary masonry of the stove
After preparing the base and familiarizing yourself with the drawings, you can move on. It is important to strictly follow the order indicating the correct position of the bricks and installation of stove fittings.
With stove and bed
If you plan to bake a stove with your own hands, then the simple procedure looks like this:
- Make a continuous and even row.
- Lay out the internal compartments, design the cleaning channels and ash pan chamber.
- Place the door of the blower and cleaning chamber. Secure them with steel wire, placing the ends in the seams.
- Close the vault, block the entrances to the channels, form holes and decorate the ceiling of the bottom channel from the inside.
- Fix the grate in a large firebox. Carry out the internal masonry without mortar; it is better to use fireclay, cutting it in half in thickness. Place the door on the small firebox.
- Install the hot water tank.
- Place the grate on the small firebox and the door on the large firebox. Stretch the right wall with a strip of steel. There is no need for mortar behind a large firebox.
- Install and secure the small firebox door. Continue to output internal channels.
- This row is combined with the previous one.
- Lay out the bottom of the furnace, combine the combustion vaults. Bring the channel holes into the chamber and close the water heating tank.
- At the edge of the masonry, secure a 5x5 cm metal corner between the fireboxes. Cover the space of the large firebox behind the stove with a grate. There is no need to secure it.
- Form the chimney and the walls of the furnace. Install a damper on the left.
- Continue the algorithm.
- Form an entrance to the chimney. It will be opened by a valve (vertical). Remove the walls of the furnace and make a hole for the damper.
- Begin to narrow the masonry, blocking the roof of the chamber. Proceed with the removal of the chimney.
- Reinforce the walls with strips of metal.
- Secure the back wall with a strip of metal. Narrow the chamber vault further and prepare to lay the vault. Above the niche with the slab, lay a corner and a strip of metal - the basis for the masonry that creates the ceiling.
- Lay out the outer walls and roof of the furnace in the shape of a dome. You can install a template or weld an arch from strips of metal.
- Strengthen the wall above the entrance to the chamber with a strip of metal and surround the roof of the furnace with walls.
- Pour sand and compact it.
- Proceed to the base of the bed. Lay a sand embankment and narrow the slit in front.
- Narrow the overpipe and install a panel with a circular hole to change the direction of the smoke.
- Install the cleaning window door.
- Install the draft control valve.
- Continue to cover the space.
- Work according to the algorithm.
- Combine the overpipe and chimney on rows 27-29. Lay out the chimney before starting to form the groove. In the place where the chimney passes the attic floor, use cement mortar.
When the pipe is brought to the roof, make an otter - an extension above the roof in the form of an overlap. Close the gaps between the roof and the chimney with waterproofing.
The Russian stove with a fireplace and a stove bench is multifunctional. It gives warmth, they cook food on it, and they rest on top. Any things will dry on it instantly.
With a stove for a cauldron
Both the components and the masonry resemble a Russian stove with a fireplace and a stove bench. Refusal of the latter is beneficial due to the reduction in dimensions and a stove on which a large cauldron will fit. The order is:
- Make a level and continuous base.
- Install an ash chamber.
- Secure the cleanout doors.
- Place the grate.
- Form a flood chamber.
- Start lining the firebox.
- Start building the walls.
- Align the corners.
- Align under.
- Form a hailo.
- Place the stove.
- Build a combustion chamber.
- Close the smoke duct.
- Form the roof of a large firebox.
- Build walls.
- Continue the previous row.
- Connect the walls with the arches.
- Continue the row.
- Insulate the furnace.
- Take care of the general overlap.
- Continue the algorithm.
- Set the valves.
- Install cleanout doors.
- Continue the previous row.
- Follow the algorithm.
- Close the channel.
- Form a chimney.
- Install the valves.
All that remains is to build the pipe to the ceiling. Cover it with 2x1.5 bricks. To insulate the ceiling, non-combustible material is used - metal, asbestos.
You can build a stove with a firebox and a stove bench. In this case, the length of the combustion chamber is increased or an extension is built, inside of which there will be smoke channels.
Are you planning to build a Russian stove for yourself?
Not really
Advantages and disadvantages
The main advantage of the Russian stove is that it takes a long time to cool down.
The advantages of the Russian stove include the following properties:
- Durability. The brick structure, subject to operating conditions, will last for decades.
- High degree of fire safety.
- Cooking occurs without direct contact with fire.
- The oven is cooling slowly.
- Wide functionality of modern models.
- Low cost. This is due to the simplicity of the design and the lack of automation.
- You can build it yourself. A design for the future furnace is first created, and then installation work is carried out.
The disadvantages are the following:
- Low efficiency (about 30%) compared to modern heating devices, whose efficiency exceeds 90%.
- Uneconomical consumption of firewood.
- Uneven heating of the room. The difference between the top and bottom points can be 20°C.
- Uneven combustion of fuel. Wood in different parts of the stove burns with different intensity.
- It is impossible to observe the cooking process.
After studying the positive and negative qualities of the Russian stove, you can decide whether to make it in the house or not.
