Comparison of the cost of polystyrene foam and expanded polystyrene
When purchasing large volumes of thermal insulation material, its cost plays an important role.
Often the price determines the choice of similar polystyrene foam and expanded polystyrene. Starting from production, the cost of expanded polystyrene becomes higher than polystyrene foam. With every improved property it only goes up.
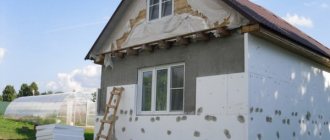
For the optimal choice, it is recommended to use differentiation in the choice of thermal insulation material. A more stable, durable option for heavy loads, with high humidity, is polystyrene foam. For simple wall insulation, without unnecessary impacts, it would be relevant to purchase polystyrene foam. It is better to use it for finishing siding.
This approach is more justified and economical in terms of monetary costs.
Currently, construction stores offer a wide range of both polystyrene foam and polystyrene foam at an affordable price.
When choosing a material, pay attention to the following manufacturers:. Expanded polystyrene:
Expanded polystyrene:
| MANUFACTURER | COST OF 1 SHEET |
| TECHNONICOL | From 35 UAH |
| Ecoboard | From 39 UAH |
| Penoboard | From 220 UAH |
| Bateplex | From 85 UAH |
| Ursa | From 41 UAH |
Styrofoam:
| MANUFACTURER | COST OF 1 SHEET |
| BauGut | From 35 UAH |
| ANSERGLOB | From 48 UAH |
| Stolit | From 31 UAH |
Having analyzed two options for thermal insulation materials - polystyrene foam and expanded polystyrene, it is difficult to unequivocally answer the question of which insulation is better. It all depends on the tasks assigned to it and the conditions for its further use. Before purchasing, also take into account the delivery of the material, its cost, and the labor costs of installation. For ease of comparison, we offer a table showing the main properties; in many positions, polystyrene foam is the best. But its high cost often makes it possible to accept the performance of foam plastic, depending on the requirements for insulation.
| CHARACTERISTICS | STYROFOAM | FOAM POLYSTYRENE |
| Thermal conductivity | 0.039 W/μ | 0.028 W/μ |
| Density | 15-35 kg/m3 | 30-45 kg/m3 |
| Moisture absorption, (when absorbed into water for a day) | 2 % | 0,2 % |
| Bend resistance | 0.07-0.2 MPa | 0.4-1 MPa |
| Flammability | G2 - average | G2 - average |
| Tendency to shrink | Deforms when heated | Not prone to shrinkage |
| Vapor permeability | 0.022 mg/mhPa | 0.05 mg/mhPa |
| Environmental friendliness | Best used for external installation | Best used for external installation |
| Installation | Additional processing of joints | Invisible joints thanks to ribbed sides |
| Service life | 50 years | 50 years |
| Price | Cheaper | Expensive |
The purpose of the article is to maximally reveal the advantages and disadvantages of polystyrene foam and expanded polystyrene, reveal their features and compare the main parameters. We leave the choice to the buyer, providing the most complete prospects for using one or another insulation.
Insulating the exterior of a house with foam plastic: step-by-step instructions, list of tools
It is better to prepare everything you need in advance so as not to waste time searching for materials later.
What you will need:
- A trowel (trowel) is a polished steel blade.
- Weight with thread.
- Level for defining boundaries.
- Hammer.
- Steel plate with handle.
- Hacksaw.
- Roulette.
- Pencil for marking.
- Electric drill.
- Drills for concrete.
Drive-in dowels
- Bucket for mixing the solution.
- Drill with attachment for stirring dry mixture.
- Fasteners (the length of special dowels is 4-5 cm longer than the width of the sheet).
- Dry adhesive mixture.
- Foam for installation.
Thermal calculation
How to get started with exterior walls
First you need to determine how much insulation is needed for the entire surface of the house facade. The calculation is simple - add up the total area of the external walls (add a little on top in case of fitting errors and at corner joints), buy additional dowels (about 7 pcs.).
You should act according to a clear plan - first clean the slabs and cover all defects, then treat the surface of the slabs with a diluted primer (we wrote about the preparatory work above).
Installation of scaffolding
Preparing the wall surface
Determine where you will start laying the insulation (exterior, window openings or doorways).
Determining the dowel size
Priming the base
We will begin insulating the walls outside with polystyrene foam. Use a plumb line to check the wall for unevenness and differences (you can use a laser level).
Place a dot at the bottom of the blocks and draw a strip for laying the first row of foam. If the walls are curved, then first install aluminum support profiles and attach the sheets to them.
If the surface of the foundation is flat, then the foam is laid directly on the foundation that has been cleaned and treated with a solution.
Enlargement of the base part
Measuring base deviation using a level
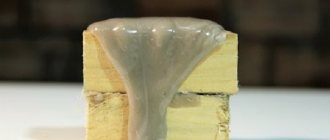
Adhesive “Moment Montazh” for gluing foam tiles together
The most popular glue for joining pieces of foam plastic is “Moment Montazh”.
Before purchasing, you need to understand that, depending on the composition, the adhesive substance can ruin the structure of the material (the type of solvent affects the destruction).
The glue is applied to the material in a thin, serpentine strip, 2 cm from the edge.
Installation of beacons for the first row of polystyrene foam boards
There are several types of glue: in the form of regular glue in a tube (acrylic), liquid nails with synthetic resins (on the “MP” tube), and nails with a water-polyacrylate dispersion (on the o tube).
Glue with synthetic resins is very flammable, but very durable and moisture resistant.
MV glue is suitable for gluing baguettes, baseboards, and other interior decorative works.
Kneading the adhesive mixture
Preparation of the required form of polystyrene foam
Technology of external wall insulation with foam plastic: gluing polystyrene
Before you start gluing sheets of foam plastic and applying them to the outer surface, you need to wait until the walls dry out after treating the house (it is recommended to wait at least 30 days for moisture and other substances to evaporate).
The next step is to prepare glue from the dry mixture. The more defects there are on the wall, the more solution will be needed (this is why it is recommended to cover up all the unevenness first, because even remaining dust can increase glue consumption).
Increasing the height of the plinth
Consumption also depends on the method of applying the adhesive mixture - for some, one layer is enough, while for others, two are applied.
The characteristics, proportions and composition are indicated on the bag of glue. Facade adhesive not only performs its main function, but also smooths out small roughnesses and creates additional insulation for walls.
Cord tension for the first row of slabs
Following the instructions on the package, pour the mixture into a bucket, fill it with water, and stir with a drill and attachment (turn speed should be low).
The result will be a waterproof and frost-resistant mass, which, after hardening, will turn into a protective film.
Make cuts in the slabs for the first row with a fine-toothed knife. If you have a nichrome thread, it is better to use it (heat it before use). Nichrome thread is a wire made of chromium and nickel alloys, which, when heated, can withstand temperatures up to 1300°C.
The advantages of using thread are that polystyrene is cut perfectly evenly and does not crumble.
Control gluing
It is better to cut polystyrene foam for insulating walls outside on some flat surface, and not on the ground. When the boards are prepared, you can proceed to lubrication with glue.
If the material is extruded polystyrene foam, then you need to make roughness on the foam using a “spiky” roller, otherwise the layer will fall off the wall.
Using light pressure with a trowel, apply glue to the surface of the foam until you get a layer at least 25 mm thick. It is better to apply the mixture in thin strips, starting from the corners and further along the perimeter. First apply one thin layer, and only then a second, more voluminous one. Make sure that the mixture does not lie on the ends of the layer.
Place glue dots (2-3 pieces) in the middle of the block, lean the foam against the wall - this way you can determine the proportion of the occupied area of the adhesive mixture.
Installation of the first slab
Gear method
The adhesive contact should not exceed 60% of the total adhesive area (maybe less, depending on the thickness of the layer). Our goal is to make the surface of the facade as smooth as possible; the dry mixture provides additional leveling.
Sometimes the adhesive is applied to a cinder block wall rather than foam (if the wall is very uneven).
Successful technology for insulating walls with foam plastic from the outside with your own hands depends on compliance with certain rules.
One of the most important things is that the seams of the bottom and top rows do not coincide when laying. To do this, you need to lay the slabs so that the upper layer moves away from the lower one. Draw the location of the top and bottom rows on the wall in advance. If the distance is less than 15 cm, the seams will allow cold to pass through.
Installing the slab on the plinth
When everything is ready, glue the first block of polystyrene foam in the marked place, using a thread or level, check whether the plate is level. Do not forget to place pieces of foam under the bottom layer, which will support the block until it “sets.”
Having glued the first layer of insulation, glue the remaining blocks in the first row in the same way (if the wall is smooth, then use dowels, and for reliability, glue too).
Then proceed to install the second row. Press the material tightly against each other, making sure that there are no gaps between the layers. Lubricate small gaps with mounting adhesive (you can use foam) or fill them with pieces that remain after cutting the foam.
Once the mounting adhesive has dried, cut off the excess with a hacksaw.
If the surface of the blocks is not completely smooth, sand it with a plaster float. Insulation of walls with foam plastic is not complete without final sanding of the joints.
Control by building level and cord
Removing beacons and removing glue
Insulation of corners
To insulate a corner of a house with polystyrene foam, one block must protrude beyond the boundaries of the wall at one corner and coincide with the thickness of the material glued on the other side. The arrangement of the blocks changes - the squares are glued in the opposite, checkerboard order. Excess material is carefully cut off and the joints are sanded.
Glue the blocks on the inner corners. Before doing this, make markings on the foam in advance.
The corner protruding outside the house does not need to be lubricated with glue; apply the mixture only to that part of the slab that will be glued to the corner of the wall; the second part beyond the border should remain clean.
Formation of external and internal corners of the first row
Installing a corner slab
Place the foam plastic against the surface of the facade, check with a level whether the layer lies evenly; if not, then level the block.
Prepare the next corner - make a mark according to the size of the first corner, cut off the excess, apply glue and lean it against the wall, tightly connecting it with the previous part.
After joining the parts, remove the excess with a saw. If everything is correct, you will get an even angle. Fill the gaps with pieces from the remains of the sheet (smear with glue and insert inside).
All corners of the building are glued in the same way.
Inserting a slab into a corner
Complete installation of the first row
Insulation of window frames, doorways and walls
It is recommended to begin work on window insulation after installing the window sill, slopes and other components of the window.
Do not forget that the thickness of the foam and decorative trim will be impressive - the main thing here is that the dimensions of the window sill and slopes match, and do not turn out to be too small after installing the insulation (which is also possible).
What should be the dimensions:
- Window sill: protrusion beyond the wall no more than 4 cm.
- Slopes: protrusion no more than 1 cm (insulation is not taken into account).
- Casting (strip of galvanized steel): pitch 20 cm.
If the insulation is 6 cm thick, then the depth of the window sill should be 10 cm. All gaps when installing the window sill must be filled (use polyurethane foam or insulation).
Insulating the house with polystyrene foam from the outside begins with the slopes (they should protrude 1 cm without insulation). The insulation should be 3 cm thinner (otherwise it will simply “crawl” onto the glass).
Installation of a window unit
Installation of façade profiles for windows
Remove the protective shell (film), treat the window frame with a degreaser, glue the profile onto the window frame, apply an adhesive solution around the perimeter (width no more than 9-10 mm).
Then a fiberglass mesh is pressed against the opening, the second half of which is pressed into a thin strip of glue on the wall, and then a second layer of adhesive solution is applied to it.
The next step is preparation, cutting.
Foam for insulating the area above the window frame often has a more curved shape, so a lot depends on the experience of the builder. When installing the form, do not forget about the drain - if it is not there, rainwater will penetrate into the house.
To prevent this from happening, attach the blocks with a slight slope, then there will be no problems with installing the drain.
Installing an L-shaped window insert
Cutting slabs with heated wire
Doorway
Insulation of doorways with polystyrene foam should be done taking into account the space - if the calculation is incorrect, the door may jam or not open at all.
The door can be installed flush with the main wall. Then it will be inside the foam (“recessed” inside), but for normal opening you will have to file the foam blocks along the edges. If this is not done, the door will constantly touch the ledge. As a result, both the door and the layers will be damaged.
Another way: installing the door using special fasteners and supports (structural profile of “U”-shaped elements). Then the level of the outer layer of insulation and the door will be the same.
After installation, the fasteners are visible from the side on the cinder blocks, and the channels are installed under the door instead of the plinth.
Door slopes
Instructions for insulating a doorway
Before starting work, make markings on the slabs and file all uneven edges. You can use a construction knife to make the cut. If there is no door frame, install it and treat it with a low-grease solution.
Prepare the profiles (the angles of each profile are no more than 40°). Profiles are necessary for additional thermal insulation.
Installation of facade profiles for doors
Secure the profiles on each side. They should fit snugly into the opening (don't forget to remove the protective adhesive strips). Make sure that the corner cuts fit snugly against each other.
The next step is to attach fiberglass mesh strips to the wall. Cut the mesh from the roll - the width should be the same as that of the insulation (add another 10 cm to secure it).
Gluing additional fiberglass mesh
Apply a bead of adhesive to the wall, carefully press the mesh against the doorway and press the edge of the protruding mesh into the adhesive.
Once again, lubricate the pressed mesh with adhesive solution around the perimeter so that it is not visible.
In this way, stretch the mesh on all sides of the doorway.
Then glue the foam cut off at the edges.
It’s up to you to decide which method to choose—internal installation or on the edge. If you decide to “recess” the layer inside the doorway, do not forget to seal the resulting cracks with pieces of material.
Installation of L-shaped slabs
Installation of fungi
When the external insulation of the walls with polystyrene foam is completed, you need to wait a few days (3-4) until the adhesive solution dries, and only then start fixing the sheets.
For final fastening of façade foam plastic, disc-shaped dowels (plastic mushrooms) are usually used. The difference from conventional fastening dowels is the wide cap that holds the fiber insulation.
Plastic mushrooms are made from polypropylene, polyamide or nylon. The fungus should be 10 cm longer than the width of the insulation. One block will require at least 5 dowels (1 in the center, 4 in the corners).
Installation of dowels
Hammering a dowel with a hammer
Drill a hole in the wall with a drill, insert a dowel and hammer it until it stops. The hat should fit tightly to the foam. If this does not happen, remove the dowel and deepen the hole a little more. To reduce glue consumption, the cap needs to be deepened into the foam by 1 mm.
It is more difficult to drive a dowel into extruded polystyrene foam than into polystyrene foam.
If the fungi do not want to clog, then you need to change the worn-out drill. In some cases, spacers (dowel legs that are inserted into the caps) are twisted by hand.
The cap on the surface can be “recessed” inside the foam by cutting out a recess in advance and covering the caps with a cut out circle of foam after installation. It is believed that additional insulation minimizes the penetration of cold into the cracks. But you don’t see such work often.
Installing dowels over the entire surface
Calculation per 1 sq.m
Sealing joints and fungi
Go around the entire perimeter of the blocks with a special grater - this will remove all the rough edges that were missed during work. Cut off the protruding edges with a knife.
It is not possible to clean extruded polystyrene foam with a float - it is harder, and the excess can only be cut off with a construction knife.
If cleaning is not done at all, more materials will be wasted during final finishing.
Seam filling
Cutting off excess
Cover the seams and caps with glue (if they are not covered with foam), level the surface with a trowel.
Wait at least 6 hours until the solution dries, and once again go over the surface of the blocks with a float (or a piece of sandpaper). The goal is to make the insulation perfectly smooth.
Checking for unevenness
Grinding with graters
Rules for safe use
How to minimize harm from polystyrene foam, you need to take into account a number of rules:
- You cannot insulate rooms with high temperature changes;
- do not insulate the ceiling of a balcony or loggia, and those places where direct sunlight may fall;
- look at the certificate when purchasing, try to buy material in large retail chains;
- systematically ventilate the room;
- Humidifiers and ionizers cannot be used if there is foam insulation;
- The kitchen should have a good hood with air venting.
It must be remembered that styrene can be released when heated, so it is better to insulate areas that will not get very hot with foam boards.
Types of decorative finishes
When finishing the facade with foam plastic is finished, it’s time to start decorative cladding of the building. It is recommended to decide on the material before you start insulating the facade, but if you haven’t done this yet, then it’s time to start.
Preparing the decorative layer
Primer of walls
The most popular options:
- A simple option is facade plaster (huge selection of colors, water resistance, vapor permeability, simplicity, durability). It happens: mineral, acrylic, silicate, silicone.
- Vinyl siding is inexpensive, easy to install, and one of the most popular coatings.
- Facade panels with patterns. They are made of plastic, metal, wood, aluminum, stone, brick, tile. Installed on the façade sheathing.
- Decorative ceramic tiles - durable, fire-resistant, large selection of colors and sizes.
- Concrete tiles - durability and strength at low cost.
- Facing bricks (ceramics, clinker, hyper-pressed, silicate).
- Artificial or natural stone (marble, sandstone, dolomite, limestone, quartzite).
- Sandwich panels – aluminum, plastic, steel, magnesite sheets. Filling: cotton wool, polystyrene foam.
- Porcelain tiles (high frost resistance, water resistance).
- Facade cassettes are galvanized steel coated with polymer of various shapes.
Applying facade plaster
You can also distinguish wooden (the more common name is lining), foam, metal (it weighs a lot, you need to take into account the load), and cement siding.
Before installing any type of siding, you must first install a ventilation structure into the walls.
Which material to choose depends on personal preference and cost.
Formation of invoice
Features: pros and cons
Extruded polystyrene has its advantages and disadvantages as a building material.
Pros:
- Wide range of applications. It is used for interior and exterior work on various surfaces: floors, walls, ceilings, as an insulating, packaging and decorative material. In addition to the construction sector, its use is widespread in the production of toys, household supplies, household appliances, military and medical industries.
- Low thermal conductivity. Due to this property, polystyrene often serves as a heat-insulating material. It prevents heat loss in the room, which affects heating costs. The better the thermal insulation, the cheaper it is to heat your home.
- Low coefficient of moisture permeability. Inside the material there are sealed granules into which a minimal amount of water penetrates. It is so small that it is unable to destroy the structure of the material and negatively affect its insulating qualities.
- Improves sound insulation in the room. To achieve maximum effect, you need to combine it with other materials, but in a room where the problem is not pronounced, it will be enough.
- Easy to cut. During the installation process, the slabs can be divided into fragments. The cut will be smooth and will not crumble. This is a hallmark of quality material.
- Has a relatively light weight. One pair of hands is enough to work with the material. In addition, the advantage of light weight is that polystyrene sheathing does not place a large load on the walls or ceilings in the room.
- Easy to install. No special skills are needed to finish walls, floors or ceilings.
- Resistant to many chemicals.
Insensitive to the effects of living organisms. That is, mold does not form on it, and insects and rodents do not spoil it. Due to its internal structure, it is classified as a “breathable” material.
This is important when finishing walls, since condensation does not form. Levels any work surface. The decorative coating fits well on top. Polystyrene boards can be glued directly to the wall of a building (or other surface) without installing a sheathing for this.
This reduces time and financial costs for repair work and simplifies them significantly. The minimum service life is 15-20 years. Low finishing cost per square meter.
Minuses:
- Insulating a large area of walls, ceiling or floor will be expensive even with a low cost of material per square meter.
- For maximum tightness of the finish, additional materials may be needed in the form of construction tape and sealant.
- Expanded polystyrene sheathing does not regulate room temperature on its own. It works on the principle of a thermos: it retains heat in the cold season and keeps it cool in hot weather. If the room’s thermoregulation is poorly adjusted, then the effectiveness of polystyrene is zero.
- Despite the “breathing” properties of the material, when completely covering a house with polystyrene foam, installation of ventilation is required.
- The material is afraid of ultraviolet radiation. Under the influence of sunlight, internal bonds in the structure of the substance are destroyed, and natural conditions accelerate the destruction of extruded polystyrene.
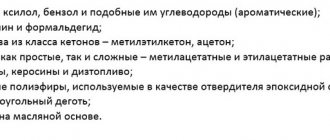
- Some types of paint, substances based on petroleum products, acetone, gasoline, kerosene, and epoxy resin corrode polystyrene foam.
- Decorative finishing on top of polystyrene foam is required to cover all seams and protect it from sunlight.
- The density of the material is greater in comparison with polystyrene foam, but polystyrene foam loses to other materials according to this criterion. It is more suitable for finishing ceilings and walls, and under the floor covering it shrinks under constant point mechanical influence (walking, rearranging furniture).
Insulation materials
140 votes
+
Vote for!
—
Vote against!
Expanded polystyrene is a rather interesting material. The production method was patented back in 1928, and since then it has been modernized many times. The main advantage is low thermal conductivity, and only then light weight. Expanded polystyrene is widely used in various industries of production and construction, and every person, one way or another, has come across products made from it in everyday life. In addition, expanded polystyrene, the price of products from which is low, will be a good option if you want to insulate your home.
Table of contents
- What is expanded polystyrene and how is it different from polystyrene foam?
- Expanded polystyrene, characteristics and properties
- Application area
- Disadvantages of polystyrene foam: a review of myths
What is expanded polystyrene and how is it different from polystyrene foam?
Expanded polystyrene is produced by adding gas to the polymer mass of polystyrene, which, upon subsequent heating, significantly increases in volume, filling the entire mold. Depending on the type of material, different gases are used to create volume: for simple variations, natural gas, fire-resistant types of expanded polystyrene are filled with carbon dioxide.
Quite often, amateurs tend to call expanded polystyrene and polystyrene foam the same material. However, this is not entirely true. They have a common basis, but the differences and characteristics are quite significant. Without going into lengthy spatial reasoning, the main distinguishing features are as follows:
- the density of polystyrene foam is significantly lower, 10 kg per m3, while the indicators of expanded polystyrene are 40 kg per m3,
- expanded polystyrene does not absorb steam and moisture,
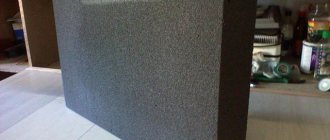
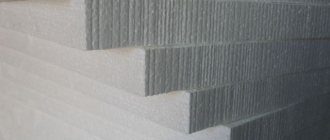
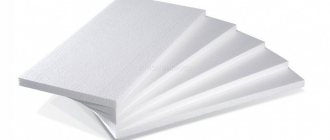
- the appearance is different. Polystyrene foam - has internal granules, polystyrene foam is more uniform,
- polystyrene foam is characterized by a lower cost, which is noticeable when it is used as a thermal insulation material for the outer cladding of building walls,
- expanded polystyrene has better mechanical strength.
Polystyrene foam is made from polymer raw materials, which are treated with water vapor, as a result of which the volume of granules increases significantly. But at the same time, this also leads to the fact that the micropores also increase in size, as a result of which the connection between the granules deteriorates and gradually, when exposed to precipitation and climatic conditions, this leads to the fact that the material weakens. Roughly speaking, if you break a sheet of foam plastic in half, a large number of granules are formed. This is not typical for expanded polystyrene, since it initially consists of closed cells that ensure the material is moisture- and vapor-tight. At the beginning of production, its granules melt under the influence of high temperatures, forming a uniform fluid mass, which is filled with gas.
The material itself also has several varieties:
- Extruded polystyrene foam is practically the same material as non-pressed polystyrene foam, the difference lies in the use of equipment such as an extruder, therefore extruded and extruded polystyrene foam are often called the same material.
- Extrusion is also obtained by processing the final mass of polymer material, and also represents a homogeneous mass. The variety is used for the manufacture of disposable packaging and tableware. Roughly speaking, meat products in supermarkets are packaged in extruded polystyrene foam packaging.
- The press method of obtaining the material is more expensive, since it involves subsequent pressing of the gas-foamed mixture. In this case, it acquires additional strength.
- Autoclaved polystyrene foam is rarely mentioned, and in fact, it is an extrusion variety in which foaming and baking of the material is carried out using an autoclave.
- Pressless is one of the most popular varieties. Moisture is first removed from the polystyrene granules by drying, then foamed at a temperature of 80°C, after which it is dried again and then heated again. The resulting mixture is filled into a mold, where it compacts itself as it cools. This type of expanded polystyrene is more fragile, but requires half as much isopetan for its production, which affects the final cost.
Expanded polystyrene, characteristics and properties
Expanded polystyrene is an ambiguous material: some extol its properties to the skies, while others, on the contrary, foam at the mouth and demand an immediate and complete ban on its use on the basis of “the revealing work of one academician.” True, the ubiquity of expanded polystyrene and its high popularity tilts the conclusion towards the fact that this material is really good and has the following advantages:
- Low thermal conductivity allows you to achieve a significant insulation effect. In fact, 11 cm of expanded polystyrene can provide the same thermal insulation as a wall made of sand-lime brick more than two meters thick. The thermal conductivity of the material is 0.027 W/mK, which is significantly lower than that of concrete or brick,
- Moisture resistance of the material. Even with prolonged exposure to moisture, absorbency will be no more than 6%, so there is no need to worry about deformation of the polystyrene foam structure.
- Expanded polystyrene is durable and can withstand up to 60 cycles of exposure to temperatures from -40 to +40°C. Each cycle constitutes a design climate year.
- Insensitivity to the formation of biological media. Expanded polystyrene will not become a breeding ground for fungi and mold.
- Harmlessness of the material. Non-toxic components are used in its production, so products made from polystyrene foam are also used in the food industry. For example, for storing food.
- Due to its light weight, insulating building facades with polystyrene foam takes much less time and effort than using other means.
- Fire-resistant types of material, when exposed to an open flame, tend to self-extinguish and melt without spreading combustion. The spontaneous combustion temperature of expanded polystyrene is +490°C, which is almost twice as high as that of wood. If the material is not exposed to an open flame source for more than four seconds, the polystyrene foam extinguishes. When burning, the material releases 7 times less thermal energy than wood. Therefore, polystyrene foam is not capable of supporting a fire.
- Providing sound insulation. This quality is especially important for residents of standard apartments. A layer of insulation material 3 cm thick is enough to reduce noise penetration by 25 dB.
- The vapor permeability of the material is at a low level of 0.05 Mg/m*h*Pa, regardless of the degree of foaming and density of the variety. In fact, the vapor permeability indicators are similar to pine or oak timber.
- It is resistant to alcohol and ethers, but is easily damaged when solvents get on the surface of the material.
- Mechanical tensile strength is at least 20 MPa.
As can be seen from the above, expanded polystyrene is an effective means for solving many problems: from using some of its varieties as packaging to thermal and waterproofing of building facades. In addition, the material is used for other purposes in construction, which will be discussed below.
Application area
Expanded polystyrene in construction is used primarily for insulation of the following elements:
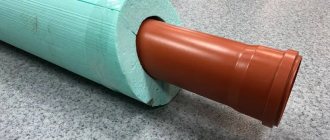
- water pipes,
- roofs,
- floors,
- door and window slopes,
- walls
For example, the consumption of polystyrene foam for pipe insulation is economically justified and expedient due to its capabilities. Moreover, for these purposes, molded block polystyrene foam is used, which allows, in case of damage to the pipe, to easily access it by removing the desired section of the protective coating.
Expanded polystyrene is actively used in laying transport routes. It reduces the impact of vertical loads on the coating during building construction. Common in the production of SIP panels.
The scope of application of expanded polystyrene, the characteristics of which, combined with a low price, make it extremely attractive for use in any industry, is practically unlimited. The only thing that should be taken into account is that the material has a low density, therefore, it is susceptible to any mechanical damage.
Disadvantages of polystyrene foam: a review of myths
In addition to the bouquet of advantages, there are also disadvantages. Moreover, a large number of different myths are associated with expanded polystyrene, which need to be considered in more detail:
- Many manufacturers claim that extruded polystyrene foam is significantly superior to other types, as proof of which they often provide a table of comparative characteristics of this type compared to conventional foam. However, the difference in thermal conductivity between extruded and pressed polystyrene foam is practically unnoticeable and amounts to 0.002 units, while due to advertising, the cost of extruded insulation boards is higher.
- The maximum density of polystyrene foam gives the same high insulation performance. According to experts, such a statement has some discrepancies with reality, since the closer the molecules adhere to each other, the higher the thermal conductivity becomes and it is easier for the cold to penetrate into the room. The way out of this situation is to use low-density polystyrene foam boards, which must be covered with a reinforcing mesh and a protective layer of primer to increase their mechanical strength.
- Fire-resistant polystyrene foam is absolutely non-flammable and harmless to the human body. Any building material, when exposed to an open flame, will exhibit combustion properties, more or less. However, the spontaneous combustion temperature of polystyrene foam is higher than that of wood and, in addition, it emits a significantly smaller amount of thermal energy when burning. It is important to remember that fire-resistant varieties, despite the loud name, are by no means capable of stopping the fire, only reducing its impact. A serious disadvantage of the fire-resistant variety compared to the usual one will be the carbon dioxide that is used in its production. As a result, when melted, the material will begin to release significantly large amounts of harmful substances. Some sellers talk about non-flammability based on demonstrative experience: when the base with the insulation board attached to it begins to be heated from the reverse side. When exposed to high temperatures, polystyrene foam begins to melt and deform, but there is no fire. However, as long as it is exposed to flame, the material will continue to burn.
- Fire retardants added to polystyrene foam for its fire resistance are “pure poison in any case.” Another controversial statement. A fire retardant is a component containing in its structure substances that slow down the combustion process. They differ in composition and contain various components, ranging from formaldehydes, which really pose a danger to humans, to magnesium salts, which are completely environmentally friendly and safe. Recently, solutions based on inorganic salt are increasingly used, so they are not capable of harming health. Fire retardants are often used to impregnate and apply a protective layer to wood to increase its fire resistance.
- Installation of polystyrene foam thermal insulation materials is not able to provide heat. In fact, the task of insulation is not to bring heat, but to retain it indoors. Roughly speaking, the use of insulating boards will significantly reduce the release of heat outside the room, thereby not having to heat the street at your own expense.
- "Polystyrene foam is hazardous to health." Modern production makes it possible to create material from environmentally friendly components, so there is no threat to health. Moreover, the widespread use of products for storing semi-finished products and using them in everyday life speaks volumes about the safety of the material.
More often, problems arise when you want to buy expanded polystyrene of cheaper and low-quality varieties. Insulation boards made from such material actually have less strength and can begin to deform already at temperatures above 40°C. The main rule when using polystyrene foam materials in any field of work will be to ensure quality and reliability, for which you need to pay. And then during operation only the advantages will begin to appear.
Is polystyrene foam harmful inside the house? Is polystyrene foam as insulation harmful to human health?
To retain heat in a private house or apartment, external or internal wall insulation is performed.
It is important that all materials used in the construction or repair process are environmentally friendly
For example, polystyrene foam is used as insulation. How safe is it for humans and can it be used for insulation?
Is polystyrene foam as insulation harmful to human health?
Many users, in particular owners of apartments on the upper floors, prefer to carry out thermal insulation work from the inside of the room. What does this mean? Which insulation material should you prefer and what is the difference between polystyrene foam and polystyrene? Is polystyrene foam harmful to human health? If it is dangerous, then why and what are the harmful properties of polystyrene foam?
What harmful substances does foam release?
To determine whether polystyrene foam emits harmful substances, you need to consider the composition of the foam; among the harmful components it includes:
styrene (0.01-0.2%) is a substance harmful to human health that can be released into the air for another 20 years after installing the insulation. Released when the temperature exceeds 25 °C;
phenol is another chemical compound in foam that is released when exposed to direct sunlight or at temperatures exceeding 20 ° C;
formaldehyde (formaldehyde, methanal) is a toxic gaseous substance that is released at high temperatures (over 160 ° C).
It should be remembered that substances released by polystyrene foam tend to accumulate, causing deterioration in the health of people living in the room.
So, on the one hand, the balance is: ease of installation, convenience of further finishing, low cost, and on the other hand, the safety of the house and its occupants.
Is polystyrene foam harmful as insulation?
It is possible to answer unequivocally only taking into account the location of its installation and operating conditions, in particular the temperature regime.
When talking about the harmfulness of polystyrene foam, you need to consider at what temperature the foam releases harmful substances. As already noted, styrene and phenol are released at room temperature.
Many are convinced that the harm of polystyrene foam manifests itself regardless of the installation location. However, is foam plastic harmful indoors or is there no health risk when installing it on interior walls? Experts say that polystyrene foam installed on external walls is absolutely safe, since the small amount of vapors of harmful substances that can penetrate through the ventilation, even if accumulated, cannot cause significant harm.
How to eliminate the harmful effects of polystyrene foam
You can reduce or neutralize the harm of polystyrene foam as follows:
do not install in residential premises, inside rooms of a house or apartment;
when insulating walls in a house, attach polystyrene foam only to external walls and install ventilation correctly;
if it is necessary to install foam plastic on the ceiling, this should be done from the attic side (provided that it is non-residential). Installation on the balcony ceiling (from the inside) is also excluded;
do not purchase polystyrene foam produced by handicraft methods. Each seller must have a certificate confirming the styrene content;
Use only for its intended purpose, namely as external insulation. The construction of playhouses for children is, of course, unacceptable. But is polystyrene foam dangerous for animals and birds, in particular for chickens (who love to peck at it)? Manufacturers say no. After all, the lifespan of chickens is short and harmful substances simply do not have time to accumulate in their bodies.
Reinforcement and plastering of foam plastic
Sometimes the insulation of a facade with polystyrene foam needs to be extended over two seasons - left to overwinter at some stage. Without harm to materials, it can be left only after applying a leveling layer. Simply attached polystyrene foam (EPS) cannot be left. It is recommended to keep it even packed in packs indoors and not outside. So you can only stop after plastering.
Sticker of reinforcing mesh on corners
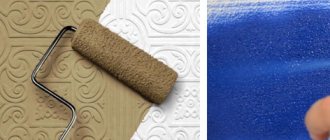
The mesh is used as a façade mesh for exterior work (the inner mesh will simply crumble from the glue). Density 140-160 g/sq. m. First, glue the corners. All corners are reinforced - both external and internal, and slopes. Important! From now on, you need to use a universal composition, and not the one on which the foam was glued. The glue is diluted a little thinner than indicated in the instructions - it should stick well to the spatula, but be easily pressed through the mesh.
For reinforcement, you can use a ready-made corner with a mesh, you can cut strips from a roll (30 cm wide) and glue them. It’s easier to work with a ready-made corner, cheaper - with a piece of mesh. If you make it from a roll, cut strips across the roll, you get pieces a meter long. Fold them in half lengthwise and press the fold well with a spatula. You need to fold it so that the edges of the mesh are wrapped inward (it was in a roll). If it turns out the other way around, they will stick out from the layer of glue and it will be difficult to work.
Corner reinforcement mesh
Either way the work is almost the same. A strip of mortar 6-7 cm wide and 2-3 mm thick is applied to the corner on both sides. If you are gluing not a finished corner, but bent strips of mesh, then the length of the area filled with mortar should be 5-7 cm shorter than the cut piece (93-95 cm).
A corner or piece of bent mesh is placed on top. Running a spatula over the mesh, lightly press it into the glue. Herringbone movements - from top to bottom and to the side.
About half of the mesh on the sides remains without glue. This is normal - it will be easier to join it with foam reinforcement in the plane of the wall. Also, without glue, a strip remains at the top if you glue from pieces. When gluing the next piece above, apply glue directly to this “empty” mesh and cover it with the next piece on top. This way the joint is the same thickness as the entire corner.
When forming an angle, we try to make it even. If you can’t do it with a regular spatula, you can use a corner one (pictured above). It won't be difficult - just move from top to bottom with one click.
Foam reinforcement on walls
Polystyrene foam and EPS are reinforced by applying a layer of plastic mesh, which is pressed into the adhesive composition (universal). The procedure is as follows:
- Apply a layer of glue (universal composition) to the wall with a spatula (width at least 350 mm). The width of the strip is 5-7 cm narrower than the mesh (the mesh is usually 100 cm wide).
- Roll out the mesh from top to bottom, so that 5-7 cm from one edge are free of glue.
- Pass the spatula over the mesh, pressing it into the glue. They try to make the surface smooth. The mesh is rolled out onto the laid layer of glue and pressed into it with a spatula.
- The second strip of glue is applied, starting from the section of the “empty” mesh. A new piece of reinforcement is applied close to the one already laid. It turns out there are two layers of stack at the junction, but the thickness of the glue is the same as on the rest of the wall. It can be seen that part of the mesh remains without solution
The glued mesh is left to dry. It should take at least half a day, or better yet, a day. Then take a grater with sandpaper and smooth out all the unevenness.
Application area
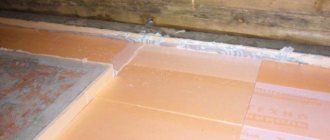
Expanded polystyrene has proven to be an excellent basement insulation material. The material laying scheme requires a pre-prepared site. In this case, both single-layer and two-layer installation are allowed. After installation, the polystyrene foam is filled with concrete mortar. Next, the structure is built in the usual manner. The method allows you to use a concrete screed simultaneously for the base of the floor without constructing a basement space.
If polystyrene foam is used for the basement, then high-quality insulation of foundations can be achieved. This is relevant for the northern regions. At the same time, both horizontal and vertical laying will save you from freezing. Creating protection for external walls requires digging a trench about a meter wide. The depth is determined by the depth of soil freezing. The slabs are laid along the foundation and covered with soil. This insulation option is suitable for a wooden house. It is better to insulate the walls in an apartment from inside the room.
Expanded polystyrene has proven itself well as a heat insulator for utilities. It is now known for sure that up to 30 percent of heat leaks through poorly insulated communications. Expanded polystyrene began to be used for pipelines, ventilation, cables and other lines. The use of expanded polystyrene ensures that lines can be laid at a shallower depth, which reduces labor costs.
The material has proven itself well as an insulator for refrigerated rooms, freezing units, and refrigerated display cases. For industrial installations, moisture absorption and thermal conductivity are important. Traditional heat insulators have more modest performance.
Expanded polystyrene does not have any restrictions. The material is successfully used to insulate floors, walls and partitions. Plates 5 cm thick play the role of both a heat insulator and a sound insulator, as they reduce the level of impact noise. The technology for laying the material involves complete sealing of the seams, as well as the mandatory covering of slabs, which can be chipboard or concrete bases.
The work technology involves installing polystyrene foam on the back side of the surface. The formation of condensation will be regulated by a ventilated cavity, which must be provided.
The foundation is also insulated with expanded polystyrene. Since this is the basis of the building, the durability of the entire structure depends on it. The issue of thermal insulation of the foundation is a priority, especially in regions with a harsh climate. Expanded polystyrene is often used as formwork. This option significantly reduces the consumption of more expensive building materials. Let's take a closer look at the technologies for external wall insulation, which you can do yourself.
Fastening foam plastic to the facade, basic rules
adhesive fasteners will affect the quality
Work begins with applying glue. For these purposes, one spatula is used - large (200 mm), and another - small (up to 100 mm), which will act as an additional tool. The adhesive mixture is always applied to the wall, and never to a sheet of foam plastic. Firstly, this will affect the quality of the installation, and secondly, it will bring unnecessary inconvenience. The wall may not be perfectly flat, and the glue will help hide all the imperfections. In addition, if you apply the mixture to the insulation itself, the sheet will immediately gain weight and will be harder to lift.
When lubricating the facade with glue, you should not strive to distribute the composition in an even layer, but try to achieve a perfectly flat and smooth surface, without dents and bumps. For example, if there are small depressions left on the wall, then they can be filled with the mixture, thereby smoothing out the overall relief.
When placing insulation sheets, you need to ensure that they are located on the surface of the facade in a checkerboard pattern. That is, a T-shaped joint should form. It is impossible to glue a sheet of foam plastic located in the top row parallel to the bottom sheet.
Before you start fixing the insulation, you need to wait for the adhesive mixture to dry. Three days is enough for this. During this period of time, the insulation has time to settle a little. In order to properly and correctly fasten the foam to the wall surface, you must initially select the appropriate fastening material. Usually the insulation is nailed with dowels. This fastener has two components: plastic and a nail made of iron or plastic, which is driven into its middle. The selection of ideal dowels should be based on the following components:
- The material from which the device is made.
- Price category of the product.
- Dimensions.
When choosing dowels, it is better to give preference to products with a plastic nail, since they are not very expensive, and at the same time are well suited for insulation such as polystyrene foam. Although, it’s still not worth saving too much on purchasing fasteners. Cheap dowels are made of low-quality plastic, which can lead to deformation of the material. To fasten the insulation you need to use a hammer drill. Using this tool, you need to drill a hole in the foam, the depth of which is slightly greater than the length of the mushroom leg of the dowel. By the way, if we talk about the optimal size of the fastening material, it is worth noting that it should be sufficient for the nail to penetrate the wall. Ideally, the length of the dowel leg is approximately 5 cm greater than the thickness of the foam sheet.
There are two ways to fix the insulation:
- Separately secure each block with five dowels: four at the edges and one in the middle.
- Nailing the sheets together at their joints with the addition of additional fixation in the center of the block.
As you can see, the methods are slightly similar to each other in the location of the dowels. However, the second option is considered the most acceptable, since it requires much less consumables and also fixes the blocks more firmly, fastening them together.
Technical characteristics of extruded polystyrene foam
Before purchasing a material such as extruded polystyrene foam, the technical specifications should be studied carefully. This will allow you to purchase the highest quality material. The building material, manufactured in compliance with the technology, has universal characteristics, which expands the scope of its application.
Marking. Manufacturer brands
When purchasing slabs, be sure to pay attention to the labeling. The technical characteristics, dimensions and dimensions of the slabs, as well as special information regarding operation, must be indicated.
In addition, information about the manufacturer must be provided. The most common brands of extruded polystyrene foam on the market are:
Release form. Dimensions
This building material is produced in the form of sheets. Standard sheet sizes are 600x1200 mm, 600x1250mm, 600x2400mm. Thickness can be from 20 to 150 mm. Some manufacturers produce EPP boards with non-standard sizes.
Thermal conductivity
The thermal conductivity coefficient of extruded polystyrene foam ranges from 0.03 to 0.032 W/mS. These indicators indicate that this material has a low ability to conduct heat. Thanks to this, all the heat in the room is retained, which reduces heating costs in winter.
Low thermal conductivity allows you to reduce the degree of heating of surfaces in hot weather. The low thermal conductivity of extruded polystyrene allows it to be effectively used for arranging thermal insulation pies.
Vapor permeability and moisture absorption
The less the ability of a material to absorb moisture and vapor, the higher its durability and the lower its thermal conductivity. The water absorption coefficient of this material ranges from 0.2 to 0.5%. These indicators mean that upon contact with vapors and liquids, moisture absorption does not occur.
Strength
Expanded polystyrene boards can have a strength value from 0.15 to 0.45 MPa. This is a fairly high indicator that allows the slabs to be used to form an insulating pie on the roof, floors and facades of houses, where great pressure and mechanical stress will be exerted on the material. The use of EPP boards increases the strength of surfaces. A rigid insulation pie reduces the risk of severe shrinkage of the walls.
Ability to absorb sounds
Expanded polystyrene boards have a high ability to absorb sound pollutants. With proper installation of the insulation pie, the noise level in the room is reduced by an average of 30-45%.
Biological resistance
This material has almost no pores through which oxygen and water can penetrate, so it cannot be damaged by fungi and pathogenic bacteria. In addition, these slabs cannot serve as a breeding ground for microorganisms.
Environmental friendliness
When used outdoors, this building material cannot cause any harm to people (except in cases of fire). When using expanded polystyrene as insulation inside the house, people are in direct contact with the material, the question immediately arises whether harm to health can be caused in this case.
There is also evidence that when exposed to temperatures above 75°C, the material may begin to emit harmful fumes. The chemicals released into the air from polystyrene foam are fat-soluble.
Fire resistance degree
The melting point of this insulation is about 80°C. Most varieties of this insulation are extremely fire hazardous. The combustion temperature of this substance exceeds 1100°C. Among other things, you need to take into account the burning time of polystyrene foam. The surface finished with this insulation can burn for more than 40 minutes.
When stoves burn, many toxic gases are released, incl. methanol, ammonia, carbon monoxide, nitric oxide, formaldehyde, styrene, carbon monoxide, etc.
The high flammability and release of a mixture of toxic gases emitted when this insulation is ignited leaves no chance of salvation for people located in the immediate vicinity of the fire.
What is polystyrene foam afraid of?
This building material can quickly collapse when exposed to direct sunlight. It should be borne in mind that it is not highly resistant to aggressive chemicals and detergents. With such contacts, not only destruction of the insulation can occur, but also the release of harmful vapors. The material is not highly resistant to high temperatures.
How to insulate a ventilated facade with your own hands
A ventilated façade is a suspended structure that looks like a layer cake. The principle itself is that a gap of 30 to 50 mm is left between the wall to which the insulation is attached and the decorative protective panel. Thanks to this gap, the facade got its name, and through this air gap, excess moisture evaporates. Thermal insulating material has an important function here, and its high-quality choice will further ensure the correct functioning of the entire system.
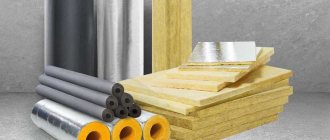
Material selection
Mineral wool has tangible advantages. This insulation is vapor permeable and has excellent, although slightly more modest, thermal performance. Basalt wool is a fairly hard material and tends to cake over the years, becoming even more durable. In addition, mineral wool is a fairly inexpensive material. Another plus is the wide variety of insulation shapes and thicknesses, which allows you to adapt to any technological requirements.
Installation of mineral wool on a ventilated facade
Attaching the insulation
Thermal insulation from mineral wool is inserted into the sheathing, which is made of an L-shaped profile or wooden blocks. To do this, vertical profiles are mounted to the wall, and the distance between them should be slightly less than the width of the heat-insulating slab. It is best to pre-glue the insulation to the wall, but it can only be mounted on disc-shaped dowels, as shown in the photo.
A wind barrier is attached to the insulation. It protects it from destruction from atmospheric influences. After this, a decorative protective panel is installed.
Video: Installation of a ventilated facade on a brick wall
Insulating the facade with your own hands using modern materials is quite feasible. The most important thing is to follow the installation technology and take into account the properties of heat-insulating materials.
Comparative characteristics
Let's compare the two materials based on the characteristics described above. Expanded polystyrene is the best insulation material, since its thermal conductivity is lower, which means that it transmits heat less well and retains it in the room.
Expanded polystyrene is a better insulation material than polystyrene foam
In addition, the strength of the first material is much higher than polystyrene foam. And the ability to repel water too. However, the materials have one essentially identical property - they are both flammable. It is worth considering another factor that characterizes materials – shrinkage. The higher it is, the worse the material is as insulation. So, for polystyrene foam this indicator is quite high, it wrinkles easily and is susceptible to mechanical stress. It is especially vulnerable to direct sunlight. But expanded polystyrene copes much better with mechanical stress and ultraviolet rays. This is due to the way it is produced and the material is processed.