Water supply to a private house from a well: advantages and disadvantages, basic requirements
The need for clean water is clear without special explanation. However, in practice various difficulties arise:
- too large a distance to a centralized highway;
- significant costs when drilling an artesian well;
- high level of pollution in the municipal water supply, frequent accidents, pressure drops.
Organizing courier delivery of bottled water is not suitable for watering the garden. The listed reasons explain the feasibility of the autonomous supply project from a personal well. It is quite possible to implement it on your own, without approvals or contacting specialized specialists.
The disadvantages will be clarified as we study the article. In order not to miss important nuances, pay attention to the following facts:
- When choosing a well location, it is necessary to take into account the proximity of cesspools and other sources of pollution.
- Digging a mine and other construction operations involve significant labor costs.
- It is necessary to bring water into the house from a well. The cost of additional equipment will significantly increase the volume of investment.
It is easy to formulate the initial requirements:
- a sufficient amount of water to fully satisfy all needs at the property;
- absence of impurities harmful to humans or dangerous to technological equipment;
- reasonable cost and timing of the plan;
- low costs during operation, minimum regulatory procedures;
- long service life of the engineering structure.
A modern water supply system for a private house from a well performs its functions automatically, without careful monitoring and frequent adjustments.
The advantage of running water from a well
Before deciding how to make a water supply from a well, you need to clearly understand how this option will be better than a well and a centralized option.
The construction of a well has some advantages compared to the construction of a well:
- This does not require the use of special drilling equipment or complex equipment. You will need simple shovels and 2-3 craftsmen to carry out construction work.
- You should also clean it no more than once every 7-8 years, while the well must be cleaned regularly in autumn and spring.
- Due to the fact that the well has a small diameter and a large length, it may not behave in the best way during operation. In addition, you will have to invest a lot of money in construction. The price of such work will be quite high;
- With the production of a well, you get high-quality water, the price for which will not increase every year. Therefore, such a design will quickly pay for itself.
Drawing up a water supply diagram for a country house from a well, general technical characteristics
Types of autonomous sources
Using this figure, it is easy to understand the operating principles and features of different solutions. The greatest depth (100-200 m) is an artesian well. The main advantage is the absence of “civilizational” pollution. Wells are drilled “into sand” from 30 to 100 meters. They are cheaper, but have less filtration capacity. High-quality wells are made up to 20-30 m deep. It is necessary to reach the groundwater level, at which an acceptable level of purification is assumed.
The figure shows a well with a “high water” fence. This term refers to the accumulation of liquid in the surface layers of the soil. This option implies the possibility of seasonal drying out and interruptions in water supply. Particular care must be taken in choosing the installation location to eliminate the possibility of contamination of the source.
Important! In accordance with current sanitary standards, the distance from the cesspool to the well should be more than 20 m, and to the water pipeline route - more than 10 m.
Project of the relative location of objects on a land plot
Instead of a standard drawing, you can use a similar drawing made by hand. Here you can see how carefully the author thought through the placement of individual functional blocks:
- The well is installed at the highest point of the site.
- It does not receive drainage from the bathhouse.
- The septic tank is located at a great distance, despite the greater cleaning capacity of the structure compared to a typical cesspool.
- The distance to the residential building is set small to reduce the cost of installing the pipeline.
Design the water supply of a private house on your own site no less carefully. Be sure to take into account the features of each significant object. Sources of pollution are:
- Cesspool, drainage field, open septic tank.
- Places for walking and keeping pets, livestock and poultry.
- Area for washing vehicles and equipment.
- Areas where agricultural chemicals are used.
- Car workshops, general roads.
- Garbage dumps, industrial enterprises.
Modern autonomous household waste disposal devices provide a high degree of purification, more than 95%
But we must understand that the remaining few percent of contaminants will not improve the quality of water. Autonomous biological treatment stations are not recommended to be installed closer than 15 m from the well. Even completely sealed water supply storage tanks for a private home are installed at a distance of 10 m.
For your information! Not only the distance, but also the direction of groundwater flow is important. Along its course, the well is not installed even at a great distance from the cesspool.
After exploring your own site, explore the surrounding area. In some cases, the presence of active sources of pollution nearby will make you forget about the water supply project for a private house from a well.
The inscription on an advertising poster for an armory
If radical methods are not needed, proceed to study practical instructions for creating a water supply system in a private house from a well. The next section talks about how to use simple magical passes to determine the optimal location for installing the main element of the project.
Instructions for water supply installation
Equipment designed to control pressure in the water supply system must be installed and connected by a specialist. For stable operation of the system, the following rules must be observed.
Requirements for the condition of the well
Excerpts from SanPiN 2.1.4.1175-02:
- The well is located in an uncontaminated area, at least 50 m above cesspools, toilets, fertilizer and chemical warehouses, industrial enterprises and sewer networks along the groundwater flow.
- Areas subject to flooding or landslide deformations, located in swampy areas or at a distance of less than 30 m from highways are unsuitable for constructing a well.
- The head (above-ground part) serves to protect against clogging, water intake and observation. It must rise above the ground by at least 0.8 m, have a lid or reinforced concrete floor with a hatch. A canopy or booth is installed above the head. A fence is placed nearby.
- A “castle” is made around the head, 2 m deep and 1 m wide, from crushed and compacted clay or rich loam. On top of the “castle” there should be a blind area made of stone, brick, concrete or asphalt. Its radius is from 2 m, the slope is 0.1 m from the well to the side and down.
- The walls of the well shaft must reliably protect against the penetration of runoff and water. Reinforced concrete rings are recommended. It is acceptable to use natural stone, brick (without cracks, not staining water), wood. Brick and stone are placed on a mortar of high grade cement without impurities.
- Cast iron brackets are embedded into the walls of the shaft for lowering into the well during repairs or cleaning. They are arranged in a checkerboard pattern in increments of 30 cm.
- The water intake part must reach the aquifer. To increase the inflow, the lower part of the shaft walls can be made with holes or in the form of a tent.
- A return filter of sand, gravel or pebbles is poured at the bottom.
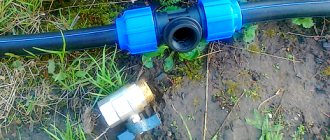
Laying water pipes.
It is prohibited to treat well walls with bituminous materials.
Nuances of pipe laying
The best option is to install a water supply system at the same time as digging a well. Drilling a hole in the wall of an already installed shaft is more difficult and expensive.
Basic rules for laying well water pipes with a surface pump:
- Dig a trench to a depth below the freezing level of the soil. A slope towards the well of at least 2° is required.
- The pipeline must be insulated. Options are to put special “shells” made of heat-insulating material (for example, polystyrene foam) over the pipes or lay a water heating electric cable (more efficient, but electricity costs increase).
- Drill a hole in the shaft wall. First pump out the water from the well.
- Insert a pipe into the hole and bend it down.
- Seal the gaps between the suction pipe and the inlet hole in the shaft wall. If the well is made of concrete rings, then a mixture of cement mortar or tile adhesive with liquid glass is suitable.
- Install a strainer at the inlet of the pipe. There should be at least 50 cm to the bottom of the well.
Metal, metal-plastic, and polypropylene pipes are suitable for well water supply.
Insulated pipeline.
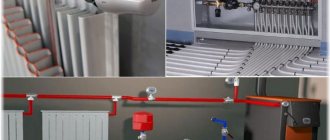
We carry out internal wiring
Methods for laying water supply pipes in a country house or country house:
- Consistent. This is the simplest and most economical scheme. From the riser the pipe goes to the first plumbing fixture, from it to the second, etc. Disadvantages of the method - it is suitable only for small needs for water, since when several water intake points are turned on at once, the pressure drops; It is impossible to turn off 1 device in case of breakdown.
- Collector. Each plumbing fixture is connected directly to the main pipe. To do this, install a collector - a device of several shut-off valves that distributes the flow of water. Advantages - uniformity of pressure at all points of water intake; the ability to turn off any device if necessary or reduce the pressure in those that are least in demand. Disadvantages - more complex and more expensive than a sequential circuit.
The pipes can be “hidden” in the walls of the house by making grooves, or left in plain sight. The second option looks worse, but is easier to install and maintain.
How to find water in a well site: scientific methods and supernatural possibilities
The higher the groundwater level, the less excavation work will be done. Preliminary research will help you make the right decision when preparing a project for water supply to a private house from a well. You just need to make sure you don’t make a mistake in choosing the appropriate technique.
Dowser
The photo shows the essence of magical technology. The vine branch in the shape of the letter “Y” is not used today. More practical and effective are two metal rods bent at right angles. They are held in the palms without preventing rotation. Slowly move around the area until they connect themselves. It is in this place that you need to dig a shaft for the water supply system of a private house from a well.
Important! The recommendations for this technique indicate that a positive result will be obtained only if the operator has special bioenergetic abilities.
If there is no water at a depth of more than 20 meters, it means your bioenergy is not strong enough, but you have good physical characteristics
The relatively close location of moisture can be judged by the presence of spruce, sedge, and other trees and plants. In the morning, fog accumulates over the corresponding areas. In warm weather, midges swarm. A more accurate test can be done using silica gel. The granules are poured into a suitable container and weighed. Bury at a depth of 40-60 cm overnight. If the control measurement shows an increase in weight, then there is water nearby.
The simplest techniques can be used. However, all of them are indirect, that is, they have a certain error. As a rule, this is how the presence of “overwater” is determined, heavily contaminated with various impurities.
Control drilling allows you to get an accurate result
To speed up the process of building a water supply system for a private home, you can rent specialized equipment with an electric drive, or order a professional geological survey.
Making a well
First we find a place for the well. There is a detailed article on this topic on our website. When the location for the well has been determined, then we begin to extract the soil. This is a simple task, but the overall service life of the well depends on it.
First of all, you will need help. Digging workers with good physical fitness will be required. You can also use special equipment, but it happens that the equipment does not reach the right place. And if you need a depth of less than 10 meters, then it will be quite expensive.
In addition, an excavator bucket can destabilize the density of the walls, which will lead to their deformation and the entire water supply system of the well. To use special equipment for digging soil, you will need to invest additional funds in delivering it to your home, so it will be cheaper to do the work manually.
Choosing materials for the well
After the pit for the well is prepared, it is necessary to proceed to the next important stage - strengthening the walls of the pit.
To carry out this process, various materials are used, the main ones being:
- Concrete rings, this option is most often used;
- Brick and natural stone;
- Wooden logs, this material is now mostly used as finishing for the upper part.
If you decide to use the wooden log method, then choose a moisture-resistant type of wood. These can be pine or oak logs.
Using them may change the taste of the water. For example, if the walls of the pit are reinforced with pine logs, then the water will acquire the aroma of pine needles.
Attention: To save money, you can use reinforcement of the walls with bricks or concrete rings, but note that unreinforced concrete rings are susceptible to rapid crumbling.
The part of the well protruding above the surface is called the “head”. What it will look like depends on your imagination. Usually the head looks like a small log house, which is covered on top with a roof made of boards. It is not only convenient to use, but also attractive as a design element.
So:
- The standard well model is made on the basis of reinforced concrete ring elements. The pit should be dug to the required depth. Then, reinforced concrete elements must be lowered into it one by one using a winch;
Attention: If you have loose soil on your site and it is difficult to immediately dig a pit, then you need to read how this is done in another way. There is a detailed article on this topic on our website.
- Before purchasing rings, check their quality in advance and whether the production technology is followed: is the material homogeneous, dimensions, are there any cracks, and so on. It is necessary to periodically check the dimensions of the ring and the diameter of the pit during the deepening process. The vertical position helps to maintain a plumb line.
Attention: For any water supply system from a well, it is necessary to form a source. They dig it up at any time of the year, except spring, because the location of groundwater may not be accurately determined.
- When installing the rings, a sealing tape should be placed between them, which will make the structure more airtight. When performing work, be sure to ensure that the installation is perpendicular;
- After installing the rings, we seal the seams. For this, cement mortar is used. After it has completely dried, the seam should be treated with liquid glass, this will enhance the tightness;
- Now we make a filter at the bottom of the well. To do this, backfill coarse gravel. We pour clean river sand on top and sprinkle fine gravel on top;
- A blind area is made along the upper contour of the ground level, which has a diameter larger than the well by a couple of meters. Here the ground is lowered and after this the site is concreted.
Well construction
Typical design
Using this figure, you can explain the purpose and features of the main elements:
- To pre-purify the water, a bedding of several layers is made at the bottom. Sand, gravel, and other purified granular materials are used.
- A pump is installed at a short distance from the bottom. Instead of rigid metal ones, you can use flexible plastic pipes. In this case, the suspension is made on a cable.
- Permanent water supply from a well is installed at a level 20-40 cm below soil freezing. Accurate data for a specific region can be obtained from a local architectural bureau.
- The upper part is surrounded by a waterproof layer (creating a “clay castle”). For reliability, concreting is used on top. This prevents rainwater from entering the source.
- Next, a lintel is installed along the mouth of the well, insulation of the walls and roof structures are made. This prevents the temperature in the working part from falling below 0°C. The hood is useful for eliminating unpleasant odors. In severe frosts, ventilation is closed.
- A separate tap is installed in the water supply system of a private house from a well for watering the garden in the summer. Mode switching is carried out by shut-off valves.
- Instead of an overhead one, you can make an underground power supply line when creating a water supply route.
Do-it-yourself well: step-by-step instructions
| Photo | Algorithm of actions with explanations |
| Test drilling will help determine the depth of the aquifer. Therefore, it is possible to make an accurate calculation of the number of elements of the future structure. Strong, reliable walls will be obtained from factory products. The author purchased concrete rings with dimensions of 100 x 100 cm (height x diameter). Protrusions and grooves at the ends prevent movement after installation. To save money, a household car semi-trailer was used. | |
| Unloading work and moving products were performed alone. To facilitate operations, wooden guides, a crowbar lever, and other available means are used. | |
| The mine is created sequentially. As they go deeper, concrete rings are lowered into it and they continue to dig. For excavation work, a regular bayonet shovel with a short handle is suitable. | |
| After filling the bucket, I had to climb up the metal brackets each time. The container was emptied and dropped back down. It is clear that with an assistant, the corresponding operations can be done faster. But this description demonstrates the possibilities of the most economical way to perform the work. The excavated soil was immediately loaded into a trailer for subsequent removal. | |
| By digging under the rings, the walls of the well are immersed under their own weight. In relatively soft soil (sand and clay), making a hole is not too difficult. Water appeared at a depth of more than seven meters. | |
| This stage is the most difficult. To simplify work operations, they are breaded for a period with minimal rainfall. | |
| This approach helps reduce groundwater levels. An additional advantage is that the engineering structure remains operational all year round. This project was completed in early November. Frosts strengthened the top layer of soil, which partially facilitated the installation of the last rings. | |
| After the granular bedding is made, the contaminated liquid is pumped out 3-4 times. Next, you can use clean water. A submersible pump and a flexible hose are used for lifting. The unit is lowered on two strong ropes to prevent problems if it breaks. | |
| Tea made from this water becomes especially tasty. However, the remaining turbidity should be noted. If it is not removed by the existing filtration, additional cleaning devices will have to be installed. | |
| Next, the joints between the rings are sealed, a blind area is installed, a canopy and a stationary water intake are installed. |
This project is not without its drawbacks, so the individual stages of creating a water supply for a private house from a well are described below in more detail.
Digging a well and installing rings
Large concrete parts provide good strength and tightness, but are difficult to move. It is recommended to use rings with a height of no more than 50 cm.
For accurate lowering, use a tripod with a winch
This simple device will prevent damage to the edges of concrete products. If locking connections at the ends are not provided, sideways movements are prevented with steel brackets.
Together with an assistant and the use of a tripod with a winch, you can reach the aquifer in 5-7 days. The author of the project discussed above for supplying water to a private house from a well had to spend several months.
Important ! It is impossible to carry out all excavation work with the subsequent installation of rings in sandy and other insufficiently stable soils. This is dangerous for a person working at great depths.
In some cases, dense rocky layers completely block the possibility of work. This is another argument in favor of preliminary geological research.
Related article:
Plastic well rings. Let's look at why they are needed, where they are used, sizes, selection criteria, constituent elements of a plastic well, average prices and subtleties of self-installation.
Well waterproofing device
After completing the installation of the main structure, it is necessary to seal the gaps, potholes, and cracks. They use a mixture of cement and PVA glue, liquid glass, and specialized sealants. When choosing, check the composition of the product. Bitumen-based mixtures and other components that can worsen the organoleptic characteristics of water should be excluded.
Apply sealant in accordance with official instructions. Pay attention to the temperature conditions. As a rule, such treatment is not performed in winter.
The outer surface of the top of the rings can be covered with plastic film. Next, a clay castle is installed. At the last stage - a concrete blind area
How to properly create a bottom filter, head
The bottom filter can be installed using different schemes
Well-cleaned granular materials should be used. For initial disinfection, you can wash them with a weak chlorine solution. Several water intakes after such treatment must be drained until the characteristic odor disappears.
For your information! If the water flows too quickly, it is impossible to remove the layer of dirt, a boardwalk is installed at the bottom. When creating such a structure, do not use nails or other metal fasteners, so as not to deteriorate the water supply to a private house from a well with the products of corrosive processes.
A cute head will decorate the area
Finishing materials and other components of the visible part of the structure are selected taking into account the aesthetics of the environment. Be sure to equip the hatch with a lock to prevent access to children.
This drawing can be used to make a gate with your own hands
If necessary, the head is made in a closed design, insulated, and equipped with a lamp.
Selection and installation of a pump in a well for water supply at home
Do-it-yourself water supply in a private house, diagrams with different pumps
To choose the right option, clarify the distance between the water levels and the ground surface. Up to 7 meters it is permissible to use an external pump. This value is not mandatory, since manufacturers have more powerful equipment in their range. The relevant technical specifications should be checked. In any case, the decision is made based on the calculation of overall needs.
Design of a submersible pump for water supply to a private house from a well
Below are the features of modern models:
- The standard threaded adapter (1) ensures a reliable, tight connection of the pipeline.
- The plastic handle (2) is sufficiently durable and does not rust.
- A special unit (3) simplifies the replacement of the capacitor.
- Load-bearing parts are made of reliable stainless steel: shaft (4), impeller (9).
- The float regulator (5) turns the power supply on and off taking into account a certain water level in the well.
- To improve the efficiency of the engine cooling system, water passes through the process passage (6) between the two casings.
- Additional shaft protection (12) is made of composite material (steel, ceramics).
- The grid (7) has holes that allow solid fractions up to 25 mm to pass through. The second barrier (10) is designed to separate contaminants of 10 mm or more.
- To protect the electric drive from water, double seals (8) with an oil chamber (11) are installed. The engine is not damaged when idling. It is protected electronically from overheating.
For your information! Here is a description of a universal pump that is suitable for pumping heavily contaminated liquids. A model with a fine filter can be installed in the water supply system of a private house from a well.
Related article:
Let's look at how to choose submersible pumps for wells , learn about their types and design, advantages and disadvantages, as well as how to choose them correctly.
Well waterproofing work
The well requires mandatory waterproofing, no matter how paradoxical it may sound. There are a number of reasons for this.
- The water in the well should always be clean. Dirty groundwater should not get inside through the walls of the well. Groundwater is located closer to the earth's surface than the water lens from which water flows into the well. In the soil there is enough of all kinds of decomposing organisms, there are fecal matter, pathogenic bacteria, chemicals for agricultural needs, etc. If such liquids are allowed to enter the well, its contamination is inevitable. It is prohibited to use such a well for collecting drinking water.
- Waterproofing is necessary to preserve the structure and strength of the reinforced concrete walls of the well themselves. Concrete, although it seems durable, is destroyed under the influence of salt and acid solutions coming from the soil. The material becomes loose and, losing strength, begins to crumble, which, in turn, allows groundwater to penetrate the well and contaminate drinking water.
Waterproofing work is aimed at creating protection for concrete well rings and sealing the joints between them.
- It is reasonable to carry out waterproofing at the stage of well construction, that is, even before lowering the rings into the shaft. This makes it possible to waterproof the surface of reinforced concrete parts, both internal and external. This will significantly increase the wear resistance of parts and prevent groundwater from flowing through the walls of the well.
- External waterproofing is carried out using the coating method, after which roofing felt is glued in several layers. However, rings with such a coating are very difficult to install. Therefore, it is better to use impregnating waterproofing. The outer surface of the well walls is treated with a specialized compound. Penetrating deeply into the material, it fills the pores of concrete and then crystallizes. This creates high-strength protection that is not afraid of the effects of soil chemical compounds. It’s better not to skimp and prime the walls not once, but twice. Then the waterproofing will last as long as the reinforced concrete rings last.
- To waterproof an old well, you will have to push the soil away from its walls 3-4 top rings down. After drying and cleaning the surface of the well walls from dirt, you can treat them using the coating method, followed by gluing them with roofing felt in several layers. For the first layer it is better to use ground mastic. If you use pure bitumen, it will dry out and crack very quickly - this material does not last long.
To create external insulation, it is necessary to make an external bedding , a clay seal and a concrete blind area. But it would be reasonable to carry out this work after laying the pipes and carrying out work on insulating the top of the well.
- Another important task is to carry out work to seal the joints between the rings. When installing a well shaft, a sealant can be immediately placed between the rings. To do this, you can use “Gyrosolite” or “Barrier”. The seal is elastic, fills joints well, expands in volume when exposed to moisture and thereby prevents the penetration of groundwater. When dealing with an old well, repair of the joints is clearly necessary. Having separated the joints to a depth of 3 cm at an angle, you should take an iron brush and clean them well. Existing leaks are eliminated using a water plug. This is AQUAFIX. The product is a cement composition that instantly hardens upon contact with water. Then you can take a repair compound (for example, MEGACRET-40) and seal the resulting cavities. The composition adheres remarkably even to wet surfaces and does not shrink.
- On the inner surface of the well shaft, all kinds of flaws are repaired in a similar way.
When the repair composition has dried, you can begin to waterproof the inner walls of the well. As noted above, when installing a new well, the rings should be processed in advance before assembling the barrel - then only the joints will remain to be sealed .
AQUAMAT-ELASTIC coating insulation has proven itself well. It is a two-component cement-polymer mixture that is absolutely environmentally friendly and does not affect water quality in any way.
Before coating with coating insulation, the concrete surface must be moistened with water. The mixture is convenient to apply with a wide brush. You can apply waterproofing tape over the first layer of the mixture that has not yet dried at the joints. The second layer is applied after the first has hardened. To re-apply the insulation, the walls no longer need to be wetted with water. After the second layer has dried (about a day), the well is considered reliably protected.
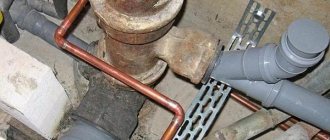
How to bring water into a house from a well
Scheme of water supply for a private house from a well with a submersible pump
If forced circulation of fluid is used to compensate for pressure drops, a hydraulic accumulator is required. In the standard version, it is a container separated by a flexible partition. It does not require additional adjustment or maintenance during its entire service life. To control pressure, pressure gauges and relays are installed in the required places.
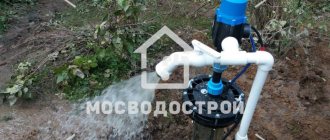
Inserting HDPE pipes (low-density polyethylene) into the well
This figure shows ways to protect the water supply of a private home from freezing in winter. If there is a basement (ground floor) in the building, deepen the trench to the required level.
Installation of a storage tank
Connection diagram and equipment composition
In this option, the water supply from the well is equipped with a storage tank. It is installed indoors under the roof to create fluid circulation in the operating circuits under the influence of gravity. If the pressure is insufficient, the additional pump is switched on automatically.
This solution simplifies the task of maintaining constant pressure in the water supply system of a private house from a well. However, a load arises on the building’s load-bearing frame and the complexity of the system increases. The attic needs to be insulated.
Application of pumping station
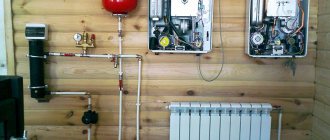
Main components of a water supply system
The figure shows how to bring water into a house from a well using a pumping station. This specialized technology consists of the following functional blocks:
- hydraulic accumulator;
- pump;
- pressure gauge;
- control and monitoring electronics;
- connecting pipes.
Such equipment for water supply to a private house from a well is characterized by good consistency of working parts, since it involves factory assembly.
For your information! Experts note the relatively small volume of standard tanks (up to 15-20 liters). Sometimes you have to install larger containers.
Laying communications from the house to the well
After waterproofing a well, the soil removed from the walls should not be returned to its place. It's time to lay the water pipes and embed them into the wall of the well .
- Water pipes should be buried in the ground below the soil freezing zone . When digging a trench, it is worth considering that there will be a sand and gravel cushion at its bottom. Its thickness is usually about 10 cm.
- Nowadays, rarely does anyone use metal pipes for the construction of water pipes. The best solution is the use of polyethylene pipes (HDPE). To fully supply water to a country house, it is reasonable to use pipes with a diameter of 32 mm. For HDPE pipes, stores and construction markets always have a large selection of fittings, adapters, tees, elbows, etc. Thanks to compression fitting connections, the work is extremely simplified and does not require the use of any additional tools or equipment.
- Experienced craftsmen, as a rule, advise when building a water pipeline from a well to a house to lay not one line, but two . One pipe is used as the main line, and the second as a backup, in case of trouble. This forethought will save you from having to replace a failed pipe.
- For a pipe located in the ground, additional protection should be created. The pipe can be laid inside a technical polyethylene pipe or inside a polymer corrugated pipe with or without insulation.
- If the trench is guaranteed to be dug below the soil freezing layer, then you don’t have to worry about its insulation. However, it is better to play it safe and lay a layer of polystyrene foam on top of the pipes before pouring soil into the trench. This solution will protect the water supply in very cold weather.
- Weak areas of the water supply system are places where the pipes rise close to the surface of the earth, pass through a basement or an unheated basement. To solve the problem, it is worth considering heating the pipes and resorting to reinforced insulation.
- An opening in the wall of the well for introducing pipes is made at the level of the water supply. Under no circumstances should you drill a hole where the rings meet. During drilling operations, the edges of the rings may crack and even be destroyed. The optimal solution would be to install a 1″ threaded fitting into the hole made.
- To fill the space between the squeegee and the walls, you can use a plastic sealing compound. Waterproofing mastic with reinforcing fibers is suitable. The same composition can be used to generously coat the walls of the ring both outside and inside. To provide additional insulation, wide rubber gaskets are put on both sides, then washers, and then the clamp is secured with nuts.
- The fitting is attached to the threaded part of the outlet . The HDPE pipe supplied from the house to the well is attached to the fitting. It is reasonable to attach a tee on the opposite part of the drive. In order to be able to drain water from the water supply, a tap is attached to the horizontal outlet of the tee. A fitting is “packed” onto the downward outlet of the tee. A vertical pipe is connected to it. If necessary, it can be connected to a submerged pump.
After everything has been done, you can move on to work on insulating the upper part of the well, making a bedding, a clay castle and a concrete blind area.
Correction of the project taking into account water quality
The pipeline water supply system for a private house from a well is installed according to standard schemes. If necessary, install a specialized pumping station to increase the pressure. Adjustment of the flow rate of water supply to a private house from a well in different circuits is carried out using a distribution comb equipped with appropriate valves.
To clarify the composition of the necessary equipment, water analysis is carried out in a specialized certified laboratory. The results obtained will be useful for the correct selection of additional filters for the water supply system of a private home:
| Type of contamination | Suitable equipment, technologies | Peculiarities |
| Sand, clay, silt, other mechanical impurities | Dirt trap, disc filter, granular fill tank, main cartridge | The device is selected taking into account the particle size and intensity of pollution |
| Iron compounds | Mechanical filters, aeration, ion exchange | In some situations, it is necessary to install several processing stages sequentially. The most complex impurities are organic iron |
| Calcium and magnesium compounds (hardness salts) | Ion exchange, polyphosphate backfills, electromagnetic converters | Some devices are suitable for the preparation of process water only |
| Heavy metals, harmful chemical compounds, microbes, viruses, bacteria | Ion exchange units | The quality of purification in this option is comparable to distillation. The only significant drawback is the low performance of household models |
Even when ordering water supply for a private house from a turnkey well, the information from the article will be useful. They will help you place an order correctly, monitor performers, and check completed work. This data must be used during the implementation of the project in-house.
To minimize errors, use comments. Post your assessments of equipment and projects here, share your plans, and ask questions. You can use this useful information completely free of charge and benefit yourself.
Country well water supply diagram
The water supply diagram is drawn up taking into account the layout of the house or cottage, the distance to the well, the number and purpose of water intake points.
An example of a pipeline that supplies water from a well to a country house:
- Submersible pump (pump). It is suspended on a cable and the electrical cable is attached.
- Check valve. This device prevents water from flowing down when pumping is stopped.
- Drain tap. It is installed to preserve the well for the winter at the lowest point of the pipeline.
- Five-pin fitting.
- Pressure gauge.
- Pressure relay (sensor). This is a device for automatically turning on and off the pump.
- Dry running relay. This is a device to protect the pump from running without water. It is installed only if the pump does not have a float switch, and the pressure switch does not have a dry-running protection function
- Hydraulic accumulator (or storage tank). This is a container for accumulating water and compensating for its thermal expansion, preventing pressure drops.
- Ball valve.
- Pre-filter for removing clay, sand, silt, rust and other mechanical impurities.
The pump, check valve, and drain valve are located inside the well. The rest of the equipment is installed indoors, in the basement or underground. If the area of the house does not allow, then a pit must be organized near the well. It is insulated if you plan to use the water supply in winter.
Laying water pipes.
The devices are connected to each other by pipes. The number of bends and joints should be minimal. The exit to the well can be laid through the basement or subfloor. The layout and depth of the pipeline hidden underground must be preserved. It will be needed during the construction of new structures.
A surface-type pump is installed in a house or pit. A pipe is connected to the suction pipe, which is led into the well. A mesh filter is installed at the inlet. A coarse filter (mud filter) and a check valve are installed in front of the pump. A fine filter is installed at the outlet.
To lift water from a depth of 8 to 30 m, a surface pump will need a remote ejector. It is placed inside the well. 2 pipes are connected to the ejector - through the first, the water rises, through the second, part of the flow returns to the device to create a pressure difference.
Small installation tricks
Construction work begins with drawing up a water supply scheme (project). The diagram clearly shows the path that water takes from the point of water intake to the point of distribution of the water supply system in the house.
Wiring in the house can be done in two ways:
- sequential , when the pipe is laid along the entire house and several water consumers depart from it;
- collector , in which a separate pipe is laid to each water consumer.
The first method is recommended to be used if the house does not have powerful sources of water consumers and there are 1-3 people living in it.
If you have a washing machine, watering hoses, automatic watering and irrigation systems, and if there are more than 3 people living in the house, it is recommended to install a collector water supply system to provide sufficient pressure for comfortable water use.
The technology for installing a winter water supply system will be as follows:
- Development of a water supply scheme. Selection of pipe materials and laying depth.
- Digging trenches for pipes.
- Installation of pumping equipment, hydraulic accumulator.
- Connection of pipes with pumping equipment and hydraulic accumulator.
- Inserting an intake pipe into a well.
- Installation of insulated pipes from the well to the house.
- Wiring the water supply system inside the house.
Installation of pipes from the well to the house is carried out using special pipes - short pipes with threads at the ends. The squeegee is pressed against the pipe using flanges or fitting adapters.
Both structures must be carefully sealed to avoid leaks. HDPE pipes are connected to each other using soldering or fittings.
The joints must be treated with silicone sealant. Treatment with bitumen and mastic is prohibited!
The depth of immersion in the well of the surface pump intake pipe should be slightly below the water level or at least 50 cm from its bottom. When lowering to the bottom, the elements of the bottom filter will be sucked in.
Before installing the intake pipe, water is pumped out of the well to ensure a tight connection with the elbow of the outlet pipe from the well.
It is advisable to equip the elbow with a tap to be able to shut off the water supply during repair work.
Pipes from the well are laid with a slope towards the well to ensure drainage of water from the water supply system during conservation work.
You can control the slope using a building level. To ensure gravity drainage, it is enough to maintain a slope of 2 degrees.
Another way to create winter water supply is the method of heating pipes. For this, a heating cable or plates are used, which are mounted along the pipes or wound in a spiral.
The installation of such a cable is advisable if the area is uninterruptedly supplied with electricity.
If the power supply is turned off, the uninsulated pipe will immediately freeze and the water supply system will fail.
The best option can be considered a combined method, in which insulated pipes are heated with a heating cable. In this case, the cable will consume a minimum amount of electrical energy.
Organization of winter water supply
The winter water supply system is not much different in composition from the summer water supply system. It also includes the following elements: pump, water pipes, storage tank or accumulator, drain valve.
At the same time, the installation of a winter system requires compliance with certain rules.
Step #1 - insulate the water supply pump
The pump and the cable feeding it need insulation. To thermally insulate a pumping station, you can use ready-made thermal insulation systems or build a casing yourself using mineral wool, polystyrene foam or other insulation materials.
The junction of the pump and water pipes (sump) also requires insulation. Typically the dimensions of the pit are 0.5 x 0.5 x 1.0 m. The walls of the pit are lined with brick, and the floor is covered with a layer of crushed stone or concrete screed.
Read this article on how to choose a pumping station.
Step #2 - thermally insulate the hydraulic accumulator
The storage tank or hydraulic accumulator must also be insulated. The tank acts as a storage tank, allowing the water supply system to operate uninterruptedly.
In the absence of a storage tank, the system will periodically shut down, which will lead to wear and tear of all its elements.
To insulate a hydraulic accumulator, you can use the following types of insulation:
- polystyrene foam or polystyrene foam;
- mineral and basalt wool;
- polyurethane foam and polyethylene foam;
- rolled fine-cell insulation with a foil layer.
The insulation process consists of installing the outer lining of the hydraulic accumulator, followed by finishing with the final material, if necessary.
Step #3 - take care of water pipes
For an insulated winter water supply with a laying depth of 40-60 cm, the best option would be to choose low-pressure polyethylene pipes.
Compared to metal ones, they have the following advantages:
- not subject to corrosion;
- low specific gravity;
- easy to install;
- much cheaper in cost.
The diameter of the pipes is calculated based on the planned water consumption at the design stage of the water supply system.
Water consumption depends on the number of people living in the house, the presence of water-consuming devices, the volume of water used for watering and caring for animals and other factors.
For example, a pipe with a diameter of 25 mm has a throughput capacity of 30 l/min, 32 mm – 50 ml/min, 38 mm – 75 l/min. Most often, HDPE pipes with a diameter of 32 mm are used for country and country houses with an area of up to 200 m².
Read more about how to choose insulation for water pipes.
Step #4 - install the drain valve and pressure switch
The drain valve is necessary to preserve the system; thanks to it, water can be drained into the well. If the water pipe is short, the drain valve can be replaced with a bypass drain pipe.
Main components of the system
The main elements of a water supply system for a dacha from a well:
- Pump . There are surface pumps and those that are completely submerged in water on a steel cable. A cable goes to the pump, and a water hose comes out of the pump.
- Hydraulic accumulator Provides control over water pressure.
- Valve for draining water . Necessary for preserving the system for the winter
- Heating boiler or boiler . Provides water heating.
- Wiring and pipes – ensure the distribution of water and deliver it to the necessary points in the room (kitchen, shower, restroom, etc.)
Everything you need to supply water from a well Source unipump.ru
The main elements of the water supply system are located in one place Source stroy-dizayn.ru
The layout and laying of pipes depend on the specific room. The final cost of the project will depend on the needs of the homeowners.
Main elements of a water supply system Source prakard.com
Choosing an installation location
Construction of a well is a fundamental stage. It is advisable to dig it in the summer, since in the hot season the water lies at a much shallower depth than in autumn and winter. To determine, without involving specialists, the level of the water layer, talk to your neighbors who have wells on their property. They will surely come to your aid. However, you can use the old-fashioned method using a vine. But the most reliable option for determining the depth of an aquifer is test drilling. Experts recommend carrying out this operation at intervals of half a meter to a meter. This way you won’t “overshoot” even a thin aquifer.
Having determined a water layer of suitable productivity, let the hole fill with water, leaving it for a day. This way you will know the water level in the well. The optimal value of this parameter is 1…1.5 meters. And be sure to take the water to the SES in your area for analysis. There they will determine the degree of its suitability for use and the composition as a whole.
There should be no cesspools, septic tanks or other similar structures near the well or borehole.
When choosing a location, pay attention to the following point: the distance from it to the nearest cesspools, septic tanks, etc. must be at least 50 meters. If this requirement is not met, the possibility of such a serious deterioration in water quality cannot be ruled out that it cannot be used even for technical purposes. But digging a hole very close to the house is also undesirable: washing out the sand can cause soil displacement.
You need to understand that laying a water pipeline from a well with your own hands is a very labor-intensive process. But if the trenches are prepared according to the diagram, you will not encounter problems.