Tile cutting device
It's been a while since I added anything here.
Preface: why exactly this way, and not using a machine.
Firstly, I’m not entirely sure that the so-called wet tile cutter will cope with this task, and I’m sure that a cheap one definitely won’t cope, and an expensive one, let’s say from 50 thousand rubles. Maybe he can handle it, maybe he won’t.
Therefore, with such a daisy, I refused to buy an expensive machine because the work will not pay for such costs, and cheap rubbish is not needed.
This means we work the old way, proven and cheap.
In general, I have a tile cutter, it’s not the worst, it successfully coped with various tasks, but there was a problem with this porcelain tile. It (porcelain stoneware) breaks off along the cut line completely uncontrollably, it can clearly break, or the arrow can go to the side. The second problem is that the surface is very fragile, just like a glass surface; even behind the roller, chips can occur. A diamond cup can also chip even with a light touch. There is no need to talk about a diamond disc at all, the surface after it is jagged and chipped, which means that not every water-powered tile cutter can cope with such a task.
Source
how to seal holes in the ceiling near heating risers?
Dear masters! Please advise how to seal the holes (holes) in the ceiling near the heating risers?? You can clearly hear the upstairs neighbors through these holes, and this is terribly inconvenient and unpleasant, plus when they slam the door or close the window, old pieces of mortar fall out of these holes. Some time ago I read that it is impossible to cover it with cement or repair compound, because... The pipe may rupture. It seems that they advised to seal the holes with silicone. Silicone is possible. Or what is better and safer? I really need advice from knowledgeable people! Thank you in advance.
2SZN can try polyurethane foam
SZN wrote: Some time ago I read that it is impossible to cover it with cement or repair compound, because... pipe rupture may occur
wrap the pipe with ch.-n. heat- and alkali-resistant (paper from a kraft bag, coated Whatman paper, fum tape, etc.) thicker, or put on a tube of the required length cut lengthwise from fanin, respectively. diameter and seal. Just clearing the area of the remnants of the old mortar, dust, washing it, and priming it won’t hurt at all.
stroika wrote: polyurethane foam
turns black near the hot water riser and begins to crumble
SZN wrote: Neighbors above
with the lower ones it is of course easier
I recommended foam for a temporary fix or stuffing a rag in there -
SZN wrote: You can clearly hear the upstairs neighbors through these holes, and this is terribly inconvenient and unpleasant, plus when they slam the door or close the window, old pieces of mortar fall out of these holes.
stroika wrote: for a temporary fix
there is nothing more permanent than temporary
Yann: - You can also use automotive, two-component putty (putty), such as “chemical propol”. It holds great and hardens instantly. But anyway, first I blew foam into the hole, and from the bottom with chemical propyl floor.
Yann wrote: But still, first he blew foam into the hole
- so it seems -
tetra75 wrote: it will turn black near the hot water riser and begin to crumble
In general, the gap cannot be sealed with anything, the pipe goes back and forth significantly, that’s why it’s in the glasses.
Nothing can be done about it at all. Horror Conversations can be heard as if the neighbors are sitting nearby, and if they raise their voices, then they are completely on guard, and their boy likes to sit on the radiator and tap his feet on it. So silicone won’t help either and will fall out over time, for example when the heating is turned off and the riser (pipe) shrinks?
Draw a sleeve, as advised earlier, treat it with penetrating primer and fill it layer by layer with gypsum plaster, although cement mortar will be preferable if the setting conditions are successful. By successful conditions I mean moistening with a spray bottle while the solution is setting. It will be easier to work with gypsum mixtures.
tetra75 wrote: it will turn black near the hot water riser and begin to crumble
Why does this have to happen?
So silicone won’t help either and will fall out over time, for example when the heating is turned off and the riser (pipe) shrinks?
It is at this time that you need to seal it, but it is better to cool it even more, dry ice will do, for example, as a last resort from the refrigerator. And when the pipe shrinks as much as possible, seal it immediately. Seriously though, write it down and forget it. And if > it turns black near the hot water riser, it will begin to crumble
or God forbid it melts. Call us, let's see if your pipes emit ultraviolet light.
I understand that I’m asking stupid questions, but I’m a woman, I’m scared to death of flooding, probably already a phobia, so I was worried about the question of how to seal it up and prevent the pipes from bursting + to remove audibility from the upper neighbors. Thank God we were isolated from our side neighbors.
I filled all three risers with sand concrete. Please tell me, has my sentence already been signed? And when should we expect an ambush? I poured it when the heating was already on, and while it was not yet turned off. I myself am on the 5th floor of a 5-story building.
Sorry, > I read it some time ago,
I missed the letter “a”. If in your case it is a room with high humidity, a bathroom (which is not possible), or a kitchen (which is possible), then a sealant is better. But again, just to reassure yourself, there are a lot of other ways for serious water. In other rooms, the reason is either an overflowing flower and a trickle on the floor, an overturned bucket (aquarium, etc.), or a heating radiator, and “traces” of the work of service 01. It is harmful to think about the last two reasons, i.e. there is no point. The pipe passes through a void in the slab. Foam will fill this space a little, reduce noise, and keep debris and smell out. The sealant will only close the gap at the beginning (and also debris and smell). If there is a sleeve (around the pipe), you can use sealant in it - it will go a little further. You can combine first the foam, then the sealant, having first cleared the gap from the foam (after drying). To make the foam stick better, blow out the gap with a blower and spray it with water from a spray bottle (or, on the contrary, do not do this in order to better clean the foam).
For example, they make a hole in the slab for installing pipes, whereas before the hole was not weak. Next, place the sleeve and fill it with a solution of something (your choice). Or maybe they don’t fill it (like mine), when I was replacing the wooden floors, I took a shirt (flannel) out of the hole; the neighbors probably covered it with plaster. And when the floors are then poured, the sleeve should be higher. According to the mind, the sleeve allows you to dismantle and install pipes. It is placed, among other things, because of the difference in the expansion temperature of reinforced concrete and metal when heat is supplied, especially sharp like a water hammer (although it will rupture in another place). Also when settling a new house, when the foundation settles (depending on the size, land, etc.). But not so much that the plates will walk back and forth, this is not a “fountain” at all and the sleeve gap will not save. Both sealant and foam of your choice, this is quite enough, it certainly won’t do any harm. Changing the pipes in this case, if later, is easier than hollowing them out. But this is also not scary, cut it flush and drill a new hole nearby. I haven’t heard anywhere that there were problems due to the pipes being filled with mortar, maybe someone will respond.
How to repair a crack or fistula in a cast iron sewer pipe
We can all face such an unpleasant situation as the formation of cracks and leaks in the sewer pipeline. And even if this has not yet happened, due to the natural aging of communications, the likelihood of the question of how to repair a crack in a cast iron sewer pipe will increase every day. Of course, you can install a new element of the sewage disposal system instead, but not everyone can afford such a “pleasure”.
There are several ways to eliminate a leak from a crack in a cast iron pipe.
How to fill a hole from a fallen piece of plaster
If, for certain reasons, a hole forms in the ceiling from fallen plaster, you can use several methods.
There is the easiest way to solve the problem than to cover up a hole in the ceiling; it is simply covered with putty. However, there is no certainty that a similar problem will not arise again.
For this reason, it is best to use a more labor-intensive but reliable option. It involves performing the following actions:
- Before sealing a large hole in the ceiling, the hole is treated with an antiseptic solution, which prevents the formation of fungus.
- Then the working area is covered with a layer of deep penetration primer. As a result of this event, the surface around the hole is strengthened and the degree of adhesion of the putty to the base increases.
- The primer is dried and putty is applied to the problem area. It is best to perform the last step 2-3 times, and each layer should be thoroughly dried.
- Finally, the treated area is sanded and coated with primer again.
Why do cracks form in cast iron pipelines?
To choose the right method for repairing sewer pipes, you need to find out why they leaked. First of all, determine the location of the crack. Pay special attention to the joints of the pipes, as well as various external defects of the cast iron pipeline.
If you find that the sewer pipe is leaking at the joint of the fittings, then the reason lies in the negligence of the plumbers when installing the sewage system.
In general, cast iron is not particularly resistant. First of all, impulse effects, in other words, blows, are contraindicated for him. Although it should be noted that the owner would not have to repair the sewer pipe in the apartment if the load was evenly distributed throughout the pipe.
Cast iron pipes are durable and can last for decades, but they must be protected from mechanical stress
New cast iron products are characterized by greater strength, however, they can only withstand light impacts. But a crack will inevitably appear from any load within 10-20 years. And it’s good if it’s enough to just cover it up, and not replace the entire pipe.
How to fix a leak in a cast iron sewer pipe
There are several ways to solve this problem. The choice is influenced by the following factors: the strength of the pipeline, the presence of longitudinal cracks and chips, as well as the size of the defects. As practice shows, repairing a sewer pipe without dismantling is permitted in the following cases:
- if there are small cracks or holes in the riser body;
when sewerage leaks at the junction of pipes.
If the sewer pipe is leaking at the joint, to repair the cracked joint, follow these steps:
- During the work, turn off the sewage system.
- Using a rag or hair dryer, dry the joints.
- Remove cement from joints. Remove any remaining stuffing from the cracks.
- Using linen plumbing tape, caulk the gap formed between the pipes.
- Make an aqueous solution containing polycement and PVA glue.
- Apply several layers of solution to the crack at the joint.
- Do not use the sewer during the day.
To eliminate a leak from a pipe joint, you need to seal the joint using plumbing flax
Helpful advice! Instead of the above solution, you can use a special silicone sealant. Then the permissible downtime of the sewage disposal system will be only 3 hours. In addition, you can seal the joints of sewer pipes using waterproof glue, raw rubber, epoxy resin or children's plasticine.
To avoid constant repairs to a cast iron sewer pipe, talk to your neighbors about a comprehensive replacement of the sewage disposal system riser before it finally bursts. After all, even a small leak can become a harbinger of big troubles when an element of the engineering communication system that has exhausted its service life fails and all the apartments on the lower floors are flooded with sewage.
To eliminate leaks in small holes you can use:
- rubber bandage. This material is only suitable for temporary repairs of cast iron sewer pipes. Be sure to secure the bandage with tight turns of aluminum or copper wire;
- stubs. It is very important that such wooden wedges are short in length. Otherwise, they will play the role of a source of blockage in the sewage system. Carefully drive the planed chop into the place where the pipe flows, then wrap the pipeline with gauze and at the final stage impregnate it with epoxy resin;
- gauze. Wrap the pipeline in several layers of this material, having previously soaked the gauze with the same epoxy resin or cement mortar. The winding should look like a cocoon;
- special clamp. Repairing sewer pipes in an apartment with its help is carried out as follows: first you need to wrap the hole with a gasket, then cover the rubber with a clamp and tighten it. This method allows you to eliminate any leaks.
The fastest method for fixing a leak in a sewer pipe is to apply a clamp
You can repair a small crack that appears in the pipe as follows:
- Expand it, giving the recess a V-shape. This place will need to be sealed with a sealing agent.
- Degrease and dry the crack.
- Fill (cover) it with silicone or sealant.
How to seal the passage of a rectangular pipe - sealing
To organize a chimney and ventilation of a corrugated roof, rectangular pipes are often used. They are usually constructed from heat-resistant bricks or special ceramic blocks. To finish the areas where the corrugated sheeting meets the chimney, a ready-made shaped product in the form of an apron is usually used. The material for the manufacture of such an apron is usually galvanized steel. After installation, it can be painted to match the roof.
To decorate the joint with an apron, you will need to perform the following steps:
- Waterproofing and insulation damaged during the installation of the chimney outlet are glued to the outer walls of the pipe. To do this, use construction tape.
- The perimeter of the pipe is formed with a shallow groove: the upper junction bar is placed in it.
- After installing the upper part of the junction strip into the groove, it is additionally fixed with heat-resistant silicone sealant.
- When placing the lower part of the apron, an overlap of 10-15 cm is observed.
- Before covering the roof pipe from rain, the lower part of the apron is equipped with a tie made of waterproofing film: it serves as protection against leaks.
With proper installation of corrugated sheeting on the roof of a house, you can be guaranteed to avoid leaks during rains and spring melting of snow. By this criterion one can judge the reliability of the roof. It should be remembered that any roof structure consists of many elements. The list includes valleys, front strips and ridge. However, based on practice, the most risky element in terms of leaks is the chimney.
Several decades ago, stove makers dealt with this problem by thickening the brick chimney. However, such work requires certain knowledge and skills, and modern structures are increasingly being built from metal. Typically, chimneys are made with a round cross-section. Simple instructions will help you figure out how to seal a pipe on a roof made of corrugated sheets.
Causes of leaks
The roof, covered with a profiled sheet, must be equipped with several openings through which the chimney pipe and ventilation channels will be routed. As a result, the integrity of the waterproofing may be disrupted, which will increase the risk of leaks. It is quite difficult to solve this problem if the chimney had to be routed through an already constructed roof.
To ensure high-quality sealing of the areas where the pipe meets the corrugated sheet, you need to put in quite a lot of effort.
If the work is done poorly, many problems arise:
- Water begins to flow. This happens if the sealing of the joint between the chimney and the corrugated sheet is poorly equipped.
- The rafter system began to rot. After water gets inside the roofing pie, the wood from which most of the roof elements are made gets wet. As a result, the structure is deformed.
- The roofing material itself begins to rust. Corrugated sheeting is not very well protected from corrosion from below.
- Aging of thermal insulation. When insulation gets wet, its effectiveness is significantly reduced.
To increase the reliability of the roof, you need to correctly select the location of the chimney and ventilation ducts. This will make sealing the pipes much easier.
What needs to be done to ensure that there are no leaks at the points where the pipe joins the corrugated sheet? To do this, you need to properly seal the joints. Experienced installers note that when solving a problem, it is important to take into account the location of the chimney. The closer the chimney pipe is located to the ridge, the less water gets to its junction with the chimney. In this case, the risk of leaks is reduced.
In addition, the pipe installed as high as possible along the slope has the smallest section located in the cold air zone. This allows you to minimize the formation of condensation, which contributes to the growth of soot inside the chimney. In addition, if condensation constantly forms in the pipe, the walls of the pipe are exposed to acid, which corrodes the metal.
You should separately consider different designs of chimney pipes in order to figure out how to design their joint with a corrugated roofing.
Today, more and more manufacturers are making sure that the joints of the roof and chimney pipes are reliably protected from water. For this purpose, special additional elements are being developed. They are installed near valleys, ridges, and pipes. Such elements are called aprons.
The main purpose of the apron is to collect water flowing down the chimney and roof slopes. With the help of such devices, moisture is diverted to the eaves into the drainage system. However, during the installation process it is important to consider one important point. You need to take care of proper waterproofing.
As you know, it is mandatory to lay a waterproofing film under the corrugated sheeting. It doesn't matter whether the roof is insulated or not. At the junction of the pipe to the roofing, a cut is made for the installed chimney. The edges of the cut are left wide from 50 to 100 mm.
However, these are not all the points that need to be taken into account. At the joints it is necessary to create a reinforced layer of waterproofing. Therefore, quite often a special tape is installed under the apron. It must be placed under the apron strips located on top. The tape partially extends onto the corrugated sheet. The scheme of work when creating a waterproofing layer should be as follows:
- first the tape is applied to the lower edge of the chimney pipe;
- after this, the joints must be sealed on the sides of the pipe structure;
- At the final stage, the upper edge of the chimney is glued.
Situations often arise when it is necessary to run a stove pipe through an already created corrugated roof. This job can be done quite simply. However, one subtlety must be taken into account. It is necessary that the hole for the chimney in the roofing material be 1.5-2 cm smaller than the pipe itself. In this case, the chimney will not be able to fit through. But to do this, the edges of the corrugated sheeting are simply cut and bent.
After installing the chimney, they will fit tightly to it. This allows you to create additional protection for the joint from leaks. In this case, it is necessary to install the lower strip of the apron under the corrugated sheet, and a waterproofing tape on top.
We suggest you familiarize yourself with Is it possible to pour a foundation in winter: conditions and methods of work
The easiest way to seal the joint between a pipe and a corrugated roof is if it is routed through a ridge. This increases the reliability of the connection. In such structures, the formation of snow pockets is impossible. The risk of leaks arises precisely when they are present.
Such options also have one significant drawback - to pass the pipe through the top of the roof, the ridge element must be divided. This means that two additional posts need to be installed under the edges of the plots. You can seal the junction using an apron.
However, it must have a certain configuration. This element is made from smooth metal sheets.
Attention! Often the space between the corrugated sheeting and the apron is filled with silicone-based sealant. Modern manufacturers offer consumers the use of self-adhesive tapes, which are made of butyl rubber.
The upper junction area must be sealed using the standard method - using the upper elements of the apron, sealed on top with sealant. The silicone composition is not afraid of high temperatures.
Not in all cases, the layout of the building allows the chimney to be brought out through the roof ridge. Therefore, another path is chosen - to make a hole on the slope. In this case, the work on sealing the junction becomes significantly more complicated.
The main goal is to correctly install the top element of the apron. Therefore, the main rule is to install this element under corrugated sheeting.
Attention! If the upper side of the chimney structure is more than 80 cm wide, a shaped apron with a slope is installed on it. This design resembles a breakwater that diverts water in different directions from the chimney.
Installation of such an apron is associated with certain difficulties. In addition, at the junction of its elements and corrugated sheeting, two valleys are obtained. They need to be sealed in the same way as valley roofs. This requires the installation of additional strips and increased waterproofing.
Round pipe
Many chimney structures for stoves are equipped with round channels made of sheet metal. Such products are multi-layered and are additionally insulated. Such a pipe is sealed in many ways. It’s worth looking at the most popular ones:
- The passage of these structures can be sealed with bitumen derivatives. Quite often, roll materials are used for this purpose.
- Installation of self-adhesive tape. This material has a foil layer.
- Installation of special aprons made in the form of caps. They are also called roof passages. These devices are simple and reliable. They need to be put on a pipe with a circular cross-section and attached to the roof sheathing.
When there is a residential attic space under the roof of a house, the passage for the pipe must not only be sealed, but also thoroughly insulated. The gap formed between the apron and the pipe must be closed using a special heat-resistant gasket. It is attached to the plane of the product.
As you can see, you can install the joint between a corrugated roof and a chimney yourself, knowing the installation features of various structures. In the process of work, it is important to follow technology. This will ensure sealing of the junction.
If the insulated roofing pie has already been completed, there will be many problems with passing the chimney through it. The main difficulty is compliance with fire safety requirements. At the same time, it is necessary to maintain the integrity of the vapor and waterproofing.
The chimney structure should be located at some distance from the wooden rafters. Therefore, the passage of the pipe through the corrugated roof is created in a special box, which consists of rafters located next to the chimney duct. Two beams are fixed between them.
They are placed above and below the chimney structure. From cross beams and rafter legs to the chimney structure is selected in accordance with fire safety standards. This figure ranges from 130 to 250 mm.
It depends on the material from which the chimney structure is made.
The inside of the box must be filled with insulation with non-flammable properties. Typically, high-density material is used, made using basalt fiber. It has low hygroscopicity compared to conventional insulation.
How to seal sewer pipes most reliably
The question of how to seal the joints of sewerage elements in an apartment has already been briefly discussed above. The listed methods began to be used simultaneously with the advent of cast iron sewer pipes. But the achievements of science and technology do not stand still. This led to the introduction of new technologies in this area. Experts are unanimous: if a cast-iron sewer pipe bursts in an apartment, it is best to eliminate the leak without dismantling the utility lines using phosphoric acid and copper oxide.
Helpful information! These chemical reagents, having reacted, harden over a period of time. This phenomenon is accompanied by the formation of a strong fill at the site of damage.
Elimination of leaks is carried out in the following sequence:
- Cleaning the intended stash site. To do this, use sandpaper or a stiff metal brush.
- Degreasing the problem area using acetone or another solvent.
- Preparing the mixture that you will use to seal the leak. The ingredients - orthophosphoric acid and copper oxide powder - are mixed in a ratio of 2:3.
- The actual sealing. The joint should be covered with the resulting composition immediately after mixing . It will harden instantly, so you can use the system in a few hours.
You can thoroughly clean the pipe with a special metal brush - manually or in the form of an attachment on a drill.
The answer to the question of how to seal a cast-iron sewer pipe most reliably would be incomplete without mentioning one more method. To perform it, powdered ammonia is used, which is mixed with sulfur and iron filings. Add water to the mixture until a thick consistency is formed. The practice of using this method of sealing the joints of sewer pipes in an apartment and sealing damaged segments has demonstrated the amazing durability of the formed connection.
How to seal the joint between a roof and an oval and round pipe
Sealing a modern round chimney is made easier by the fact that the pipe is equipped with the necessary accessories. The finished apron-cap consists of a metal sheet with a hole, which is closed by a truncated cone of the cap inclined towards the sheet. The installation proceeds as follows:
- Having made a hole in the waterproofing, the edges of the material are glued with mastic to the pipe, which has been previously primed to increase its adhesive properties.
- The sheet is attached to the sheathing, the pipe is passed through the cap. The junction of the cap and the walls is covered with a steel clamp equipped with a heat-resistant gasket.
For a round metal chimney, you can use a special sealant
In addition to metal aprons, it is possible to use a special elastic flexible pipe seal. Flexible chimney sealant can be used to insulate any additional elements on roofs.
On roofs made of metal tiles or corrugated sheets, abutment strips are used for sealing.
The waterproofing membrane in the area where the chimney is being installed is cut and partially removed. The rest of the waterproofing is attached to the walls of the pipe, overlapping them by 5-10 cm. The membrane is glued to the walls with bitumen mastic.
The metal apron around the chimney is assembled from the outer and lower junction strips. The outer junction strip is filled with sealant for the chimney pipe.
Roofing material is manually laid on top, and the joints are treated with sealant.
When working on an ondulin roof, after fixing the waterproofing film, lower and upper ties are formed from metal corners. The structure is covered with sheets of ondulin, and an apron is installed on top. Bitumen mastic is used to treat seams.
Seal the gap between the pipe and the roof
No matter how tightly the pipe is placed to the roof, there will still be a gap. In rainy weather, precipitation will fall into the inner layers of the roofing pie and cause irreparable damage. That is why sealing the gaps between the pipe and the roof is an important stage in the construction of a chimney, which should not be neglected.
We invite you to familiarize yourself with the drawing of a boiler for a pipe bath
The easiest way to seal the gap between the pipe and the roof is to install a special protective element on top - an apron. You can build such an element yourself, but you will need to provide junction strips on the pipe in advance.
You can do it even simpler - purchase a ready-made roofing passage made of stainless steel. As a rule, the chimney passage has a round cross-section, and the material for its production is galvanized steel. The passage is placed on the pipe, and the joint is additionally secured with a steel clamp.
Galvanized chimney passage
If you need to seal small gaps between the pipe and the roof, a silicone-based sealant is suitable. Today, any hardware store offers a huge selection of sealants; your choice must be made on a heat-resistant option.
In addition to general recommendations, there are also specific specifics for sealing cracks for various roofing materials. Therefore, the algorithm for waterproofing differs on slate, tile, bitumen roofs, as well as corrugated roofing.
If it is necessary to seal a gap in a slate roof, an asbestos-cement mixture is used. The process technology is as follows:
- A round hole is cut in a steel sheet, which is used to finish the ridge.
- A ring of sheet asbestos cement is placed on the pipe.
- For complete tightness, it is necessary to seal the joint between the pipe and the roof with a solution of cement and asbestos, which are diluted in a ratio of 1 to 2.
- It is also necessary to fill the gap between the chimney pipe and the slate sheet with asbestos-cement mortar. For this purpose, you can make a temporary limiter from cardboard.
Return
The best way to seal cracks in a tile roof is to use a cement-sand mortar. It is this method of sealing the pipe that will provide reliable protection against any type of precipitation.
Passage through metal tiles
In order to carry out waterproofing, it is necessary:
- Prepare a galvanized steel collar on the roof, thereby creating a space for filling with mortar.
- Fill the gap with cement-sand mortar, making sure that it fits tightly to the roof and chimney.
- Additionally, make an inclined surface on the collar to drain liquid.
Return
To waterproof a chimney that rises above the bitumen roof, Wakaflex self-adhesive tape is used. The stages of the work are as follows:
- Making cuttings from Wakaflex roofing tape.
- Pressing the cutting with a pipe case.
- Seal the gaps between the connected elements with special bitumen mastic.
Return
If it is necessary to remove a smoke exhaust device through a roof made of corrugated sheets, ready-made pipe cutting Master Flash is most often used. This roofing element is very convenient to use and can be used not only for corrugated sheeting, but also for other roof materials.
Master Flash is an apron-cap, which is a rubber or silicone apron on an aluminum base.
Silicone Master Flash has a wider operating temperature range, but most often rubber is sufficient, which can withstand loads from -50 to 130 degrees.
To organize the passage of a pipe through a corrugated roof, a galvanized steel pipe with a round cross-section can be used. In this case, sealing the abutment joints is not very difficult. It is for these purposes that elastic funnel-type penetrations are intended. The material for their manufacture is usually latex and synthetic rubber. They are usually included with pitched and flat roofs.
The process of sealing a joint using elastic penetration looks like this:
- Selection of suitable elastic penetration.
- Cutting the narrow part to ensure a tight fit around the pipe.
- Removing the protective umbrella and deflector from the pipe, followed by carefully tightening the elastic penetration. The product must cover the entire pipe section.
- Fixing the base of the penetration to the roof surface is facilitated by the presence of a self-adhesive base. You can also use silicone sealant or roofing screws.
- At the final stage, a decorative apron is installed. It looks like a cap and is tinted to match the color of the roof. The apron is designed to protect the elastic penetration from solar radiation and mechanical influences.
Selecting the size of the elastic penetration plays a key role in ensuring reliable sealing of the joint. When the product does not lie tightly on the pipe, you have to additionally use sealant and a steel clamp. Penetrations of small diameter may rupture when trying to put them on a chimney.
The easiest way to seal a sewer pipe
Very often, homeowners are interested in how to seal a cast-iron sewer pipe if it is leaking at a caulked joint. Silicone sealant will again come to the rescue. Before sealing a sewer pipe joint, clean the socket of old putty, remove any remaining debris, and dry the pipe.
Note that the following phenomenon often occurs: the connection does not flow, but emits an unpleasant odor. Sealing of sewer pipes in this case can be done using ordinary cement. In order to make the connection stronger and speed up setting, add a small amount of sodium silicate (liquid glass) to the solution before sealing the joint.
It is very easy to repair sewer pipes with your own hands in an apartment using Cold Welding glue. To properly seal the hole, before starting work, empty the cavity of the sewage drainage system from the remaining liquid and mark the location of the leak with chalk. Then clean the surface of the pipe and degrease it. Apply a small cold-welded patch to the damaged area, then apply a rubber sealant to it. By the way, this method is also the answer to the question of how to eliminate a leak in a plastic sewer pipe.
In conclusion, it should be noted that if a sewer pipe is leaking at the junction, it can be sealed using a tape consisting of an aluminum or copper layer on a bitumen-rubber base. The tape is very effective, strong and durable. And sealing sewer pipes is very simple.
How to get rid of a hole around a riser?
The hole that appears around the riser under the heating system does not appear so often, but there are still cases. If prerequisites for the formation of a crack or any other defect in this place have been noticed, it is worth taking special care to eliminate the problem. You can seal a hole in the ceiling using the following steps:
- If there is a small gap, the size of which is 0.5 centimeters, then it can be eliminated using silicone sealant. This material is characterized by excellent plastic properties, so when pipes expand under the influence of heat, no obstacles will arise.
- If there is a large hole, installation work will become more complex. Here, first you need to apply reinforcement, for example, using welding electrodes. Then fill the space with polyurethane foam. And only then seal it with cement mortar and putty.
Causes of accidents
In the event of an emergency, they begin repairing sewer pipes. Due to the fact that accidents are different, the approach to eliminating them will be different.
If the cause of the damage is mechanical impact, then most likely it will be necessary to carry out a major repair, that is, replace the entire pipe or its element. If the connection is simply depressurized, it will be enough to carry out minor repairs.
The causes of sewerage leaks are most often associated with the occurrence of pipe defects during their manufacture, as well as after the construction of the system - at the joints.
If a sewer pipe is leaking at the junction, you will need:
- dry the joint;
- remove accumulated dirt, cement or glue;
- close the gap between the pipes with linen winding;
- coat generously with construction sealant;
- wait 5 hours, after which you can start using the sewer.
If it turns out that a pipe is leaking, we will consider what to cover it with, based on their specific situation. If water oozes through a cracked solution, then the cracks that appear after drying will need to be covered with silicone, epoxy or liquid rubber.
If the liquid is leaking through a crack in the pipe, then as a temporary measure, you can drive a small wooden or lead wedge into it, then wrap the damaged area with rubber or bandage and soak it with epoxy or install a clamp. A clamp would be ideal, even if it is homemade.
Repairing cracks in sewer pipes
Due to temperature changes, small longitudinal cracks may appear on cast iron pipes.
To eliminate this problem, first of all, on the outer part of the pipe, the crack is slightly widened, dried and sealed with sealant. After this, the pipe is wrapped in a heat insulator.
There are cases when water seeps through through cracks.
In this case, eliminating the leak will be as follows:
- the cold welding method with two-component glue is suitable;
- After the glue has dried, we sand the seam, after which it can be painted over.
Getting rid of fistulas
Before you fix a leak in a sewer pipe, you should understand how to fix it.
You can use the first method:
- wrap the damaged area with a rubber gasket;
- tighten with a clamp.
There is an alternative method:
- if a large fistula occurs, you will need to use a repair coupling;
- cut a piece of rubber to the size of the coupling;
- Tighten it well and the leak should stop.
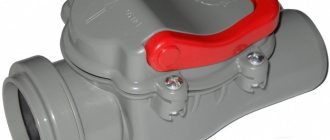
It is worth noting that special plugs can be found on sale. They are installed in cleaning areas. You can additionally put a rubber gasket on the plug. The solution to sealing a cast iron sewer pipe if the leak continues is to additionally seal the plug with silicone.
If a leak has formed at a joint, then the joint is additionally filled with liquid glass, that is, silicate glue, on top of the sealing layer.
Replacing a defective pipe
Often, due to serious damage, it is necessary to completely replace the entire pipe. To do this, you will need to stock up on tools and parts: a hacksaw for metal, flax, pipe wrenches, a sealant, a union nut and a coupling.
The sequence of work will be as follows:
- Using a metal hacksaw, the defective section of the pipe is cut out, plus 30 cm.
- We unscrew all the connections, clean the threads, and remove the cut piece of pipe.
- We make a new thread on the old pipe. To hold it, we use plumbing wrenches.
- We screw the coupling onto the pipe, after which we determine the length of the pipe to be replaced, taking into account the thread.
- We fix the pipe in a vice and cut off the required section.
- Using a die we cut a thread on it.
- We wrap flax around the thread and lubricate it with a sealant.
- Using a coupling, we connect the new piece of pipe to the old one.
- At the other end we join the new and old pipe with a union nut.
If emergency repair of a pipe is necessary, it can be wrapped in rubber from a bicycle inner tube and then secured with couplings.
Repair methods for cast iron pipes
When craftsmen decide how to coat a cast iron sewer pipe, they have several options to choose from:
- wind the strands;
- to settle the strands;
- use asbestos cement solution as putty.
However, before starting any work, the pipe should be cleaned to a metallic shine.
In cases where sewer pipes made of cast iron are morally and physically worn out, they are completely dismantled for replacement.
This work is carried out in several steps:
- using a grinder, cut off a section of pipe to the joint;
- the socket is freed from cement and packing residues;
- the remaining section of pipe is cut with a grinder in several places to make a stop for the lever;
- insert a crowbar into the slots and loosen the pipe along the axis;
- the last piece of pipe is removed from the socket;
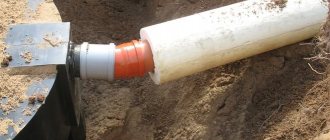
- the rubber adapter coupling is mounted in the old socket;
- A new plastic sewer pipe is installed in the adapter.
How to repair sewer plastic communications
Since plastic sewer pipes are quite cheap and not very reliable, it is not recommended to radically repair the damaged surface.
In this case, the best option for cosmetically eliminating the problem would be to seal it with a regular sealant.
As additional protection, it is possible to insert shaped parts, for example, tees.
If a leak is detected in the pipe at the junction of two sections, then you should simply replace the leaky sealing elements with new ones, not forgetting to seal the seam with silicone.
Thus, it is possible to eliminate a leak in a sewer pipe made of any materials using available materials and tools. Use our recommendations and everything will work out for you in the best possible way.
Sealing gaps between ceiling and walls
If during the operation of the plasterboard ceiling a gap has formed between the structure and the wall, then to solve the issue of how to repair the hole in the ceiling, you must perform the following steps:
- The edge of the plasterboard sheet adjacent to the wall is cut at an angle of 45 degrees.
- Fill the seam with gypsum-based putty and dry thoroughly.
- Next, treat the putty with sandpaper and secure the seam with paper tape with an adhesive side.
If a gap has formed between a concrete floor slab and a plastered brick wall, then the following measures are suggested:
- The resulting gap is widened to 1 cm.
- Cover with a special primer using a brush. In this case, it is best to use concrete contact or its equivalent.
- Next, the gap is filled with gypsum or acrylic-based putty.
- Lay sickle tape over the putty to strengthen the seam, trying to press the material into the putty mixture.
- The corner is leveled with a spatula and left until completely dry.
- The repaired area is treated with fine sandpaper.
Sewer pipe breakdowns and repairs
Reliable operation of the sewer system is the key to a comfortable stay in any room, regardless of whether it is an office or a residential building. That is why it is so important to monitor the serviceability of the collector and eliminate possible risk situations in a timely manner. But what to do if repair of sewer pipes suddenly becomes necessary, and for some reason it is impossible to call a technician, or you simply want to deal with the problem yourself? In the material below we will analyze in detail how to repair sewer pipes with your own hands and at the same time do everything correctly.
Important: self-repair of the collector can only be carried out if the system is plastic. Repairing a cast iron sewer pipe can only be done by professionals, since this part of the communication is heavy and requires certain skills.
What do building codes and regulations (SNiP) say about this?
SNiP 41-01-2003 “Ventilation, air conditioning and heating” regulates the main aspects related to the arrangement of various autonomous heating systems. Since this publication is devoted to an analysis of the design features of the passage of a chimney through the attic floor, it is necessary to pay special attention to section 6.6 - this is “Stove heating”, and its subsections.
In some cases, these existing rules become a real problem for owners of private houses when arranging their home heating system. Such difficulties arise due to the fact that some of the requirements for modern heating systems and materials used for thermal insulation are clearly outdated. However, despite possible obvious contradictions, regulatory organizations rely on this guidance and demand compliance with established standards.
It must be remembered that if a stove is installed in a newly built house, then it will be necessary to legalize its presence with the fire services, otherwise it will simply not be possible to register the property. Such a permit is issued on the basis of a document drawn up by an employee of the controlling organization who accepts the building. If during the inspection serious violations of current standards are discovered, then there is no escape - the mistakes will have to be corrected. Therefore, it is best not to immediately deviate from the established standards.
The design and location of both the stove itself and its chimney are strictly regulated by current building codes and regulations
Not everyone likes the dry language of regulatory documents, and that is why they are simply afraid to look into them. Let's try to outline these rules for them in a few paragraphs:
- The thickness of the walls of a brick chimney in the area of its passage through the floors, roofing or walls (partitions) must be greater than along the main height. This thickening is called cutting.
According to existing standards, the cutting thickness is calculated taking into account the thickness of the pipe itself. Craftsmen often use the colloquial term “from smoke” in this regard. So, the standard cutting size is:
- 500 mm if the pipe borders a building structure made of flammable material (which, of course, includes a wooden floor).
- 380 mm - for those cases when the materials of the building structure are protected from fire by a layer of plaster of at least 25 mm reinforced with steel mesh, or a metal sheet with an asbestos lining underneath with a thickness of at least 8 mm.
- The height of the chimney cut must be at least 70 mm greater than the thickness of the ceiling. By the way, SNiP does not stipulate from which side these millimeters should “look out” - from below, on the ceiling, or in the attic. Judging by the forums, there is also no unanimity among the masters. But, as a rule, customers ask for a flat ceiling in the room, so a 70-mm step can be located in the attic. However, if you read the forums again, you can come across cases where fire inspectors demanded a 70-mm “side” both at the top and bottom. And it was not possible to convince them otherwise.
- It is not advisable to attach the chimney section rigidly to the floor materials or to rest it on any building structures. True, there is no categorical prohibition in this regard, but one should still adhere to such a recommendation so that the deformation of one element that occurs for some reason does not entail the destruction of another.
- The space between the cutting and the building structure is filled with non-combustible materials. The list of materials is not specified, but in practice those that can be classified as thermal insulators are usually used - expanded clay, vermiculite, mineral wool.
- If the pipe is cut through the opening of a wall or partition and flammable materials, then its thickness cannot be less than the thickness of the partition itself. In this case, the cutting must be done along the entire height of the wall.
- When the pipe passes through the roofing, cutting is also often performed, which in this place is called “otter”. In any case, the distance from the outer walls to any elements of the roof structure made of combustible materials must be at least 130 mm for a brick pipe, and 250 mm for a ceramic pipe without thermal insulation (when using insulation with a heat transfer resistance of at least 0.3 m²×ºС/ W – 130 mm). The roof section at the passage point should only be made of non-combustible material.
- When constructing a stove and its chimney, it is important to maintain the distance to walls and partitions. This gap has its own name - retreat. The amount of derogation is also regulated by the requirements of SNiP:
Common sewerage breakdowns
The most common breakdowns that occur with a sewer or water supply system are blockages and traffic jams in the sewer system
Important: very often sewer and water pipes are hidden behind decorative panels and shields. That is why, in the event of leaks or blockages in any of the communications, you will have to dismantle parts of the wall cladding in order to identify the exact location of the fault.
The most common breakdowns that occur with a sewer or water supply system are:
- Congestion and traffic jams in the sewer system. In this case, a clear indication will be water stagnation with feces in the toilet or waste water escaping in one of the other plumbing fixtures.
- Leaks in certain areas of a sewer or water pipe.
- Cracks in plastic pipes.
Important: in any case, repairs must be started immediately, otherwise it threatens a global catastrophe for both the residents of a private house/apartment and the neighbors (in a high-rise building).
Blockages in the sewer
This type of failure is the most common, especially if the collector is old or not used properly.
This type of failure is the most common, especially if the manifold is old or not used properly. That is, traffic jams and blockages in this case are formed not so much in the central pipe as in the siphons under the bathtub or sink. Typically, clogs are caused by hair and other fibrous debris. Combining with sebum and dirt, they cling to the siphon bridges and interfere with the outflow of water. If this occurs in your sewer system, you can use a simple plunger to clear the system.
- Water is drawn into the sink or bathtub. The device is installed in such a way that its rubber cap fits tightly to the drain hole, and sharp and dense movements begin in the up and down direction. The vacuum created by the plunger must either pull debris out or push it further through the system.
Important: if there is an overflow in the sink and bathtub, then they must be closed while using the plunger. Otherwise, it will not be possible to create a vacuum.
- If the plunger fails to remove the plug, then you can use an aggressive chemical agent that will simply corrode the plug formed in the system. The drugs must be used very carefully, following the instructions exactly. As a rule, the dry product is poured into the sink or bathtub drain and filled with a glass of water. The mixture is left for 30-40 minutes, after which it is washed off with very hot water. The congestion should go away.
- As a tool for removing the plug, you can use a flexible cable with a brushed tip. It is launched into the sewer pipe and advanced until it becomes clogged. Using rotational movements, the cork is crushed or pulled out. Sewage pipes are washed with plenty of water.
Important: to clean plastic pipes, the tip on the cable must be rubber or something similar to plastic. Otherwise, there is a risk of scratching the pipe from the inside and then debris will accumulate in it.
Sewer leaks
If you find a leak in one of the sections of the sewer pipeline, then you should urgently take measures to eliminate the problem
If you find a leak in one of the sections of the sewer pipeline, you should urgently take measures to eliminate the problem.
As a rule, leaks most often form at the joints of cuffs and corrugated sections of the pipeline. This indicates an inaccurate and leaky fit of one element of the system to another. In this case, you just need to replace the rubber gasket and properly tighten the connection. To be sure, the joints need to be sealed with sealant.
- A leak on a section of a plastic pipe can be eliminated by replacing a section of the line and connecting it properly to the main manifold using couplings and seals. After this, the pipe does not leak.
- If a leak is found on a section of a cast iron pipe with cement putty, then the work here will be a little more difficult. First of all, the entire layer of cement is knocked down. Residual pieces of stuffing are removed from the cracks and the area is thoroughly cleaned of debris. Now you need to lay a new layer of packing from a mixture of cement, asbestos and water. The solution is prepared in a ratio of 7:3 plus the amount of liquid that will allow you to obtain a suspension with the consistency of soft plasticine. The top of the joint of a cast iron pipe can be covered with cement mortar, which is mixed in proportions of 1:10 (cement: water).
- Lead pipes (if they leak) are treated according to the principle of cast iron. Only here all the old lead is removed from the joint and new pieces of material are laid. It is very convenient to use just a chisel.
Important: lead or asbestos packing for cast iron pipes can be replaced with a liquid glass gasket. It is made from standard bandages and a mixture of cement and liquid glass. The working technology looks like this:
- The cleaned joint of the cast iron sewer pipe is wrapped with a bandage soaked in the prepared mixture. Considering that liquid glass dries very quickly, you need to work without delay. After a couple of months, such a winding can be successfully painted in any color.
Crack in sewer pipes
A crack is the most dangerous problem in a sewer system.
A crack is the most dangerous problem in a sewer system. Such a seemingly small nuisance can bring very big problems in the form of a gradual increase in clearance and an unexpected burst of the sewer. Is it worth talking about what comes next? Therefore, it is better to replace the pipe section immediately after detecting a crack. Especially if it's plastic. To replace cast iron pipes you will have to invite professionals.
If there is no time or opportunity to replace a section of pipe at the moment, then you can cover up the crack for a short time. But for the shortest possible time.
- For a plastic pipe, a sealant is used to seal the gap. The crack is covered with tape from above.
- The cast iron pipe will have to be “treated” more seriously. To do this, you need to widen the gap and degrease it. The resulting lumen is coated with a mixture of phosphoric acid and copper in a ratio of 2:3.
How to seal a hole around risers? - Homo habilis. Magazine for skilled people
: 5 / 5
Kendrick Erickson, flickr.com CC BY
Replacing risers in an apartment is a controversial event. There is no doubt that for a person tormented by constant leaks or lukewarm batteries, this is a long-awaited and joyful task. But after replacement, all residents have to take care of sealing the holes formed around the risers.
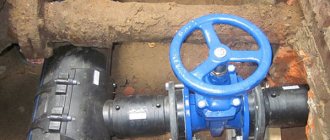
In general, the passage of riser pipes through ceilings must be sealed according to certain rules. For example, SNiP 41-01-2003 “Heating, ventilation and air conditioning” establishes that pipelines through ceilings must be laid in sleeves made of non-combustible materials. Also, the sealing of holes in the ceilings around the riser pipes is carried out with non-combustible materials.
The sleeve is usually made from a piece of pipe larger than the riser diameter. This sleeve allows, if necessary, to very carefully replace pipes without destroying the finishing of the room. Unfortunately, such an ideal situation does not occur often. In older houses, sleeves are often missing. It also happens that the riser pipe cannot be pulled out, and the pipe has to be knocked out along with the sleeve.
When replacing a riser, workers rarely bother making a sleeve. And it is very rarely possible to achieve restoration of the finish. Most often, there is a large hole left around the riser.
Is it possible not to close it?
No, of course, the hole doesn’t have to be sealed. This even has its advantages. For example, debris generated during sweeping can simply be dumped into this hole. And there is less hassle, and the hole is slowly filling up. In a couple of years it will be possible to fill it to the top.
But at this time your life will be much more varied than it was before. You will be aware of all the events happening with your neighbors - from grades in the child’s diary to the lunch menu. If there are smokers living downstairs, then you will smoke with them. And you won’t be lucky at all when a constant tourist exchange opens between the apartments. Cockroaches will only act as tourists.
How to seal it correctly?
The very first thought that comes to mind is to fill the hole with cement-sand mortar. This is far from the best option. A rigid seal will prevent the pipes from moving during thermal expansion. In this case, steel pipes will most likely destroy the cement-sand screed, and everything will have to start all over again. In addition, the coating of steel pipes in a rigid seal is severely scratched, which accelerates corrosion of the metal.
Plastic pipes, rigidly fixed in the interfloor ceilings, are deformed on their own, and you will have to admire the crooked pipes. Otherwise, the pipe may crack; this is a serious accident that will require a second replacement of part of the riser.
Therefore, proper sealing should allow the pipe to freely expand by 1-2 mm in diameter, move 1-2 cm along the axis of the riser, and reliably protect against the penetration of insects, odors and sounds.
nylon is best suited for sealing . This is a durable and elastic substance that is resistant to mechanical stress. Nylon does not absorb moisture and does not rot. It is especially important that nylon does not support combustion - in the absence of an external source of fire, nylon fiber goes out on its own.
The easiest way to get nylon at home is from nylon stockings. In fact, you don’t even need to get it - stockings and tights are made from pure nylon. You just need to trim the middle part of the tights so that the thickness of the resulting cord is approximately the same along the entire length. To obtain a long cord, the tights are tied together.
Now the nylon cord is not tightly wrapped around the pipes, but so that there are no gaps left. It is convenient to wrap from above, gradually shrinking the winding down.
For aesthetics, you can arrange a case of foamed polyethylene or other suitable material in the upper part.
The hole can be sealed with a cement-sand mixture (cement-sand ratio 1:3-4) or construction plaster (alabaster). Alabaster is more convenient, as it allows you to quickly finish the job. To reduce the consumption of gypsum, fragments of bricks, old plaster and other durable, non-rotting debris can be placed in the hole.
It is convenient to dilute alabaster in a plastic container that you don’t mind throwing away. There is no need to be particularly precise in the alabaster-water ratio. The mixture can be made thinner to make it easier to pour into the hole.
After pouring, you can pierce the mixture several times with something, similar to how concrete is bayoneted when pouring. This will allow the solution to fill the hole around the risers evenly, without voids. The surface of the alabaster needs to be smoothed.
Now all you have to do is wait for it to dry completely, this will take 2-3 days, and you can paint the surface of the alabaster in the color of the floor.
This seal allows the riser pipes to move relatively freely during thermal deformations, but reliably protects against the penetration of sounds, odors and insects.
We repair the sewer system of a private house
In this case, repairing sewer pipes with your own hands will be more labor-intensive, since a larger section of the collector is located in the ground
In this case, repairing sewer pipes with your own hands will be more labor-intensive, since a larger section of the collector is located in the ground. And here, replacing the worn outer manifold in case of leaks will have to involve either extensive excavation work or using one of two technologies:
- Burstlining. In this case, the old sewer pipe is dug out of the ground and simply cut lengthwise on site. Sections of the disassembled collector are pressed into the soil walls, and a new pipeline is installed in the vacant space.
- Relining. This method is even simpler. In this case, a corrugated pipe of smaller diameter is pulled inside the existing worn-out pipe directly in the ground.
In this way, it is possible to quickly and reliably eliminate depressurization of the outer part of the collector directly in the ground.