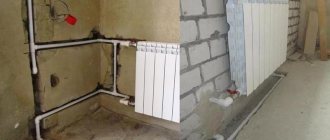
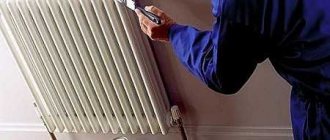
Required tools and materials
Not a single construction or installation process can be carried out without a certain set of tools and devices. In this case, you need to know what is needed to install a heating radiator. Most often the same set is used, with some exceptions.
For example, aluminum and bimetallic radiators are installed in the same way, but cast iron batteries are installed according to a different pattern. They require the use of larger plugs, and the Mayevsky valve is replaced with an automatic air vent, installing it at the highest point of the system. Steel panel-type radiators have metal arms and are equipped with brackets for hanging.
Why shouldn't a non-professional try to install the battery?
Installing a heating radiator is a very difficult task and must be done with high precision. The slightest deviation from the standards can lead to a drop in heating efficiency.
In general, someone who does not understand the installation of plumbing equipment can make many mistakes. Here are some of the most common ones, after which installing a radiator will not bring the desired benefit:
- Installation in the wrong location;
- Incorrect connection method;
- Improper handling and care.
Even if the installation of the heating battery was carried out correctly, which is very unlikely for a non-professional to work on, the battery can be placed in a place that reduces heat transfer. For example, if you place the battery in a decorative box, the heat output will drop by 15 or even 20 percent. And if the window sill is very large, then the radiator under it will lose about 10 percent of the heat.
Installing radiators and then connecting them incorrectly can be a waste of money. When the inlet and outlet pipes are connected to the radiator on one side, increasing the number of sections will worsen the condition of the system. In this case, the first section will be heated to the required 80 degrees, and the rest will be much less.
Even if somehow the installation of the heating radiator was successful, it was connected correctly and everything is going well, improper care of the battery can ruin everything. For example, if you paint a radiator in several layers, the heat will be retained by the air gap between the layers of paint, so the heating of the room will deteriorate. If you paint it, then only black, then the heat transfer will increase, but just a little. Also, do not paint the radiator white, this will slightly worsen the heat transfer.
Air release devices
Air always accumulates in heating radiators, which must be released periodically. Mayevsky taps are installed on aluminum and bimetallic radiators for this purpose. Most often it is located on the free upper manifold. This device is slightly smaller in size than the outlet, so an additional adapter is installed, which comes complete with the tap. When choosing a Mayevsky tap, you should focus on the diameter of the collector.
In addition to this device, automatic air vents are used, which are also suitable for installation on radiators. However, automatic devices are large in size, and their housing can only be brass or nickel-plated. Therefore, such a device does not look very attractive on white enameled radiators. This greatly reduces the demand for automatic air vents.
Locking elements
When installing batteries in an apartment, you will definitely need taps. They can be ball or shut-off; the second option allows you to regulate heat transfer. The taps are located at the pipeline inlet to the radiator and at its outlet. Ball valves allow you to disconnect the battery from the general system in case of emergency repairs or replacement during the heating season. In this case, the supply of coolant to the battery is stopped without affecting the operation of the entire system. Ball valves have a relatively low price, which gives them a great advantage over similar devices. However, with their help it is impossible to regulate the heat transfer of the heating device, which is a negative characteristic of the device.
Shut-off control valves shut off the water supply to the radiator in emergency cases, and at the same time allow you to change the intensity of the coolant flow. In addition, such devices look more attractive and have two configurations, straight and angular. This makes it possible to make the binding more accurate. But it is worth considering that the cost of shut-off control valves is several points higher than the price of ball valves.
In some cases, when using ball valves, thermostats are installed. They can be electronic, automatic and mechanical. Using this device you can change the heat dissipation of the battery. But it should be remembered that these devices can only reduce the flow, therefore, there is no need to install such a device on poorly heating radiators.
What radiators are best installed in an apartment?
To know which radiators are best to install, let's take a look at each type separately:
- steel batteries. Radiators made of steel are lightweight and thin. Good heat transfer and minimal water volume make them economical and efficient. They are inexpensive. But in terms of pressure they are weak - they can withstand only 6-8 atmospheres;
- aluminum radiators. They look attractive and the 190 watts of heating power keeps the user happy. But it’s too early to rejoice. Hot water with chemical impurities and high acidity instantly eats up batteries from the inside. After all, aluminum is very active. And he can't cope with a lot of pressure. Average operating pressure parameters are up to 16 atmospheres. And water hammer can destroy even a new aluminum radiator;
- bimetallic batteries. This is one of the newest and most effective developments of heating systems. Such devices are called bimetallic due to the presence of two metals in them. It can be aluminum and steel or aluminum and copper. Manufacturers guarantee that such devices will work for more than 40 years. For an apartment they meet all the criteria. They can withstand temperatures up to 130 degrees, operating pressure is up to 50 atmospheres, and with them you can not be afraid of water hammer. Anti-corrosion external and internal primer makes the devices durable and resistant to deformation. But not everyone can afford to purchase such an expensive device. And if they offer you something similar at a low price, don’t believe it: they’ll slip you a fake. If you buy, it is better to choose products from reliable brands - the Russian company Rifar, the Italian Syrah or Global;
- cast iron radiators. Such devices can operate for 50 years. It’s in vain that some manufacturers of modern devices say that it’s high time to forget about this old stuff. Thinking for a long time about which radiators to choose, many settle on cast iron batteries. When in contact with dirty water, they will not perform any tricks. This metal is not afraid of high acidity, chemical impurities in the coolant, and thick walls protect against abrasive. Radiators made of cast iron are characterized by long-term heat retention. Heat transfer using the radiant heating method is much more efficient than using convection. Cast iron radiators heat not only the air, but also objects that are nearby. Pressure drops, for which central heating is famous, are not a problem for cast iron. Its working pressure is up to 12 atmospheres. But it doesn’t always withstand large hydraulic shocks. The price of such devices is lower than bimetallic radiators. But such devices are heavy, which causes discomfort when installing them. In general, cast iron cannot be light. But this weight is compensated by thick walls, which give the radiators the necessary strength. Once you install these devices, you will forget about replacing them. The design of cast iron radiators is not as scary as it was in Soviet times. On the market you can find attractive molded batteries with a retro design that go well with beautifully designed rooms.
We recommend: What are the best radiators for central heating?
Additional tools and materials
For wall-type radiator models, you should purchase hooks or brackets, the number of which is selected depending on the number of sections of the heating device:
- If the number of sections does not exceed 8, and the length is less than 1.2 meters, then the device is attached at three points, two at the top and one at the bottom.
- Each next 5-6 sections require additional fastening.
In addition, in the process of deciding how to install a heating radiator yourself, you will need linen winding and plumbing paste, with the help of which the tightness of the connections is ensured. You should also take care of the presence of a drill, drill bits and level. Dowels may come in handy. In addition, it is necessary to purchase or rent equipment for connecting pipes and fittings.
Choosing an installation location
Before installing a heating radiator in an apartment, it is important to correctly determine its location. In most cases, heating devices are placed under the window so that the warm flow prevents cold from entering the room from the window opening. The width of the heating radiator should be 70-75 percent of the width of the window, in this case the glass will fog up less.
There are certain rules for installing heating batteries in an apartment under a window:
- The device must be located exactly in the middle with an error of no more than 2 cm.
- The distance from the floor to the heating device can be from 8 to 12 cm.
- A clearance of 10-12 cm is required between the window sill and the radiator.
- A gap of 2-5 cm should be left between the wall and the back of the device.
Compliance with these rules will allow warm air to circulate normally in the room, providing effective heating.
Rules for battery location and connection diagrams
In addition to the characteristics, the connection of heating radiators is very important; one of the factors affecting the efficiency of the heating system is the choice of the right location for the product. True, in most cases it is predetermined in advance - the new battery will most likely stand in place of the old cast-iron one, which has been there since the building was built. But still, here are some recommendations for proper placement of the radiator.
How to install a radiator yourself
Firstly, it is advisable to place the battery under a window. The fact is that it is a “bridge” through which the cold from the street enters the apartment or cottage. The presence of a radiator under the window forms a kind of “thermal curtain” that interferes with the process described above. In this case, the battery should be placed strictly in the middle of the window, and, preferably, occupy up to 70-80% of its width. What is a pressure convector and how to install it, you can see on our page.
Secondly, there should be at least 80-120 mm from the floor to the radiator. If it is less, it will be inconvenient to clean under the battery; a huge amount of dust and debris will accumulate there. And if the radiator is located higher, a certain amount of cold air will collect under it, which requires heating and, as a result, worsens the operation of the heating system. In addition, too short a distance to the windowsill negatively affects the battery efficiency.
Thirdly, a distance of 2.5-3 cm is allowed between the back of the radiator and the wall. If it is smaller, the processes of convection and movement of warm air flows are disrupted, and, as a result, the battery works less efficiently and wastes some of the heat.
All of the above principles for placing a heating battery are presented in the diagram above
Table. Standard connection diagrams for heating batteries.
Attention: The internal data of table “91” is corrupted!
Video - Replacing heating radiators in winter
Rules for installing heating radiators
Installation of heating radiators under a window must be carried out in compliance with certain rules:
- Before starting installation work, it is necessary to level the wall, this will make the installation process much easier.
- Then mark the middle of the window opening on the wall.
- Then measure 10-12 cm from the window sill and draw a horizontal line; it will serve as a guide for aligning the top edge of the radiator.
- The installation of brackets is carried out in different ways, so you should learn how to install radiators correctly. If the heating system has a circulation pump, then the radiator should be positioned strictly horizontally. For radiators in a system with natural coolant movement, it is necessary to make a slope of 1% along the flow of water. A higher level of slope can cause stagnation.
conclusions
Now it’s easier for you to make a choice: which radiator to install in your apartment - after all, out of four options there are only two left. Neither steel nor aluminum devices will withstand pressure surges and aggressive effects of domestic coolant. What to buy - focus on your budget and the characteristics of certain models. Here are some tips:
- in older houses you can install cast iron appliances. If you live in a multi-storey building where the pressure of the heating system is higher, then it is better to buy bimetallic radiators;
- If your old batteries are made of cast iron, then you can choose one of two options: bimetal and cast iron. If you want to replace batteries made from a different material, it is better to buy bimetallic ones.
YouTube responded with an error: The request cannot be completed because you have exceeded your quota.
- Related Posts
- What characteristics do central heating radiators have?
- What is the normal temperature of water in central heating radiators?
- Which radiators are best suited for autonomous heating?
- Is it possible to install bimetallic radiators on central heating?
- How to repair aluminum heating radiators yourself?
- What characteristics are used to choose autonomous heating batteries?
Wall mounting methods
The above rules are important to take into account when installing fasteners. To fix the hook in the wall, you need to drill a hole, insert a plastic dowel into it and screw the fastener into it. This device allows you to easily adjust the distance from the radiator to the wall; you just need to screw in or unscrew the hook.
When installing heating radiators in an apartment with your own hands, it is important to understand how the load from the radiator is distributed on the hooks. The weight of the device is mainly supported by the upper fasteners, the lower hook only fixes the device in the desired position. To ensure that nothing interferes with hanging the radiator, the lower fasteners are placed at a distance of 1-1.5 cm from the level of the lower outlet of the heating device.
The radiator bracket is installed according to a different scheme. Before installing the heating radiator, it is applied to the wall. Then mark the places where the brackets are planned to be installed. Putting the radiator aside, attach the bracket to the wall and mark its attachment points. Holes are made in the marked places, dowels are inserted into them, and the bracket is fixed to the wall using screws. After installing all the fasteners, the radiator is installed in place.
Types of heating radiators
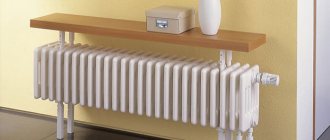
To equip your home, you can choose different models of heating devices - you can have an aluminum radiator, an electric wall heater or a cast iron radiator made of several sections. The question is whether such a battery can effectively heat a room that has large windows.
Building codes regulate at what distance the battery must be placed under the window. But at the same time, these standards do not indicate which batteries should be hung under stained glass windows or under panoramic structures. The fact is that modern technologies offer several options for organizing heating in an apartment. Including in such a non-standard situation as installing a heating radiator under a panoramic window, to the entire height of the room.
Depending on the material of manufacture, the following can be selected for installation in a central or autonomous heating system:
- cast iron sectional batteries;
- aluminum radiators;
- bimetallic radiators;
- steel models;
- radiators made of copper.
In this place you can also place convectors for connecting to the electrical network in a wall position or install them in the floor under a decorative cover.
Heating devices can be:
- in the form of full-size radiators;
- low radiators for panoramic windows;
- floor batteries;
- copper batteries for installation in the baseboard;
- convectors for panoramic windows for placement in the floor.
Installation of underfloor heating devices
Despite the light weight of aluminum radiators, sometimes it is not possible to hang them on the wall. For example, it is not recommended to hang any structures on walls covered with plasterboard sheets or made of lightweight concrete without additional support. Some models of cast iron and steel heating appliances are equipped with legs, but their appearance is not always aesthetically pleasing.
Bimetallic and aluminum radiators can be installed on the floor using special brackets. They are fixed on the floor, a radiator is installed and, using a special device, the lower outlet of the battery is fixed to the bracket. Floor mounts can have a fixed or adjustable height. Such fasteners are fixed on the floor using nails or dowels.
Connecting heating devices
To solve the question of how to install a heating battery and connect it to the pipeline of the general system, use the following methods:
- Saddle connection.
- One-way connection of heating batteries.
- Diagonal connection.
If radiators with bottom connections are selected for installation, then the issue is resolved simply. The manufacturer himself determines the location of the supply and return pipes and requires unquestioning implementation of the recommendations. Otherwise, heating efficiency is not guaranteed.
When solving the problem of how to add a heating battery in an apartment, you should know that radiators with side connections can be installed using the above methods.
Heating radiator installation procedure
It should be noted that SNIP also prescribes the procedure for installing the radiator. Using it, you can do everything correctly:
- First of all, you need to determine the location for the fasteners. Their number depends on the size of the battery, but even if the smallest radiator is installed, there must be at least three brackets;
- The brackets are being attached. For reliability, it is necessary to use dowels or cement mortar;
- The necessary adapters, Mayevsky tap, plugs are installed;
- Now you can begin installing the radiator itself;
- The next step is to connect the radiator to the inlet and outlet pipes of the system;
- Next you need to install the air vent. According to modern SNIP, it must be automatic;
- After the correct installation of the heating radiators is completely completed, you can remove the protective film from the radiators.
If during the installation of heating radiators you adhere to all the rules and requirements described above, then you will enjoy the warmth that your correct installation of radiators and a well-made heating system provides for a long time.
One way connection
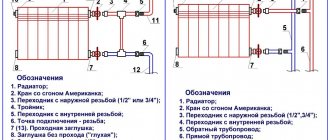
This type of connection can be used in single-pipe or two-pipe systems. Since in most apartments the system is made of metal pipes, you should consider piping for this option. To work you will need the following elements:
- Ball valves in the amount of 2 pieces.
- 2 tees.
- 2 drives, these parts have external threads on both ends.
The connection of elements is carried out according to a certain scheme. For a single-pipe system, the mandatory installation of a bypass jumper is required, which will allow you to shut off the coolant supply to the radiator in unforeseen situations. Installing a tap on the bypass is strictly prohibited, as it blocks the movement of coolant along the riser.
If you have welding equipment and the skills to work with it, the bypass jumper can be welded. A two-pipe system can be assembled without a bypass. In this case, the supply pipe is connected to the upper manifold, the return pipe to the lower outlet. Cranes are installed in any case.
The tightness of the connections is achieved through the use of linen winding and plumbing paste applied on top of it. The amount of winding must be controlled, since its excess can lead to the formation of microcracks on the body of the connected elements, which threatens subsequent destruction. Such caution should be observed when connecting elements made of all materials except cast iron products.
Installation diagram of heating system radiators
Today there are three main schemes for connecting radiators to the heating system. They have their advantages and disadvantages. They are selected individually, based on the characteristics of the heating system and the design of the house or apartment.
Radiator connection methods:
- one-way connection - the pipe carrying coolant from the boiler is connected to the upper branch pipe of the batteries, the “return” to the lower one. This is the most effective option, it works with 100% efficiency. If the house has a single-pipe heating system, it requires a special jumper in the radiator, which optimizes the operation of the entire structure;
- diagonal - the supply pipe is connected to the upper pipe on one side, the “return” pipe is connected to the lower pipe, but on the other side. The installation rules provide for the presence of a large (with a large number of sections) heating element. It will heat up evenly. The heat loss of this wiring is 2-5%, if the carrier pipe and return pipe are swapped, then this figure will increase to 10%;
- lower - used if the heating system is mounted to the floor or closed in the wall. In this case, the carrier pipe and the return pipe are connected to the lower pipes, but from different sides. Such a connection scheme has large heat losses - 12-15%. However, from an aesthetic point of view, it benefits significantly compared to previous options.
Diagonal connection
By diagonally connecting heating devices, you can obtain the most efficient heat transfer. With lower wiring, the connection process looks quite simple: coolant is supplied to the upper inlet on one side, which comes out on the other side at the bottom.
This design looks more aesthetically pleasing, which cannot be said about a single-pipe system with a vertical riser. However, knowing how to properly install a heating radiator, you can achieve high heating efficiency with this option.
When deciding how to install heating radiators correctly, you should know that when connecting a radiator to a single-pipe system, installing a bypass is required.
Saddle connection
This option for connecting radiators to the heating system is more suitable for lower pipe distribution or when they are hidden.
Installation on a single pipe system can be done with or without a bypass jumper. If there is no bypass, installation of taps is necessary. Their presence will allow you to remove the radiator in the event of an accident and replace it with a drain.
The use of saddle connections for radiators with vertical wiring is considered ineffective, since heat loss in this case can reach 15%.
