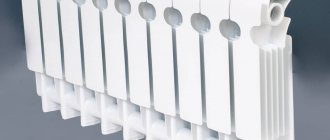
Aluminum, bimetallic, cast iron radiators are assembled according to the same principle: sections in the upper and lower parts are connected to each other by nipple nuts. Nipple nuts are hollow, ring-shaped nuts with external threads. The thread is applied to both ends. Special grooves are made inside each one. During assembly and disassembly, a key is inserted into them, rotating which tightens or separates (depending on the direction of rotation) both sections. Sealing is ensured by a gasket made of paronite or silicone, placed on top of the nut.
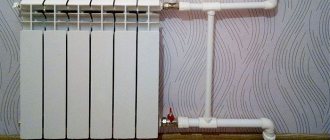
This is how the radiator is connected to the system
As a rule, it is necessary to disassemble and reassemble heating batteries in the following cases:
- when installing a new heating system;
- if necessary, add additional radiator sections;
- Replace the leaking section or gasket.
You need to change the gasket, which means disassembling the battery and then reassembling it
Theoretical part
Nipple nuts are ring-type seals equipped with external threads on both ends of the element. In the inner part there are special grooves designed for installing a radiator key. By rotating it in one direction or another, you can close or open individual sections.
Heating batteries are disassembled into sections, as a rule, in the following cases:
- During installation of the heating system.
- When the battery is expanded with additional sections.
- If the radiator starts to leak.
Bimetallic and aluminum batteries
Before disassembling the aluminum radiator, you need to prepare the necessary equipment.
The role of the main tool is assigned to the nipple wrench:
- This is a steel rod about 70 cm long. The working part of a 24x40 mm key must be welded to one of its ends, and the other must be equipped with a through hole.
- Metal rod. It is inserted into the hole at the end of the rod, which greatly simplifies the procedure for unscrewing the nuts.
The key has a series of notches, the spacing between which indicates the width of one section.
List of operations on how to disassemble a heating radiator with your own hands:
- Before disassembling the bimetallic radiator, you need to decide in which direction to turn the key. To do this, the radiator is placed on the floor surface so that its front part is at the top. In this position, the right-hand thread will be on the right, and the left-hand thread will be on the left.
- There is an easier way. You need to take the nipple and put it on left and right in turn. If the sides are mixed up, this may result in thread failure and section failure.
- On Western-made radiators, the liners and plugs on the front part are marked as follows: the left-hand thread is designated as S, the right-hand thread is designated as D.
How to drain water from a radiator in an apartment?
Draining liquid from a battery located in an apartment building is much more difficult. Before removing and disassembling the heating radiator, you will have to empty the entire riser, which runs through all apartments located in the same vertical, from water. Such work requires prior approval from the company that maintains the heating systems of an apartment building.
How to properly drain water from a battery in an apartment building? First of all, you need to get permission. You also need to understand that the coolant is drained from a section of the network, and in private buildings from the entire system.
The coolant is drained in the apartment as follows:
- the distribution valve that extends from the riser is closed;
- Depending on the type of reinforcement, certain actions are performed.
If you have a Mayevsky tap, you need to unscrew a key with a plastic handle or use a slotted screwdriver:
- The radiator drain valve has a side hole that sometimes faces the wall. It must be covered, otherwise dirty water from the system may flood the wall.
- Then you need to place the container under the hole and unscrew the screw until a characteristic sound appears - the hissing should soon disappear.
- Next, you need to turn the screw out a little until water flows out of the hole. So that some of the air mixed with water comes out during the process.
- When the flow of escaping coolant becomes stable, you need to tighten the system valve.
- After this, you need to attach a long hose to the valve, which should be enough to reach the sewer.
- Then you need to open the battery valve completely to create a strong flow inside.
- If the radiator is cast iron, then you need to unscrew the nut and make sure that after tightening it the gasket does not leak.
If there are no shut-off valves, it is better to entrust the work of draining the coolant to specialists. The service of draining liquid from the riser is paid. In Moscow it is approximately 750 rubles for one riser in the summer, and 1000 rubles in the winter. That is, in order to drain water from 6 radiators, you will have to close 6 risers. Thus, you need to pay from 4,500 to 6,000 rubles.
The procedure for unwinding the right-hand radiator section
How to disassemble a right-hand type bimetallic heating radiator:
- The key is inserted so that its “blade” fits into the upper hole: there is a special groove there for fixation.
- Next, applying force, turn the tool counterclockwise. As a result, it is necessary to move the nut out of place.
- At this stage of disassembling the bimetallic radiator, you will need the above-mentioned rod. It is inserted inside the ring on the nipple key, thus creating a lever. This will significantly facilitate the work, the implementation of which will require significant effort.
- After making two full turns, the key must be moved to the lower section of the radiator. After this, the procedure is repeated.
- Having installed the key on top again, make two turns: the sequence of actions is repeated until the section is completely unscrewed. This algorithm of actions, how to disassemble an aluminum heating radiator, allows you to protect yourself from distortions.
How to disassemble cast iron batteries with your own hands
Most often, houses and apartments with old layouts are equipped with MS-140 cast iron batteries. Nipple nuts and sealing gaskets are also used to assemble their sections. It is especially difficult to disassemble an old battery, because... Over the course of its long-term operation, the spaces between the sections began to boil with rust. As a rule, in such cases, the niches for the keys are corroded by the coolant. It is also important to keep a significant mass of cast iron in mind. For example, the weight of one battery for 12 sections is 90 kg: it will be difficult to handle such a product alone.
To implement the procedure, you will need the following tools:
- Nipple radiator key.
- Plumbing fixtures for unscrewing fittings and plugs.
- A small sledgehammer and chisel.
- Blowtorch (it can be replaced with a hair dryer).
- Steel brush.
- Wooden blocks for installing the battery on the floor.
A round metal rod with a diameter of 18-20 mm, flattened at one end, is used as a radiator key. The dimensions of the flattened part are 28x40 mm, with a thickness of 6 mm. A ring is welded to the opposite edge of the rod through which the lever is threaded. The length of the radiator key should be half the largest battery for 12 sections, plus 30 cm.
Types of heating batteries (radiators)
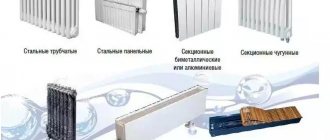
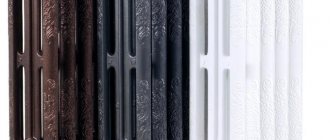
Heating equipment can be made of various materials. These include copper, aluminum, steel, cast iron, bimetal, etc. How the water heating system works can be found on our website. According to this, the following classification of radiators is constructed:
Steel
There are panel and tubular ones. In another way they are also called convectors. They can maintain boiler pressure from 6 to 15 working atmospheres. The efficiency level reaches 75%, and the power is 1800 W. There are seven types of such batteries and each of them has its own characteristics. The advantages of such a radiator are as follows:
- can heat a room by convection and radiation;
- economical consumption and light weight;
- has been in use for quite a long time;
- heats up quickly.
But steel radiators have almost no resistance to corrosion. It rusts quickly when left without water and cannot withstand even the smallest pressure drops. You need to be very careful when using it. When the first problems are identified, fix them immediately.
Aluminum
The most common batteries in modern apartment buildings. They are a device made entirely of aluminum. There are two types: extrusion and injection. It has several sections that are hermetically sealed together. If it is necessary to increase power, additional sections can be attached.
Has the following advantages:
- heats up quickly and conducts heat well;
- it is possible to add sections and valves;
- small mass.
This type of radiator requires the installation of an additional valve for bleeding air so that unpleasant noise does not occur in the batteries. However, sections sometimes leak from each other, which leads to breakdown of the heating system in the apartment, and exposure to environmental conditions destroys the walls of the battery.
Cast iron
Batteries, which, like aluminum ones, are divided into several sections. They can be seen both in the old style and in the modernized one. Such radiators can withstand a pressure of 18 atmospheres, but their power is quite low - 100 W.
Advantages of cast iron batteries:
- durable and almost never clog;
- compatible with other materials;
- do not wear out;
- long-term service life.
But this type of battery is difficult to clean if problems arise. In addition, they cost a lot of money due to high fuel costs. Due to their low power, they rarely cope with severe frosts and cannot properly heat the room;
Copper
Heats up to 150 degrees and can maintain 16 atmospheres. The uniqueness of these batteries is that they consist of special plates circulating water. There is one pipe running through the entire radiator, which is crossed by these same plates.
Advantages of copper radiators:
- small and long-used;
- are economically spent;
- can withstand pressure and temperature changes;
- high thermal conductivity.
But such batteries are quite expensive at the time of purchase, but are economical to use. It is difficult to identify any particular disadvantages of copper batteries, because they are quite practical.
Bimetallic
They combine the properties of aluminum and steel, since the pipes of these radiators are made of these two metals. This type supports up to 40 atmospheres and has high power - 180 W. They are chosen for the following indicators:
- service life more than 20 years, practically not subject to failure;
- durable and withstand water hammer;
- not subject to corrosion and mechanical stress.
Bimetallic radiators cannot be deprived of water supply for a long time, otherwise they will fail. It is also expensive, but the price is justified by the factory quality.
It may be interesting to read an article on the topic of plumbing in an apartment.
Disassembly procedure
It is very difficult to separate stuck intersection joints. In some cases, they become so attached that even significant physical efforts are powerless. In such situations, the joints are heated before disassembly using a blowtorch or hair dryer.
How to disassemble a heating radiator made of cast iron:
- The cast iron is heated with a blowtorch until it begins to emit a crimson glow. After this, you can begin the disassembly procedure.
- The first step is to unscrew the plugs.
- The radiator key is brought to the top of the battery: its head should be in the area where the nipple nut is unscrewed. At the end of the section, you need to use chalk to mark the circle for the location of the tool rod.
- The flattened part is inserted into the lower internal groove. Next, moving the tool in the desired direction, bring it to the marked circle.
Before starting the operation, it is important to find out in which direction the sections need to be twisted. If there is a nipple nut, screw it in turn onto the right and left ends of the battery: this makes it possible to determine the direction of rotation of the nipple. If the thread moves, it should not be completely unscrewed. To avoid distortions, the upper and lower nipples must be unscrewed one full turn alternately.
Assembly
Assembling a bimetallic radiator is no more difficult than disassembling it. To do this, several steps must be taken.
- Place all battery cells on a flat surface.
- Carefully inspect each threaded connection and then clean thoroughly. Even if your radiator is fresh from the factory, the threads still need some work. First, remove any paint from the end sections if there is any. Any excess layer will interfere with the tightness of the connection, which can lead to leaks. Second, sand the threads. The grain size should be very fine. Otherwise, you risk scratching the element. And this, again, will cause a violation of the tightness of the connection.
- Now it is necessary to carry out the procedure for degreasing the end sections. This is done using gasoline. Gaskets should be washed with soap and water for the same purpose. The degreasing procedure is not mandatory for those systems where water is used as a coolant. But if antifreeze leaks in the batteries, you should still pay attention to treating with gasoline, since the “antifreeze” is extremely fluid and can penetrate even microscopic holes.
- Once everything is ready, you can proceed directly to assembly. Place gaskets on the nipple connector and then connect the radiator sections on both sides. Next, using the same special tool, tighten the nuts. This is done in exactly the same way as in the case of unscrewing - carefully, with small turns, work with each nipple in turn. There is no need to tighten it too much, since bimetallic radiators are quite soft and the threads can be damaged.
- When the battery is completely assembled, install a special plug on one of the end holes, and a Mayevsky tap on the other. It should be purchased even if it was not previously on this radiator. With this equipment you can easily get rid of air pockets that form in the battery.
As you can see, the process of disassembling and assembling a modern heating radiator is, in general, a trivial matter, accessible to everyone. It's no more difficult than assembling a car from a construction set. With careful attention and a careful approach, you will definitely do an excellent job with this job. Good luck!
