How to properly fold a potbelly stove?
Even a beginner can correctly assemble a brick stove-stove on his own. To do this, you need to know and follow the simple rules that pechnoy.guru will provide below.
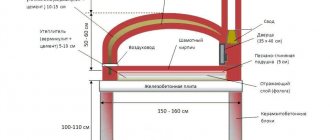
Scheme and drawing
Below we will look at how to build a potbelly stove out of brick with your own hands. The drawing and dimensions can be seen in photo No. 1:
Photo No. 1 - do-it-yourself drawing of a potbelly stove made of brick
The sequential layout of bricks from a potbelly stove is shown in photo No. 2:
Photo No. 2 - sequential layout of bricks (diagram)
We have decided on the materials and design of the furnace, and the solution is ready. This design does not require a foundation. For comfortable and safe operation, heating must be placed in compliance with all fire safety standards. Having chosen a place, lay two layers of waterproofing. On top we make a preparation of sand, 10 mm thick. Let's start laying:
- We lay a brick on top, without mortar (see photo No. 2, first row). We strictly control horizontality using a level.
- We install the door for the blower. We secure it with wire and wrap it with asbestos cord.
- We continue laying (see photo No. 2, row No. 1).
- Next comes fireclay brick (see photo No. 2). Grate bars will be installed above it.
- We place grate bars directly above the ash pit.
- We place the next row on a spoon. We put the wall at the back without mortar (knockout bricks).
- Installing the firebox door. We secure it with wire and bricks.
- On top we place a row on the bed along the contour of the fourth.
- The next one is again on a spoon. We put 2 bricks at the back.
- The row at the top should overlap the combustion door and end 130 mm above it.
- We continue laying, moving the bricks back a little. Before this, we lay an asbestos cord on which we will install the hob.
- Let's start forming the chimney from the next row. The design provides for the installation of a mounted pipe made of tin or corrugated aluminum. The pipe should not be heavy. Otherwise, the center of gravity may shift.
- On the eleventh row we install a valve to regulate the air flow. Don’t forget to seal it with asbestos cord and cover it with clay.
- Next, we place a chimney pipe in the quadrangle, which we connect to the metal one. The pipe must stand strictly vertically and not lean to the side. For greater stability, it should be covered with three rows of bricks.
- We remove the knockout bricks that we placed on the 4th row and clean the chimney of debris.
- Now the stove should be whitened. Any lime will do. Experts recommend adding blue and a little milk. This way the whitewash will not darken and fly off.
- We install a metal sheet in front of the firebox.
- We install the baseboard.
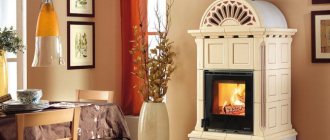
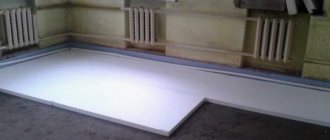
An example of a finished brick stove
Drying
The cause of cracks is excess moisture in the bricks, so the oven must be thoroughly dried. There are two stages of drying: natural and forced.
- Natural drying lasts at least five days. All doors must be fully open. To increase the intensity of the process, place a fan in front of the firebox or stick it into it and turn on a regular electric incandescent lamp (not an energy-saving one). It will not be possible to completely dry the oven using this method, so we move on to the next step.
- Forced drying is carried out by burning dry wood. This type of fire is carried out once every 24 hours. You should only heat with small dry logs. Open the blower door slightly and open the plug halfway.
When the wood burns out, loosely cover the ash pit. Close the top plug, leaving 1-2 cm. When the coals burn out, open all channels. Carry out this fire for a week. On the first day, about 2 kg of wood is burned. Then add 1 kg every day.
Making a firebox door
This element is the most complex in the entire structure. The following table shows the standardized dimensions of oven doors:
| Size | Blower, cleaning doors, mm | Openings for fire doors, mm | |||
| length | 25 | 25 | 25 | 30 | 25 |
| width | 130 | 130 | 250 | 250 | 250 |
| height | 70 | 140 | 210 | 280 | 140 |
We make the door for the firebox according to the drawings shown in photo No. 3:
Photo No. 3 - drawing of the door for the firebox and cleaning chamber
Metal cladding
A brick potbelly stove can be additionally sheathed with metal. We will get a metal potbelly stove with all the advantages, but without the disadvantages (except for weight). This design will protect the stove from cracking and chipping. This will significantly increase service life. This will require sheet metal 4-6 mm thick. The process is not particularly difficult. The metal sheet is marked, the necessary parts are cut out with a grinder or a cutter. Next, the cladding is carried out and connected using welding and a metal corner.
This design is not only durable, but safer. However, it requires additional costs and labor.
How to heat a potbelly stove?
The bourgeoisie who invented the potbelly stove knew how to work not only with their heads, but also with their hands in the laboratory. Therefore, in order for their stove to show all its advantages, it is necessary to determine the minimum and maximum content of each type of fuel. The heat from an overfed/underfed potbelly stove will fly out into the chimney due to the fact that circulation will not form in the firebox. In the first case, the excess gases simply will not leave room for it, and in the second case there will not be enough gases themselves.
Fortunately, the potbelly stove is unpretentious here too: the range of fuel mass at which efficiency is maintained is very wide. You can immediately define it like this:
- We are preparing a bucket of fuel.
- We literally lay in a handful and light it up.
- Add a little at a time until the beginning of the hog turns cherry red.
- Let's look at how much is taken from the bucket; this is the minimum amount.
- Add more, in larger portions, until 1/5-1/6 of the far part of the hog remains dark.
- Let's see how many have been selected now, this is the maximum bookmark.
Note: it is necessary to determine on a cloudy winter day or in weak diffuse lighting of the same intensity.
Using high-quality fuel (anthracite, pellets), the hog can become heated with a ring that varies in width and “walks” along its length. In this case, to determine the volume/mass of the bookmarks, several fireboxes will be needed. As the fuel burns out, the ring will narrow and move towards the beginning of the hog. At the maximum setting, at the beginning of the firebox it will take up to a third of its length at the far end, and at the minimum, it will appear in the middle and will be 3-4 palms wide.
Video: potbelly stove in garage heating
Brick laying - step by step instructions
The procedure for how to assemble a simple stove with a stove of any type consists of two stages:
- Dry masonry. At this stage, the bricks are laid out without using mortar. This approach allows you to better understand how to move the stove, understand the design of its smoke channels, and identify possible problem areas. When carrying out dry masonry, gaps of the same size are left between the bricks: inside them there will be a masonry mixture. For these purposes, you can use plywood or wooden spacers 5 mm thick. Dry laying is carried out to the point where the chimney begins. Next, each of the rows needs to be numbered and dismantled.
- Main masonry. If the first stage did not cause any difficulties, proceed to the main procedure, how to build a small stove with your own hands. To implement this you will need a clay solution. The reference point here is the order scheme and numbered brick rows.
The following step-by-step do-it-yourself oven instructions are offered:
- Preparation of masonry mixture. Dry clay powder must be soaked in water for a day. After this, the soaked material is mixed with small portions of sand: it is more convenient to knead the solution manually until the lumps and compactions completely disappear. The volume of sand added directly depends on the fat content of the clay, and can reach 100% of the total mass of the mixture. A sign of good quality clay mortar is that it slides off the shovel without sticking to its surface. Factory-prepared dry clay powders do not require pre-soaking.
- Laying the bottom rows. Its effectiveness depends on how you lay a brick oven. The upper surface of the base must be waterproofed. For these purposes, bitumen mastic or a couple of layers of roofing material are suitable. The outline of the base of the future structure is marked on top of the roofing material. The first two rows of bricks are laid completely on top of the roofing felt. The second row is mounted in such a way that its joints do not coincide with the joints of the first.
- Arrangement of blower and cleaning channels. Using the third and fourth rows of bricks, a niche is laid out for the ash pan and the cleaning cavities of the chimney.
- Door installation. To secure cast iron doors in brickwork, they must be equipped with holes in the corner area of the frames. A soft steel wire of such a size is inserted into the holes made so that a piece 30-40 cm long peeks out from each edge. To seal, an asbestos cord must be fixed to each frame. Having installed the doors in the desired position, pieces of wire are placed in the joint solution of the upper and lower brick row.
Choosing the shape and components for the potbelly stove
The choice of the shape and parts from which the future “Pobelbelly stove” will be made is of great importance. It is worth carefully considering your wishes and taking into account everything that you have come up with, only after that you can begin to select the right amount of materials. Careful calculation is needed in order to complete the work quickly and not redo the structure later. In order to properly make a potbelly stove, you can watch the video, which will tell you how to build the required structure. There is enough information on the Internet on what needs to be taken into account during construction.
The shape of the future potbelly stove is chosen depending on the material you are going to use. If it is a pipe, the stove will be round; if sheet metal is used, it will be easier to build a rectangular structure.
You will definitely need to add ash collection and firebox areas, as well as an area through which combustion products will be discharged. The firebox area is located just above the ash pan and is divided by a horizontal partition in which slits are made through which the ash falls. If you plan to use firewood with an impressive diameter as fuel, then you should cut holes in the partition with a width of 40 mm or more, but if you plan to burn with small wood or coal, then you should reduce the slots to 10-20 mm. This is done to prevent large fuel particles from falling into the ash area.
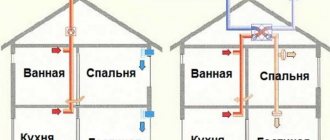
The area through which combustion products are removed is the smoke exhaust pipe; it is usually located on the top of the structure or on the back. If you plan to use the vertical method, the smoke draft will increase, which will reduce the smoke content of the room you plan to heat. If you use the rear outlet, then you should take into account that the angle of the pipe must be made no more than 30 degrees in order to ensure excellent smoke draft.
Once you have carefully considered the functionality, you should also think about heating food, boiling water for tea or other hot drinks. For these purposes, when thinking about the method of making a potbelly stove for a garage, you can also take into account the place on which the cast-iron stove, equipped with removable mugs of different diameters, will be installed. In this case, the potbelly stove can be conveniently used as a stove. To do this, you will need to lengthen the structure to the size of a regular slab.
If you decide to increase the heat transfer area and heat capacity, you can place a few more fins on the sides of the main stove structure. To do this, weld several metal plates (thickness - 5 mm) to the side walls of the stove, and they should be located perpendicular to the plane of the wall. In this way, you can increase the heating area and the surface in contact with the air, while the rate of heating the room will also increase.
If you take into account the space for a water tank when constructing the stove, the potbelly stove will become more functional. The tank is usually made of metal (at least 3 mm thick), it should be equipped with an opening lid, as well as a pipe in order to attach a hose. For more convenient work, the tank is designed not too large and removable
Main types of furnaces
Before you start laying a stove yourself, familiarize yourself with the features of existing varieties of such units. The stoves are:
- heating. Designed exclusively for heating. Such ovens have an extremely simple design and can be installed in the shortest possible time and with the least effort compared to other types of structures;
- heating and cooking. The most popular and sought after option. At the same time they heat the house and allow you to cook food;
There are also improved varieties of heating and cooking stoves with a built-in stove or even a full-fledged oven.
Do-it-yourself Dutch masonry
Fireplace stoves belong to a separate category. This is an excellent option for a modern private home. Such designs do an excellent job of heating rooms and have an attractive appearance. A properly laid out and finished fireplace stove will be a worthy addition to the interior of both a small country house and an expensive private villa.
This is what heaters are like
The diagrams of modern stoves distinguish them not only by their purpose, but also by their shape. Most often, rectangular and square-shaped units are installed in private homes. But if you wish, you can lay out a round oven. Select a specific option taking into account the characteristics of the room and your own preferences.
The picture shows a simple brick oven for heating and cooking
Of course, you can lay out the oven yourself, and numerous diagrams will help you do this in the shortest possible time. However, when performing such work, remember that any stove, regardless of its purpose, shape and other characteristics, must fully comply with current fire safety standards.
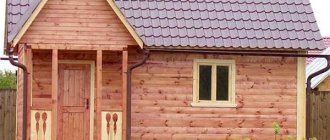
A simple baby brick oven for the home
Beginner stove makers are advised to pay attention to just such a simple brick stove. The finished structure is small in size - the total occupied area is no more than 0.5 m2
Set for laying a mini brick oven
Start by preparing the devices necessary for the construction of the unit in question. You will need the following:
- red stove brick;
- fireproof brick;
- fireclay and building clay;
- sifted fine sand;
- roofing iron;
- roofing felt;
- doors for combustion, cleaning and ash chambers;
- grate;
- stove for one burner;
- valve;
- steel pipe;
- plumb line;
- yardstick;
- protective gloves;
- trowel;
- level.
Furnace laying
Mini oven
Do-it-yourself baby oven
Having prepared all the necessary equipment, proceed directly to the stage of arranging the “baby” brick stove.
First step. Select a location for installing the heating unit. The distance from the walls of the oven to the nearest walls of the room must be at least 300 mm.
Order
Second step. Lay out a brick foundation measuring 76x50.5 cm. The depth of the foundation should be at least 5 rows of bricks. Dig and level a hole of a suitable size, place a layer of clay on its bottom, compact it thoroughly and cover it with a layer of roofing felt.
Third step. Lay out a platform of 12 bricks. Coat each brick with clay solution.
Having laid out three rows of base, cover them with a second layer of roofing material and continue laying. The level of the foundation must coincide with the level of the floor.
Fourth step. Lay out the first over-floor row. Lay out the second row in the same way, but provide space for mounting the blower door. Before installation, wrap the ash door around the edge with strong asbestos rope. Secure the door with wire.
Fifth step. Lay out the third row of the stove using fireclay bricks. For masonry, use a separate solution of refractory clay.
Sixth step. Install a grate in the fourth row and continue laying, placing bricks on the ribs. In the fifth row, lay the brick flat, in the sixth - again on the edge.
Seventh step. When laying the eighth row, install beveled bricks. In this design, it will take on the functions of a smoke tooth and will ensure that the fire moves when the fire door is opened.
Eighth step. Wrap the combustion chamber door with asbestos cord and install it in its proper place.
Installation of the combustion door
Ninth step. When laying the ninth row, mount the hob.
Tenth step. Continue laying the stove until you reach the beginning of the chimney (starting from the tenth row). Prepare supports in the chimney for installing an internal partition. Place an outward protruding (knockout) brick in the rear wall of the furnace unit. There is no need to lubricate it with the solution, because... By the end of the work, this brick will need to be removed.
Eleventh step. When laying out the eleventh row, install a valve pre-wrapped with asbestos rope. Install a metal smoke exhaust pipe.
Twelfth row. Remove the previously unsecured protruding brick.
Let the stove dry for a week and you can start using the unit. The optimal fuel option is firewood.
Making a potbelly stove.
I bought 12 meters of profile pipe to fit into the car and asked to be cut into 6 pieces of 2 meters each.
I immediately bought cast iron grates 270 x 270 mm.
I cut the pipes into pieces 50 cm long and began to weld the side walls.
I decided to bend the back wall.
Here are the approximate dimensions of the firebox:
- height 50 cm,
- length 55-60 cm,
- width 40 cm.
I set the side walls parallel, measured the diagonals, sawed 4 identical rods and welded them. They will hold horizontal partitions
Then I cut out the lower partition from 4 mm sheet steel. It is moved forward, behind the stove there is a gas passage of 33 x 12 cm.
The upper second partition has the same size for the passage of gases, but it is already shifted back. There is a small gap at the rear to reduce aerodynamic drag.
These partitions are removable and will be slightly reinforced with a corner. They can be easily removed through the firebox.
The next stage is making the top cover. The shape was made in such a way as to increase the passage of gases and reduce the aerodynamic resistance at the entrance to the pipe. In the chamber above the firebox there will be a tube with holes through which warm secondary air will be supplied for afterburning.
I found a piece of square profile pipe 100 x 100 mm in the garage; the gas duct at the outlet of the furnace will initially be square. This makes it even easier to make a damper. We will need an axle (I used a long bolt), a spring to secure the damper, the damper itself and a handle with a counterweight.
The flap is 4 mm thick.
Then I welded the pipe to the top of the stove and made a smooth transition for the gases.
I made a tube for secondary air. The bottom line is that hot air is supplied to the area behind the firebox, and the flue gases are burned. Theoretically, this gives an increase in temperature in the second chamber. To prevent the tube from burning out, protect it with a corner. The nozzle itself was flattened and welded for greater strength.
Well, I welded the pipe.
I also sawed the fittings and made an insert from a thick-walled pipe. I welded the pipe on one side, the other end is free. This is done for thermal expansion of the reinforcement.
I made a tight hatch to remove ash, and reinforced the walls of the ash pan with a corner. The lid is inserted very easily, the gap was set using thick paper.
I made 4 holes in the hatch and secured the lower part of the carburetor with flaps. I will use them to very accurately regulate the flow of air.
To prevent the stove from burning out and retain more heat in the active combustion zone, I use refractory bricks. Dimensions 23 x 11.5 x 3 cm.
I made the front wall, cut out a window for the firebox door and reinforced it with a frame.
Next, I made a door from a cut piece of the front wall, corners and a sheet of metal. There are holes on the outside in the lower part, and on the inside too, but at the top. This keeps the door cool! Of course, the design is not very successful; the inner sheet needs to be secured with studs, and not scalded around the perimeter. It heats up more, expands and bends the door outward. I'll fix it!
I made 4 legs. 3 of them are height adjustable.
I welded the legs into place and made a door locking mechanism. A piece of power steering plate, fittings, ball. I also made stops for the door, it is on a hinge.
I'm making an air circuit to make forced airflow. I bought a 0.5 mm sheet of tin and fastened it with screws and rivets.
The fence will be from below, and will be fed along the corrugation along the garage.
I had some cans of thermal paint lying around in the garage and decided to use them.
I lit the stove. I’ll say right away that I got carried away with the paint, the can says 400 degrees, but it’s Fahrenheit. The paint was fading and it stank.
Stove water heating device
Advantages:
- installing a conventional stove does not require large financial investments; red and refractory bricks, local clay and sand are used for masonry;
- if desired, you can combine the stove with a fireplace, thereby obtaining a beautiful decorative element and a room heating device;
- independence and autonomy of the heating system, which does not require access to communications;
- the ability to use a relatively inexpensive type of fuel;
- no preliminary preparation is required to put the structure into operation;
- only stove heating can fill a house with special living warmth and comfort;
- food cooked in a real Russian oven has a special taste;
- burning wood does not harm people and the environment;
- stove heating is the simplest way to heat a house, solid fuel is placed in the firebox and ignited, and as it burns, the next portion of fuel is added;
- Possibility of connecting stove heating to water heating.
Like any other type of building heating, stove heating, in addition to its advantages, has a list of disadvantages. You can buy fuel in almost any locality. To make a sufficient supply of fuel for the heating season, you need to equip a special storage space.
Flaws:
- installing a stove in a house takes up a lot of usable space;
- To fully warm up the building and maintain the desired temperature, you have to spend a lot of time; stove heating has a low efficiency index;
- fuel must be prepared regularly so that in cold weather there is something to heat the stove;
- the fuel in the stove burns out quickly, which requires constant monitoring;
- it is necessary to construct a chimney and carry out its careful insulation from structures characterized by rapid combustion;
- the room warms up unevenly; the further away from the stove, the lower the air temperature.
- when constructing a traditional oven, it is impossible to fully ensure that the premises comply with sanitary requirements;
- improper care of the stove and violation of operating rules can lead to large emissions of carbon monoxide into the room;
- The fire hazard indicator when installing a stove in a house increases significantly.
Following simple rules will help eliminate many of the disadvantages of stove heating.
First of all, the heating area increases significantly, the heat is rationally and evenly distributed throughout all heated rooms. The heating of the room involves the smoke channels of the furnace, walls and coolant. Heat transfer to radiators occurs only when the furnace firebox is operating. After combustion stops
in the radiators for some time.
The design of a water-heated stove differs from a conventional stove in the presence of a heat exchanger installed in the firebox. The simplest water system is connected to the register. The design of the heat exchanger may be different, but in any case it should warm up the coolant well and ensure high-quality circulation. To produce registers, metal pipes or sheet steel are used.
The stove water heating system is especially popular among residents of villages and villages where there is no gas pipeline. In this case, improved stove heating is the only way to heat the house during the cold season. This heating works even during a power outage.
Many owners of stove water heating install circulation pumps to improve coolant circulation and increase system efficiency. The combined installation of an expansion tank and a pump allows the entire heating system to operate uninterruptedly in any conditions. The main thing is to light the firebox and periodically add fuel to maintain the optimal temperature in the system.
Installing a stove heating system combined with water heating costs the home owner much less than purchasing a factory-made boiler.
Disadvantages of using stove heating with a water circuit:
- to maintain the optimal temperature in the house, the stove is heated every day;
- when using this type of room heating, it is impossible to install a stove in the basement in the same way as is done when using a factory solid fuel boiler;
- it is necessary to strictly follow the installation rules of the entire system to ensure sufficient coolant circulation;
- high temperature changes during furnace operation sharply limit the choice of material for the heat exchanger; only registers made of metal pipes or sheet steel can be installed in furnaces;
- This type of heating cannot be arranged using only forced circulation.
Construction materials for mini ovens
First you need to prepare the clay. To do this, fill it with water and leave it like that for about a day. You can speed up the process by thoroughly kneading it every five to seven minutes, preferably using a drill mixer, for an hour. Strain through a sieve. The sand also needs to be sifted first.
To fold a mini heating stove, which will take up an area of 0.4 square meters. meters, you will need:
- 20 liters of solution;
- 60 pieces of red stove bricks;
- 38-40 pieces of fireclay bricks;
- firebox door;
- ash door;
- grate;
- hob;
- chimney damper.
Doors, grill and hob must be cast iron.
If you do without fireclay bricks, then it will be a mini-stove model that burns wood rather than coal. Red brick, even of the highest quality, will collapse over time due to the high temperatures created by coal fuel. In general, to make a mini Russian oven with your own hands, you just need to follow the recommendations.
Homemade potbelly stove
It’s not difficult to make a potbelly stove with your own hands, even without a drawing. Available materials are suitable for the work, be it a gas cylinder, a milk can, a barrel, a piece of pipe or sheet iron lying around in the garage. Having decided what you can put into action, choose a drawing of a rectangular or circular section of the combustion chamber for your potbelly stove with your own hands.
For example, you need to do the heating in your country house yourself and you have an unused milk can (for arranging the stove itself), a bent piece of pipe (for creating a chimney) and a piece of metal fittings with a diameter of at least 6 mm (for the grate). To make a stove out of all this, you just need to be familiar with the tools, as well as use a little ingenuity.
Potbelly stove from a can
The can is installed on its side - this is the basis of our home-made potbelly stove, its combustion chamber. A rectangular blower is cut out under the neck, the edges are processed with a file. The blower can be left in this form, or you can attach a damper to it, resulting in an output stove with adjustable draft.
In the upper part of the bottom of the can you need to make the markings yourself for the chimney (it should be 2-3 mm less than the diameter of the pipe). We cut out a hole and tightly push a piece of pipe adapted for the chimney into it. Half the work is done.
Next we deal with the insides of the potbelly stove. With our own hands we make a grate in the form of a “snake” from a metal rod. We insert the rod into the neck of the can and position it so that the grate stands horizontally in the future combustion chamber. That's all! If desired, you can place the resulting stove on an iron pallet and a rack of bricks. This will help avoid heating the floor and also reduce the likelihood of a fire to a minimum.
Note that a similar algorithm of actions can also be applied if you want to have a potbelly stove from a barrel. Such stoves cannot boast of long-term burning, but they cope well with the function of quickly heating the room.