How to dilute lime for whitewashing walls
It should be noted that recently the lime substance has not been used very often for such purposes. This is due to the abundance of alternative options offered by the modern market of finishing materials.
However, in some cases, knowledge of how quicklime or slaked lime is diluted for whitewashing walls can be of practical use. For example, when you need to carry out repairs in the apartment of elderly parents who do not recognize other options, or in a school classroom.
Cancelled
This is the simplest, fastest and most secure option. There are many ways to prepare the working substance. Moreover, each of them is good in its own way.
The most popular and recommended proportions are the following: add 2 tablespoons of drying oil, 100 grams of table salt, and paint blue to diluted lime (about 2-3 kg per 10 liters of water).
The last two components, which provide additional whiteness, should first be diluted in hot water. If we talk about the function of drying oil, it improves adhesion to the surface and provides the necessary strength of the coating.
Depending on the application method, it is possible to prepare a solution with different saturations. If you use a brush, the consistency becomes thicker. If you use a sprayer, a more liquid mixture is prepared, which should be filtered through several layers of gauze.
Quicklime
Such a product must first be extinguished with water. Since this reaction releases a large amount of heat, generates steam and there is a high probability of the substance splashing out of the container, safety precautions must be observed to avoid burns. In particular, use rubber gloves, thick clothing that covers all areas of the skin, and safety glasses.
After the extinguishing procedure, you must wait at least two weeks. After this period, the product is ready for use. To obtain the desired working consistency, water and other components indicated above are again added to it.
Disadvantages of whitewashing trunks
Meanwhile, there is an opinion that whitewashing garden or street trees is not only useless, but in some cases even harmful. Having considered the disadvantages of this procedure listed below, let everyone decide for themselves whether it is worth whitewashing the trees in their garden plot or local area.
- Covering the bark reduces its breathability and, as a result, the necessary gas exchange rates. As is known, nutrition of plant tissue occurs not only through the root system and lighting, but also as a result of air exchange processes. In addition, clogged bark pores slow down the movement of sap from the roots to the crown, which gradually weakens the plant and leads to its premature aging.
- Very often, the composition includes an adhesive component, which further worsens the air exchange properties of the bark.
- Whitewashing changes the acidity of the wood surface, which is why it can gradually loosen, losing its stability characteristics.
Read the article about how to whitewash trees.
When making a final decision on the advisability of whitewashing, you should take into account that frost and sunburn can harm the delicate bark much more than lime or any other whitewash.
Related article:
How to use tea in the kitchen and garden
How to dilute lime to whitewash a cellar
The decision to whitewash basements and semi-basements with lime is not only the most economical, but also truly practical. This method allows you to achieve the appropriate level of disinfection while simultaneously providing the interior with a neat appearance.
Cancelled
To obtain a solution, dry lime mass (approximately 2.5-3 kg) must be diluted with 10 liters of water. Next, the most important component is added - copper sulfate (100 g), which can also be replaced with iron sulfate (30 g). The resulting mixture shows high efficiency in the fight against fungus, as well as harmful insects that have entered the cellar along with the harvest.
Along with the indicated method, lime milk is also used for whitewashing basement areas. It is prepared in slightly different proportions: 2 kg of freshly slaked product is mixed with 10 liters of water, after which 200 g of copper sulfate is added.
Quicklime
This type of lime must be slaked before use. Recommendations for safety measures, methods, ingredients, timing, consistencies and other parameters here are absolutely the same as for whitewashing walls in residential premises.
An important nuance: if the basement has brickwork, then noticeably more lime will be consumed than on a smooth surface. When calculating the volume of the required substance, this point must be taken into account.
How to wash off old whitewash from walls?
Painting the ceiling
If there is already whitewash on the surface of the walls, before applying layers of new material, you must get rid of the old one. Ordinary chalk whitewash from the walls is washed off with water. To do this, you will need to apply water using a roller - the entire surface of the wall is treated with moisture evenly.
It is best to go through the walls several times, maintaining short periods of time between applying water. If the walls do not get dirty, you can be sure that the existing whitewash has been removed efficiently.
We invite you to familiarize yourself with useful tips that will help you remove old whitewash from walls quickly and thoroughly.
- Before you begin removing whitewash with water, be sure to prepare the room. If possible, remove all furniture from the room, and cover the floors, window openings, and doors with polyethylene. In the same case, if it is impossible to remove the furniture, also protect it with plastic film. Keep in mind that whitewash is very difficult to remove from surfaces;
- Before starting work, be sure to turn off the power to the electrical wiring in the room. Be careful and careful;
- It is advisable that the person working in the room has a reliable headdress. Many builders, by the way, use caps made from newspapers. Wear gloves on your hands, because the effect of lime on the skin will not be beneficial at all;
- In case you are working at arm's length (for example, at the top of a wall), try to ensure that dirty water does not flow under the sleeves. To do this, you can attach a plastic cover to the base of the roller. In this case, your hands will remain clean and dry.
Once you have thoroughly wetted the whitewash on the walls, you can begin to remove it. Usually the walls are cleaned well from the old layer - if you, of course, conscientiously moistened them with water. We take a spatula and get to work.
And after the whitewash has been removed from the walls, we carefully inspect the walls for the presence of weak plaster. Be sure to scrape off any old, crumbling material. If voids suddenly appear in the layer of plaster, remove them and then cover them with fresh mixture.
Prime the surface of the walls
Mortar
After all the work on cleaning the walls and putting them on has been done, it is time to coat the surfaces with a primer. This is the last preparatory stage before starting the whitewashing procedure.
You can use the recipe above or any other available and effective composition for the job. So, for example, the primer is prepared in this way. You need to take three kilograms of lime paste, about two hundred grams of ordinary laundry soap (or rather, soap shavings), and about one hundred grams of drying oil (“Oxol”).
Slaked lime is diluted in four liters of water. In another container, grated or chopped soap is diluted in three liters of hot water, and drying oil is added to the solution. The two resulting solutions are mixed. That's all - a high-quality primer is ready. The only thing is, do not forget to dilute it with water immediately before work (the total volume of the solution should be about ten liters).
Of course, the main purpose of using a primer is to create a thin film on the wall surface through which paint cannot penetrate. This way, the surface will be painted evenly and dry more evenly. Apply the prepared primer to the wall surface with a roller. You can also use a wide brush or paint sprayer. Wait until the layer dries. And only after that you can begin the work of whitewashing the walls.
If you decide to whitewash both the walls and the ceiling in a room, you must start work from the ceiling. And only when the ceiling is completely dry can you begin to treat the surface of the walls with lime mortar. This is the basic rule for whitewashing walls with lime.
The walls should be whitened in this way: the hand moves from top to bottom, and certainly in one direction. One layer of whitewash for the walls will not be enough; you will need to apply two, and in some cases even three layers. Each layer of lime whitewash must dry thoroughly. It will take on average five to six hours.
When treating the surface of walls with lime mortar, do not forget that the container with the mixture must be shaken, thus mixing the contents. The fact is that lime paste quickly settles to the bottom of the container. If you notice that the solution has become thicker than you need, add water (a little, of course) and mix thoroughly.
Only if you whitewash the walls with lime correctly, following all the rules and recommendations, will the surfaces look perfect when the work is completed.
Lime whitewash is used less and less in modern decoration. However, there are situations in which quick and inexpensive repairs are required. This material is also preferred by people who, from Soviet times, have retained the habit of using it to “ennoble” the ceiling surface. In general, lime whitewash continues to be used today, so the issue of proper dilution of the working mixture and maintaining the correct consumption of material has not lost its relevance.
We properly dilute lime for high-quality whitewashing
If “active quicklime” (CaO) was purchased, then it must be diluted with water (proportion 1:1) to obtain the working composition – “slaked” lime (calcium hydroxide). During the reaction, an abundance of thermal energy is released, and the mixture begins to boil, producing steam and splashes.
Attention! Safety glasses, thick rubber gloves and very thick (preferably rubberized) clothing will prevent you from getting traumatic burns to your eyes and skin!
After the completion of the violent slaking reaction, the lime cannot be immediately used for work. The solution needs to sit for at least 13 days.
However, there is an excellent alternative option - to purchase ready-made, crushed slaked lime. It’s easier and faster to prepare, and it’s absolutely safe to work with.
The powder material is diluted with water to the required density and 2.6 tbsp is added. spoons of regular drying oil, paint blue (the amount depends on the desired result) and 110 gr. table salt. All these proportions are indicated for 10 liters of lime mass.
Important! Blue and salt must be thoroughly stirred and dissolved in heated water before adding to the working mixture!
Additional additives are required for: - blue and salt - give the whitewash mixture pronounced whiteness; — drying oil – promotes high-quality adhesion of the applied whitewash to the main surface, and also gives the coating additional strength.
The solution saturation of whitewash directly depends on the method of its application. If you use a brush, the whitewash solution becomes thicker. When using a sprayer, the whitewash mixture must first be liquefied and thoroughly filtered. As a result, the layer turns out thinner and “thinner”.
Consumption indicator of lime mixture during whitewashing
The amount of whitewash used directly depends on two factors: - the method of its application; — quality and preparedness of the treated surface. Smooth walls require less whitewash than brick surfaces.
Reference! The average estimated consumption of the finished whitewash mixture per square meter of surface is 0.51 liters!
If you purchase ready-made whitewash powder for dilution, the correct proportions (in addition to additives) will be as follows: 1 kg of dry crushed powder per 3 liters of clean water. For example, a two-kilogram package of powder composition should yield 6 liters of ready-to-use whitewash mixture. This amount will be enough to cover 12 square meters. m. smooth and 7.8 sq. m of brick surface.
Lime dough
In stores you can find another type of lime - ready-made lime dough, which is an intermediate state between powder and solution.
This substance must be diluted to working condition in the following proportion: one kilogram of dough per liter of clean water. Knowing that 1 liter of whitewash is enough to cover 2 square meters with high quality. m of wall surface, you can very easily calculate the required amount of lime paste.
Method for calculating the amount of lime substance
As noted above, lumpy “quicklime” must first be “quenched”, and then more water must be added to the required consistency.
The entire technological path is as follows: 1. Lumpy lime is “quenched” with clean water in a proportional ratio of 1:1. The result is a wet powder. 2. Add 2 more parts of water to the resulting powder to form a lime dough. 3. The dough is diluted with water to the required concentration of the working composition.
Thus, from a kilogram of lump lime, ideally, you should get ten liters of good whitewash, completely ready for use!
Conclusion
Of course, the process of preparing a lime mixture is somewhat approximate, so accurately calculate the amount of initial material and the exact volume of the finished composition.
Lime is not an expensive construction and finishing material, so it is better to buy an additional supply so that the lack of working solution does not affect the quality of the finish!
Dilute lime to whiten trees
Protecting tree trunks from pests and sunlight is one of the most important tasks of any gardener. To do this, you need to dilute slaked lime for whitewashing trees in the correct ratio, and then treat the trunk bark from ground level.
Cancelled
Depending on the scope of the proposed work, you can mix the working fluid in a plastic bucket or other suitable garden container.
The basic proportions are as follows: 2.5 kg of lime per 10 liters of water. Next, add 500 grams of copper sulfate, as well as 200 grams of casein or wood glue.
For a similar purpose, you can prepare a milk solution at the rate of 2-3 kg of freshly slaked lime, 10 liters of water, 500 grams of copper sulfate and 2 liters of skim milk.
Quicklime
You can also use quicklime to whitewash trees. However, before use, it must be extinguished using the same methods as already described above.
Depending on the ratio of lime and water, the output can be one of three products: milk, dough or fluff. The latter is most suitable for further preparation of the working substance.
How to slak lime
If you decide to use lime for white walls, you need to know how to prepare it correctly by slaking. In retail chains, lime is sold in two versions: slaked in the form of powder (or dough) and quicklime in the form of lumps. Slaked lime can be immediately dissolved with water and used for its intended purpose, but the quicklime analogue will have to be quenched first.
The most important thing in this process is to protect yourself from the harmful effects of lime, which, when slaked, releases gases harmful to human health. What should be done:
- In addition to clothing, be sure to wear gloves.
- Protect your eyes with special glasses (buy in a store).
- It must be remembered that lime is slaked only in a metal container.
- Work must be carried out outdoors or in a well-ventilated area.
- If during the extinguishing process some of the lime gets on the skin, you must rinse the problem area with water for 15–20 minutes, and then consult a doctor.
After taking the above measures, you can begin slaking the lime. As a result of quenching and depending on the amount of water, you can get a powder ( fluff
) or
lime dough
.
To produce powder
water is added to quicklime in proportions 1: 1, that is, if you take 1 kg of lime, then you need to use 1 liter of water. The water should be cold and clean. The reaction occurs with hissing and splashing, the temperature of the mixture rises to +50 ºС. However, after about forty minutes everything calms down and after the water evaporates, a powder is formed, which must be mixed with a clean wooden stick.
To obtain lime paste
the mixture should consist of one part lime and three parts water (1: 3). The process is similar to the first one with the only difference being that water is added gradually and mixed just as gradually. After the excess moisture has evaporated, the expected product will be obtained.
In conclusion, we can say that the powder is used to prepare whitewash mortar, and the “dough” is used to prepare mortar and to strengthen cement-sand mixtures used for plastering work.
How to dilute lime for a chicken coop
In the poultry industry, disinfection of premises by whitewashing with lime is a mandatory procedure that must be carried out several times a year. Similar treatment is required for both walls and ceilings.
Cancelled
Basic recommendations on how to dilute slaked lime to whitewash a chicken coop are not too different from those already discussed. Most often, lime milk is prepared for these purposes at the rate of 0.5 kg of diluted product for every 2.5 square meters of surface.
Quicklime
To whitewash, this product must be extinguished according to the methods already discussed above. In its original form it can only be used for disinfection. To do this, quicklime simply needs to be poured onto the floor and then securely covered with a protective mat.
Recipe 1: lime dough, salt and water
Whitewashing the ceiling
You will need three kilograms of lime dough, one hundred grams of table salt, ten liters of water. Dilute slaked lime in half the total volume of liquid. Add a salt solution to the lime milk (table salt is diluted in a liter of hot water). Mix the resulting composition thoroughly.
Separately, soak the required tint pigments or ultramarine in water. Gradually add the diluted coloring pigment into the lime mixture until the desired shade is obtained.
And finally, to finish, add the remaining five liters of water to the solution, mix thoroughly and gently, and then strain through a fine sieve to get rid of impurities and small lumps. By the way, you can replace table salt with another crystallizing component - aluminum alum; about two hundred grams of it will be required for ten liters.
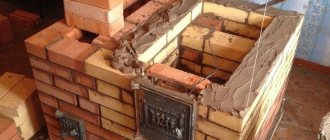
For the stove
This traditional object, which many associate exclusively with the life of an old Russian village, can be whitened in several ways: with tooth powder, putty, and even milk and chalk. Painting with lime is also possible.
Cancelled
To prepare the required solution, you need water, slaked lime (1 kg) and salt (35 g). The latter acts as a fixative. As a result of the use of such a substance, a film is formed on the surface of the furnace, which provides protection against early abrasion.
Quicklime
In this situation, as in the vast majority of others, preliminary preparation in the form of extinguishing is required. To do this, the initial lump product is filled with water in a ratio of 1:3, after which it is tightly covered with a lid. As a result of the reaction, a kind of paste is formed, vaguely reminiscent of sour cream. You can whiten the stove surface with it (after additional dilution with water to the desired consistency) only after 14 days.
Chalk or lime
What exactly is lime? Lime is a material obtained by burning carbonate rocks. Lime has found practical application both in construction and for the production of various chemical compounds. To whitewash surfaces, lime in powder form is mixed with water. The positive qualities of the material include the following:
- Availability and low price.
- Antibacterial.
- Does not lose properties when temperature changes.
- Moisture resistant.
- Penetrates into small cracks.
- Has good adhesion to many materials.
However, there are also disadvantages to lime. This:
- When whitewashing, streaks and stains occur.
- When working with lime, you must be careful not to get burned.
Chalk, which is a natural material, is also popular and is used for whitewashing walls. Pros of chalk:
- Cheap and accessible.
- Environmentally friendly.
- Very good whiteness.
- It simply washes off the surface.
- Safe to work with.
- Loses its properties in a humid environment.
- When working with chalk, you need certain skills, otherwise you cannot avoid stains, bubbles, etc.
As can be seen from the comparative characteristics, lime and chalk for whitewashing have their own priority of use.
For borders
To perform such work, you can use various products: from water-based paints to oil paints. However, the most classic method is whitewashing with lime mortar.
Cancelled
This material is immediately ready for use. All you need to do is simply mix it with water until you get the desired consistency.
Quicklime
The initial product is quenched according to all standard rules, after which the working substance is prepared.
The question of whether any additional components can be saved for these purposes is quite controversial. On the one hand, the requirements for painting borders are not as high as, say, for residential premises or chicken coops.
On the other hand, these objects are often installed in open space, where there is exposure to various aggressive factors: from natural-climatic to man-made. Therefore, to prolong the “novelty” effect, it makes sense to use various strengthening additives.
If we talk in general about all the goals and processes discussed above, then it’s still not worth saving on components. Moreover, all of them are not only quite cheap, but also publicly available.
Why is lime good for trees?
- Whitening the bark with lime helps protect trees from temperature changes. In winter, the contrast between day and night temperatures can lead to icing of the bark and the appearance of frost holes. This happens much less often with whitewashed trees.
- Lime, which is part of whitewash for trees, saves garden crops from the penetration of various pathogens and pests under their bark.
- Lime helps protect the bark from sunburn. In winter, the sun is quite aggressive, especially during thaws. White lime reflects the sun's rays well, the bark does not overheat and does not crack.
- Whitewashing trees: when, how and is it necessary at all?
It is believed that autumn is the most suitable time for whitewashing trees. Is this true and why?
Can all trees be whitewashed? Many gardeners believe that young plants should not be treated in this way, arguing that whitewashing will only harm them: it can burn the bark and prevent the trunk from “breathing” and growing in width. However, this is not quite true.
The bark of young trees is much thinner and more delicate than that of adult crops. This means that it may suffer more during the winter. But whitewashing with lime can also create certain problems. What to do in such a situation?
There are two solutions at once: firstly, you can halve the amount of lime in the whitewash solution, and secondly, the trees can be whitened with water-based or acrylic paint. Still, sunburn and frost damage will damage the young tree much more than whitewashing.
People have long realized that mountain limestone can be very useful on the farm. Previously, it was used primarily as a material for creating cement mortar; later, lime began to be used in agriculture. Lime can be slaked or quicklime. Each of them has its own purpose.
Quicklime is in demand in the construction industry. It is used in the production of plaster materials, slag concrete, sand-lime bricks, and paints. Quicklime is also included in some food products. Its task is to bind substances that cannot mix (for example, oil and water).
Slaked lime is produced by the interaction of quicklime and water. At the same time, the amount of water determines what kind of mixture will come out in the end:
- fluffy,
- lime dough,
- lime milk.
It is this lime that is used in agriculture. Slaked lime is added to the soil to reduce its acidity and to increase soil fertility. Another popular use is whitewashing trees.
Trees should be whitened twice: in autumn and spring. The first whitewash is considered the main one, the second allows you to restore the layer that was erased (or washed away) during winter storms.
Whitewashing trees with lime in autumn
Trees should be whitened in the second half of autumn after the leaves have fallen. The best temperature for this: 4-5°C. It is important to have time to carry out all the necessary procedures before the snow falls. Cleaning trees can (or even should) be done in wet weather - wet elements of the bark move away from the trunk more easily. But the whitewashing itself must be carried out only on a dry day.
Whitewashing trees with lime in spring
Spring whitewashing is usually carried out in late March - early April, after the snow melts. It is advisable to do this at a temperature not lower than 5°C. It is important to be in time before the leaves on the trees begin to bloom and the earth warms up thoroughly. With the arrival of a thaw, pests that hibernate in the ground also wake up, and after that there is no point in whitewashing trees.
- When is it better to whiten trees in the garden - in autumn or spring?
Is it necessary to whiten trees and, if so, is it better to do it in autumn or spring and what compositions to use - read about it in our article.
We hope our information will be useful to you, and you will be able to properly prepare a lime-based solution for whitewashing trees.
Whitewashing surfaces
Before you start whitewashing, you need to decide on the tool for the job. Application of milk to the surface is carried out in two ways: with a brush and with a spray bottle. In the old days, whitewashing was carried out exclusively with a brush, but with the advent of modern technologies, the process is increasingly carried out using a spray gun.
Although, if the whitewash area is small, it would be more rational to use a brush, but large areas are better treated by spraying the material. This makes it more beautiful, more uniform and more economical.
The spray gun can be replaced with an ordinary spray gun: electric or mechanical. Since the spray gun is smaller in size than a spray gun, it will be easier to direct the whitewash jet into hard-to-reach places.
Surface preparation
Today, there are two main types of mortar for whitewashing ceilings:
- Chalky. It is hygienic, has a deep whiteness, but crumbles quite quickly.
- Lime. It has bactericidal properties, crumbles less, but can dry out the air in the room and can cause allergies.
Both of these compositions are completely environmentally friendly. When choosing a suitable solution, you should be guided by personal preferences and which one was applied previously. It is not advisable to whitewash with chalk mortar over lime mortar or vice versa, as bubbles or stains will appear.
You can buy lime and chalk in dry or paste form. For high-quality whitewashing, you can use both options. Most recipes also include additional ingredients.
There are several recipes for preparing this composition. In addition to traditional ingredients, you can add various colors to give the desired shade to the ceiling.
Before diluting chalk to whitewash the ceiling, you need to stock up on laundry soap, wood glue, ultramarine or colorant.
We adhere to the following instructions:
- Sift 3 kg of dry chalk powder and pour into a container.
- Pour 3-3.5 liters of warm water.
- Add 50 grams of laundry soap shavings and 100 grams of wood glue.
- In a separate vessel with warm water, dilute ultramarine.
- When the shade of the desired intensity is obtained, pour the blue into the solution.
- Thoroughly mix all ingredients until uniform and strain through double gauze or nylon.
You can check if the consistency is suitable by dipping a knife. If white runs off the blade, there is excess water. In this case, the mixture can be left for several days. During this time, the chalk will settle to the bottom, and the water will be on top, and it can be removed with a ladle.
The consumption of this solution is 0.5 liters per 1 m2.
This composition will be sufficient for whitewashing 20 m
ceiling.
We prepare it in this order:
- We heat 10 liters of water to a temperature of 40-45 degrees.
- Dissolve 120 grams of wood glue and 150 grams of laundry soap shavings in it.
- Mix thoroughly and add 6 kg of dry chalk, which had to be sifted first.
- Add water, bringing the composition to a volume of 20 liters.
- Dilute ultramarine with water in a separate vessel.
- Add blue to the solution to avoid yellowing of the layer.
Do not forget that after preparing the composition, it is recommended to strain it. In this case, it will be homogeneous and easily lie on the surface.
To make a solution of paste chalk for whitewashing the ceiling, you will need CMC wallpaper glue. We carry out the work in the following sequence: dissolve the glue in warm water so that a 1.5 percent solution is obtained, mix the adhesive mixture with chalk paste in a ratio of 4 to 1. This composition does not need to be filtered, it is immediately ready for use.
Lime for whitewashing the ceiling, like chalk, is sold dry or already slaked. Dry lime, depending on the speed of slaking, is of three types: fast slaking - 10 minutes, medium slaking - 20 minutes, slow slaking - more than half an hour. The slower the lime slaks, the smaller portions you need to add water. The composition for whitewashing the ceiling is prepared from slaked lime. If you only have dry fire, you can extinguish it at home.
To carry out this procedure at home, you must first put on safety glasses, a respirator and work clothes.
We carry out the work in this order:
- Pour the lime into a rust-free metal container.
- Pour cold water in a ratio of one to two.
- Mix the lime and dilute with water to the required viscosity.
- Let it sit for several days.
During the process, it is very important not to lean over the container with slaking lime, since very caustic steam is released.
To properly dilute slaked lime, we need salt, dye (you can use ultramarine), 200 grams of aluminum alum.
Prepare in the following order:
- Dilute 3 kg of slaked lime in 1 liter of water and stir until smooth.
- Soak 100 grams of salt in a separate bowl.
- Add 200 grams of aluminum alum and soaked salt to the solution.
- Mix all ingredients thoroughly and pour in 0.5 kg of dye.
- Bring the composition to a volume of 10 liters with warm water.
To ensure that there are no streaks left during lime whitewashing, it is recommended to first wet the coating with water.
To prepare this solution, you will need slaked lime, laundry soap, wood glue, ultramarine, and table salt.
Dilute the mixture in this order:
- Dissolve 6 kg of slaked lime in 8 liters of water.
- Add 100 grams of laundry soap shavings.
- Separately dilute 200 grams of wood glue in water and dilute it with the general solution.
- Mix the composition thoroughly and add ultramarine until the shade of the desired intensity is obtained.
- Add 200 grams of regular kitchen salt, which we first dilute in water. This will make the mixture more stable.
Colored whitewashing can be done by adding special dyes with a high level of alkali resistance. To do this, they must initially be diluted in water and poured in liquid form. Please note that after drying the shade will become several shades lighter.
This mixture can be made from slaked lime, water, drying oil and salt in the following order:
- We dilute 400 grams of lime in 0.6 liters of warm water.
- Add 1/3 tbsp to the composition. spoons of drying oil and the same amount of kitchen salt.
- Mix the solution thoroughly until a homogeneous consistency and shade is obtained.
- Strain the mixture to remove excess lumps. The consistency of lime white should be like thick milk. Whitewashing with such a mixture will last a long time and have high moisture resistance.
To prepare the lime finishing composition you will need the following components:
- slaked lime;
- pure water;
- drying oil;
- 50 grams of table salt;
- a bag of blue or ultramarine.
Before diluting lime to whitewash the ceiling, you will need to prepare 2–3 kilograms of the starting material and 5 liters of hot water. The required volume of the finished composition is determined in most cases from the calculation that for every 2.5 m? Approximately half a kilo of lime and 0.75 liters of clean water are consumed on the treated surface.
To obtain the optimal composition, first dissolve slaked lime in the prepared water, and then sequentially add all the auxiliary components in that direction. To give the finished whitewash additional plasticity and durability, add a little drying oil (one third of a tablespoon) and about 5 grams of table salt to the mixture.
Carrying out finishing work is not a clean procedure; during whitewashing, product may drip from the brush. Therefore, before starting work, the floor and furniture are covered with oilcloth, because... Whitewash is difficult to wash off. They also use eye protection, that is, glasses, and special clothing.
The main goal is to create a durable and uniform surface using whitewash. To make a high-quality surface, it is first cleaned of dirt and greasy stains. If the wall is too dirty, then the layer of material is cleaned off to the concrete base; this is the only way to ensure a reliable coating.
Working with lime is dirty, the liquid solution creates smudges and splashes. You can find a professional for this task, but it is also possible to do the work yourself.
Before whitewashing the walls, you need to protect the furniture and floor from white splashes. These insidious stains are then difficult to wash off with water.
The painter must wear protective clothing and a hat. It would also be nice to put plastic glasses on your eyes.
The master’s task is a strong and even whitewash. In order for the paint on the wall to last long, the surface must be cleaned of dirt and stains.
It is better to clean the layer down to concrete or brick. In this case, you can guarantee that the whitewash will last a long time.
If there are greasy or yellow stains on the surface, they must be neutralized with a bleach solution. The walls should not be primed.
On a sunny day, a lot of bright light will fall on the lime, this will negatively affect the quality of the material. Therefore, to whitewash the walls you should choose the evening or a cloudy day.
| Friday, 04 Thursday 2014, 16:48 |
| Lime paste is intended for whitewashing the external and internal surfaces of buildings and structures. Lime paste is also used to make mortars for plant protection and liming of acidic soils. The material contains industrial lime and water. Lime paste is widely used by craftsmen in many industries:
To prepare the whitewash mixture, mix the contents of the bag with water, the concentration depends on the type of work, if necessary, add dye to the solution, stir and whitewash. |
Scope of application of lime
- In construction, lime is used as a plasticizer for cement mortars. It prevents cracking of the solution and binds it well. It is an indispensable ingredient in plaster mixtures. Helps the coating adhere to stone and wood surfaces. For this purpose, only slaked lime is used.
- In gardening it is used to treat trees and reduce acidity in the soil. To whitewash trees, lime is mixed with copper sulfate.
- In industry, animal skins are treated with lime, and water is softened and disinfected with it.
- In everyday life, lime is used for whitewashing various surfaces - walls, ceilings, stoves, etc.
- In medicine, bleach is used to disinfect premises, equipment and water.
Use of lime
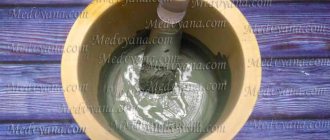
To whitewash walls, slaked lime is used. This product has high disinfectant properties, as it has alkaline characteristics; lime prevents the appearance of fungus, mold, and insect pests. No cracks, bubbles or peeling appear on the whitewash; this material is resistant to humidity and temperature changes. To apply whitewash, it is not necessary to remove the previous coating; you can whitewash the old surface if it is not too dirty. Whitewashing also strengthens surfaces on which small cracks appear. The main advantage of the material is its cost; compared to other materials, it is the cheapest, this is due to the ease of its manufacture. When the mixture is properly prepared, after its application, a homogeneous layer is obtained that does not peel off.
How to prepare the solution
The quality of whitewash largely depends on how you prepared the solution. For regular whitewashing of house walls, the following proportions are used: 4.5 kg bag. dilute in 6-7 liters of water and mix thoroughly until a homogeneous mass, which in consistency resembles thick sour cream or thickened cream. If you want to get snow-white walls and ceilings, add a little ultramarine blue, after diluting the powder in a small amount of water to obtain a blue liquid. Pour in slowly, stirring thoroughly, until the desired color is obtained.
Be sure to prepare the walls for whitewashing. If they are plastered, but never bleached, treat them in 3 layers; it is not necessary to add blue to the first layer. It will take approximately 5-6 hours for one layer of whitewash to dry.
If you are whitewashing a previously painted surface, it must be prepared. Scrape off the layer of existing whitewash with a spatula, start working from the ceiling, going down. When whitewashing, do not allow any omissions. Experts recommend applying lime perpendicular to the direction of light the first time, and in the direction of light the second time. Do not forget to shake the solution systematically, as the lime paste settles at the bottom of the vessel. If the solution becomes viscous, add water and stir.
How to prepare the solution
First you need to purchase lime powder at a hardware store. Fluffed lime is usually used; it is already slaked. To whitewash a room of about 15 square meters, you will need one package of material. Concrete walls with a smooth surface require less mortar than brick walls.
In the second option, the material actively absorbs liquid, and the mixture consumption increases. More composition is lost when applying several layers, so the material is purchased with a reserve. For convenient application, it is necessary to properly prepare the mixture; if the material is in the form of a paste, then diluting with water will be easier. To treat one square meter you will need approximately 0.5 liters of mixture.
To prepare the mixture, you need to prepare 1 kilogram of dry lime and three liters of water. To prepare the paste, dilute the dough with water in a ratio of 1 to 3. You can use quicklime, it comes in clumps to make a mixture, pour the material with water, maintaining a ratio of 1 to 3, and cover the container.
After the reaction is completed, the paste will be ready; it must be left for two weeks for a high-quality infusion. The paste is then diluted with water to obtain the required consistency. When water hits dry material, the mixture heats up and a reaction begins, so the container must be covered to avoid the release of harmful fumes.
It is necessary to add blue to the composition to give a beautiful color, half a glass of salt, and 20 grams of drying oil, this contributes to high-quality adhesion of the mixture to the surface. About four liters of the composition are prepared from one kilogram of lime. The solution is consumed depending on the type of surface, the maximum amount is about one liter per square.
The quality of whitewash largely depends on how you prepared the solution. For regular whitewashing of house walls, the following proportions are used: 4.5 kg bag. dilute in 6-7 liters of water and mix thoroughly until a homogeneous mass, which in consistency resembles thick sour cream or thickened cream. If you want to get snow-white walls and ceilings, add a little ultramarine blue, after diluting the powder in a small amount of water to obtain a blue liquid. Pour in slowly, stirring thoroughly, until the desired color is obtained.
Be sure to prepare the walls for whitewashing. If they are plastered, but never bleached, treat them in 3 layers; it is not necessary to add blue to the first layer. It will take approximately 5-6 hours for one layer of whitewash to dry.
If you are whitewashing a previously painted surface, it must be prepared. Scrape off the layer of existing whitewash with a spatula, start working from the ceiling, going down. When whitewashing, do not allow any omissions. Experts recommend applying lime perpendicular to the direction of light the first time, and in the direction of light the second time.
Where is lime used?
As mentioned above, lime has high antiseptic qualities, so it can be used in unheated rooms with high humidity, for example, barns, garages, workshops, basements, and other buildings. Lime is also used to treat walls and ceilings in the entrances of apartment buildings, kindergartens, schools, and other public institutions.
Since lime is resistant to precipitation and different temperatures, it is used to treat house facades, trees, and garden borders. Lime is used to change the acidity of the soil, it protects trees from rodents, and gives them a beautiful appearance. You can also whitewash the walls in the foyer, entrance or corridor, while saving on costs and getting a clean, neat look.
Ceilings in kitchens or public buildings are whitened with lime; after the material dries, it does not emit any toxins and is safe. If it is necessary to treat a large area of utility rooms and save money, use lime mortar. It is quite simple to prepare and apply; after drying, a white and clean surface is formed.
How to extinguish lime?
To extinguish the lime, prepare a deep container and a stick to stir the composition. For one kilogram of lime in lumps, use one liter of cold water. Pieces of lime are placed in a container and filled with water, then thoroughly mixed. At the same time, the mixture begins to hiss, as if boiling, which means that a reaction has begun to occur. After the end of the hissing, the lime becomes fluffy, but is not yet suitable for whitewashing; it is left for up to two weeks, and then used in preparing the solution. The extinguished material is removed to a cool place to settle.
Lime slaking
Three types of lime can be purchased in stores and warehouses: slaked, unslaked, and soda lime (a mixture of slaked and unslaked lime). But for whitewashing walls it is best to use slaked lime.
Why? Because for finishing work the so-called “lime milk” is used, which is obtained by slaking unslaked lime. We will consider below how to carry out the extinguishing process correctly and safely:
- After purchasing lime (not slaked), you need to break up too large lumps, but not to the powder stage.
- Place all this in a metal container (galvanized bucket).
- Pour clean cold water into the container. After contact with water, the lime will begin to bubble and splash, so you need to close the bucket and move away.
- After 20 minutes you will need to mix the composition. At the same time, protect all exposed parts of the body, wear glasses and rubber gloves. If drops of the solution do get on your body, you need to quickly rinse the area with water.
- Complete dissolution of the lime occurs after six hours.
- After which the prepared solution is filtered through gauze (or through a nylon stocking).
- The result is lime milk, ready for use.
Some whitewash masters add salt and drying oil to the solution to increase strength and to prevent the walls from getting dirty later. The proportion is as follows: for 10 liters of solution, mix 100 g of drying oil and the same amount of salt. It happens that the solution turns out to be too thick and in order to correct this, you need to add water to the desired viscosity. In addition, you can add a little blue, which will give the house whitewash lime a snow-white hue.
As you can see, slaking lime is not very difficult. However, it is necessary not to neglect personal protective equipment, so as not to burn your skin and eyes.