Foam insulation - definition and characteristics?
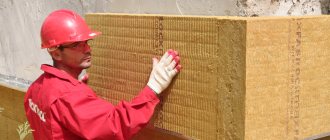
We will try to consider in detail the features of this material and its application, so that everyone who builds their own house can master working with it. It is now not only fashionable, but also necessary to warm yourself. Energy prices are inexorably creeping up, maintaining comfort in the house is becoming an increasingly wasteful activity, so insulating apartments is more important than ever. The same wave has also swept over the construction of houses, where you can acquire a “reliable fur coat” at a very early stage; all that remains is to decide on its type. But if you have a ready-made building, even with finishing, insulation will not be a problem, especially when it was decided to use foam insulation.
The class of these substances is a polymer or a combination thereof; upon reaction between the components or a single component with moisture and air, curing occurs with pre-foaming, due to which the material successfully fills the space, sometimes increasing in volume by 20 times. The disadvantages of this group of insulation are the need for good air flow, that is, ventilation of the room for work. You also need to properly protect the insulation layer after finishing the work, because it is afraid of sunlight and precipitation; over time, the material will simply begin to deteriorate.
But these points cannot overshadow the impression of the advantages of foam materials. Biological and environmental safety allow their use in residential premises of varying degrees of cleanliness. Such insulation consists of pores filled with air or a gaseous reaction product between the components, due to this, good thermal and waterproofing is created, so additional measures to protect the room from freezing and moisture are not required. But this is provided that all external pores of the material are insulated with finishing (internal or external, depending on the location of the insulation).
Foam insulation that is well sealed from external influences will serve you for an incomparably long time, moreover, over a wide range of temperatures, even the coldest Russian winters will not destroy the material, the same applies to elemental heat.
Good insulation is also due to the fact that, when expanding, the foam does not form seams or gaps through which cold could still seep, so the “fur coat” of these materials is the most reliable. They also adhere well to any coating; adhesion guarantees reliable service for many years. This layer also has antiseptic properties and protects the metal from corrosion. Yes, also, the material, as a rule, is not flammable, you see, that’s also a plus.
How long will the foam last?
Thermal insulation material does not have a limited service life.
After installation, the foam is destroyed when exposed to:
- direct sunlight;
- exposure to ultraviolet radiation;
- carrying out silicification.
Therefore, the thermal insulation layer is covered on top with a finishing material, which serves as a protective layer.
Under the cladding, the service life of the foam is unlimited.
Foam insulation - types of materials
There are quite a lot of foam materials in construction (polyurethane foam, penoizol, foam concrete, polyurethane foam, ecowool), but we will not consider everything in detail. Let's weigh the suitability of several of the most popular ones in private construction. Let's start with penoizol, which for private construction can be seen more often in the form of already hardened sheets, but for large scales it is mixed in special machines, from which it is poured into wall cavities or formwork. The total curing time is about 3 days, but this material is harmful, or so, in any case, the average person thinks, seeing aldehydes in its composition, but the manufacturers deny the danger to humans.
The specialists of the site REMOSKOP.RU have prepared a special calculator for you : Building Heat Loss Calculator . You can easily calculate the heat loss of a building.
Foam concrete and ecowool are expensive and difficult to use, although the filling methods are almost no different from others, so they are rarely used for the construction of a private house, which cannot be said about polyurethane foam (PPU) and polyurethane foam. Many people identify these materials, but they still have some differences. Polyurethane foam is considered two-component, its parts are mixed when prepared in a spray machine, and polyurethane foam is one-component, and swelling occurs due to the influence of compressed air on it, under the pressure of which it comes out of the cylinder, in which it is sold in ready-made form.
Polyurethane foam increases its volume by more than 40 times, and polyurethane foam does not expand as much; moreover, there are fewer closed cavities with air in it, and polyurethane foam almost entirely (90%) consists of closed pores, which is why it is more heat-intensive and reliable insulator. Polyurethane foam is sold in cylinders, the covering capacity of which is about 1 m2, and if you are insulating a house, you will need a lot of it, it will not be cheap, so polyurethane foam is most often used, which is also called polyurethane foam in a wide circle of builders. This is exactly what the conversation will be about.
Basic structures for insulation
Thermal protection of vertical elements in a private house is required in three cases:
- insulation of the floor above a cold basement;
- interfloor ceilings;
- attic floor in the presence of a cold attic.
In the second case, work is carried out to improve sound insulation characteristics.
Insulation in a wooden house helps prevent the following problems:
- overconsumption in the heating system;
- violation of the temperature and humidity conditions of the room;
- rotting of floor structures;
- the appearance of mold and mildew.
In a private house or country house, it is worth thinking about carrying out thermal insulation measures at the design stage.
Insulation with polyurethane foam - application methods
Depending on the readiness of your room, wall insulation with polyurethane foam can be carried out in several ways - spraying and pouring. In the first case, your construction has not yet been completed, in front of you are bare, rough-hewn walls, some kind of minimal frame is attached to them to divide the area into unique sections, and a thin layer of foam is sprayed on. As it expands, it forms a “fur coat”, which you will then have to level and carry out external finishing. When insulating floors or a roof in this way, you already have a frame in the form of a rafter system and a log under your feet.
Filling is used in cases where it is necessary to insulate a cavity in a wall with a finished finish or during construction the frame of a house consists of several rows of bricks, for example. The difficulty with this process is that you do not see how evenly the foam has filled all the voids, because you are simply blindly pouring it into the cavity on top of the wall under construction or through holes in the wall that is already covered with a ceiling or roof. For this, a special hose is used, which is fixed on the spraying machine and the other end is inserted into a hole in the wall.
In what cases and why is insulation from below correct?
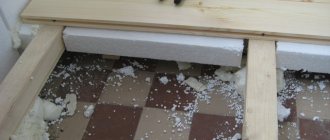
It is better to insulate the floor above a cold attic from above, but the thermal protection of the floor above the basement is technically more competent to perform from below. This has its reasons:
- there is no reduction in the height of the room on the ground floor;
- there is no need to choose dense rigid insulation that will withstand the loads from residents, furniture and equipment;
- protection from freezing not only of the floor, but also of the entire wooden floor;
- displacement of the dew point (the line on which condensation falls) to the surface of the ceiling from the thickness of the structure, which prevents rotting.
But when carrying out work in a private house or dacha, some difficulties may arise specifically related to work from below:
- the need for more reliable fastening of the insulation;
- the difficulty of working in low subfloor conditions;
- the need to work on the ceiling leads to rapid fatigue of workers;
- restrictions on types of insulation.
Therefore, if you are looking for simpler methods of insulation, we recommend that you read the following articles:
Insulation with polyurethane foam - step-by-step diagram
Step 1: Preparing for work
If you are filling a cavity between walls where there will be nothing but foam, then no special preparation is required.
Also, you don’t need to worry too much if you spray foam; you will then lay all communications directly in it. The only thing is that to spray the foam you need a frame that will divide your wall into sections, which you will fill in turn. Usually this role is performed by the sheathing. The rest of the preparation will consist of following safety precautions, get a respirator, goggles, preferably a mask to cover your face, a thick work suit and gloves. Foam is difficult to remove not only with solvents, but also with acids, so you risk wearing the “gift” on your skin for a very long time. If you are pouring polyurethane foam into a wall with finishing, but you need to drill technological holes in it according to the size of the hose, the first one is at the level of the middle of the wall, the second one is at the top. Seal all holes and cracks with masking tape so that, as the material expands, it does not leak out and pollute your wall; damage in the form of several holes will be enough. These gaps include sockets for sockets, window and door openings, etc. If there are any niches, then they should not only be glued, but also the fabric should be stuffed there in a dense layer.
Step 2: Pouring and Spraying Foam
To spray, you just need to spray starting from the bottom.
Apply a small layer and work your way up evenly. Having sprayed 30 centimeters high, stop, watch how the foam expands, how thick it is, and how far up it will creep. If necessary, spray a little more foam on top of the finished layer, achieving the desired thickness. This way you will develop the desired pace of work and spraying strategy. For pouring, the biggest problem will be to determine the filling method, that is, which trajectory to move the hose in order to evenly fill the entire space, because you pour liquid, and then it begins to turn into foam and expand. In practice, it is almost impossible to verify this, because you cannot see anything inside the cavity. Therefore, it is best to install the hose motionless in the direction strictly downward, and pour it that way. In this case, there will be less splashing, and the liquid below will decide for itself how to spread; most likely, it will have time to do this evenly in the area adjacent to the hole. Then it will systematically creep up, filling the free space.
To create symbolic, uniform sections for pouring, make holes at a distance of 1 meter from each other horizontally, and about two holes in height are sufficient (one almost at the ceiling, the second 1.5 meters from the floor). Having poured a certain portion, let it react, then pour in the next one, this will allow the liquid foam to fill in some of the flaws of the previous portion.
Step 3: Shutdown
This stage consists of waiting for the foam to completely harden; this can take up to 3 days; we remind you that for this you need to ensure good air flow. Then, if spraying has been carried out, the outer side of the “coat” is leveled and covered with finishing material, most often plasterboard, lining and other dense materials, to protect the foam from possible mechanical damage in the future. Although many argue that after complete hardening you can even walk on it, so plastering will be enough, but this is at your discretion. If filling was carried out, then you just need to remove any drips that have appeared, remove all protection, and seal the technological holes.
- Author: Manager Andrey
Rate this article:
- 5
- 4
- 3
- 2
- 1
(4 votes, average: 2.8 out of 5)
Share with your friends!
Material characteristics
Foam sealant has a number of special characteristics:
- foam output volume. The indicator is measured in liters, determined by the consistency and amount of mass that came out of the cylinder;
- adhesion level. The parameter is intended to characterize the strength of adhesion of the substance to the base. For example, with concrete, brick, wood and plastic, the level of adhesion of the product is exceptionally high. At the same time, there is practically no grip in case of contact with oily surfaces, ice and silicone;
- foaming The indicator characterizes the process of boiling of foam insulation in a cylinder;
- extension. The process is a chemical reaction of a substance to its environment that follows foaming;
- secondary expansion. The process occurs after polymerization of the composition, and has a negative character, since high-quality products are not subject to repeated expansion or shrinkage.
Foam for floor insulation has an expansion characteristic.
When planning the insulation of floors with polyurethane foam, one should also take into account such indicators of the quality of the substance as the level of viscosity and density.
Advantages of bottom insulation
In order to reduce labor costs and construction costs, many resort to top insulation of wooden floors. The technology consists of installing an insulating layer of rigid heat-insulating sheet material between the frame and the finishing coating. This option is suitable for construction in regions with a relatively mild climate.
But when building in a region with cold winters, it is recommended to insulate the floor on the ground floor in a private house from below for the following reasons:
- the height of the premises is not “eaten up”;
- it is allowed to use any type of insulation - there are no restrictions on rigidity, since the thermal insulation layer will not experience loads from furniture, people, or household appliances;
- protection against freezing is provided for the entire floor frame, and not just the external flooring;
- The dew point (condensation line) moves upward to the surface of the coating, due to which the base structure is protected from rotting.
Bypass and heated floor
The so-called bypass line when installing “warm floor” systems is part of the mixing unit. It is used constantly and without it the system will not be able to work normally. The water moving through the supply part of the pipeline has a temperature of 80 degrees and above. The water temperature in the circuit should not be higher than 45 degrees.
To prepare the coolant, a mixing unit with a special three-way valve is used. It is capable of passing only the required amount of water. The rest of the coolant will move through the bypass. There it will mix with the water coming out of the collector and go to the boiler.
Care and operation
Although the material is airy, it must be regularly ventilated in the fresh air. Dust must be removed from the surface of the product. If a stain appears on the mattress, it must be removed immediately with detergent. When wet cleaning is done, drying in fresh air is required. Do not use a fireplace, heater or other heating devices for this.
Every month you need to turn the mattress over to the other side to prevent caking and maintain the orthopedic effect. You also need to choose the right product in the store, taking into account the weight of the person who will sleep on it. Proper mattress care ensures proper rest.

