Setting the register
You can make water heating using a boiler welded from sheet steel or a coil from pipes with your own hands if you have the skills to work with a welding machine.
When making it yourself, you need to take into account that the thickness of the sheet metal or pipe walls must be at least 3-5 mm. Heating of such a coil will occur slowly compared to thin-walled devices, but its service life will be much longer. Burnout of thin metal walls will lead to a major overhaul of the furnace in which the heating element is installed. In self-made coil designs, an old battery (heating radiator) made of cast iron can be used. To use it as a heat exchanger, preliminary preparation is required: the radiator must be disassembled into sections, washed from the inside to remove scale and rust with appropriate compounds and checked for defects (leaks). Reconnect the serviceable sections, using an asbestos cord impregnated with drying oil as a seal between them. The prepared radiator can be installed in the firebox of a brick or metal stove, either on the side or above the flame. In the latter case, the battery must be located in a horizontal plane.
The welded heat exchanger of a water heating system can have different shapes. If the oven is not planned to be used for cooking, the register or boiler can be made in the form of a U-shaped structure from pipes or sheet metal. So the efficiency of a homemade boiler can be increased by increasing the surfaces heated by the flame. To allow cooking on a stove located above the firebox, a different design will be required. In this case, the containers located on the side surfaces of the furnace and the stove, located as it is usually installed in cooking structures, will heat up.
Furnace design, its specifics
The important elements of a potbelly stove are:
Furnace compartment. It is located approximately in the middle third of the oven. Designed for burning fuel - wood or coal. Equipped with a door on the side wall of the oven for loading. An ash pan is necessary to collect solid residues after burning wood or coal. It is disconnected from the part for the firebox at the top by grates, which are cast iron rods of a specialized shape. Ash awakens in the gap between them and penetrates into the waste collection tray. At the bottom of the ash pan, a bottom is made of sheet metal 1.2–1.5 mm thick. The container with the coolant is a tank made of sheet metal, filled with water or the rest of the heating agent. This device requires absolute tightness. At the top of the tank there is a hole for the outlet of water, at the bottom there is a return pipe through which the coolant cooled in the heating system is returned. The smoke exhaust duct is installed on top of the stove body; it can be vertical, horizontal or inclined. It is brought out through the wall. For potbelly stoves, in most cases a pipe diameter of 150 mm is used. The supporting part is legs made of profile metal, providing a clearance between the body and the floor of at least 20–25 cm. Under them it is necessary to install a protective sheet of metal with an asbestos backing
This is very important if the heating unit is placed on a floor made of combustible materials.
Pipe coils
The design of this unit depends on the design of the furnace. There are different types:
- With right angles. Such thermal units are made of sheet metal up to three millimeters thick. Naturally, the most technologically advanced pipe coil is made in the form of a jacket located around the combustion chamber. The distance between the walls of the jacket and the furnace body depends on the volume of the heat exchanger. The higher it is, the very slowly the heating of the coolant in it occurs. Often containers are installed on top of the combustion chamber, but in this case the surface for cooking the stove becomes inaccessible.
The quadrangular shape of the stove is most suitable for a potbelly stove
Cylindrical vertical potbelly stove is very cheap
A potbelly stove can be made from a metal pipe needed for a high-pressure pipeline
Lining can be compared with thermal insulation
You can also heat the room with sawdust
Making a potbelly stove with a hydraulic circuit with your own hands
When installing this type of heating system, you can either build a water boiler into a potbelly stove or create the stove itself from scratch. Thanks to this, figuratively speaking, the process can be divided into 2 stages.
Development of the potbelly stove
Before work begins, drawings are drawn up that include all dimensions of the furnace, and key materials are prepared for working with metal: an inverter unit, a hammer, an angle grinder, as well as pliers and special protective clothing.
When creating a diagram of a potbelly stove with a water jacket with your own hands, it is important to take into account the thickness of the components of the future unit. Once the metal has been cut, we proceed to the next steps:
Once the metal has been cut, we proceed to the next steps:
Combine the bottom with the walls, excluding the front. All parts should be welded at right angles.
Important: It is better to place the bottom of the stove at a level of 25-30 cm from the floor. Likewise, engineered iron legs can reduce the effect of heat on the flooring
A partition is welded into the space between the combustion chamber and the blower. You need to drill several longitudinal holes in it through which the ash will be removed.
The blower opening must be up to 3 cm smaller compared to the blower itself.
- Openings for doors are made on the front wall. After which it can be placed to the key structure;
- Roof protrusions are added to both sides of the front part and doors are installed;
It is better to equip all doors with deadbolts
A chimney pipe is welded to the part on top of the stove. At the end of the work, all parts should be checked for flaws in the seams. If none are found, we proceed to the second stage - adding a hydraulic circuit.
Adding a hydraulic circuit to a potbelly stove
The basis of a similar type of furnace is a pipe coil, which can be constructed from various materials, for example, hollow steel pipes or steel sheets. In addition to the heat exchanger, to create a potbelly stove with a hydraulic circuit you will need:
- Finished furnace body.
- Heating appliances.
- Pipes.
- Sheets of metal.
The system installation process is as follows:
Two holes are made on top of the base of the potbelly stove for the supply and return of water.
Drawing up a drawing of a future potbelly stove with a hydraulic circuit, created on your own, can help make the work easier.
- A water tank is formed from metal or other suitable non-usable materials; the largest space should be allocated for it when compared with the combustion chamber and ash pan. Holes for the pipes are made in the tank, then it is placed behind the combustion chamber. The space is disconnected by a sheet of metal.
- Next comes the process of installing the pipework. It can be one-pipe, two-pipe or manifold.
Important: A two-pipe design is considered more preferable, as it makes it possible to change the temperature using installed taps and provides the same heating, unlike a single-pipe design. The collector is considered very difficult for independent construction
The next step is the methodical connection of pipes with heating devices throughout the house.
It is recommended to install heating appliances under windows. This will increase the heat conductivity of the stove. The design of a potbelly stove with a hydraulic circuit is examined for the absence of holes where water can leak through the circuit.
An expansion tank is installed to the supply line, which will prevent the supply of cold water. Its size is selected based on the volume of water that will be located in the entire system - the tank must be made 20% larger.
Example of a potbelly stove with an expansion tank
With proper construction, the water will heat up in the heat exchanger, pass through the pipes to the heating devices, cool and return to the pipe coil.
We recommend reading in detail about the types of heat exchangers for all this material.
The finished structure can be painted or finished using brick, depending on what appearance the owner prefers.
Video: project of a potbelly stove with a hydraulic circuit
With the help of a potbelly stove with a water jacket, designed with your own hands, you can save a lot on heating a country house. Such a structure can provide the required amount of heat to any room.
Mini-stove potbelly stove for caravanning or country house
Hello everyone, summer is coming to an end, which means it's time to prepare for the cold weather. Today we will build a small metal stove that can heat a small house or tent. The homemade product is made of sheet steel 3 mm thick, the length of the stove is only 35 cm, and the width and height are about 20-22 cm. With such dimensions, the weight of the stove is 9 kg, as a result it can be transported in a car without any problems. The homemade product is equipped with a convenient ash collector, which is a drawer. In addition, the grates and furnace legs are removed. The author made the smoke outlet under a 65 mm stainless pipe. If the welding seams are well cleaned and the stove is painted, it will look great. If you are interested in the project, I suggest you study it in more detail!
Materials and tools used by the author:
List of materials:
— sheet steel 3 mm thick;
- door hinges; - thin profile pipes or rods for legs; - a piece of round pipe for the smoke pipe; — bolts, etc. List of tools:
— grinder; - welding machine; — welding angles; — measuring tool, marker; - drill; - vice. Furnace manufacturing process:
Step one. We weld the body
To begin with, we think through everything, mark and cut the sheet steel with a grinder. Well, then all that remains is to weld the furnace body, so that the welding is carried out at a right angle, it is useful to have magnetic angles.
The author also immediately cut out a rectangular hole in the front part for the door; the cut piece will serve as the door. We scald the inside of the window with steel plates to ensure tightness.
After welding the body, we clean the weld seams well with a thick grinding wheel. Of course, cracks and holes need to be sealed to prevent smoke from entering the room.
Step two. Smoke pipe
Let's make a smoke pipe; according to the author's idea, it should be 65 mm in diameter. The author had a pipe of smaller diameter, and he enlarged it. We cut the pipe crosswise and then expand it using a bolt, nuts and a piece of steel pipe. Having unclenched the pipe, we try everything on and weld a piece of metal in place of the gap formed.
The pipe remains to be installed on the stove; do not forget that there is a coil inside the stove and the smoke outlet should be at the very end of it. The author drilled a hole with a drill and welded the pipe.
Step three. Grate bars, ash pit and ash collector
We mark the bottom part and mark the places for the holes. We drill more holes through which air will flow into the oven. Well, then all that remains is to cut out the finished grates using a grinder.
To ensure that the grates fit inside the furnace, we weld strips of steel.
Step four. Door
We hang the door on good door hinges or on bolts and nuts, as many craftsmen do. For safety reasons, it is extremely important to make a reliable latch for the door; its design is quite simple. We use a bolt and nut as a hinge. To prevent the latch from falling when the door is opened, it would be a good idea to weld a stop under it.
We make legs for the stove; the author has them removable, which is convenient for transportation. For the legs you will need pieces of profile square pipe, which are welded to the stove. Pipes of a smaller diameter are inserted into these welded pieces, which are the legs. We drill holes in the fasteners and cut threads for the screws. So that everything can be unscrewed by hand, wing nuts can be welded to the screws.
This is the end of the project, I hope you liked the homemade product and found useful thoughts for yourself. Good luck and creative inspiration if you decide to do this again. Don't forget to share your ideas and crafts with us!
Become the author of the site, publish your own articles, descriptions of homemade products and pay for the text. Read more here.
Care and maintenance of the potbelly stove
The stove will serve you for a long time if you follow the rules for caring for it:
- The condensate collector installed on the chimney must be opened weekly to drain the water.
- at the beginning of the heating period, the chimney must be cleaned of soot with a specialized tool.
- During operation, the stove body and pipe must be constantly monitored for smoke penetration into the room.
- Monitor the condition of supply and exhaust ventilation.
Self-made iron wood stoves can not only be spectacular, but also become a real interior decoration of the room. But do not forget about the need to follow all installation and operation rules.
Registers for a water-heated furnace
When creating a water heating system, a heat exchanger is used. It may be in the form:
- small boiler;
- coil;
- register.
The main advantage is that a standard water-type heating design can be connected to the heat exchanger.
Registers may have different structures. Most often they are made of steel sheets or metal pipes.
A high-quality register should work in such a way as to ensure the highest heating of water and its continuous and uniform circulation throughout the system.
When creating a register, it is necessary to pay special attention to the heating area and a suitable shape that will give better water circulation. It should be noted that a heat exchanger made of steel sheet is easier to use. It is easy to clean from the deposits that have formed, and it is much cheaper in cost.
However, its heat-absorbing properties are not so high. Registers and coils are more efficient since they are made from pipes and provide maximum heating area
It is easy to clean from the deposits that have formed, and it is much cheaper in cost. However, its heat-absorbing properties are not so high. Registers and coils are more efficient because they are made of pipes and provide maximum heating area.
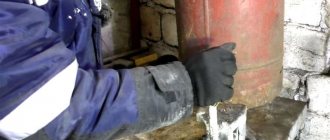
Required material
First of all, depending on the chosen model, you will need one or two empty gas cylinders.
In addition to them you will need:
- A sheet of steel from 3 mm, for arranging a jumper between the ash pit of the firebox, as well as a hob.
- To make the stove look more solid, you will need a finished cast iron door with a cast pattern.
- If the appearance of the product is not important, then a fragment of metal is suitable for the door. It can be cut from a steel sheet or from the cylinder itself.
- Chimney pipe. Its diameter should be 9-10 cm.
- For the grate and legs you will need a steel corner or reinforcing rod d (diameter) 1.2-1.5 cm.
- A ready-made cast iron grate can be purchased at a specialized store. Also, its role can be played by the bottom (holes are drilled in it) of a horizontal cylinder.
Either one or the second model can be made from a large cylinder, or from a small one. Accordingly, the result will be a large or small potbelly stove from a cylinder. It all depends on what type and size of room it is intended for.
Construction of an exhaust furnace with a water circuit
The design consists of two chambers connected by a pipe through which air is supplied. When heated in the lower tank, the fuel forms oil vapor. In the pipe it mixes with air, causing the combustion process to become more intense, and in the upper chamber it burns out. The products of the chemical oxidation reaction of the substance are removed through the pipe.
When making a unit with your own hands, the design is often supplemented and changed depending on the required functions of the product and the material used. The thicker the steel of the body of a homemade oil furnace for mining with a water circuit, the longer the device will last. In addition to sheet steel, unnecessary cylindrical products (for example, gas cylinders) are also used.
Advantages and disadvantages of potbelly stoves with a contour
A potbelly stove with a water circuit, which can be purchased in a fully assembled and equipped state with certain characteristics and qualities in a specialized store, has a number of positive and negative qualities, familiarization with which is mandatory before purchasing.
A water circuit firebox, due to the principle and features of its structure, is capable of heating a house quickly and evenly, while affecting all nooks and crannies, rooms and every wall. A water circuit furnace is also capable of heating to fairly high temperatures, and such heating equipment also has a number of the following distinctive features:
- With a high heating rate and sufficient performance of a potbelly stove with a water circuit, it is relatively inexpensive, and its installation and installation do not take much time;
- Self-assembled potbelly stoves at home are based on waste materials that are found in almost any home, thus they will be practically free or relatively inexpensive;
- Heating equipment of this type mainly runs on solid fuel, which is one of the most popular and inexpensive; often firewood, coal or pellets are used for ignition;
- Heating, which a potbelly stove provides in full, is in no way dependent on other resources, such as the presence of electricity in the house. And water circulation in heating radiators, radiators and pipes occurs using natural methods.
Equipping a potbelly stove with a hydraulic circuit
To remove this significant design disadvantage, such heating units are equipped with an additional heating system.
The purpose of this modification is to increase the overall heat capacity, which will make it possible to maintain a favorable temperature in the room for a longer period and, therefore, to fire the stove less often.
The heating medium is heated directly from the combustion chamber of the furnace. There are several options for this:
- Arrangement of “pockets” on the side walls into which the coolant is poured.
- Installation of a water tank with outlets to a traditional heating system.
- The process of installing a collector around the chimney very close to the stove, passing through which the air is heated specifically from the chimney.
- Installation of a water heater in the combustion chamber of a furnace.
The potbelly stove can be used for traditional heating
When starting to make a potbelly stove with a water heater, the home craftsman focuses, first of all, on the materials available and determines the heating method himself.
The advantages of this heat supply device include its speed. The room can be heated to a suitable temperature too quickly, and maintain the required level for a long time.
The disadvantages usually include the following:
- Such a stove requires continuous attention and timely heating within 24 hours.
- In a house outside the city, where you sometimes appear as a coolant, it is necessary to use antifreeze or mineral oils, preferably transformer oil, but regular oil can also be used. Otherwise, the water will freeze in winter and rupture the parts of the heating system. Repairs in cold weather are unrealistic.
An iron furnace with a water jacket has a high level of efficiency
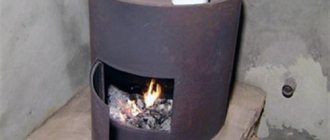
Metal furnace design
The simplest design of a potbelly stove consists of a metal body on legs and a chimney pipe placed outside. Inside the case there are two chambers with doors; a cooking hole can be located in the upper part. Structurally, the potbelly stove has the following elements.
- The firebox is a chamber where firewood or another type of fuel is placed; the firebox door insulates the firebox.
- The ash pan is a smaller chamber located under the firebox and designed to receive ash; its door acts as an ash pan.
- Both chambers are separated by a grate, which ensures the removal of ash and access of oxygen to the combustion chamber.
- In the upper part of the fuel chamber there are smoke circulation partitions that ensure the combustion and cooling of gases.
Over the years of evolution, potbelly stoves have undergone significant changes and improvements:
- the slow burning mode allows you to increase the efficiency of the stove and the burning time of one load of firewood;
- increases the efficiency and also reduces the fire hazard of the device for afterburning flue gases;
- heat-resistant (fireclay) lining allows you to keep the metal from overheating and extends the life of the furnace;
- An insert made of heat-resistant glass on the firebox door allows you to receive aesthetic pleasure from contemplating the fire.
The industrial production of potbelly stoves made of steel and cast iron has long been established. Steel stoves are lighter, but a cast iron stove is more durable and can retain heat a little longer.
| Cast iron stoves are more durable, heavier, have a more impressive appearance, attractive design and retain heat for longer. |
Furnace design with a water circuit
The classic design of the stove consists of a firebox divided by grates into a firebox and an ash pan, surrounded by walls made of brick or metal. When fuel burns, heat is transferred to the premises through radiant heat transfer from the enclosing surfaces of the furnace. The use of furnaces is usually caused by objective reasons:
- Lack of other types of fuel other than firewood and coal, namely natural gas and electricity of the required power;
- The relative cheapness of firewood in many regions of our country;
The main disadvantage of the heating design is the uneven distribution of heat throughout the heated rooms, as well as the cyclic mode of operation of the heating unit. In addition, the ovens are operated manually.
The introduction of a water circuit into the furnace design greatly improves heating performance. A metal heat exchanger allows you to remove part of the heat from fuel combustion and ensure its transportation through a liquid coolant - water or antifreeze.
Furnaces with a water circuit are divided into 2 types:
- Brick;
- Metal.
Brick kilns are built independently or with the assistance of specialists. Metal furnaces are made from steel or cast iron and can be built independently, but this requires professional skills as an electric welder. Moreover, industrially produced models have better characteristics compared to home-made ones - they are made of heat-resistant steels and are carefully calculated by designers.
Brick kilns take longer to heat up, but they also give off heat over a long period of time. In essence, brickwork partially functions as a heat accumulator.
Metal stoves heat up and cool down at a faster rate. Cast iron stoves are more profitable than their steel counterparts in this regard - cast iron accumulates a significant amount of heat.
Heat exchangers for water circuits of furnaces are usually made of steel. Heat exchangers have a wide variety of shapes and sizes and differ in location. In shape, these can be rectangular containers connected by round or profile pipes, coils, registers, and so on. The thickness of the steel for their manufacture is at least 3 – 5 mm.
In brick kilns, heat exchangers are most often placed in the fireboxes. It is not recommended to place devices in areas directly surrounded by flame, especially in furnaces using coal as fuel. The temperature in these areas reaches high values and the service life of the metal will be significantly reduced. Heat exchangers are placed in the edge zones of the flame and along the path of movement of hot combustion products.
In metal furnaces, heat exchangers are often made in the form of water “jackets” encircling the furnace space of the combustion chamber. In essence, stoves with a water circuit are an analogue of a solid fuel boiler.
Heat exchangers are equipped with threaded pipes for connecting heating system pipelines. Smoke removal is carried out using natural draft, that is, the construction of a chimney is required. The amount of combustion air supplied is regulated by a chimney damper and a damper on the air intake.
It is worth noting that to improve heat removal, smoke ducts are sometimes equipped with a labyrinth type or an additional heat exchanger is installed in the chimney duct for DHW or heating needs. In this case, the aerodynamic resistance increases sharply and a more accurate calculation of the parameters of the chimney will be required - and at a minimum, an increase in its height.
In addition to water heating circuits, stoves can be equipped with additional elements:
- A door with fireproof glass - a fireplace stove is created;
- Hot water preparation tank;
- Hob;
- Oven.
With an increase in the number of options, the dimensions and weight of the oven increase, and the cost increases. Some models of factory-made stoves are equipped with heating elements built into the heat exchanger (with the ability to be removed and replaced). Usually they cannot completely cover the entire thermal power of the furnace and serve as an additional or backup heat source.
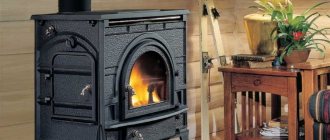
Modern stove-stove: what makes it an effective heating device?
Winter is approaching, and the issue of heating is becoming more and more pressing. Not everyone is lucky enough to have a gas pipeline on their property, and not everyone can afford to build a large brick fireplace in their house. A portable metal stove-stove may be a way out of the situation.
A potbelly stove has two main advantages. Firstly, it can be installed almost anywhere - both in a living room, in the kitchen or in a change room. And secondly, it is relatively inexpensive (especially compared to a masonry fireplace). And yet many do not take heating devices of this kind seriously.
Perhaps it's a matter of an established stereotype. Many decades ago, a portable stove was an iron box with a door and a short pipe that usually led out into a window. This is exactly the image that comes to mind when hearing the word “potbelly stove”. And this is partly true. Such a primitive heater can still be bought today. It will cost very little, but it will be of little use - the efficiency will hardly exceed 20-30%.
But modern devices offered by domestic and foreign manufacturers work much more efficiently. A small stove, made with the latest technology, warms up a room of 30-40 m², and one load of fuel lasts up to 12 hours. So, what are modernized potbelly stoves?
The “heart” of the stove is a metal chamber equipped with a hermetically sealed glass door. The material used for the firebox is steel or cast iron. Each material has both pros and cons. Steel is relatively cheap, but cannot boast of durability. After several heating seasons, the firebox inevitably burns out at the welds. Cast iron is much more expensive, but lasts for many years.
Some manufacturers protect the fireboxes of their products with lining made of fireclay clay, which greatly increases the durability of the products.
A modern furnace chamber is equipped with a ash pan, a grate and a pipe for connection to the chimney pipe. Special valves allow you to regulate the flow of air into the chamber. The less it gets inside, the longer the wood burns. In the most economical version, they simply smolder.
Furnace design with afterburning chamber
Another useful improvement is the special shape of the roof, which directs combustion products for re-burning. This, firstly, increases the efficiency of the stove, and secondly, reduces the temperature of the smoke entering the chimney.
Proper control of air flows inside the chamber allows you to minimize the amount of soot deposited on the glass of the firebox. This means that the user does not have to frequently clean it of carbon deposits.
The main problem of the “antediluvian” potbelly stove was low efficiency (most of the thermal energy literally flew out into the chimney) and rapid cooling after the combustion was completed. Both can be corrected by the casing that manufacturers supply their fireboxes with. The heated air circulating underneath noticeably increases the heating effect and prolongs the cooling time.
The “jacket” for the firebox is usually made of metal. To enhance the accumulating effect, it is covered with ceramic or stone slabs. Such a stove will retain heat even longer. In addition, fireplaces with casings also look very attractive. They are decorated with casting, covered with heat-resistant paints, etc. A potbelly stove, “dressed” in the latest fashion, will become a real decoration of the interior.
Many manufacturers equip their stoves with burners on which you can boil water or heat up food.
We have listed only the main innovations that turned the potbelly stove into an effective heating device. Obviously, all of them significantly increase the cost of the product, but at the same time they increase efficiency. For some models, efficiency reaches 80% or more. And this is a very impressive indicator.
Let us note one important nuance. Many people strive to buy the most powerful potbelly stove from the range offered. This is not quite the right approach. In a cramped room, a hot stove will dry out the air excessively, burning off oxygen, which will barely add comfort. The power of the stove directly depends on the area of the room that it will heat. You should consult the seller in detail about this.
Installation
It's time to talk about installing a potbelly stove. Theoretically, the chimney can be brought out of the window, but today almost no one does this. As a rule, the device is connected to a steel “sandwich” that passes through the ceiling to the roof, just like a stationary fireplace.
Since a portable stove weighs little, it does not require a separate foundation, like, for example, a masonry fireplace. A potbelly stove can be placed both on the first and on the second/third floor, without fear that the ceiling will not hold up. But it is very important that the floor under the heating device is made of non-combustible materials. This requirement is due to fire safety standards.
The firebox area is usually made of stone, ceramic or porcelain tiles. But you can just put a large sheet of glass or metal on the floor
There is one more rule that must be followed. You cannot place the stove close to the wall. A gap of at least 250 mm is required. And if the wall is made of wood or other flammable materials, it must be protected from heat by tiling it.
It is worth noting that you can make a full-fledged fireplace from a portable cast-iron stove by simply covering it with bricks. But not close, but with a gap of 2–3 cm. This will kill two birds with one stone: firstly, a flow of warm air will flow between the stove and the masonry, significantly increasing the heating effect, and secondly, the heated masonry will continue to radiate heat for a long time. heat after combustion ends. Important! When “walling up” the stove, it is necessary to leave the air intakes open, otherwise it simply will not work.
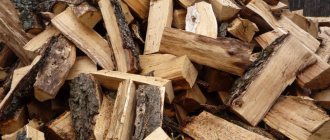
And finally, exploitation. Most often, potbelly stoves are heated with hardwood wood. Conifers are undesirable - they contain too much resin, and therefore they smoke, and the smoke settles on the walls of the chimney as thick soot, which is almost impossible to remove. In addition to the usual logs, you can put compressed straw briquettes, sawdust pellets and even coal into the furnace firebox. But only brown! Stone produces too much heat, and even the most durable potbelly stove using such fuel will quickly burn out.
Conditions for optimal fuel combustion
How to properly install a potbelly stove in your home to get maximum heat transfer from fuel combustion?
In order for the draft in the stove to be sufficient, the height of the chimney (counting from the stove grate) must exceed 5 mm. If the installation of a potbelly stove is carried out in a one-story house, the roof ridge is located at the highest height. In this case, it is possible to save the maximum amount of heat by placing most of the chimney inside the house. At the same time, the attic (or attic) space is also heated, contributing to the overall heating of the house. The absence of a temperature difference along the length of the chimney will also help stabilize the draft in the stove, which depends, among other things, on the heating level of the chimney.
What is a potbelly stove with a water circuit? The advantages and disadvantages of a popular stove
A potbelly stove is characterized by high heat transfer and fuel burning rate. These qualities are given to it by the materials from which the firebox is made (cast iron, steel, iron). The potbelly stove quickly flares up and heats up, and if a water circuit is connected to it, then the warm flue gases along the way also manage to heat the water for domestic needs.
When choosing the material from which it is best to make a potbelly stove, you need to be guided by the following indicators:
- Thermal conductivity is the property of metals, liquids and gases to conduct heat through themselves. The faster heat is transferred, the faster the object heats up or cools down. Foam plastic has low thermal conductivity - 0.036–0.050 W/m*C. Taking it in our hands, we will immediately feel that it is warm, because the foam does not transfer heat, but accumulates it. If you take a metal bar, you will feel the cold due to the high heat transfer.
- Heat capacity is the property of a material to accumulate heat. Water has the highest heat capacity, air is in second place, and cast iron, steel and iron are at the end of the list. Therefore, a metal stove heats up quickly and cools down just as quickly. In city houses, central heating radiators are filled with water, which gives off heat for a long time, heating the home.
List of materials used to create a potbelly stove:
- Steel.
- Cast iron.
- Iron.
- Brass.
- Aluminum.
- Copper.
Copper is the most thermally conductive material of all those listed in the table. Its disadvantages are cost and melting point. Aluminum and brass have the same limitations. At high temperatures, a cast iron or steel stove will only turn red, but will do its job, while a copper, aluminum or brass stove will melt.
Potbelly stoves are most often made of steel because it has a high melting point and the highest heat capacity among all available materials
Making a stove from steel, iron and cast iron is justified due to the prevalence of these materials. From the point of view of thermal conductivity and heat capacity, they need fine-tuning. It is more expedient to use the thermal energy of the stove to heat water, otherwise it will simply go down the chimney
To limit heat loss, it is also very important to achieve complete combustion of the fuel.
The ideal way for a potbelly stove to work is when barely warm air comes out of the pipe, and all the energy is directed into hot water supply and heating the house.
Table: advantages and disadvantages of a potbelly stove
As can be seen from the table, a potbelly stove has a lot of disadvantages, so if you decide to install this design, you will have to take into account all its weaknesses.
What to heat with?
The potbelly stove is efficient, small-sized, and unpretentious in operation. Its installation is not difficult, and kindling is a process that does not require special preparation. Firewood (or dry wood chips) is used as fuel.
Expert opinion
Pavel Kruglov
Stove maker with 25 years of experience
When using firewood, it is recommended to use logs that do not exceed half a meter in length and 8-10 centimeters in thickness. This will allow them to burn efficiently and evenly, avoiding sudden smoldering. You can also take a closer look at wood briquettes, which are no different in properties from firewood. At the same time, they are more capricious in storage and, if left for a long time in conditions of high humidity, disintegrate into sawdust.
Wood is one of the most popular types of fuel. But how to heat a potbelly stove other than wood?
What to use besides firewood?
You can take:
- Peat briquettes, like wood briquettes, do not tolerate direct wetness, but they are less critical of storage conditions. However, when they are burned, a lot of ash is formed. Peat does not like long burning mode, releasing bad smell.
- Coal is no less popular for kindling than firewood. It burns longer and has higher efficiency. But due to the high combustion temperature of the stove, coal-fired stoves place special demands on the design of the chimney.
- Pellets are granules made from compressed waste from the woodworking industry. The economic benefit of such fuel lies in the fact that it is produced from real waste and does not require special processing - cutting, splitting.
What can't you heat?
You should not heat a potbelly stove with raw fuel; this leads to moisture being converted into steam during combustion. Steam, passing through the furnace channels, cools them and settles on the walls of the structure. Mixing with soot, the drops form condensation, which leads to damage to the metal components of the unit and the failure of the potbelly stove. So, firewood must dry out for at least a year before use.
Installation of the system in a finished oven - all the nuances
If the house already has a stove, then only a certain part of it is disassembled and a register is installed. In this case, more frequent fuel supply will be required.
If desired, you can change the number of smoke channels or their direction. However, this is only allowed in the most difficult situations.
All work must be carefully thought through, since after the actions taken it is important to maintain good traction. When dismantling the structure, it is recommended to sketch the location of the masonry
In the future, using this scheme it will be possible to easily disassemble the oven
When dismantling the structure, it is recommended to sketch the location of the masonry. In the future, using this scheme it will be possible to easily disassemble the stove.
If the brick remains in good condition after dismantling the masonry, it can be reused
If it is necessary to replace the material, it is important to select bars of the same quality and shape as the previous ones
Is it possible to turn a potbelly stove into a fireplace?
If desired, it is possible to transform the stove so that it performs some of the functions that a fireplace has.
The simplest option is to cover the potbelly stove with bricks: in this option it will retain heat longer, because the stove itself will serve as a firebox, and the brick cladding will help extend the duration of heating the room. It is recommended to lay the brick at a distance of about 2-3 cm from the surface of the stove - the air layer formed in this case will help conserve heat.
There is a more interesting modification of the potbelly stove - a steel or cast iron island fireplace. This fireplace is distinguished by the fact that the air supply to its firebox is usually carried out through a special air duct - this allows you not to consume the oxygen contained in the room. Also, an island fireplace is usually equipped with transparent doors made of fireproof glass, which allows you to freely admire the flames.
DIY potbelly stove
Installation work
For water heating in the garage you will need a set of instruments and parts, including:
- heating boiler;
- metal radiators with good thermal conductivity;
- connecting pipes made of metal or plastic;
- accessories for fastening;
- locksmith tools.
Project development
Before installing the heating system, you need to determine the diameter of the pipes that will connect the radiators. Risers with a large cross-section will increase the flow of hot water to the batteries, increasing the efficiency of the design.
It is worth considering that heating large volumes of liquid will lead to increased electricity costs. The optimal scheme is a balance between the room temperature and the cost of heating. These parameters are also affected by the number of radiators in the insulated garage.
Expansion tank
The design of the garage heating system involves the use of expansion tanks. These items are made from simple plastic containers or large canisters with fill holes cut in the top.
The water circulating in the system constantly evaporates and requires regular addition of liquid, and the steam formed during boiling needs to be removed. The tank is installed at the lowest point of the heating system and at a half-meter distance from the floor.
Boiler
Before installing the boiler with your own hands, you will need to prepare a metal pipe of a certain diameter with a half-meter or meter length. Its extreme end is tightly welded with a metal sheet.
The next step will be assembling flanges for attaching tubular electric heaters and fixing them to the boiler using bolts. To supply the working fluid to the installation, two sections of pipe with the diameter that will be used in the heating system are welded.
Radiators
Heating batteries are attached to the walls of garages using special reinforced dowels. The distance from the floor to the radiator should be at least fifteen centimeters. For effective heating, you need to leave a few centimeters of free space between the walls and the heating elements for air circulation.
The individual structural elements are connected into a system using metal or plastic pipes with special fittings. The seams of their joints and forks require special attention during installation so that leaks do not occur in the future during operation.
Installation
The connection of metal pipes is carried out using a welding machine. Working with polypropylene will require the use of a special soldering iron. Regardless of the material of the pipes, they should be placed on the walls at a slope - this will improve the circulation of liquid.
The water heating system is considered ready after connecting the radiators to the risers and connecting them to the boiler using a rubber hose. Before starting operation, it is recommended to re-inspect the line, search for defects and seal problem areas.
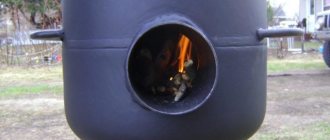
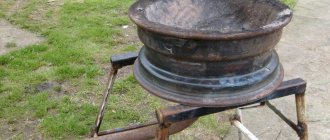
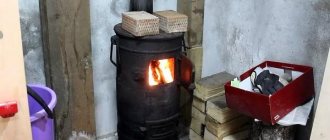
Model No. 2 – potbelly stove made from a metal barrel or pipe
For this design, a metal barrel or pipe with a certain diameter is taken. An excellent option for a house in the country, and if you assemble it beautifully and decorate it, it will look quite good in a living room, while also providing excellent heating.
Step-by-step instructions:
- Take a container for the stove and mark two rectangles. These will be the entrances for the firebox and ash pan. Cut out these holes.
- We do not throw away the cut rectangles, as they will serve as material for the doors. To do this, each door is brought to the required size, for which it is framed with strips of metal. Next we install the latch handle.
- Inside the container (barrels, pipes), moving 10 cm down from the firebox door, we attach corner brackets. Then we will place a grate on them.
- You can buy a grate ready-made, or you can make it yourself by welding it from reinforcing bars.
- If you took a pipe as a base, now you should weld its bottom and top.
- To give stability and raise it above the floor, we weld several legs to the bottom of the container.
- In the upper part of the tank we prepare an opening for the chimney pipe, where we then weld it.
- We fix the hinges and hang the doors on them. We mark and secure the hook under the lock.
- Appearance plays an important role, so the surface and seams should be cleaned. Coating the stove with heat-resistant paint will allow our design to compete with the factory model.
- When the stove structure is completely assembled, it is necessary to connect it to the chimney pipe, which we take outside to the street.
This type of stove is a good option for heating a room, provided there is enough space, since the stove is quite large. But another plus is the spacious top panel, on which you can install both a kettle and a frying pan.
How to make a potbelly stove with a water circuit
To heat several rooms or premises with a potbelly stove, the stove, first of all, must be made of durable, reliable material.
Ideally, you should consider a material such as sheet steel or brickwork. At the first stage of construction, it is necessary to develop a sketch drawing. First, to do this, you should decide on the placement of the stove. Using a tape measure and other measuring devices, it is necessary to take measurements, after which the dimensions of the structure itself will be calculated. These measurements will form the basis of the drawing.
When the drawing is ready, we begin marking the foundation and laying it.
In order to lay the foundation, it is necessary to dismantle the floor coverings and dig a rectangular pit 40-50 cm deep
The bottom of the pit is filled with rubble, which can be fine brick chips, crushed stone, or sand. The rubble mixture is poured with cement, and it is important to maintain the horizontalness of the pour by checking it with a building level. Several layers of roofing material are laid on the dried layer of cement, which serves as a waterproofing material and a material that prevents the influence of moisture from the soil on the furnace structure
How to make your own stove with a heating circuit
The main part necessary for installing water heating on wood with your own hands is a heat exchanger. This unit can have a different design: made of pipes (register, coil) or in the form of a closed container (boiler). In any case, its purpose is to heat the volume of coolant contained in it in a short time and send it to the distribution pipes. The hot coolant flows through the pipes throughout all rooms, heating the radiators, and cools back to the boiler. This system is called gravity and can be used to heat small rooms.
If it is necessary to heat a residential building, especially one with 2 or more floors, the circulation of the coolant in the pipes must be forced. For this purpose, an electric pump is installed on the return line. Its purpose is to pump cooled water under pressure into the heat exchanger, forcing it to circulate more intensively and not stagnate in the radiators. The use of a pump is also possible for one-story buildings in order to speed up the heating process of pipes and radiators when igniting the furnace.
So, to install a water heating circuit you will need:
- heat exchanger (boiler, register);
- large diameter pipes for wiring;
- water heating radiators, convectors of any design;
- expansion tank;
- electric circulation water pump;
- welding machine;
- "Bulgarian".
General requirements
In the case of installing a heating system with your own hands, the property owner can personally choose the timing and need to turn it on.
Most often, the heating is turned on during repair work, and turned off while the car is being stored.
Safety
One of the main requirements for garage heating is its safety. The room contains a large amount of fuels and lubricants, as well as highly flammable items.
In cooperatives where structures are located end to end, a fire in a separate area can lead to the burning out of a significant area. For this reason, all heating systems must be capable of emergency shutdown in the event of an emergency.
Feasibility
For property owners, the economic feasibility of the methods used is important. If the installed heating system requires significant operating costs, you should think about choosing a different method.
Proper garage heating should be reliable and resistant to temperature changes outside the room. This also applies to energy supply interruptions.
Insulation
The garage heating scheme involves preliminary thermal insulation of the room. Heating unprotected buildings is pointless - the heated air will escape through the cracks of the enclosing structures.
Calculations of potbelly stove indicators
Thermal engineering calculations of furnaces are the most complex. In construction and manufacturing, such operations are performed by specialized laboratories. For domestic use, they are significantly simplified, leaving only the key indicators of thermal units for independent determination:
- Calculation of the thermal resistance of a room, in other words, the designation of its ability to retain heat. This indicator depends on the material and thickness of the floor and walls, its thermal conductivity, the structural properties of window and door structures. But in any case, heat resistance also depends on the quality of all components.
- Calculation of the cross-section of smoke exhaust channels, since the quality and rate of fuel combustion in the furnace depends specifically on this parameter. If the diameter is larger than good, then most of the heat will be lost without return, reducing the efficiency of the device. On the contrary, an insufficient cross-section can lead to incomplete combustion of fuel and gas pollution in the room. To determine the size of the chimney pipe, an indicator of 2.7 is used in relation to the volume of the furnace firebox. If this figure is 40 liters, then the suitable chimney size will be 40 / 2.7 = 14.8 cm.
The classic size of a metal chimney pipe is 150 mm. In most cases, 15–20% is added to the calculated value. The final adjustment of the draft in the furnace is carried out using a damper, which makes it possible to perfectly adjust the cross-section of the chimney. It must be said that the amount of thrust will depend not only on the diameter, but also on the weather, so the use of a gate is considered necessary.
The height of the chimney is of priority. There is a limiting parameter - its total height should not be more than 5 meters counting from the point of exit from the combustion chamber. The level of elevation above the roof depends on the location in relation to the ridge.
It is fundamentally important to determine the dimensions of the chimney correctly