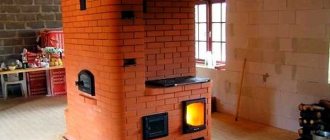
Furnace design
The design of the stove is based on the fireplace-bread oven scheme described by the Finnish author J. Keppo in the book Brick stoves and fireplaces: masonry (St. Petersburg: Alpha-mer Publishing. 2005). Design changes were made to this scheme based on the developments of Igor Kuznetsov: dry slots, a catalyst grille and an air duct system for supplying secondary air were made.
In addition, the massive fireplace tooth was removed from the Finnish design, instead of which we now have a catalyst grate in the hearth of the bread chamber. The gas flow pattern in the furnace is as follows. Hot gases, rising upward during the combustion of wood, pass through the catalyst plates, enter the bread chamber and heat it. Further gases flow depending on the selected combustion mode. In the fireplace mode (with the rotary valve open), the gases go directly into the pipe, and when the rotary valve is closed, they are divided into two streams on the ceiling of the bread chamber and, through channels located on the sides of the oven, are lowered DOWN to the level of the second row. Here they gather in one ascending channel and rise up to the pipe. Dry slots cut the firebox in the rear corners and, according to the concept of free movement of gases in the furnace, allow cold air that is not involved in the combustion process to go into the lower parts of the side descending channels, which increases the temperature in the firebox. In addition, thanks to this device, the furnace becomes truly slag-free, since the draft effect (blowing out the furnace with the valve not tightly closed) does not affect the hot gases in its upper part and it retains heat longer. Well. finally, these slots contribute to more uniform heating of the furnace, since through them some of the hot gases enter the side channels directly from the firebox and the temperature of the lower part of the furnace rises as a result.
The secondary air supply channels begin with holes in the ash chamber, pass between the bricks of the combustion chamber lining and end with holes in the upper part of the firebox under the combustion grate.
Classification of baking ovens according to various parameters
By device
Dead end bakery oven
Dead-end type bread makers are most widely used in bakeries and large bakeries, as they have large dimensions and weight. They bake all types of bread and a wide range of bakery products.
The internal structure of dead-end ovens differs from tunnel ovens in the presence of only one opening through which flour preparations are loaded and finished products are unloaded. For this reason, dead-end units are difficult to use in automatic production lines. Occupied area from 13 to 26 sq.m
The oven system consists of a baking chamber, a conveyor with a drive mechanism of separate cradles, a firebox and heating channels. The baking belt is driven by an electric motor, but the oven also has a manual drive. The furnace firebox is designed to burn any fuel: wood, coal, liquid fuel, gas.
The speed of movement of products in the oven is constant, it cannot be changed, but the baking time is regulated by changing the time spent in a stationary state (at the time of loading or unloading products). The productivity of the furnaces, depending on the model, varies from 120 to 590 kg of products per hour.
Tunnel baking oven
The tunnel kiln got its name for its design features. Due to their large dimensions, equipment of this type is most often used only in industrial settings; there are no mini-models for home use on the kitchen appliances market.
The principle of the tunnel kiln is simple. Externally, it has the shape of a huge metal elongated box from 10 to 25 meters long. There are elements installed inside that have their own functionality:
- furnace inlet and outlet,
- baking conveyor belt (from 1.6 to 13.3 meters),
- furnace space heating system,
- conveyor drive and tension stations
- channels for supplying and discharging steam,
- control and measuring instruments.
Depending on the model, the oven may be equipped with an automation system, a steam humidifier, recirculation fans and other elements.
The upper and lower walls of the baking chamber simultaneously play the role of heat-releasing heating surfaces. A conveyor metal mesh, on which pallets with bakery products are placed, moves along the lower base of the oven chamber. The idle branch of the mesh moves in the opposite direction to the loading hole.
The heat source for heating the furnace space can be natural gas, electricity or solid fuel. In the first case, the furnace has independent gas circuits, in the second - an electric motor and gearbox.
Compared to a dead-end type of device, a tunnel kiln has greater thermal inertia and productivity, while repair costs and energy consumption are also higher.
The required power is 7-8.6 kW, some models consume up to 22 kW. The productivity of tunnel-type ovens varies from 230 to 520 kg of finished products per hour.
Convection bakery oven
Convection ovens are professional food equipment for restaurants, food factories, and cafes. Processing of food during cooking is based on a combination of convection and steam generation.
The circulation of heated air ensures the effect of all-round convection, that is, its uniform forced distribution. Air is constantly drawn in and forced through the heating element using an electrically driven fan. Heating occurs using special heating elements or gas. Different models of furnaces have two types of heating elements: straight or circular.
Oven models according to the method of steam generation are divided into two types:
- Boiler with built-in steam generator
- Injection (steam formation occurs with direct injection of water onto the heating element)
In addition to the main operating modes (convection, steam or a combination of both), modern units may have other modes: low-temperature steam supply, forced steam supply (to create a crispy crust), heating, reduced fan speed (for baking cakes), grilling and deep-frying.
For cooking, baked goods are loaded into a steam convection oven in special gastronomic containers or on trolleys.
Using a convection oven in a bakery has several advantages:
- Uniform baking
- Reduced cooking time
- Low energy costs
- Possibility to cook several dishes at the same time
Rotary baking oven
Rotary-type equipment is used by bakeries, bakeries, hypermarkets with their own baked goods departments, in short, enterprises that need to produce a large or medium volume of flour products in one technological cycle.
A rotary oven is a massive chamber made of food-grade stainless steel into which loading trolleys with still raw, formed products are placed. Baking chambers have a four-, six- or octagonal shape.
The operating principle consists of continuous blowing (rotation) of hot air onto carts rotating around their axis. The direction of air flow is opposite to the movement of the cart. The loaded trolley clings to a ceiling hook rotated by a motor.
The design of the steam generator is of a cascade type, due to which the temperature in the chamber does not decrease when steam is supplied. This ensures uniform heating and baking of flour products. Most rotary oven models are equipped with an automatic steam humidification system. The baked goods do not dry out during cooking and turn out soft and fluffy.
The heat-resistant material of the front parts of the units and the high insulation of the baking chamber prevent burns to personnel. There is a fan on the exhaust canopy that turns on when the door is opened. With its help, hot steam is quickly eliminated.
The use of a rotary oven in the technological process eliminates the need for separate proofers. Proofing time after kneading and shaping is required to restore the texture of the dough. There are many models on the market that have different sections that combine proofing and baking at one point in time. This device significantly saves time and space.
Important parameters for rotary kilns are:
- the number of levels and sizes of baking trays (the number of products being prepared at the same time depends on this);
- power;
- performance
The productivity of rotary kilns varies from 30 to 180 kg or more of product per hour and depends on the maximum load, that is, on how much product can be placed in the kiln at the same time. The higher the technological load of a particular model, the higher its performance.
The highest power consumption of an electric rotary oven varies from 20 kW (mini ovens) to 90 kW (high-performance ovens). The main energy consumption is for primary heating (when turned on) and reheating of the chamber (during breaks for unloading and loading).
Cradle baking oven
The design of cradle baking ovens is similar to rotary ovens. The difference lies in the movement of the rolling trolley: in the rotary type the cradle rotates around a vertical axis, in the cradle type - around a horizontal axis, crossing all temperature zones inside the baking chamber. The rotation of the cradle forms with bread is driven by a chain drive or a gear motor.
The performance of cradle-type baking equipment is similar to that of rotary equipment, while the cost of the former is approximately 2.5 times lower.
The transition from one baking temperature to another occurs automatically and takes 5-10 minutes. This is of great importance when producing various types of bakery products on one oven, when working in one shift.
Cradle (carousel) type units are characterized by a minimal difference between the temperature in the baking chamber and the temperature of the exhaust gases, low fuel consumption, and quick heating to operating temperature.
Some features:
- all rotating loaded units are located outside the heated zone,
- If there is a power outage, the baking process can be continued by rotating the cradles manually,
- reconfiguration when switching from gas to diesel fuel takes half an hour.
Deck baking oven
Hearth ovens are indispensable for enterprises that bake not only bread and bakery products, but also more tender and delicate products: eclairs, rum baba, biscuits, souffles, etc. At its core, a modern hearth oven is an analogue of a Russian oven, when baked goods are cooked on a special surface - a hearth.
The tray is a plate of metal or ceramics on which the workpieces are laid out. If it is ceramic, then the products can be placed on it without molds or baking sheets. However, a metal hearth has its own advantage - durability and faster heating.
Hearth ovens may have one or more hearths (tiers), each of which has independent electrical elements or gas burners on top and bottom for even heating. The main advantage of hearth ovens is that each hearth section can be controlled independently, and several types of baked goods can be produced at once without loss of time and taste. Most models are equipped with a built-in steam generator and timer.
Deck baking oven
Due to their small footprint, deck ovens are in demand in enterprises with medium and small production volumes: catering establishments, mini-bakeries, confectionery shops, etc. In addition to bakery products, you can bake meat, fish or vegetables in them.
The design of the baking chamber consists of several levels, each of which operates independently from the others. This allows you to set each level your own temperature regime for simultaneous baking of different types of flour and confectionery products. A special feature of multi-level ovens is the absence of fans, which makes it possible to avoid microvibration.
Deck ovens are:
- Cyclothermic. The principle of operation is the circulation of hot air in the heating channels under the stove plates.
- Thermal oil. The heating method is hot oil circulating in stove radiators under the stove plates.
- Electrical. Equipped with independent electric heating elements.
Important parameters of rack (tier) ovens are: the number of chambers and levels, chamber volume and tier area, temperature mode, power. The greater the number of levels and the volume of the working chamber, the more products will be produced at the output. At the same time, the required power will also be higher: single-level units consume 3.2-6.6 kW, multi-level units - from 19 kW.
By energy carrier type
All baking ovens can be classified according to the type of energy carrier into electric and fuel. Fuel, in turn, are divided into several types: gas, liquid fuel and solid fuel.
Electric baking ovens
Electric furnaces are the most common and versatile type. Such equipment is convenient to use, has a relatively small size, and is highly profitable for small bakery enterprises. It is also used in food production where gas connection is technically impossible or economically unjustified. View the catalog of electric baking ovens.
Gas baking ovens
Suitable for large enterprises with high production volumes, since installation requires a large area. The most cost-effective, regardless of the operating principle of the equipment and production load. But only on the condition that the premises are gasified, the gas supply project is technically feasible, and the cost of fuel in the region is low. View the catalog of gas baking ovens.
Diesel baking ovens
Bread makers running on liquid fuel are relevant for remote areas that cannot be provided with gas or electricity: rotational camps, military facilities, remote populated areas.
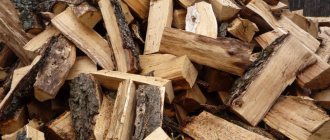
Wood and solid fuel stoves
They are mainly used in enterprises with a small volume of baked goods (for example, cafes serving national cuisine, etc.), or in remote settlements. They have a number of competitive advantages: only in a wood-burning oven can you make aromatic delicacy bread and other bakery products, which means bringing the product into a different price category; there is no need to equip a ventilation system; Any type of wood is suitable for lighting the stove.
According to the produced assortment
Bakery ovens can be universal (multifunctional) and highly specialized. On ovens of the first type it is possible to bake a wide range of bakery products; the second type is limited to the production of a certain type of baked goods.
By type of control
- Mechanical
. Management of this type involves the use of a large proportion of manual labor during the entire technological process. The units are distinguished by the simplicity of the panel. Disadvantage: low functionality of the oven - Electromechanical
. This type of control combines touch elements, indicators and mechanical levers. Simple and convenient type of control. The downside is the inaccuracy of the main parameters (baking time and temperature). - Electronic
. Technological processes are automated. The influence of the human factor is minimized - the oven is programmed once. The downside is the sensitivity of the equipment to temperature, humidity, and changes in mains voltage.
Brick selection
What type of stove will turn out depends largely on the source materials and, first of all, on the brick from which the stove will be built. Each type of brick has its own characteristics that must be taken into account and which should be known. The quantity of each grade of brick becomes clear from the order of the kiln and the total height of the chimney, taking into account the interfloor cutting, the “otter” and the distance from the chimney to the roof ridge. You need to buy bricks with some reserve for the battle (about 5-7%). I used 5 types of bricks in this kiln. Lode bricks are produced in Lithuania by JSC LODE, the largest manufacturer of ceramic building materials in the Baltic countries. Products under this brand are distinguished by high quality, clear geometric shapes, and original colors. Therefore, I laid out the outer walls from it. At the same time, I used two types of red solid brick - rectangular and with a Rounded (R60) corner.
These bricks have features: the rectangular one has a barely noticeable convexity on the front side, and the corner one has convexities on the curves. This has to be taken into account during laying. In addition, the Lode bricks have chamfers on the edges of the front sides, as a result of which the usual seam (about 5 mm) seems much thicker, and the chamfer of the corner brick in its rounded part is slightly less than the longitudinal one. Stoves made from this brick look great, but its high cost is often an argument in favor of a cheaper one - Vitebsk. Vitebsk brick. I used red solid Vitebsk brick (often called stove brick) to lay the inside of the stove (chimneys and ash chamber). This brick is produced in Vitebsk by JSC Keramika in two workshops: workshop No. 1 and No. 2. The brick from the first workshop is marked in the form of tattoos and, according to my Moscow colleagues (as well as my own), is of higher quality than the brick from the second workshop. The latter is marked with a flat stamp indicating the workshop number
Vitebsk brick may have deviations from standard sizes of 2-3 mm. In order not to encounter uneven seams (both horizontal and vertical) during laying, it is better to adhere to the well-known rule: select a brick for each row in advance. It is not recommended to build a pipe higher than the roof from this brick - it has low frost resistance and after a few years the pipe begins to collapse. Fireclay brick ShchA-8_or ShB 5; They are used, as a rule, for lining fireboxes, although quite often the entire stove or fireplace is made from it, using in some places or completely decorative treatment to resemble wild stone. Produced by several factories. When purchasing, you need to pay attention to the appearance; the brick must have sharp edges, appropriate markings and must not crumble. There is also a sha-5 brick on sale, which is slightly smaller in size and less convenient to work with.
Pipe brick This is a semi-dry pressed ceramic red solid brick with 6 protrusions on one bed. It is produced at the Obolsky ceramic plant in the Republic of Belarus. It has an attractive appearance and strictly maintained dimensions, but is very hygroscopic. Before using this brick, it must be thoroughly soaked in water. One of the main advantages is a very smooth surface (and the back and front edges do not differ in quality and the surface of the chimneys turns out to be very smooth). In this regard, working with this brick is a pleasure. But it is not recommended to use it in hot places in the furnace and when building a pipe above the roof. This brick was used to build a pipe up to the roof near my stove. Facing - red or yellow slotted ceramic bricks withstand low temperatures when wet. In addition, it is much lighter than other bricks, which is very important when lifting it onto the roof. I used it to lay pipes above the roof.
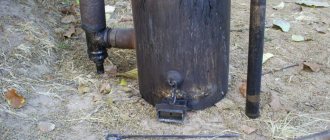
Furnace appliances
Installation of furnace appliances. I secured the cleaning and blower doors in the masonry using soft wire 01-1.2 mm. twisted in four (photo I). First I twisted wire 1 in half using a screwdriver with a hook attachment.
I did it this way: I bent the workpiece in the middle and at this point I hooked it to the hook on the screwdriver. A gloved assistant held the two opposite ends of the wire tightly, pulling them tight. and I turned on the screwdriver. The tension force adjusts the twist pitch. If there was no assistant, I usually made two more hooks and secured them in the wall or on some kind of support. The opposite ends of the wire were hooked and twisted. I inserted the prepared twisted wire into the door mounting holes and twisted it in half again, but this time by hand. The door shelves were coated with a thin layer of masonry mortar and covered with a strip of basalt cardboard. The ends of the strip were connected at the bottom of the shelf. In this case, the strip does not spread to the sides. After this, I cut off the excess part of the wire, bent its end and secured it in a vertical seam with tension. If necessary, using a short nail driven into the seam closer to the door, I pulled the wire away from the edge of the bricks so that it lay entirely in the masonry.
I usually attach Finnish furnace doors with screws, but first fix them with wire. I do it like this. After aligning the door with the center of the front wall of the stove and the horizon with wire passed through the lower and upper side holes in the frame, I attach the door to the board, which is inserted at both ends into dry cracks located in the far corners of the combustion chamber. I select the length of the board so that the board can be easily removed at the end of the laying (photo 2,3).
In our case, at the customer’s insistence, I reinforced the door opening lintel with a 50x50 mm metal corner. placed on the back side of the slab bricks in level with the slab (photo 4). The corner was covered on all sides with basalt cardboard. After the opening was lined and blocked, I finally secured the door with 26 mm screws with a key head, with preliminary drilling of holes for them in the bricks located along the side walls of the opening. I filled the holes with a small amount of masonry mortar, wrapped the screws themselves with asbestos thread and screwed them into the holes. To prevent the thread from flying off the screws, it was lightly coated with a solution. An equally important and difficult moment is the installation of the bread chamber door and the rotary valve. Photo 5 clearly shows a board with a cross, to which the bread chamber door is temporarily attached using the same wire; the cross prevents the board from falling down. The transverse wire twist allows the door to be tightly pressed to the brickwork. The body of the rotary valve at the junction with the brick was carefully insulated with basalt cardboard.
I installed the rotary valve perpendicular to the side wall of the furnace and, according to the instructions, slightly at an angle, on the bricks prepared in advance. I cut a groove in the brick that secures the rod with the rotary handle. It is very important to adjust the location of the rod to the seam of the next row. This greatly simplifies the work. Before installing the valve, I temporarily crushed the stem by slightly loosening the two screws that secure it. I measured the required length of the rod and cut it according to the dimensions of the stove. The rod passes through the masonry inside the tube. Before putting this tube on the rod, I wrapped it tightly with asbestos thread so that the tube was put on with force. The tube itself was also cut to size and wrapped with basalt cardboard. The rod passed through the valve body and fixed the rotary plate on it. I secured the handle to the stem together with the decorative trim later using two screws. The body of the rotary valve in the places where it abuts the brick was carefully insulated with basalt cardboard. Photo 6 clearly shows the installed rotary valve. Under the row of flue covers, I installed a retractable furnace valve, which is the main one (photo 7). It is securely hidden in a basalt coat to protect it from overheating when the stove is operating in fireplace mode.
The process of laying a fireplace stove
This fireplace stove is built on an existing foundation and connected to an existing chimney. For laying ceramic bricks, we used our own clay-sand mortar in a ratio of 1/3. For laying fireclay bricks, a mixture of MSh 28 with a small addition of liquid glass was used, as well as heat-resistant glue. The work on laying the fireplace stove took a total of 10 days. The first row of the stove is decorated with a hand-carved plinth from brick. Such work cannot be done without assistants.
Brick corner plinth
The process of laying a brick kiln. Wet the previous row with water.
Apply clay-sand mortar
Smooth the mixture under the masonry
Laying brick on mortar
Upsetting the brick
Then level the brick horizontally
Align the row along the side plane
Fifth row
Installing the fire door into the factory mountings. Door Vesuvius 224
Concrete self-tapping screws are used to install the door.
Mounting the door on a stainless steel frame would be preferable.
Bread chamber door Vesuvius 270
Gate valve installation options
Final installation of the valve
During the first firing, insufficient draft in the furnace was detected. The existing chimney was inspected and a narrowing of the horizontal part of the “lounger” was discovered, after eliminating which the stove started working as it should.
First heating
Do-it-yourself oven cladding with artificial stoneWatch
Catalyst
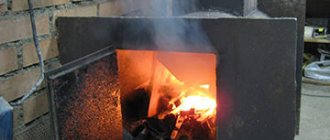
Secondary air supply and catalyst grid. The secondary air supply channels and the carbonization grate are, as already mentioned, an important structural part of the stoves of the stove maker Igor Kuznetsov. My secondary air supply system starts with holes in the side walls of the blower chamber (photo 8). From these holes, the air rises through 5mm gaps between the fireclay masonry of the firebox and additional bricks placed parallel to them on the edge (photo 9). The air exits under the catalyst grid through centimeter-long slots in the fireclay bricks in the side walls of the combustion chamber (see photo 2). When laying bricks above these passages, the main thing is not to block them with mortar. I didn’t succeed in trying to do this the first time, and I had to be smart. A thin sheet of aluminum foil caught my eye, from which I cut out plates somewhat wider than the air ducts, laid these plates over the slots, and carefully applied clay to the uncovered parts of the brick and pressed it down with the top bricks. The catalyst is a system of thin plates made of fireclay bricks (with a cross-section of 20×40 mm and a length slightly wider than the outlet of the firebox). I installed the plates in grooves cut into the side bricks with rectangular inserts made of the same fireclay placed between them (photo 10).
When installing a catalyst grid, it is necessary to maintain the total area of the holes between the plates - it must be no less than the cross-sectional area of the chimney (in my case, 12x25 cm, that is, the area of one brick). Dry gap, photo 11 shows the rear corner of the furnace firebox, lined with fireclay bricks on edge. It can be seen that the bricks in the corner are not tied and a 3-centimeter so-called “dry gap” is left between them. Despite the additional work on its installation, in my furnaces, following the recommendations of Igor Kuznetsov, I make “dry” slots, both in combination with static grilles and separately, since experience shows that they increase the thermal characteristics of the furnace and significantly reduce the formation of soot in it chimneys. Between two rows of fireclay bricks placed on edge, a narrow gap in the air duct is visible, originating in the blower chamber. Covering openings. I most often close the fire door opening “into the lock” (photo 12,13). The main difficulty here is to fit the “lock” brick tightly to the adjacent bricks. When laying the lock and the next row, you should be careful, since if you press too hard, you can fall the bricks inside the opening. For greater stability, you can load the side bricks - put a brick on them “on the butt” or put another load. The jumper was made taking into account the curvature of the arch of the combustion door (photo 14). The bread chamber was blocked in the same way as the firebox openings, that is, “into the lock” (photo 15). Photo 6 clearly shows the architecture of the floor masonry from the inside. A rotary valve is visible in the depths of the bread chamber.
WOOD OVEN FOR BREAD, WOOD OVEN FOR BREAD AND PIZZA
The SHELDEM company offers wood-burning stoves, which have been manufactured in European factories to our order for 60 years. They are designed for baking bread, pizza and other bakery products, as well as any other dishes according to different recipes. Our stoves have received recognition all over the world. Wood burning stoves are not so much about aesthetics as they are about lifestyle. Every year brings something better to the design of ovens, which embodies all connoisseurs of proper and healthy wood-fired baking. These wood stoves are designed for home or small shop use. You can not only bake bread and pizza in them, but also cook all kinds of dishes from meat, fish, vegetables, and cook porridge with the smell of smoke.
WATCH THE VIDEO OF THE WOOD STOVE OPERATING
Wood burning stoves represent excellence in craftsmanship, quality and freshness. All parts of the stoves are made with special care, punctuality and only from durable materials. We are committed to providing our customers with high performance and high quality cooking and cooking equipment.
Specifications:
Model
| Wood stove for home or shop | |
| Type of coolant | firewood |
| Overall dimensions of the oven, depth x length x height | 1180 x 1020 x 1580 mm |
| Furnace chamber dimensions, depth x length x height | 800 x 420 x 420 mm |
| Oven temperature | up to 600 degrees C |
| Chimney smoke temperature | 190 degrees |
| Chimney diameter | 140mm |
| Oven weight | OK. 330 kg |
PRICE: make a request to managers
Fireclay core
Reducing resistance to the movement of flue gases. For stable combustion in a furnace, it is necessary to round the corners in the path of the flue gases - this reduces the resistance to their movement. For example, on the ceiling of the bread chamber, for this purpose I installed gas distribution shaped bricks to remove gases into the side downward chimneys (photo 17). The width of the outlet holes (two holes on each side) is calculated in such a way that it is convenient to block them. Fireclay core insulation. The fireclay core of the furnace experiences the greatest thermal loads during combustion. As a result, its thermal expansion is greater than the expansion of the remaining parts of the furnace. To prevent this from leading to the appearance of cracks in the furnace, the fireclay core must be separated from the outer masonry by a thermal gap or a layer of basalt cardboard. The fireclay core overlap also needs to be isolated from the underlying masonry. To do this, I laid two layers of basalt cardboard on top (photo 18) and reinforcing mesh over the entire floor area, which I filled with masonry mortar, and on top I laid channels and corners that do not rest on the fireclay core (photo 19).
Iron in the furnace masonry should always be treated with extreme caution, well insulating it from direct contact with brick, otherwise cracks in the masonry cannot be avoided. Therefore, when laying the channels and corners, I carefully packed them in basalt cardboard, and, in addition, separated the channels from the chimney with bricks (fogo 20). It must be said that the channels are used here in connection with the fact. that, according to the masonry conditions, it was necessary to move the pipe to the center of the furnace. If the pipe rested on the outer wall, then the corners would be enough to cover it. Exterior view of the stove. Periodically, at the end of the working day, I washed the stove and removed excess debris. It is more pleasant and safer to work in such conditions [photo 21].
WOOD OVEN WITH BBQ
Wood-burning ovens with barbecue are designed for baking bread, pizza and other baked goods, as well as for frying kebabs and barbecue on a separate grill, which is attached to the side of the wood-burning oven. Wood-burning ovens with barbecues are suitable for preparing any other dishes according to different recipes. Our stoves have been manufactured in Europe for over 60 years and are recognized throughout the world. Wood burning stoves are not so much about aesthetics as they are about lifestyle. Every year brings something better to the design of ovens, which embodies the dream of all connoisseurs of proper and healthy wood-fired baking. These wood stoves are designed for home or small shop use. You can not only bake bread and pizza in them, but also cook all kinds of dishes from meat, fish, vegetables, and cook porridge with the smell of smoke. A barbecue/kebab maker is built into the side of the stove. All parts are made of high quality parts.
WATCH THE VIDEO OF THE WOOD STOVE OPERATING
Wood burning stoves represent excellence in craftsmanship, quality and freshness. All parts of the stoves are made with special care, punctuality and only from durable materials. We are committed to providing our customers with high performance and high quality cooking and cooking equipment. Technical characteristics: Type of coolant: firewood Overall dimensions of the stove: 1400 x 1160 x 1660 mm Dimensions of the stove chamber: 1000 x 520 x 450 mm Temperature in the stove: up to 600 degrees C Smoke temperature from the chimney: 190 degrees C Pipe diameter: 140 mm Stove weight: 470 kg PRICE: make a request to managers
Results
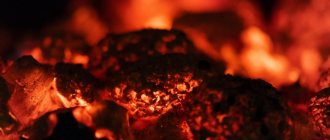
First results. Recently I inquired about how the stove I built behaved and was pleasantly pleased. During the period of operation, not a single crack appeared in the masonry. At the beginning of the fire, the catalyst grate is covered with a thin layer of soot, but then the soot burns out.
The brick oven first warms up in the upper part, but after 2-3 hours it becomes hot throughout the entire massif. In the bread chamber, like in a Russian oven, you can prepare crumbly porridge and baked milk with foam. Even after a day and a half, you can feel the heat emanating from the stove.
What I bungled. This is a Pompeian wood stove. Why Pompeian? I didn't go into too much detail. The principle of operation is the same as in a Russian oven. The combustion process is self-regulating. Details later.
Let me return to the beginning of the idea to build an outdoor oven for bread (and more). The Internet is full of advertisements: “Pompeian stove, wood-burning, super-mooper.” And this super-duper will cost you ONLY 150,000 rubles. They just piss me off. Guys, I will make a stove without spending a penny! Just like any man in the old days could do this, without lashing out at the state with taxes, fines, and fees. With your hands, and with your head, of course. Well, let's get started. Materials. Clay, sand, straw (grass), logs, boards, nails, screws. This is definitely necessary. My site ends in a ravine, there is plenty of clay and sand there. Logs, boards (not rotten), everything that was lying around unattended, we put everything into use. Don't let the unevenness and curvature bother you. Everything can be adjusted, even any crooked board. Adobe is a mixture of clay, sand and straw, in different proportions. Straw is used as a reinforcing material and also has poor thermal conductivity, so the last layer in an adobe stove will retain heat. It’s not necessary to use straw, let’s use our brains and think. What's stronger? What is less susceptible to rotting? Reeds, reeds for example... will be very good. But stems as thick as a finger, of course, are not suitable for a stove, but perhaps for adobe walls. I simply cut the grass in the area, let it dry, and used it. Straw (grass) prevents the adobe from cracking when drying and when using the stove. As for clay, it doesn’t matter what color it is, the main thing is that it doesn’t crumble after drying, that is, its strength and fat content are important. Sand is needed for less shrinkage of the mixture. There is always more sand, and clay as a binder. Proportions 1:2, 1:3. One part clay and three parts sand, for example. To check, mix in the intended proportion, roll into a ball, and dry. If it crumbles in your hands under pressure, it means you need less sand. I re-read everything above. A style that somehow teaches how, it’s not fair. It seems that I am a real AC in clay stoves. It's all bullshit! I'm a dunce who knows nothing and has never done anything like this before. I'll just write what I did myself. And we’ll leave the philosophy of what’s best and how to do it for the evening, over tea and delicious bread made with our own hands. Agreed? Pour it, come on. What? Pour some tea! Roof.
I started with a canopy, that is, a roof over the stove. The roof is pitched, approximately 3x3 meters. Well, there’s someone here who’ll be up to the task. I built this entire roof from old slate that my neighbor was going to throw away. The frame is made from firewood and old boards. The pillars are acacia, which I immediately cut down. The far right post is an acacia trunk, with roots, cut down. In general, I collected what was lying around and made a roof. Taking into account the weather conditions, of course. So that it doesn’t fall on your head when snow piles up, for example. The ends of the pillars, dug into the ground, were annealed at the stake. Someone there might say: “I would fill the pillars with concrete.” Don't forget that we need to build a stove, and not run to earn money and spend on concrete, slate, boards.
Foundation, countertop. Now about what our stove will stand on. That is the foundation. He raised the stove to a comfortable level for himself, that is, at the level of the wiener. In general, the numbers don’t really fit in my head. Therefore, everything will be on the fingers (and pussies). The foundation was on annealed mulberry (mulberry) logs; behind the house there was a huge “baobab tree”; if I had not cut it down, it would have collapsed onto the roof of my house. These logs were dry, which is very good! Next to the shed, the eldest son dug a shallow hole for mixing adobe. Well, I dug the logs in, about half a meter. I filled the lath for a countertop under the stove. The slats from some old packaging were lying around in the firewood, so I used them. It doesn’t need to be exactly there. I stuffed it at random. The main thing is that the entire structure does not move around. They mixed adobe and piled it all on the sheathing, leveled it, greased it. Why not a table? Under the stove. I also made the under (bottom) of the oven from clay, without bricks. With thermal insulation made of expanded clay. Can be used, glass bottles. In general, anything that is fireproof and does not conduct heat well. I had expanded clay on hand. Or you don’t have to insulate it at all; an adobe countertop will prevent the heat from escaping quickly. Dome. I sculpted a dome out of sand and covered it with wet paper. The book “1C Accounting Configuration” was suitable, very good sheets, high quality. Subsequently, the sand is removed from the inside.
Next... the heat accumulating layer, which is connected at the edges to the bottom of the furnace. Made from balls of clay. I sculpted it like snowballs, about 8 cm in diameter. The proportions of sand and clay are the same as on the floor. I held the balls together with water and my hands and smoothed them out.
Coat made of adobe. Mix light adobe (with a lot of straw, grass...). I didn’t chop the grass, but used long grass and laid it out in layers, cross on cross. Reinforcement made of long grass - no cracks. Lay out a heat-retaining layer. The thicker it is, the more efficient the oven will work. Thickness is approximately 12~15 cm. Let it dry (a couple of days). Mouth. I cut out a hole, the future mouth of the furnace. Here it is important to maintain the ratio of the radius of the mouth and the radius of the firebox. The radius of the mouth should be 60 - 63% of the radius of the firebox. Optimal ratio for good combustion of wood. A sharp, non-flexible knife will do.
First, I just cut a hole and scooped out the sand. I widened, leveled the mouth and made a cutout for the valve.
I made a damper, wooden (oak), upholstered with a piece of galvanized tin. Everything is made from garbage and firewood. I let the stove dry. Summer - a couple of weeks was enough. The oven is ready! First firebox. Some wood (straw). The second one is a little larger. Well, for the third, as expected, 2 hours. In terms of wood consumption and efficiency, a two-meter stick as thick as a wrist is enough to heat it. This is a pebble in the direction of the “masters of the world” - gas workers. And off we go! Lavash, pizzas, pies, bread, omelettes of all kinds, fish, meat, stewed, baked, dried fruit, etc. Further improvements have already begun, unnecessary as always. There was a tin pipe from a gas boiler lying around unattended, so I made a removable pipe. Why removable? And to remove it and never use it again! With a pipe, the draft is better, it burns more actively and, as a result, the wood consumption is twice as much. I made a lamp from bottles on the “back”. I placed an oil lamp inside. I looked at this case and demolished the “beauty”, it looked pathetic. The horizontal mark remained on the “back” of the stove. It turned out to be convenient. It’s not that special on a semicircle, what are you going to put? Baking bread, it turns out, is a whole science. It's winter already. New Year is coming soon. The bread began to turn out pleasant to cut, smell, eat and look at.
NO!
NO!
Also no!
YES!
YES! At the end of this writing, I would like to mention the book “House of Adobe Philosophy and Practice.” Evans Y., Smith M.D., Smiley L. And of course, the Internet came to the rescue sometimes. In general, you could hardly read or search for anything. Because the issues that arose during work were resolved on their own, intuitively? Maybe the genes “remember” just give it a push?
In general, I made a stove, and you, my dear, can read too. Forward! Dig into the ground, look around - there is plenty of garbage. For some reason it’s always scary to start. And this fear is completely understandable. With the current way of life, it is simply the core of the existence of the “top”. So that the thought does not even arise in a person that it is possible to live without passing through the link - money. © vAv 2021.