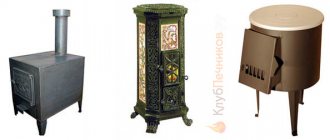
Calculation of a chimney for a potbelly stove
After the stove is installed and ready for use, it is necessary to install a chimney that can function properly, retain heat in the room and at the same time prevent combustion waste from entering the air of the room where the stove is installed. To do this, you need to correctly calculate the diameter of the pipe, its length and think about how it will exhaust the smoke into fresh air.
In order for the heating system to have the highest efficiency, it is necessary that the pipe for the potbelly stove provides sufficient draft.
Expert opinion
Pavel Kruglov
Stove maker with 25 years of experience
The best ratio of pipe diameter to combustion chamber is 2.7 millimeters to 1 liter. For example, let's take a potbelly stove with a combustion chamber of 50 liters: 2.7*50=135 mm. It is this chimney diameter that will be optimal for the efficient operation of a 50-liter potbelly stove.
Once the diameter of the chimney pipe has been determined, the length of the entire pipeline should be calculated. In these calculations, it is important to take into account not only the location of the potbelly stove, but also how far from the ridge the chimney is located on the roof.
The pipe outlet above the roof should be located according to certain rules:
- The chimney is located from the roof ridge at a distance of up to 1500 millimeters, which means the pipe outlet should be located at a height of 50 centimeters above the top of the ridge;
- With a distance to the canopy of 150-300 centimeters, the pipeline outlet can be positioned at the same level with it;
- If the chimney is located near the edge of the roof, then its outlet should be slightly lower than the ridge, or at the same level with it;
The second option for the pipe to exit is through the wall, and not through the roof. In this case, the end of the chimney should be located just below the top of the roof ridge.
But the main long pipe will be the total distance from the pipe outlet to the potbelly stove itself - the calculations in each individual case will be different, it all depends on what floor, in what place in the room and at what height the potbelly stove will be located.
Making a chimney
It’s not at all difficult to build a pipe for a potbelly stove with your own hands, just like making the stove itself.
The motor for a potbelly stove is one of its main elements. Since this type of stove is portable, a brick chimney will not work. But if you are going to make a brick screen for a potbelly stove with your own hands, the chimney can also be made of brick. But this is one of the exceptions . In general, there are mainly two options: metal or asbestos-cement pipes.
When a chimney for a potbelly stove is made with your own hands, it is necessary to take into account the fact that its design, firstly, must be small in size, and, secondly, must be collapsible . In general, the chimney must be led through the roof and out of the room along the shortest route, and must consist of two elements connected in the space between the roofs or in the attic. It is advisable to fulfill this condition, because metal structures burn out over time and must be replaced or repaired ; and this is easier to do with part of the device than to remove the entire chimney.
Materials and their quantity
The list of materials required for the construction of a chimney varies depending on what kind of pipe structure it is decided to install. If the exit will be directly through the roof, then fewer corner bends will be required.
A standard size chimney will require the following number of pipes:
- 1 elbow 120 cm long, 10 cm in diameter;
- 2 elbows 120 cm long, 16 cm in diameter;
- 3 butt elbows 16*10 cm;
- Tee with a diameter of 16 cm and a plug for it;
- Fungus – 20 cm;
- Sealant.
In addition, for the construction of various chimney structures, other parts may be needed: an anti-spill canopy, a passage glass, thermal insulation materials.
Expert opinion
Pavel Kruglov
Stove maker with 25 years of experience
A huge role is played by what kind of pipes for the stove chimney it was decided to purchase, since the number, size and types of bends will depend on what kind of structure will be installed. If it was decided that the smoke exhaust system will be located outside the room, then it will no longer be possible to install it inside the building, since then a different set of parts will be required.
Rules for operating the chimney and cleaning it
Approximately every six months it is necessary to carefully inspect the structure. The safety of people and buildings depends on this. If areas of burnt, rusted or cracked metal are found, they should be replaced. This is the advantage of prefabricated construction.
Features of chimney cleaning
Don't forget to clean your chimney once or twice a year or as needed. A deposit of soot and ash impairs traction and interferes with the normal emission of smoke, making the structure heavy. There are mechanical, chemical and folk cleaning methods. But you cannot clean the chimney of a potbelly stove using mechanical cleaning methods for stationary stoves. It is best to use ready-made chemicals by adding them to the firewood during combustion. You can buy such compositions in specialized stores. If you prefer traditional methods, heat it with aspen logs. High combustion temperatures will burn away the soot.
Regular chimney maintenance significantly extends the life of the heating device, increases its efficiency and reduces the risk of fire.
Tools
You only need cutting tools: grinder, jigsaw, knife. All work is carried out manually and does not require special equipment.
Installation diagram
There are several types of chimneys; the most suitable type of design is selected individually.
Installation methods
It is important to take into account the collection of condensate in the system, so it is necessary to have a plug, a condensate drain and a container for collecting condensate.
If the potbelly stove is installed through a wall from a pipeline located on the street, then it would be advisable to lead the chimney through a window so that you do not have to prepare a hole for the pipeline in the ceiling.
The outer part of the chimney is insulated using thermal insulation and covered with protective material. A fungus is installed at the end of the pipe, which will protect the chimney from debris, rain, various small animals and foreign objects.
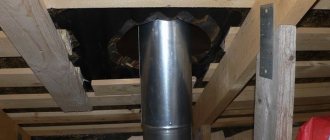
Floor preparation
The chimney pipe for a potbelly stove is most often installed in such a way that it passes through the ceiling, therefore, before installing and fixing the pipeline structure, it is necessary to make a hole for it in the ceiling: using a jigsaw or other cutting tool, having a diameter suitable for the passage of a glass for elbows of the internal chimney.
Example of a hole for a chimney pipe
Pass-through glass
The passage glass is installed in the hole before the chimney for the potbelly stove is assembled. The diameter of the glass should be selected according to the diameter of the inner pipe, although sometimes the joint is made before the chimney passes through the ceiling. It should be understood that it is important to secure the glass tightly - it serves as a retainer. But in addition to this, the pipeline must also be attached to the surface of the wall.
If installed incorrectly, the following consequences may occur:
If there are easily flammable materials, insulation or wooden parts in the ceiling, then they must be removed so that they do not come into contact with the passage glass.
Once the pipe has been inserted, the whole thing needs to be sealed with a fire-resistant material, such as heat-resistant sealant or special fire-resistant wool.
The following stages of work are shown in the photo:
Sealing
Pipe outlet to the roof
Roof work
At the last stage you need to put a deflector on the pipe
Tips for working
- The pipes used in the structure are located exclusively in a vertical position; to fix them, it is best to use special brackets with dimensions corresponding to the elbows of the system. To save money, you can make the brackets yourself using a metal corner.
- All connections must be treated with sealant so that there are no holes through which smoke can escape into the room air. There is a large selection of sealants on the market that are suitable for sealing pipeline seams for smoke exit:
- High temperature sealants;
- Heat-resistant sealants;
- Heat-resistant sealants;
- Heat-resistant sealants;
High temperature and heat resistant sealants are used to seal areas that reach temperatures of 350 degrees Celsius. Since the chimney for a potbelly stove heats up to higher temperatures, these types of sealants are only suitable for parts outside the piping system.
Heat-resistant and heat-resistant polymers can withstand enormous temperatures, up to 1500 degrees Celsius - they are the most suitable choice for a potbelly stove chimney.
Connecting the chimney to the stove
The chimney coming out of the potbelly stove, called internal, is connected to the street, external pipeline, in the attic or in the under-roof part of the roof. The beginning of the internal chimney is the segment coming out of the stove pipe, which is joined at the elbow to the ceiling.
When installing an internal chimney, it is important to correctly connect the pipe to the stove pipe - since if this is done incorrectly, smoke may escape into the air in the room, which will make it impossible for the heating system to function properly.
Expert opinion
Pavel Kruglov
Stove maker with 25 years of experience
The chimney is connected to the potbelly stove using a heat-resistant seal and a special clamp. It is important to make a completely sealed structure, since any breakthrough of gases can lead to poisoning of those inside the room.
Chimney connected to potbelly stove
Is it worth covering the pipe with bricks?
A metal chimney pipe for a potbelly stove does not require special protection from external influences, but due to the visual effect and possible contact with a hot pipe, enterprising owners often line the pipeline with bricks.
Expert opinion
Pavel Kruglov
Stove maker with 25 years of experience
But the construction of a chimney using brickwork is prohibited - such structures are not suitable for this heating system; only a galvanized pipe for a potbelly stove is suitable for this role, it will provide good draft, it is easy to clean and check for defects. Simplicity of installation and easy maintenance are the main advantages of this hood.
Care and cleaning
The overall quality and efficiency of the heating system directly depends on the condition of the chimney, so periodically attention should be paid to its systematic care.
Every year it is necessary to conduct a complete inspection of the pipeline to detect cracks, burnouts, rust and other defects that can lead to unpleasant consequences. During the inspection, the entire chimney structure should be simultaneously cleaned of soot - this can be done by burning aspen wood in the stove.
Chimney maintenance
Proper care of the chimney will ensure fire safety and extend the life of the chimney. After six months of operation (and subsequently every six months), it is necessary to carefully inspect the entire surface of the pipe: traces of burning, corrosion and cracks indicate the need to repair or replace the damaged area.
As the stove is used, a layer of soot and ash accumulates on the inside of the chimney. This reduces draft , interferes with the free passage of smoke and increases the weight of the structure. Cleaning should be done once a year.
So, this article has provided you with a complete set of tools for making with your own hands the main element of the functioning of a potbelly stove - a chimney. A few days of operation will provide years of quality heating!
Conclusion
Installing an exhaust pipe for a potbelly stove is not a complicated process and can be done independently, without the involvement of specialists. The main thing is to follow fire safety rules, not allow the chimney to come into contact with easily flammable materials and monitor the tightness of the structure.
With a responsible approach to the installation of the potbelly stove and the installation of the chimney, as well as proper operation, no problems will arise when using the heating system. If the entire system is installed incorrectly, then like a boiler or fireplace, a potbelly stove can cause a fire.
Chimney options
The chimney design involves the use of one of three possible schemes, differing in the location of the pipe exit:
- The chimney comes out of the wall about a quarter of a meter from the ceiling level. This design is convenient primarily because the part of the pipe running inside the room plays the role of an additional heating device, which increases the efficiency of the potbelly stove and saves fuel.
- The chimney is discharged through the ceiling and roof. The design is also quite energy efficient, since the chimney stretches throughout the room, but it is labor-intensive during installation. In addition, during the installation of such a chimney, it is necessary to take into account how to properly ensure the appropriate level of fire safety.
- The pipe is routed through the wall near the stove. The chimney is attached vertically to the outside of the wall, which is much better in terms of fire safety, but more fuel has to be used to heat the room.
Experts who know how to make a chimney for a potbelly stove in a garage often recommend the first option, although it is more labor-intensive than, for example, the third, not to mention the second. The second option is not used at all in garages due to high requirements for waterproofing joints, fire safety and unnecessary complexity.