Damp wood and harmful fungi
It is no secret that wood is very quickly attacked by mold fungi if it is always wet. The tree ceases to be strong enough after just a few months. If you start the process and ignore it for a couple of years, the fungus will spread and the material will turn into dust. The most important condition for mold development is optimal amounts of moisture. Therefore, in order to keep the floor of your home in optimal condition for a long time, it must be protected from high humidity.
The absolute humidity of freshly felled coniferous trees is about 90%, of a log house before installation - from 25 to 35%. As for a wooden floor, its absolute humidity under normal conditions throughout the year remains at 10-20% - everything is connected with the current time of year. It is worth saying that the fungus begins its activity when the humidity rises to 22%, and this is only a couple of percent more than the maximum natural state of the tree. By the way, this environment is also optimal for the wood-boring beetle to take a fancy to the log.
With constant high humidity, the wood will lose strength, mold and mildew will begin to appear.
Note! Under no circumstances should the wood be over-wetted as this will cause the structure to decay.
If there is too much water in the tree, it will begin to rot.
General information and purpose
When constructing residential premises, builders pay special attention to the arrangement of a vapor barrier layer. Its presence guarantees long-term operation of the ceiling structure and comprehensive protection of the attic floor from condensation and high humidity. The use of advanced materials and innovative technologies allows us to solve the problem in a short period of time.
The vapor barrier layer will protect the room from high humidity and condensation
During human life, a massive release of steam and moisture occurs. For example, after taking a shower or bath, when preparing dishes in the kitchen, etc. Condensation also occurs when using a heating system, washing machine or dishwasher.
According to the laws of physics, water vapor always moves upward, so it begins to accumulate on the ceiling. The presence of a vapor barrier layer performs a lot of important tasks:
- Helps extend the service life of the roofing structure and materials used in the wooden floor.
- Prevents the accumulation of moisture in the attic floor, preventing the formation of fungal organisms and mold.
- Interacts with thermal insulation, ensuring stable heat retention.
Also, good vapor barrier has a positive effect on the fire safety of the ceiling, and this is an important advantage. If you successfully select a material that will act as a vapor barrier, and then correctly place it on the ceiling, this will extend the life of the building without the need for unscheduled repairs or maintenance.
More details about gluing vapor barriers:
Why is vapor insulation necessary?
As we said earlier, wood is a rather specific material for construction: it is excellent for air permeability, but likes to absorb water, and for this reason it swells. Ignoring this fact, you may encounter the following troubles:
- the floor will become crooked or “bulge”;
- finishing materials or coatings will be damaged;
- You can find mold in the corners, which will make the house smell disgusting;
- when water freezes during winter frosts, it expands, causing cracks and small crevices in the wood to become larger - this causes rapid wear of materials (if we are talking about open spaces);
- After a few years, the floor will no longer function correctly, and you will have to install it again - this is costly both financially and in terms of effort.
Moisture frozen in winter expands, and this can lead to damage to building materials.
All of these problems can be avoided if you make a high-quality vapor barrier for the floor.
Why do you need ceiling vapor barrier?
As it becomes clear, a vapor barrier layer on the ceiling is needed to remove moisture and leave it along with the air through ventilation. Due to the presence of vapor barrier in the house:
- the service life of the insulating layer of the ceiling increases;
- prevents the development of mold indoors;
- the cost of heating the house is reduced;
- insulation dust is unable to enter the living space and, therefore, affect human health.
Vapor barrier may not be used only in the case of forming a ceiling between two heated rooms, since they maintain approximately the same temperature and water vapor does not rise upward. But, if we are talking about a combination of attic and living space, you simply cannot do without a vapor barrier layer.
Floor construction
Floor coverings in wooden houses can be completely different - it all depends on the financial capabilities and preferences of the home owner. But this is only the last stage of a lot of work with the floor - before this, several layers of different materials must be laid, which will ensure the durability of the structure.
As a rule, the floor consists of the following elements:
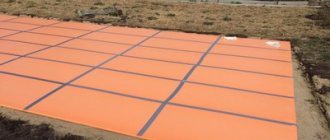
- subfloor - consists of wooden logs and boards. Sometimes sand and concrete screed are used;
- waterproofing layer - it is necessary to prevent moisture from entering from below, that is, it protects all subsequent layers. The waterproofing film is placed between the subfloor joists and secured so that there is no tension. If necessary, the sheets are joined, but always with an overlap of about 20-30 cm. Such a film can be secured using a special adhesive tape, a stapler, or nails;
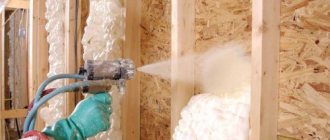
A layer of waterproofing must also be laid, which will protect the structure from moisture from below. - thermal insulation - it is usually placed between the subfloor joists. For thermal insulation, stone, mineral wool, and sometimes basalt wool are used. It is mounted in such a way that there are no gaps left. If the subfloor was made of sufficient quality and is durable, you can use bulk insulation (like expanded clay);
- vapor barrier. This layer is necessary to protect the inside of the floor cake. It prevents the penetration of steam that accumulates indoors.
- finishing layer. Here we are talking specifically about floor coverings - these can be ceramic tiles, parquet, laminate, natural boards, etc.
The floor covering should be laid only after a layer of vapor barrier
It is important that the sequence must be strictly the same as we described earlier. If you swap at least two layers, you may encounter moisture accumulation under the floor covering, which will lead to rotting of the floor in a wooden house. It won't last very long and you'll have to do a lot of work first. This is why vapor barrier is so important.
At the same time, we note that some craftsmen prefer to lay several layers of vapor barrier: the first - on the subfloor boards (instead of waterproofing), the second - after thermal insulation.
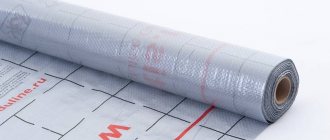
By the way! Typically, vapor barrier materials are sold in rolls, which are twisted so that they are laid with the correct side to the insulation. If you miss this moment, the vapor barrier simply will not “work” as it should.
It is important that the vapor barrier material is laid on the floor with the correct side, otherwise it will not “work” properly
Vapor barrier membranes
Diffuse (breathable) membranes are classified as the most effective and expensive vapor barriers. This group of products contains both single-sided and double-sided materials. The former allow steam to pass through only in one direction, so during installation it is extremely important not to confuse which side to lay the fabric towards the insulation and which to the load-bearing surface. Double-sided ones work in both directions, so there are no problems with them.
Vapor barrier membrane
Vapor barrier membranes can be single-layer or multi-layer. The first ones have an affordable price. Multilayer ones have the function of accumulating moisture inside the canvas and gradually releasing it.
A special group of products in this category are “smart” membranes. They are able not only to absorb vapors, but also to regulate the level of humidity of surrounding materials, while simultaneously acting as a water barrier. These membranes are the best choice. But their cost is beyond the means of most private home owners.
Vapor barrier membranes "TechnoNIKOL"
The undoubted leader in this category of materials is TechnoNikol membranes. For vapor barrier of wooden ceilings, the “Optima” brand is recommended for use. This hydrophobic polypropylene membrane consists of three layers:
- upper and lower polypropylene;
- medium – high-tech functional vapor-permeable film.
Specifications:
- weight 80 g/m2;
- thickness 0.3 mm;
- vapor permeability 5 g/m2x24 hours.
The TechnoNIKOL Optima membrane is produced in rolls. The width of the canvas (roll height) is 1.5 m. The length is 50 m. This material is optimal for vapor barrier of any type of ceiling, intended for installation indoors and on external surfaces of buildings.
Superdiffuse reinforced membrane
Superdiffuse membrane
Diffusion membrane films "TechnoNikol"
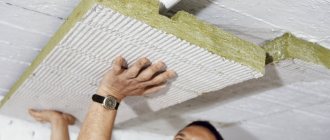
Rules for installing a vapor barrier for a wooden ceiling
Step 1. The membrane is laid directly on the insulation so that the smooth side is directed inside the room.
Step 2. It is possible to lay the strips in different directions: parallel or perpendicular to each other.
Step 3. During installation, an overlap of at least 10 cm must be observed.
Step 4. To attach the membrane to a wooden floor without insulation, use galvanized screws with wide heads or staples with an anti-corrosion coating.
Step 5. The joints of the canvases are sealed using self-adhesive mounting tape.
Use foil tape, width 50 mm, length 30 lm.
Step 6. When laying on a floor with insulation, it is necessary to bring the edges of the panels onto the wall by 15-20 cm and secure them with suitable materials (slats or metal profiles).
Step 7. Mounting tape is glued along the perimeter of the vapor barrier layer.
Step 8. Between the membrane and the material with which the wooden floor will be lined, leave a ventilation gap 3-4 cm wide.
Step 9. Particular attention is required to the places where the vapor barrier comes into contact with the structural elements of the floor and the building: beams, chimneys, ventilation ducts.
Ceiling vapor barrier in wooden floors
During installation of the vapor barrier, it is necessary to ensure that the film is laid evenly, without folds or sagging. A guideline for correct installation can be a colored stripe, which is the center line along the entire length of the canvas.
Video - Ceiling vapor barrier
An equally good choice are multilayer vapor barrier membranes of other brands: Dorken Delta REFLEX/REFLEX PLUS and Dorken Delta LUXX. The first is a four-layer material, is particularly durable and can provide 100% waterproofing of a wooden floor. The second has limited vapor permeability, ensuring gradual and uniform removal of moisture from the living space.
Main recommendations for installing floor vapor barrier in a wooden house
What is important to consider?
- Do not skimp on vapor barrier material - how long the floor will last depends on this layer. If you do something wrong, mold and mildew will quickly form, and the wood will turn into dust.
- All overlaps and gaps must be glued - this is the only way to ensure high-quality vapor barrier.
- There must be a ventilation gap between the vapor barrier and the floor covering, which can be ensured by laying a counter-lattice.
It is worth leaving a gap between the vapor barrier and the floor covering, which is formed after installing the counter-lattice - Using a vapor barrier material with an aluminum layer will help retain heat in the room.
- It is worth using materials only from well-known, trusted manufacturers.
Important! Even if the vapor barrier was done correctly, using only high-quality materials, it will not work properly without properly equipped ventilation in a wooden house, which is necessary to remove moisture. Without this, living in the house is unlikely to be comfortable, and the microclimate will not be correct.
Vapor insulation materials
At the moment, the industry presents a fairly large range of materials for vapor insulation. Almost all of them are artificial polymers, since fibers of natural origin are characterized by excellent water absorption and transmission in two directions.
An important criterion for the quality of such products is the impossibility of steam passage. This is defined as the amount of water in grams that can pass through a square meter in a day: grams per square meter. Good permeability should not exceed 15-20 grams per square meter.
You can create a vapor barrier using various materials
If you look at the pros and cons of materials, then you need to analyze the material from the angle of the following qualities:
- service time;
- mechanical strength;
- the ability to pass air and at the same time hold water.
When choosing a material, you need to take into account strength, ability to pass air and retain water
Most of these materials are characterized by an insufficiently high ability to provide access to air, as a result of which a greenhouse effect occurs in housing. People should systematically ventilate the house, even if the winter weather outside is cold.
Let's consider a comparative table of materials, which describes the advantages and disadvantages, as well as the degree of budget.
| Material | Characteristic |
| The cheapest option that provides heat insulation. You can buy it in rolls. It has very low strength and a short service life. Therefore, it is better to take a model reinforced with fiberglass mesh. This allows you to strengthen the material, as a result of which it “lives” longer. This film protects well from steam, but it does not allow air to pass in either direction. Therefore, condensation may accumulate on the material; water from the natural drying of the wood remains. The effect of this isolation is doubtful. |
| This material costs a little more. As for insulation from steam, the performance is similar to the first material, however, the metal surface allows you to accumulate heat, drying the condensate. |
| This material is completely moisture- and vapor-proof. It differs from the others in that it insulates heat. The metal side of the film is placed towards the home, allowing it to effectively reflect heat. Based on the thickness, the thermal insulation properties of the material are considered. |
| A quality option. The idea is that the membrane allows steam to pass in one direction. In other words, moisture will come out of the floor, but new moisture will not appear. The price of the material is rather high, and it is also not always suitable for vapor insulation of walls on the street side. |
| Another membrane material. In addition to flooring, it is used to insulate walls from the outside, as well as for roofs and ceilings of buildings. This is a one-way material that does not allow steam to pass in the opposite direction at all. There are several varieties - we will talk about them a little later. The film is of high quality and can withstand gusts of wind without any problems. Installs very easily. The best option in our case. |
If you puncture small holes in polyethylene or propylene film, you will not get enough air. The floor must receive air directly from the entire surface. In addition, warm air will enter such holes along with the water that has evaporated there. Therefore, this material makes no sense.
Wooden floor and liquid rubber
Types of membranes for vapor insulation
If we look from the point of view of consumer properties, it is advisable to divide the materials for the insulation we are considering into membranes and others. The reason is that the membrane is a new generation material, it is not similar to the usual polymers of artificial origin.
Main advantages:
- they allow water to pass through in volumes of no more than 10 grams per square meter per day, so they are very often used in rooms with high humidity (for example, a bathhouse);
- since the structure of the material is porous, it perfectly holds condensation, preventing it from getting into the insulation material;
Vapor barrier membranes can be used when arranging a bathhouse - the material copes with temperature changes from minus 40 to plus 80;
- since the structure is reinforced, the fibers can cope with work without wearing out for ten years or more;
- the porous structure provides excellent gas exchange between the home and the environment;
- Some of the membranes are reinforced with foil, which reflects heat coming from the room, so they help the insulation material maintain the internal temperature of the house in winter.
Based on their functions, membranes can be divided into:
- anti-condensation – preventing water from penetrating;
- foil - in addition to insulating steam, they leave heat.
Membranes can be anti-condensation or foil
If you look at market prices, the cost of membranes is quite high compared to other materials. Let's look at the price tag for a 75 square meter roll.
| Brand | Cost in rubles |
| "Tyvek Soft" | 5200 |
| "Delta Vent N" | 8900 |
| "Delta Maxx" | 12100 |
| "EUROTOP T150" | 8000 |
The cost of membrane vapor barrier is quite high, but its properties justify the price
To a large extent, the production of membrane material is carried out in Germany. The high cost will pay off if the owner plans to thoroughly decorate his house. If you do the math, constantly replacing the insulating material and laying out a new vapor insulator will cost more than choosing high-quality materials.
Elements for fastening vapor barrier
To securely fasten membrane or film vapor barriers, wide-headed nails or metal construction staples are used. The most practical fastening option is counter rails.
To increase the tightness of the structure, individual vapor barrier elements are additionally glued with double-sided adhesive tape or wide metallized tape.
To ensure a long service life of modern insulation, high-quality vapor barrier protection is required. Otherwise, it will be difficult to obtain the optimal ratio of temperature and humidity indicators in the premises. The main thing in this matter is to choose the right material and know how and which side to lay to the heat insulator.
Until recently, the only type of vapor barrier was glassine. We cut it, attached it, secured it – that’s all! It was only a few decades ago that a more convenient polyethylene film appeared, and more complex and reliable materials began to be made on its basis. Yes, modern options please not only with their strength characteristics, but also with their resistance to temperature changes and ultraviolet radiation, and with their versatility. But, at the same time, they are upset by the complicated instructions for their use: they should be connected along a clearly defined line, and only special tape should be used, and - most importantly! – the installation side must be chosen correctly.
Therefore, it is not surprising how often you can find panicky questions on the Internet about how and which side to lay the vapor barrier to the insulation, and what to do if the sides are mixed up? Will it really be necessary to disassemble the entire structure? We can assure you: you won’t have to. Let’s take a closer look at determining which side is “correct” - you will be very surprised!
Look at what exactly roofing insulation manufacturers recommend in this regard:
What is the essence of roof vapor barrier?
Protecting insulation from moisture is one of the most important problems of thermal insulation, and we will now tell you why.
Water itself is an excellent conductor of heat, because it is used in heating and cooling systems for a reason. And, if the roof insulation is not sufficiently protected from steam from the room, then this will not end well. Even in the warm season, you will not know about the presence of a problem, because... such steam will easily disappear due to heat and good ventilation. And in hot countries, where there is no sub-zero temperature, they don’t think about vapor barrier of insulation at all, because the problem is quietly solved on its own. But in Russian latitudes, due to temperature differences in the cold season, steam rises and penetrates the insulation, concentrating in the form of water when it meets the so-called “dew point”.
At the same time, the top layer of insulation in the roofing pie freezes and creates yet another condition for getting wet from the inside. The effectiveness of the insulation itself is significantly reduced, and the changed structure contributes to the development of fungus and corrosion. Moreover, with a large amount of moisture, it can even seep back into the room and thereby damage the interior decoration. This is exactly what a vapor barrier is for.
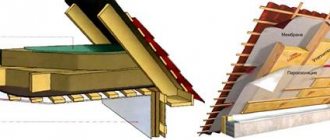
And in order to understand how to properly install a vapor barrier, you first need to understand the structure itself. Thus, the insulation is protected on both sides by completely different films that perform opposite tasks. Below, on the side of the living room, a vapor barrier is installed that will not allow steam to pass through, and on top - a vapor-permeable membrane, which, on the contrary, will release excess steam from the insulation, if it is “wadded”, and will protect it from roof leaks:
But where is the logic, you ask? How can steam get into the insulation if there is a vapor barrier in front of it? In fact, no film or membrane protects 100%, and there are still poorly glued joints and other construction errors. Therefore, some minimal amount of steam will still be in the insulation, and it is important to properly remove the steam outside without harm:
Look carefully at the diagram: do you see where condensation appears in a well-designed roof? That's right, not from the side of the room, but quite a bit from the side of the roof, on that side of the insulation, and it is easily removed by a windproof anti-condensation film or membrane. But condensation should not appear on the vapor barrier, and no rough side of it can cope with it, because... it has a different structure, and we will now prove it to you.
Types of vapor barriers: A, B, C and D
To understand which side the vapor barrier should be laid and why, for example, both sides suddenly turned out to be smooth, you must first determine its type. After all, not every species has two different sides!
Type A insulation: only for steam outlet on the other side
For example, type A cannot be used as a roof vapor barrier because eventually all the vapors will end up in the insulation. After all, the main task of such insulation is precisely to provide them with unhindered passage, but not to allow rainwater to pass through from the other side.
Such insulation is used in roofs with an inclination angle of 35° or more, so that water droplets can easily roll off and evaporate (and the ventilation gap between such insulation and the insulation helps them evaporate).
Vapor barrier B: classic double-sided installation
But B is a real vapor barrier material. Vapor barrier B has a two-layer structure that allows you to avoid condensation, due to the fact that moisture is absorbed into its fibers in the morning and disappears during the day.
That is why type B vapor barriers are always placed with the smooth side facing the insulation (film side), and the rough side facing outwards. Vapor barrier B is used only in insulated roofs, because For an uninsulated one, its strength is too low.
Type C membrane: for enhanced protection against water vapor
Type C vapor barrier is a two-layer membrane of high density. It differs significantly from type B in the thickness of the vapor barrier film layer. It is used in the same place as type B vapor barrier, but in itself is more durable.
Additionally, such a vapor barrier is used in non-insulated roofs to protect the wooden elements of the attic floor and in flat roofs to enhance the protection of thermal insulation. Vapor barrier C should also be installed with the rough side facing the inside of the room.
Polypropylene insulation D: for heavy loads
The new-fashioned vapor barrier type D is an especially durable polypropylene fabric, one of which has a laminate coating on one side. This can withstand significant mechanical loads. It is used not only for insulating attic floors as a waterproofing layer, but also in insulated roofing to protect it from leaks. Moreover, type D vapor barrier is indispensable for rooms with particularly high humidity.
Here are the cases and where all these types of insulation are needed:
Does vapor permeability change when changing sides?
All of the above modern barriers are divided into the following types:
- for one-sided installation, which need to be rolled out only on a certain side, and it is recommended not to confuse them;
- and for double-sided use, usually with membranes that can be laid on either side.
You will be interested to know that for the first time, membranes that already had such properties as modern roofing membranes were used in astronautics! And from there they began to be used in construction and in many areas of the national economy. And until recently, there were not as many problems with their installation as there are today.
But now there is a strong opinion among ordinary people: if you lay the vapor barrier to the roof insulation “on the wrong side,” then the entire structure will not last long. In fact, the correct choice of side affects exclusively the service life of the interior finishing of the roofing pie, because the rough side has the same abilities as the smooth side and has absolutely the same vapor permeability. But how much it will retain droplets of condensate there is a little-studied question.
The right side of vapor barrier: myth or reality?
Let's understand such concepts as condensation - this is important. There is a catch here: for some reason, most ordinary people are sure that if high-quality vapor barrier is used, then there will be no condensation at all. Or, on the contrary, it will quickly evaporate on its own. In fact, condensation is formed from moisture that rises upward in a vaporous state.
There is such a thing as a “temperature limit”, i.e. that specific condition under which the air temperature and humidity are sufficient for steam to appear in the form of droplets. For example, at a temperature of 15°C and air humidity of about 65%, condensation will already begin to form. But if the air humidity reaches 80%, then condensation will appear at a temperature of 17°C.
In other words, the entire process of water vapor formation occurs as a result of the difference in the so-called “partial pressure”. All the water vapor contained in the air tries to escape out into the colder street through the roof enclosing structures, but on its way they encounter a barrier in the form of a vapor barrier. If the air in the house warms up faster than the surface of the vapor barrier, then moisture from the air will fall on it in the form of condensation. Here the difference between an insulated roof and a non-insulated one is clearly visible: any vapor barrier that is laid on the insulation will warm up much faster than something that is in direct contact with the cold elements of the roof.
If there is no vapor barrier layer at all, or there is not enough of it, then water vapor penetrates inside the roofing pie and encounters a “cold front” there, which turns the vapor into condensate, and under special circumstances, also into ice. And all this happens inside the roof! This ice will not bother you until spring comes and the outside air warms up, thereby warming the roofing elements. Then the accumulated ice will melt and form entire smudges on the slopes inside the house.
But with a properly equipped roof, condensation should not appear at all, and therefore, in fact, the difference between the smooth and rough side is not significant at least in this aspect.
What is the difference between anti-condensation film and “anti-condensation side”?
As we have already said, most modern manufacturers emphasize that their vapor barrier films have a so-called “anti-condensation side”:
The “anti-condensation” side differs from the usual one in the presence of a fleecy layer that absorbs a small amount of condensation and holds it until it evaporates.
Thanks to this, the risk of the film surface getting wet is much lower, which extends the service life of the interior finishing of the roofing cake. That is why the rough side should always be directed inside the living room or attic, and the smooth side should be leaned against the insulation. But is this really so?
Practice shows that if condensation forms inside the roofing pie, then the fleecy side of the film cannot help in this regard, and there is not much difference whether these drops adhere to the film or flow down. The fact that they exist at all is bad in itself. The anti-condensation side of the vapor barrier and the anti-condensation waterproof film on the other side of the insulation are completely two different things!
Therefore, let's summarize: the “correct” side of the vapor barrier is not equivalent in terms of the properties of the anti-condensation film: it does not remove water vapor, does not destroy drops of moisture and does not solve the problem with condensation.
But, if you are still in the process of building a roof, then for the sake of peace of mind, do as the manufacturer instructed in the attached instructions. If you have already installed a vapor barrier and are in doubt whether it is correct, forget it and don’t worry anymore. But if you hope that the “right” side of the vapor barrier will take care of all the future shortcomings of the roofing pie, don’t believe it.
Experienced roofers often declare that they consider the whole epic about which side to attach the vapor barrier to be a kind of shamanism. Allegedly, by complicating the product, they increase its positioning in the market. But in fact, as we have already said, with a well-equipped vapor barrier, there shouldn’t be any droplets on the walls, otherwise even the lining on the walls will swell and the wallpaper will fall off, since everything is so serious.
After all, this only happens when there are serious mistakes during roof construction. In addition, if the vapor barrier itself is located between the drywall and mineral wool, then there is no point in messing around with such a complex structure at all. Drywall itself absorbs moisture well, and steam will practically not be able to reach the internal vapor barrier. In this design, even simple glassine is quite acceptable!
For example, some curious roofers even conduct their own vapor barrier tests to determine whether the “wrong” side is working or not:
And those who are especially quick-witted even say that polyethylene vapor barrier with a rough side is obtained simply in the factory, when polyethylene is combined with a non-woven material: the film is glued to the rough layer, and the finished product actually has two different sides. And there is no point in modifying the second side so that it also becomes smooth by connecting it to another layer of polyethylene: the vapor barrier properties will not change, and the manufacturing process will become more expensive.
And therefore it is easier to give this meaning to the product itself. And in fact, quite a lot of people have already become convinced that, even if they mix up the sides of the vapor barrier, nothing like that happens, and the film works the same on both sides, fully performing its functions.
Therefore, in any case, just strive to implement roof steam protection correctly, think through all the necessary details and not skimp on quality!
Knowing which side to lay the vapor barrier against the insulation on the ceiling, wall or floor is very important when working on insulation. It only at first glance seems that which side to lay the vapor barrier against the wall insulation does not matter, but in reality this is not the case. We will tell you in this material why a vapor barrier is needed and its purpose. Watch the video - which side to lay the vapor barrier on, how to distinguish the inside of the vapor barrier film from the outside.
The need for high-quality thermal insulation of premises arises very often. If you plan to insulate a wooden house with your own hands, then many questions arise about how to do it correctly. And one of the important questions concerns the need to use a vapor barrier, the place of the film in the thermal insulation “pie” and which side to lay the vapor barrier against the insulation on the wall.
Why do you need a vapor barrier for insulation?
Vapor barrier is always necessary when using moisture-absorbing insulation. The fact is that the characteristics of mineral wool are such that the material installed on the inside of the wall comes into contact with warm air, which contains water vapor. In the absence of a water barrier, moisture penetrates into the thermal insulation layer on the floor, where it condenses, turning into water.
An example of using a vapor barrier when installing a warm roof
As a result of moistening, the thermal insulation properties of mineral wool material are reduced; in addition, mold and mildew may appear in a humid environment. If the vapor barrier under the insulation on the wall is correctly laid, then it becomes an obstacle to moisture. Therefore, thermal insulation requires the installation of a vapor barrier between the warm air of the room and the insulation.
Types of vapor barriers for insulation
Among the modern materials for hydro- and vapor barriers presented on the construction market today, three main types can be distinguished:
The film is a blind vapor barrier that does not allow moisture to pass through. The main advantage of polyethylene film is its low price. Two-layer vapor condensate films are also produced - these are smooth on the inside and rough on the outside. Drops of water do not pass through the film, but are retained.
Which side should the vapor barrier be laid against the insulation?
A diffusion membrane is a vapor barrier with limited vapor permeability, consisting of non-woven polypropylene and polymer film. It has an outer and inner side (see video), which allows steam to pass through it in an optimal amount. Water vapor does not linger in the insulation, but quickly evaporates.
The vapor barrier membrane (energy-saving) film has a metallized outer layer that is resistant to high temperatures. The material is more often used when insulating the walls of baths and saunas, because the material additionally reflects infrared radiation (works like foil penofol).
If glass wool is not protected with a vapor barrier during installation, then as moisture is absorbed, the thermal conductivity of the material will increase.
Roll waterproofing - used to protect building structures from moisture. When using this material, it does not depend on which side the waterproofing is laid to the insulation, since TechnoNIKOL roll and coating waterproofing does not allow moisture to pass in both directions.
Which side should the vapor barrier be laid against the insulation?
At first glance, it seems that there is nothing complicated - attach the waterproofing film over the insulation on the side of the warm room and you're done. However, there are some important nuances in this matter that you need to be aware of. It is also important to take into account which side the vapor barrier is laid to the insulation on the ceiling and what the installation features are. This is where previously acquired knowledge about the types of film used comes in handy.
How to distinguish the inside from the outside
Photo. Izospan B at multiple magnification
If the manufacturer’s instructions are missing or do not contain the necessary information about which side of the film is considered internal, then you should independently determine this based on external factors. Please pay attention to the following points:
. If the waterproofing film has a different color on both sides, then the light side of the isospan is laid against the insulation ; . The side of the waterproofing that faces the floor when rolled out is considered internal and should face the insulation; . The outer side is made fleecy so as not to allow moisture to pass through, and the inner side is smooth and is laid towards the insulation.
Which side should the vapor barrier be placed on the insulation?
The polyethylene film is laid on either side, because they are no different from each other. The diffusion membrane (vapour-condensate film) is correctly laid with the smooth side on the insulation, and the rough side towards the warm room. Thus, it prevents the insulation on the ceiling or wall from getting wet, and excess moisture from the material can freely pass through the smooth side.
Photo. Laying vapor barrier on floors and walls
Also, diffusion membranes are mounted on the floor or wall with the smooth side facing the insulation. Vapor barriers with a foil side are attached with the reflective side facing outwards, as it reflects heat back towards the warm room. And it should be remembered that laying vapor-tight materials, for example, isospan, requires the installation of a ventilation gap to remove excess moisture.
If the internal cladding (false wall) is made closely without a gap, then it will be exposed to the influence of moisture settling on the film. If there is a gap, air movement will facilitate the unhindered evaporation of excess condensate from the surface of the film. It is important not only to know which side to put the isospan towards the insulation, but also to maintain the integrity of the vapor barrier itself.
Video. Which side to lay Izospan on?
Types of materials
Based on the location of the material in a particular part of the home, they are classified:
- types A and AM – protects the insulating material from the influence of the external environment;
- types B and C – protection of the insulating material from the action of internal moisture;
- type D – protection of the floor from moisture coming from the soil.
There are several types of vapor barrier materials
Type A
Materials of this type are used for walls and roofs. Type A materials are rarely used for flooring.
For the membrane to work correctly, so that it allows water to pass through from the inside and does not allow it to pass through from the outside, it is necessary to carefully place the layers. The marked side must be placed in the direction of the street.
Type A vapor barrier materials can be used for walls and roofs - they are rarely used for floors
Type AM
This type is mounted in the same way as the previous one; it is also more suitable for walls and roofs. However, it has a rather complex and multi-layered structure:
- layers of spunbond (1-2);
- diffuse film.
Due to the film, steam escapes from the inside, but liquid from the outside does not enter inside. A distinctive feature of the type is that it does not need to provide a ventilation gap. Therefore, it is placed close to the insulating surface.
Spunbond is a method of producing a waterproof polymer film and a direct product of this production. In this situation, the fiber is made from artificial threads, which are stitched together under the influence of chemicals, heat or water jets.
Materials of type AM are similar to type A, but differ in their multilayer structure
Type B
This insulation is required to protect the floor of a wooden house from water from the inside. It is also used for walls. By the way, type B materials are often used for vapor barrier between floors.
Multilayer materials protect well from the wind, while foil materials keep heat inside, since they reflect it over the entire surface.
Type B materials are most suitable for internal floor vapor barrier
Type C
This is a very durable membrane that includes 2 layers. It is necessary for the same thing that the B-type is for. It is advisable to use for additional heat in rooms without heating that are associated with housing:
- attic;
- basement;
- base;
- veranda or porch.
Type C vapor barrier materials can be used for rooms without heating, but they are also perfect for floors in a wooden residential building
Type D
These materials are made from polypropylene. For reinforcement, an additional lamination layer is used. Therefore, it can be used for floor insulation - in other words, when there is a possibility of a large mechanical load from furniture, movement and wind.
vapor barrier for floor
Basic requirements for vapor barrier materials
For the current generation of builders and repairmen, the question of whether a vapor barrier is needed has long become rhetorical. To protect the house from dampness and extend the life of the thermal insulation, a vapor barrier layer is installed between the cold surface and the insulation layer.
The purpose of this layer is to keep the insulation layer dry.
Elements of multilayer polyethylene film.
Therefore, there are only three requirements for the materials used to construct the vapor barrier:
- the material must freely release moisture trapped in the insulation layer to the outside;
- the material should not allow water to pass through to the insulation from the outside;
- the material must be strong enough to support the weight of the insulation.
To achieve this, the material used for vapor barriers must only be one-sided, i.e. allow water to flow in only one direction.
Return to contents
Vapor barrier made of polyethylene film
As a low-cost option, perforated and non-perforated polyethylene films are often used. But you need to know that they do not fully cope with the task of reliable vapor barrier. But they still guarantee a certain degree of protection for the insulation layer.
Scheme of vapor barrier flooring for the roof.
Polyethylene films intended for waterproofing and vapor barrier are reinforced with a special fabric or mesh to give them greater strength. It is generally accepted that perforated films are intended for waterproofing, and non-perforated films are intended for vapor barrier.
However, in practice, such a division is purely arbitrary, since the vapor permeability of polyethylene films is in any case less than necessary. Therefore, when using both types of films for under-roof hydro- and vapor barrier, you still need to create a ventilation gap for the heat-insulating layer. Therefore, builders often use non-perforated films to protect the insulation on the roof, as a cheaper material.
When using polyethylene films for vapor barrier, it is very important to securely fasten them together, as well as attach them to the structures of the house. To ensure the reliability of the vapor barrier, manufacturers of polyethylene films produce special connecting tapes for them.
Scheme for laying vapor barrier for the floor: 1- floor, 2- Izospan vapor barrier, 3- insulation, 4- counter lath, 5- beam, 6- subfloor, 7- Izospan vapor barrier.
As a type of conventional reinforced films, films with a reflective layer made of aluminum foil are produced specifically for vapor barriers. Such films have very high vapor barrier properties, and they are used mainly for rooms with high humidity: baths, saunas or kitchens.
It is difficult to say whether vapor barrier with such films should be carried out in ordinary rooms; there is no information yet about the dangers of using such films for rooms with normal humidity, but it is possible that increased vapor permeability can make the microclimate in the premises too dry. And why overpay if the same result can be achieved using cheaper materials?
Return to contents
Vapor barrier made of moisture-absorbing polypropylene
Often, a moisture-absorbing type of polypropylene is also used for vapor barrier, which is also a good protection, although it is inferior in quality to diffusion membranes. Such films first began to be used in Russia in the early 90s of the last century, simultaneously with the appearance of metal tiles. Polypropylene films are much stronger than polyethylene films and also have increased resistance to ultraviolet radiation.
To prevent moisture from forming on the surface of the vapor barrier films during the operation of the house, a special layer consisting of viscose fiber mixed with cellulose was “rolled” on one side of the polypropylene film.
This layer is capable of absorbing and retaining moisture, and it does it so well that it practically prevents condensation from occurring. But the main thing is that, having eliminated the cause of condensation, it dries quickly. Such films are installed with an anti-condensation layer facing the insulation layer, since they have only one-sided use. Today, polypropylene films for vapor barrier construction are the most common. The reason for this popularity lies in the moderate price and sufficient strength of this material.
Return to contents
Options for fixing film for vapor insulation
You can record the material like this:
- using a stapler for construction;
- using special tape or adhesive tape.
Often these two options are combined. Most adhesive tapes are made from virtually the same components as vapor insulation. Reinforcement occurs using spunbond technology, since it is believed that the material will be under constant load.
Secure the vapor barrier material with a stapler or special adhesive tape
Let's look at the types of adhesives used for the types of membranes under consideration.
- Izospan KL tape is used to secure fabric classified as A-type. It is highly durable, copes with temperature changes, and is not afraid of exposure to water. Can perform its functions well for more than ten years. It is necessary to glue the fabric with an allowance of about 15-20 centimeters, no less.
- Izospan KL+ tape is characterized by high mechanical strength, since it consists of two layers of polymer with reinforcement. It is used for harsh winter conditions, as it is not afraid of temperatures down to minus 50. It is worth saying that the tape is universal, since it can be used for absolutely any type of membrane.
- Izospan ML Proff tape is an excellent choice if work will take place on complex surfaces, such as pipes, ceiling and wall curves, corner protrusions and communications. The tape perfectly secures the membranes and also serves as a good insulator against steam.
There are several types of adhesive tapes for different types of materials
adhesive tape Izospan
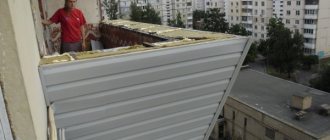
Installation of floor vapor barrier in a wooden house: step-by-step instructions
Step 1. If you are laying a vapor barrier under the finished floor, and not during the construction process, you need to remove the floor covering and remove all debris and dirt. The wooden elements of the subfloor are treated with special antiseptic agents - this is necessary to protect against mold and mildew.
Step 1. If you are doing a vapor barrier not during a major renovation, you will have to remove the floor covering
Step 2. The waterproofing is laid, a layer of thermal insulation is placed on top. If these layers are already laid on your floor, this step is therefore skipped.
roll waterproofing
Step 2. Before the vapor barrier, hydro- and then thermal insulation is laid
Step 3. Laying vapor barrier. It is very important to place it on the correct side (if you are using a special material and not just plastic wrap). You need to focus on the inscriptions on the material, its smoothness and roughness of the sides. The smooth side always fits against the insulation. When using metallized material, the metallized side must touch the insulation. Polypropylene, which has a one-sided lamination, is also laid with the smooth side down. And if you are using a three-layer film with a reinforcing mesh, you need to lay it so that the denser side touches the insulation.
Step 3. Lay a vapor barrier. The film, as mentioned earlier, must be laid correctly
How to fix it? As we said earlier, this can be done using special tapes and/or a construction stapler. Do not forget about overlaps of 20-30 cm. You need to try to fix the film as best as possible, in several places, but at the same time it should not be stretched - this can lead to damage.
Step 4. It is recommended to make a counter-lattice so that there is a gap between the vapor barrier and the finished floor. After this, you can lay the floor covering.
Step 4. The counter-lattice will allow you to leave a gap between the finished floor and the vapor barrier layer
Features of vapor barrier installation
An important stage in protecting insulating materials is laying a reliable vapor barrier layer. All work is carried out during the repair or reconstruction of a finished building or during the construction of a new building. To correctly install a vapor barrier, you need to understand how to connect membrane sheets and which side to fix them to the insulating base.
Preparatory work
At this stage, work is carried out to select the appropriate type of vapor barrier, taking into account the features of the installation process, operational characteristics and material requirements.
Before laying a vapor barrier, careful surface preparation will be required. It is important to consider the type of material used in the construction of floors, walls, ceilings and roofing structures.
- During the construction of a log house, all structural elements are treated with protective antiseptics and fire retardants.
- When carrying out repair and reconstruction work, complete dismantling of the finishing, cleaning and preparation of surfaces is carried out:
Wooden elements are treated with compounds against aging, rotting and burning. Concrete, block and brick surfaces are treated with deep penetration antiseptic compounds.
Proper preparation of surfaces will ensure a long service life of the insulating material and the entire structure.
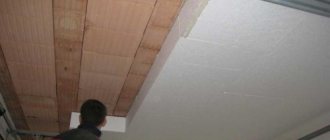
Technology for laying vapor barrier on the ceiling
If the roof structure and interfloor ceiling are made of wood, then the installation of a membrane for waterproofing is carried out on a prepared base.
Roll or block insulation is installed in the space between the rafters and joists; the best option is mineral or basalt wool. Next, you can lay vapor barrier protection on the ceiling surface.
When the thickness of the insulation is equal to the height of the logs, an additional slatted counter-lattice is installed to maintain natural ventilation.
It is necessary to install a vapor barrier on the ceiling with a slight overlap on the walls around the perimeter, and special attention should be paid to the corners. It is better to place the joints on the joists and glue them on both sides with tape on a reinforced base.
Important! When installing a vapor barrier, sagging and deformation of the panels should be avoided.
To thermally insulate a flat roof or concrete ceiling, a waterproofing film is mounted from the inside on a self-adhesive tape, then a sheathing made of wood or metal is installed.
The height of the sheathing is determined based on the thickness of the thermal insulation material and the minimum technological gap for ventilation. The installation step is 3 cm narrower than the width of the heat insulator, which allows for high-quality installation of the insulator into the prepared sheathing cells.
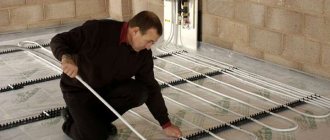
Technology for laying vapor barrier on the floor
The installation scheme for vapor barrier protection on the floor is similar to how the material is laid on wall and ceiling surfaces.
The wooden floor is insulated using joists, on which a waterproofing layer is laid. Next, insulation is placed in the space between them - wool on a mineral or basalt basis. After this, vapor barrier material is laid.
The rolled material must be laid with an overlap of 12 cm, with the joints carefully sealed with metallized tape on both sides. A properly laid vapor barrier should completely cover the floor surface with an overlap of up to 10 cm on the walls.
To install a vapor barrier on a concrete base, you will need to install a sheathing, in the cells of which a waterproofing layer and a heat insulator will be laid.
Where can I order materials and how much do they cost?
All necessary materials for insulation and insulation from steam can be purchased at construction stores. A very large assortment opens in hypermarkets that have a narrow focus.
Of course, they also sell materials in online stores. But this option will not allow you to immediately verify the quality of what you purchased. Therefore, it is better to make purchases in regular stores.
You can purchase the necessary materials both in construction stores and online.
So, installing a vapor barrier for the floor in wooden houses is most often necessary so that the building “lives” for a long time, and frequent repairs can be avoided.