Preparing materials and tools
To disguise the pipeline, we will need:
- Frame elements. You can use both galvanized steel profiles and wooden beams, but the first option is more technologically advanced and less susceptible to deformation under the influence of moisture.
Advice! If you nevertheless decide to make cladding on a wooden frame, be sure to treat all parts with waterproofing impregnation with antibacterial components.
- Drywall. It is best to use moisture-resistant sheets. Their price is slightly higher, but they will not swell from condensation and will retain their shape longer.
- Self-tapping screws for drywall and frame. For wood - ordinary, for metal profiles - with a drill.
- Inspection hatches through which access to the pipes will be provided.
- Materials for finishing a plasterboard box - putty, mesh for gluing seams, primer, interior paint or ceramic tiles.
- If the box is being built to mask heating radiators (which, in general, you shouldn’t do), then you must take care of installing plastic or metal grilles through which heat will flow into the room.
As for the set of tools, it will be quite standard:
- Hammer or impact drill.
- Screwdriver with a limiting attachment for drywall work.
- Metal scissors for cutting profiles.
- Knife or saw for gypsum boards.
As for finishing tools, they need to be selected in accordance with the chosen decor. List all spatulas, brushes, graters, etc. hardly necessary - if necessary, you can easily figure it out!
Be your own master or step-by-step work
Sheathing pipes with plasterboard is carried out if it is not possible to hide them in the wall based on the layout of the room, difficult access or the passage of sewer lines.
Related article: Which primer is best to choose for wallpaper?
Drywall (GK) is a universal material that is easy to work with and allows you to create any shape for decorating a room . For renovations in rooms with high humidity (kitchen, bathroom, loggia), it is better to use moisture-resistant GK sheet (see also the article on moisture-resistant Knauf plasterboard).
Advice! Additional lighting will help to emphasize niches and protrusions, but electrical equipment and wiring must be provided before installation work begins.
Niche for counter
To perform all the manipulations when constructing a plasterboard structure with your own hands, you should adhere to the following sequence:
- We make a frame using metal profiles, constructing a kind of box at the place where the sewer and water pipelines pass (see also the article How to make a frame for drywall - technological stages).
- We determine the height of the structure, its width and depth. We remember that horizontally located profiles affect the strength of the box and its rigidity, so they should be placed at a distance of half a meter from each other and at least less often.
- Using an angle grinder, we cut off pieces of the profile that correspond to the calculated dimensions.
- We connect the profiles with self-tapping screws, strictly at right angles, so that later the frame can be strengthened on the surface of the panels.
- We screw the frame to the load-bearing walls with screws and dowels, fixing it permanently and preventing it from moving beyond the elements being decorated.
- We take measurements of the metal structure and cut out blanks from plasterboard.
- We fasten the plasterboard inserts to the profiles along the side surfaces with self-tapping screws.
- We make one or more holes for the inspection window in the place of shut-off valves and connections.
- The final stage is finishing the drywall with ceramic tiles. If you are using plastic panels as trim, then no further processing is required at all.
Watching a video with a step-by-step description of the work performed will help you carry out work on hiding sewer and water pipes more productively and efficiently.
Note to craftsmen
The main manipulations for assembling and installing the box are completed at this stage. The pipelines are securely hidden and decorated with plasterboard, and you have creative work to do - decorative finishing. All surfaces of the bathroom should be easy to wet clean, which means that glazed ceramic tiles may be the best option.
Related article: Asm wallpaper adhesive, general overview
Recessed niche for toiletries
If you want to add several modern design techniques to the design of the toilet room, then when installing the box you can think of decorative elements in the form of niches and steps, which, in addition to their aesthetic appearance, will also be functionally used as shelves for detergents and toilet paper.
How to hide sewer pipes in the bathroom and toilet: methods and their features
The issue of aesthetics when installing any pipeline is no less important than the functionality and reliability of the system. This problem is especially acute in areas of an apartment or house where the main water supplies are concentrated: in the toilet and bathroom. There are many ways to close a sewer pipe in a bathroom or toilet. And each of them has its own advantages and disadvantages.
The pipes in the bathroom are covered in order to give the room a neat and aesthetic appearance.
How to hide pipes in the toilet and bathroom: basic methods
If the water supply system is being laid for the first time or major renovations are being carried out in the house, then the option of laying pipes into the wall (grooving) is possible. Calculations for the location of pipes are made when creating a water supply plan. It is not recommended to hide sewer risers with large diameters in the wall in this way. After all, if the wall is “cut to such a depth, this may negatively affect the integrity of the load-bearing structures of the house. You can hide a pipeline with a diameter of up to 50 mm in grooves.
You can also hide the plumbing by installing it in the floor. In this case, the pipes are laid on the floor slabs and filled with cement screed. Naturally, the pipe material must be designed for placement under the screed, that is, it must withstand a certain pressure. It is especially worth paying attention to this when choosing plastic pipes for water supply.
But if the installation of the pipeline has already been carried out using the open method, then the only option for hiding the pipes would be to create decorative structures in the toilet or bathroom.
All methods of installing structures to disguise a sewer pipe in a toilet and bathroom have very similar principles. Their main difference will be the choice of easy-to-use material that will provide the bathroom or toilet with an aesthetic appearance.
Water pipes of small diameter can be hidden in specially prepared recesses in the wall - grooves
In addition to external characteristics, there are several basic rules for choosing finishing materials:
- The selected materials should be easy to care for: easy to wash, not exposed to aggressive cleaning agents. The possibility of using materials prone to corrosion is also excluded.
- Light and thin materials produce very compact structures, which is important for bathrooms with a small area.
- The material should not deteriorate from exposure to moisture, temperature changes and atmospheric pressure. When heated or cooled, they should not release any substances harmful to health.
There are quite a lot of materials that meet these requirements. In order to hide pipes in the bathroom and toilet, moisture-resistant types of plasterboard or plywood, MDF, and decorative plastic panels are used.
How to properly hide sewer pipes in the bathroom and toilet?
The main rule that should be followed when choosing a pipeline camouflage method is to maintain access to communications. The camouflage structure must be such that it can be easily opened and closed in the event of a water supply system failure. If sufficient attention has not been paid to this detail, in the event of a force majeure situation, the decorative wall will have to be demolished entirely.
Good to know! In some apartments, when designing bathrooms, special niches in the wall for laying pipes were initially planned. In this case, the recess with the pipeline is simply filled with plasterboard or plastic. This is an ideal option for hiding a pipe - in this case, the bathroom area does not decrease.
If there are water meters or valves in the communications, then to access them you need to use the method of installing an inspection hatch. If necessary, you can install the inspection hatch after laying the decorative wall. To do this, just cut a hole of the required size in it, and then close it with a plastic hatch with a door.
When covering pipes with a false wall, you must install a door in it to access communications
Before installing the structure that hides the pipeline, you must ensure that there are no defects in the pipe connections. There should be no leaks or deformations in the system. The connecting elements must be well sealed, and the sewer pipes must have the required angle of inclination.
How to cover sewer pipes in a toilet or bathroom with decorative panels
Plastic or plasterboard panels (false walls) are one of the best options for how to seal (hide) a sewer pipe in a toilet with a small area. You can also close communications in bathrooms. A false wall can be finished by any method, for example, ceramic tile cladding is often used. There are also plastic panels on sale in various textures and colors that do not require additional finishing.
PVC plastic panels are used to decorate the walls in the bathroom and toilet. Their dimensions can be as follows:
- thickness: from 5 to 10 mm. The larger the false wall, the stronger the panel should be;
- length: from 260 to 600 cm;
- width: from 10 to 50 cm.
If the false wall is made of plasterboard, it is worth purchasing a primer and putty to grout the joints. For maximum protection of the plasterboard wall from moisture, you can treat the inside of the structure with drying oil. Plastic panels are moisture resistant and are equipped with special locks on the edges of the products, so they can be used to close communications without additional means.
To attach decorative panels you need to install a sheathing
If you do not plan to install an inspection hatch, it is better to finish the bathroom using plastic panels. The use of drywall is also not recommended in cases where it is necessary to hide old pipes. In the event of an accident, the plastic wall can be dismantled easily and quickly, unlike a plasterboard partition covered with tiles.
Installation of the false wall is carried out close to the ceiling and floor. The distance from the main wall to the decorative one is taken to be minimal, from 70 to 100 mm. To install the panel, load-bearing bases are made of aluminum profiles, preferably galvanized. The distance between the guide profiles is calculated depending on the wall area - from 30 to 60 cm. The metal frame is sheathed with finishing material using self-tapping screws.
Corner profiles, starting strips and plinths are used to hide turns, edges and corners of the structure. It is better to seal the joints between panels and profiles with silicone sealant after installation.
Preparation and marking
How to cover pipes with plasterboard? First you need to inspect the communications. Plastic and new metal pipes do not require preliminary preparation. Old water supply, heating and sewerage networks are carefully checked and, if there is rust, the damaged area is cleaned. The pipes are then primed and painted.
To get an even box without distortions, markings for the frame are made using tools. Depending on the location of the pipes, marks are made on the ceiling, floor and walls. The contours of the plasterboard box are outlined using a plumb line, level and tape measure. The distance from the walls of the structure to the communications must be at least 5 cm. If it is necessary to hide the pipes of the heating network, then the gap between them and the casing can be made larger. This will avoid overheating of the material and preserve the aesthetic appeal of the decorative finish.
How to hide sewer pipes in a toilet: boxes made of plasterboard or plastic
A box is one of the types of false walls. The installation will be similar, with the only difference being that they can only hide the pipes; they will not occupy the entire wall.
Instead of a whole false wall, you can build a small box made of wood or plasterboard
A box or podium (if you need to hide horizontal pipes) can be an excellent place to store tools or household chemicals.
Helpful advice! When installing boxes, you should select the material so that it does not have to be joined vertically (for example, panels with a complex pattern). In this case, additional load-bearing strips may be needed to maintain rigidity.
A functional option for hiding the pipeline in the bathroom and toilet is a cabinet box. Its installation is somewhat more complicated than the installation of simple boxes, but this design is practical. To simplify the work, you can purchase ready-made doors for cabinet boxes.
The frame for this type of box will have to be made of wood. Before work, the bars must be treated with an antiseptic that protects the wood from fungus and rot. The walls of the cabinet box can be made of plasterboard, plywood or laminated material. It is better not to place the lower part of the box directly on the floor of the toilet or bathroom, so as not to damage it in the event of a water spill. The basis for the box can be legs at least 5-7 cm high.
On the modern market you can find ready-made boxes to hide pipes. If they are suitable for the bathroom in size and style, then you can hide the pipes with such a factory design. This significantly reduces the time spent on finishing the premises.
If the space of the room allows, you can arrange a pipe cabinet with sliding doors or roller shutters
How to provide access: 3 most convenient ways
To ensure easy and fast access, it is most convenient to use one of the options below:
- Roller shutters or blinds. An excellent solution when creating a false wall at the back wall of the toilet. Attached to the frame, they provide the widest access to the pipeline. In this case, the finishing area is reduced, and there is no need to think through mounting methods for the hatch. In addition, behind them you can organize shelves for storing household chemicals.
- Plumbing hatch. You can make it yourself, but it’s easier to buy it in a store. Can be metal or plastic, used independently or under tiles.
- Removable tiles with magnets. An interesting solution that can be used when decorating a toilet with large tiles. A hole is made to fit the size of the element, magnets are inserted between the drywall and the tile on its surface, and 4 metal plates are glued to the sides of the removable tile.
USEFUL INFORMATION: Accessories for suspended ceilings and plasterboard walls
As you can see, the process of high-quality masking of water pipes and sewer risers with plasterboard is not so complicated. With due care, attentiveness and a little skill, it is quite possible to do it yourself, significantly saving your own money.
How to hide sewer pipes in the bathroom using roller shutters
Roller shutters (roller shutters, blinds) are a good option for masking pipes. This method is notable for the fact that roller shutters provide constant access to the pipes. But the installation of these elements has some features and difficulties.
Roller shutters are installed on an existing base, that is, the installation of false walls or boxes cannot be avoided. It is necessary to cut a window in the decorative panel, as is the case when installing an inspection hatch. And only after that the roller shutters are installed in the hole. It is noteworthy that not all similar designs available for sale are suitable for this purpose. You should only buy special modifications for plumbing fixtures. They differ from ordinary roller shutters in that they are made of stainless metal or plastic.
For a bathroom or toilet, you can also choose blinds with electric motors hidden in moisture-proof boxes. But if the opening width is less than 52 cm, you will have to use blinds that can only be opened and closed manually.
You can cover the pipes in the toilet by making a box made of plasterboard. This is perhaps the most popular solution. This is because the technology is very flexible; pipes of any configuration can be hidden.
Another nice bonus is the multiple finishing options: lay the tiles with glue, level the surface with putty, then paint or wallpaper. A decorative box for covering pipes is suitable in most cases. Depending on the location of communications, it can be made in several versions.
Preparatory work
It’s worth noting right away that if the sewer riser is old, then it is advisable to change it before installing the duct. If a pipe ruptures, you will have to break the box to replace them. So, before starting installation work you need:
- prepare the walls in the toilet;
- draw up a work plan;
Designing a plasterboard box to hide a waste pipe in a toilet
- prepare the necessary material;
- assemble the tool.
It is worth noting that if you do everything correctly at the preparatory stage, then there will be no problems with installing a plasterboard box in the toilet.
How to close risers in the bathroom - practical and aesthetic solutions for the bathroom
In this article we will tell you the secrets of experienced finishers on how to cover a riser in a bathroom with plasterboard or other material so that it looks beautiful, but does not interfere with the maintenance of communications. Please note that a plastic box cannot be lined with tiles or any other finishing material, it is impossible even paint it. Therefore, immediately choose panels of a color and design that suits you.
Note! Many homeowners, when installing a pipe box made of moisture-resistant plasterboard with subsequent tiling, do not make an inspection window for fear of spoiling the appearance of the structure. However, now construction stores offer invisible revisions, which are tiled and do not stand out against the general background of the false wall. Very often, finishing craftsmen recommend erecting a false wall to hide pipes, risers and other communications from plastic panels.
They are lightweight, inexpensive, moisture resistant, easy to clean and easy to install.
- First, we install a masking box made of metal guides, plastic profiles or wooden blocks around the riser.
- Then we place a fixing strip for the panels along the top and bottom of the box.
- After this, carefully close the box with plastic panels.
- At the final stage, we glue the corners to the outer corners using silicone glue so that the structure looks neat.
Finishing
The final stage of constructing a box made of plasterboard sheets is its decorative finishing, which should protect the material from direct moisture and ensure an attractive appearance of the structure. Before its installation, perform the following preparatory work:
- The seams and fastening elements are puttied. To make the gaps between individual sheets of material less noticeable, use sickle tape, which is glued evenly. Then putty is applied, and after drying the surfaces are sanded with fine sandpaper.
- The outer corners of the box are processed. To do this, you will need metal corners, preferably made of galvanized steel. They are not subject to corrosion, do not form rust spots on the surface of plasterboard sheets during operation, and are resistant to mechanical damage.
- Before drawing out the corners, the metal corner is cut into pieces of the required size in accordance with the parameters of the box. Then putty is applied to each outer corner, distributing it in an even layer. The blanks are placed on top, carefully pressing them along the perimeter. To disguise a metal corner, it is covered with several layers of putty, each of which is applied after the previous one has dried. Upon completion, the surface is sanded.
- The walls of the box are made of plasterboard sheets. First, putty is applied to the material in an even layer and left until completely dry. Then the surface is sanded and coated with a primer.
As a decorative finish for a structure that hides utility lines, you can use different materials. However, when making a box, one of the main questions is: how to sew up the pipes in the bathroom so that they are completely invisible?
To achieve this effect, it is enough to use the same materials when decorating structures made of plasterboard and metal guides as when decorating the walls in the bathroom. These can be PVC panels, washable wallpaper or roll materials for painting, decorative plasters and moisture-resistant paint and varnish coatings. A structure made of plasterboard sheets and a metal frame can withstand some loads, so ceramic tiles or mosaics are used to finish its surfaces. The color scheme of the box can be combined with the design of the bathroom walls or be contrasting with them.
How to hide pipes in a toilet - popular methods
When renovating toilets, the question always arises of how to hide the pipes in the toilet. After all, the appearance of the pipeline creates the impression of “eternal repair. The building materials market offers many types of finishing materials that can disguise a technical unit. Such a box can be tiled and made invisible. The cost of creating a box from gypsum plasterboard will be slightly higher than covering it with plastic panels. One of the simplest designs. Drywall or plastic is useful for covering pipes.
This method is quite simple: just purchase a sheet of drywall, preferably moisture-resistant. The cost of one sheet is about 4.5 dollars. In addition to the gypsum board, you will need a profile.
It can be wooden or metal. It is better to choose a metal profile. It comes in two types:
- Guide. They form a contour and are attached at 4 corners, at a distance of at least 10 cm from the pipes.
- Wall. Serve to strengthen the structure.
If the height of the box is less than a meter, then you can do without them. After installing the frame, a sheet of drywall is attached to it using self-tapping screws.
Getting Started
Before we can cover the pipes with plasterboard, the following work must be carried out:
- Measuring work. They will require the appropriate tools, namely: a tape measure, a building level and a marker for marking.
- Cutting and preparing material. Here we will need to use the obtained measurements to construct a drawing and calculate how many profiles and gypsum boards will be required to build a box around the pipes. The next step is to purchase materials.
- In order to make a plasterboard box in the bathroom, you need to purchase the gypsum board sheets themselves, guide and supporting profiles, dowels with a wide edge for attaching the structure to the wall, plasterboard screws, screws for fastening to walls and floors, profiles, putty and spatulas.
- From the tools, take first a drill, then a jigsaw, a painting knife, the already mentioned spatulas, a container for mixing putty and a sealant for laying it under the guides. Don't forget about the die cutter too.
Helpful advice. Many people do not know about such a tool as a die cutter, but meanwhile it is a very useful thing when working with gypsum boards. The cutter connects structural elements from profiles to each other without disturbing the surface smoothness of the front side of the structure, which in turn guarantees a perfect fit of the sheets to the frame.
Before covering the pipes with plasterboard, it is necessary to seal them with insulation - this will reduce the noise characteristics of the structure.
There are certain subtleties that you need to know when doing the work of building this box. Let's look at all the stages of work:
- First, it is necessary to prepare the surfaces and communications themselves for future cladding. To do this, remove all dirt from surfaces where necessary, seal cracks and check the strength of all surfaces. Also carry out all the necessary work on tying up pipes, building junctions, etc.
Advice. Use pipe insulation, this will reduce the noise characteristics of the finished structure. Another option to reduce noise and protect the pipes is to fill the internal space with foam, but this option requires skill and experience, and in addition, after this you will no longer be able to gain access to the pipes.
- After this, proceed with the installation of the supporting structure. To do this, attach a guide profile to the walls and ceiling. All base surfaces must be hemmed with a guide type of profile, marked as UD. Keep the distance between fasteners within half a meter. Lay a sealing tape between the profile and the surfaces; this will provide additional insulation of the structure and reduce its vibration noise.
- To build crossbars, you need to use metal scissors and a die cutter. To do this, first mark and cut out the “U”-shaped elements of the lintels, opening the supporting profile from the inside to the outside, which will create petals with which the profile will be mounted to the structure. When everything is ready, use a die cutter and attach the structural elements to each other. The advantage of the die cutter is that the surfaces of the joined elements remain smooth, therefore, during further sheathing of the gypsum board there will be no swelling or distortion.
- Finally, everything is ready for sheathing with gypsum board sheets. Make a distance of at least three millimeters at the joints of the sheets; in the future, these places will be puttied. Attach them every thirty centimeters. If it is necessary to install a hatch for access to valves and meters, reinforce its edges with bars during the construction of the frame. This will increase the strength of the finished structure.
Rules for making a wooden frame for drywall
After the structure is sheathed, begin finishing work. Seal all the joints of the slabs with rough putty, then, without waiting for it to dry, cover them with sickle tape and apply the finishing layer of putty. Don't forget to also cover all screw caps.
An important detail: if in the future it is planned to cover the resulting structure with tiles, transverse load-bearing profiles must be placed every thirty centimeters for overall strengthening of the structure. And the gypsum board sheet itself must be at least twelve millimeters thick.
All that remains is to apply a layer of primer and finishing coat. Congratulations! The gypsum plasterboard box for pipes is ready.
Drywall box to hide the riser
- sewer risers with a cross-sectional diameter of 100;
- water pipes with meters;
- built-in installation for the toilet;
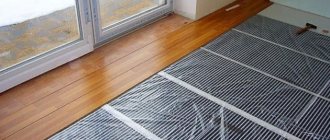
- comb (distribution unit) of heated floors;
- gas meter;
- technical points with supply valves, compensators, pressure reducers, compensators.
The edges of the plasterboard at the joints of the outer corners are trimmed with a plaster plane. This way they fit together without gaps. After this, finishing begins. Based on the diagram and markings, material calculations are made.
Please note that if the width of the toilet box for the riser is no more than 25 cm, you do not need to install crossbars. For a wall-mounted, non-corner structure, both outer corners must be exactly 90⁰. Double-check the marks, as correct assembly depends on them. Moisture-resistant sheets are used in the bathroom and toilet.
Drywall is cut out according to the size of the boxes. To do this, outline the dimensions, cut according to the marks with a construction knife and break it (you can find out how to properly cut a plasterboard sheet on our website). Sew up the box using 3.5 x 9.5 mm drywall screws.
It is better to purchase brass, oxidized fasteners; they do not corrode. This is the simplest and most accessible method of masking communications. With the help of plasterboard, structures of any type are created: one-, two-level. The advantage of this method is its simple installation. The disadvantages include the sometimes inorganic design of such structures.
In addition, they hide the space in the room. In this case, there is no need to place the plumbing fixture on top of the constructed structure. This will increase the height of the bath.
In addition, it is heavy, and the materials available for installation will not withstand such a significant load. To hide sewer pipes in the bathroom (or water communications), create a kind of podium around the plumbing fixture. An important point: in order to prevent deformation of the frame installation during seismic shifts, a special shock-absorbing tape is used.
It is applied to the areas where the working surfaces come into contact with the racks. The use of such a tape will help level out vibrations, preventing them from reaching the profile. This creates protection against destruction of the frame structure. The next step is to sew up the constructed base with gypsum fiber blanks.
Close attention is paid here to the following nuances: The choice of method depends on several factors: the size and direction of the pipelines, their location relative to each other, the presence of additional devices, etc. In a private house, everything is simpler if you take care of masking communications even before the project is implemented in life. Some pipes can be hidden in the walls, and technical hatches can be created for important components. Filters and metering devices are installed in a specially designated room - along with a pump and other equipment responsible for the water supply to the house.
First steps
Instructions for everyone who is going to transform the appearance of the sanitary room on their own:
- Make sure that all pipelines are free of damage and deformation.
- Check the tightness of all connections (if there are leaks, fix the problem before starting work)
- Clean the pipelines from previous coatings, remove rust, paint, if necessary, cover the pipeline with insulating material.
- In case of emergency damage, make a plan of your pipeline with connections and shut-off valves marked on it
- Before starting installation, plan the location of inspection hatches that would provide access to your communications during operation and in the event of emergency situations.
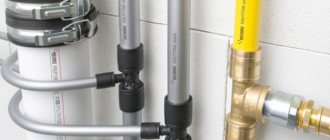
- Think, perhaps the best option would be to replace metal pipelines with modern polypropylene materials, which are not inferior in strength, but have a more aesthetic appearance, are less heavy and their price is acceptable for the average person.
Masking water pipes with free access
How to hide pipes in a toilet
After analyzing these features, it will not be difficult to decide on the type of future design. The most common are several popular types. A more reliable and thorough way to hide pipes compared to blinds. They have a similar mechanism: when the structure opens, the slats are collected into a roll or stack inside the box.
They take up more space, but if there is enough space, it is better to give preference to this method of disguise. Automatic models controlled by remote control are especially interesting. If you need to hide communications quickly, PVC panels will be the best choice.
This is a cheap and versatile finishing option. The main thing is to choose a color and pattern that will harmoniously fit into the overall picture of the interior. Before hiding pipes in the toilet, you need to carefully inspect the riser and other communications for damage and repair them if necessary.
You should begin preparing drawings and calculating materials for the future structure after all technical issues have been resolved. To accurately calculate raw materials, it is necessary to carefully make all measurements of the area on which the work will be carried out. The pipes can be left in sight and not decorated, if they look beautiful on their own. For example, metal communications in combination with plumbing fixtures made of the same material are perfectly combined and will fit into the interior of a restroom in the loft, techno or hi-tech style.
In a toilet with such furnishings they will become a source of pride. But such pipes are expensive, and there is a risk of getting burned.
How to properly hide pipes in the bathroom under tiles
The frame parts are fastened together with pull rivets or self-tapping screws. If the frame is made of steel without a protective coating, then after installation in place it is covered with two layers of anti-corrosion paint (can be lead or iron lead diluted in drying oil). The surface of the plastic shell is primed with an adhesion-increasing primer and finished with a mosaic, laying it on a white cement adhesive mixture or a polyurethane-based composition. The routing of water pipes to hide the water supply system is carried out along the walls before leveling plastering is carried out. So that the plaster layer for covering the pipes does not have to be made too thick, channels for the water supply are dug into the bathroom walls.
Using a grinder with a dry cutter, according to the markings previously made on the walls, parallel cuts are made at a distance of the diameter of the pipes used, after which the material between the cuts is cut out with a hammer drill or chisel with a hammer. This situation simplifies the solution to the issue, since installation “from scratch with a properly thought-out sequence of repair work allows you to renovate the bathroom with less effort and time. Select a thin-walled plastic pipe with an internal diameter equal to the outer diameter of the “K-Flex”, and make a cut along its entire length with a grinder.
The gaps between the pieces of the “K-Flex” shell around the circumference of the riser are filled with polyurethane foam and, without waiting for it to expand, a thin-walled plastic pipe cut lengthwise is placed on the riser, widening the slot.