Skirting radiators
This is a newfangled option when small radiators are installed around the perimeter of the apartment, at the level of the baseboard and disguised as worthless.
The main disadvantage will be this very plinth, it is wider and higher than ordinary plinths, and therefore there will be a small side around the perimeter of the room, which will not allow the bedside table or bed to be pushed completely against the wall. Agree, it’s very inconvenient when all the objects in the room stand 3-5 centimeters from the walls.
The advantage will be a more uniform heat distribution compared to radiator batteries. There will be no warm or cold corners in the rooms and it will be more pleasant to be in such a house.
Heat exchanger advantages
The heating element in the heating system installed in the furnace has its advantages. Among the main advantages are the following:
- Easy to manufacture and install.
- Combined heating appears in the house, which makes it possible to heat large areas, and not just one room locally.
- Possibility to use different types of fuel. For example, boilers are focused only on a specific type, and the stove can be heated with any solid energy carriers.
- The stove gives the interior a special charm and comfort, and thanks to the new function it will bring even more benefits.
Despite the obvious advantages, it should be noted that in comparison with factory-made boilers, the efficiency will be lower; in addition, there is no automatic control of the coolant heating temperature. At the same time, the cost of factory boilers is not affordable for everyone, and making a heating system with your own hands using a homemade heating element is within the power of everyone.
Advantages and disadvantages of heating from a stove
Stoves with a water circuit are easy to make yourself, but you can purchase ready-made heating devices in the store. The models are characterized by the following advantages:
- Furnaces with a water circuit do not need to be connected to electrical networks. They do not use gas as fuel. The devices run on coal, peat and wood, which are renewable fuels.
- Stove water heating is completely autonomous, but it can be combined with other systems.
- Adjustment is carried out using a manual valve.
- The walls of the furnace are massive, they transfer heat, heating the air and surrounding objects. The room is heated evenly due to the use of coolant. It passes through the pipes, heating them and radiators.
- Heating a private home will not require large expenses. Coal, peat and wood are available to everyone.
- Stoves not only heat the room, they are used for cooking and heating water.
- Devices, the front of which is covered with glass, allow you to contemplate an open flame. Fireplaces create a comfortable atmosphere in homes.
- The design of the stove is massive; during the cold season it accumulates a large amount of thermal energy. The stove cools down gradually, so it heats the room for a long time after the fuel has burned out. In summer, the processes proceed in the opposite way. If the stove in a wooden house is built on a separate foundation, during the warm season it releases excess heat into the ground, working as an air conditioner.
- The natural fuel on which the stove operates moderately pollutes the environment.
- Water is used as a coolant. It has a volumetric heat capacity, which allows heat to be transferred over long distances. Water is affordable. It does not burn, is not toxic.
But furnaces with a water circuit also have disadvantages. They must be constantly monitored, firewood must be placed in time and the draft must be adjusted. The chimney should be cleaned and the ash removed.
A powerful brick oven is large in size, so it is placed on a solid foundation. It takes up the usable area of the room, which is why large structures are installed in spacious rooms. Such a furnace has low efficiency.
When installing a stove, you need to build a chimney. The draft must be strong, then the fuel burns intensely and the smoke is quickly removed outside. The pipe is isolated from the wooden elements of the roof and ceilings. Having installed a stove in the house, it is necessary to maintain a fuel supply and dispose of ash and slag in a timely manner. This adds more work to the owners of a private home.
The main disadvantage of water heating is that the water freezes quickly. Turning into ice, it expands, damaging devices. Combining with air, it promotes corrosion on the metal elements of the heating system. If the water is hard, scale will form inside radiators and pipes.
Functional features of heat exchangers
Before you start making a heat exchanger, you should understand the nature of the function it performs in the heating system. The operating principle of this device is implemented in electric boilers, gas and solid fuel. The heat exchanger is a structure of curved pipes that are placed inside the heating equipment and heated by an energy source.
A coolant passes through the pipes of the heat exchanger, for example, water, which is heated and sent to the radiators; cooled water from the batteries takes its place and is heated again. This way the house is heated. Gases can be used as a coolant, then the recuperator will work as a heating element. However, in residential buildings such a device is used extremely rarely.
By installing a heat exchanger in the stove, you can get a complete heating system.
Making a heat exchanger with your own hands
It is not always possible to buy a ready-made furnace project with a heat exchanger. Also, not everyone can weld themselves. But building a heat exchanger for a heating stove with your own hands is not such a difficult task. By using aluminum or copper you can avoid welding work. With good preparation and correct calculations, this is possible and not burdensome. In addition, it saves the family budget.
Consumables
Having chosen the location and size, it is worth considering what is easier to build a heat exchanger from. You can use both the materials listed above and cast iron radiators, car radiators, and the like. The main thing is to correctly take into account thermal conductivity. Think through exactly what tool you will need and prepare it in advance. All these little things will make installation easier.
Assembly algorithm
You need to start with the project - thinking through the little things and selecting options. It is worth starting from the size - if the stove is weak, then a disproportionately large heat exchanger will only do harm. If you use copper as a pipe for the coil, then the length should not exceed three meters.
The simplest manufacturing option is a coil. It will require a copper pipe from 2 m to 3 m long.
The heating rate depends on the length of the pipe and the number of turns. But it’s worth remembering that you need to take into account the size of the stove and firebox and not overuse the enlargement of the coil. Distortions in size reduce the service life of the furnace.
To twist the pipe into a spiral, you need a template. This is any cylindrical auxiliary part. The diameter of the template must fit into the combustion chamber size.
Having prepared the materials, let's start:
- Bending the pipe, we wind it onto a prepared blank to obtain a spiral;
- We observe the dimensions in which the coil must be placed;
The average design power of the heat exchanger is 1 kW per 10 meters of area.
If you are not satisfied with this type of heat exchanger, you can make another type, for example by welding steel pipes. It looks something like this:
Examples of drawings on which to carry out work:
How to install?
It is convenient to install a heat exchanger in a stove when laying a new stove. This will allow it to be completely installed, observing all the gaps and dimensions. With this installation it is easier to maintain the correct size. Having mounted the heat exchanger on the foundation of the furnace, it is easier to cover it with bricks than disassembling the finished furnace and trying to fit it into place. But this is also possible.
There are also important points and requirements that should be observed to increase service life:
- Do not fix structural pipes with metal fasteners;
- Do not fill with ice water to avoid condensation;
- maintain the proportions between the furnace and the heat exchanger, avoiding large differences;
- use sealing materials with high heat resistance;
- fully comply with all fire safety measures;
Simple rules will help you avoid dangerous situations and help extend the life of the stove. Don't forget about fire safety.
Examples of installation in the photo:
How to make it yourself
There are several types of heat exchangers, each of which has a special production technology.
Manufacturing using the pipe-in-pipe method, connection features, diagram
The device works on this simple principle: hot liquid passes through a small-diameter pipe, and heat is transferred through the walls of the pipes to water , which is located in the cavities of the larger pipe. In this way, thermal energy is transferred and liquids that are inhomogeneous in nature, for example, oil and water, are not mixed. This type of unit is easy to manufacture and operate.
Photo 1. Diagram of a pipe-in-pipe heat exchanger. The direction of movement of the coolant is indicated.
Tools and materials
- two two-meter copper pipes, with different diameters - 102 mm and 57 mm;
- two tees with angles of 90 degrees , the diameter should be equal to the larger pipe;
- two short pieces of pipe suitable for the size of the tee;
- electric or gas welding, a powerful soldering iron with copper solder is also suitable;
- grinder, cutting disc;
- roulette.
Manufacturing process
- A tee is welded to the profile of a larger diameter pipe on both sides , which should be positioned on the side so that a smaller pipe can be inserted there.
Reference. When connecting such a design, it is recommended to place the heat exchanger in a horizontal position, the liquids should circulate in different directions, this will increase the efficiency.
- After a product of smaller diameter has entered the tee, it is boiled from the ends.
- pipes are welded to the free edges of the tees , which are intended for supplying and discharging heating fluid.
Air plate
The device is installed in a gas heating system. The principle of operation is to transfer heat energy from a gaseous coolant to a corrugated plate structure, which will heat the liquid in the pipeline.
This type of device is also suitable for transferring heat from one liquid to another.
Tools and materials
- welding equipment;
- Bulgarian;
- two sheets of stainless steel (corrugated), thickness 4 mm;
- 1 flat sheet of stainless steel, thickness 4 mm ;
- electrodes.
Work order
- A sheet of corrugated steel is cut into equal squares with sides of 30 cm. For the design you will need 31 squares.
- Cut ribbons from a flat sheet of stainless steel. Width 1 cm , length 30 cm. The total length of the parts should be 18 meters - you get 60 pieces.
- Weld squares of corrugated material together using a strip
1 cm
- . The connection goes through
two opposite sides of squares
- , the sections are located perpendicular to each other.
In one cube-shaped case, there should be 15 sections that face one way and 15 the other.
Thanks to the corrugated surface, heat is transferred efficiently from one medium to another without mutual movements of different or homogeneous coolants.
- In cases where heat will be transferred using a coolant liquid, it is recommended to weld the collector. It is better to make the distributor from stainless steel. To do this, you will need to use a grinder to cut rectangles 30x30 cm (2 pieces) and 30x3 cm ( 8 pieces) from a steel sheet. From this set of parts, two collectors that look like a square lid from a box.
- Make a hole in the collector for the pipe, which will serve as a connection to the heating pipeline.
- The hole on the collector is made closer to one of the corners. When installing it on a heat exchanger, the location of the inlet pipe should be at the bottom of the unit, the outlet pipe is always located at the top.
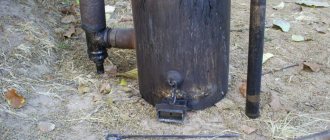
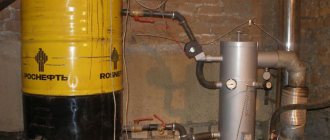
Water heat exchanger for furnace
An ordinary wood-burning stove can heat an entire house if it is connected to a water-based heating system.
Tools and materials
- meter steel pipe, diameter 32.5 centimeters;
- iron pipe - 6 meters , diameter 5.7 cm;
- steel sheet 4 mm thick;
- welding machine;
- gas cutter.
Work order
- Place a meter-long piece of pipe with a diameter of 32.5 cm
- Cut a hole of the required size with a gas cutter. Using the model of the metal circle, cut out a second similar circle.
- Cut five holes with a diameter of 5.7 centimeters. The holes should be spaced evenly in relation to each other, also from both the middle and the edge of the surface. Weld the discs to the pipe cylinder and try to ensure that the holes are parallel.
- 5.7 mm product using a grinder into 1 meter . Five segments will be required
Photo 2. Diagram of a water heat exchanger for a furnace. It is a cylinder containing pipes of smaller diameter inside.
- Each part of the pipe is mounted in a hole; it is necessary that the pipes extend beyond the holes by 1 millimeter . The device is welded using electric welding. The result should be a structure in the shape of a metal cylinder, inside of which there are smaller tubes. Hot air and smoke will flow through this pipeline, the pipes will heat up and accordingly heat the coolant liquid inside.
- In order for the liquid to circulate inside the metal system, small sections should in the lower and upper parts . At the bottom of the unit, cold water will be supplied through a pipe, and through the top pipe it will be directed to the heating mechanism.
Design features
Most often, a metal tank with a capacity of up to 5 liters with built-in pipes acts as a heat exchanger. There is no direct contact with fire. The device allows you to heat cold water, which then flows into radiators or a removable tank of larger capacity located in the same or an adjacent room.
As a result, by heating the stove in one room, it will be possible to heat another. According to its design, the heat exchanger for a furnace can be external or internal.
External
This type is very similar to a tank filled with coolant. Inside the container there is a part of the pipe used to remove combustion products. In terms of its design, the external heat exchanger is more complex than the internal one, as it places increased demands on welding work.
However, its maintenance is much easier. If necessary, the tank can be dismantled to remove scale or eliminate leaks.
Interior
Mounted above the firebox directly inside the stove. It is easy to install, but if maintenance is necessary, certain difficulties may arise. Especially if the stove is made of brick.
To avoid this, at the time of design development it is worth taking care of the maintainability of the future heat exchanger.
Primary heat exchanger repair
The exchanger deteriorates due to poor quality coolant or the materials from which it is made, as well as other factors. Pressure, high temperatures and their differences lead to cracks, which is why the element begins to work less powerfully and breaks down over time. The life of the heat exchanger can be extended if purified water is supplied and the boiler is not overloaded.
We recommend: Copper pipes for heating: price, features, advantages and disadvantages, popular manufacturers
It will be more difficult to eliminate cracks than clogs. The heat exchanger is soldered for this purpose. Select solder from the same material as the unit itself. Boiler heat exchangers are usually made of copper, less often cast iron or steel. Aluminum, silicon, manganese, nickel and zinc are added to the composition.
Leaks on the primary heat exchanger can occur due to exposure to flames, water hammer, and in some cases they are caused by corrosion
Additional solder requirements:
- melting point not lower than 700 °C;
- sufficient viscosity;
- fluidity is the same as that of a heat exchanger.
Copper-zinc solders are considered one of the best. They are used for soldering most non-ferrous metals with a higher melting point than the support material itself. Solders with inclusions of silicon or tin - up to half a percent - are safer for the human body.
It is better to avoid copper-phosphorus materials, and if exchangers are soldered with them, do so without any load such as shock or vibration. Well-chosen solder is half the battle.
Heat exchangers are soldered with gas burners and blowtorches. Before soldering, the desired area is cleaned with fine-grained sandpaper and wiped with a rag with a solvent, and then heated. The area is heated with a hairdryer or a weak burner/soldering iron. At this moment, the main thing is to get into the temperature corridor and take into account subsequent cooling. Barely noticeable damage is found by small greenish spots.
Before heating, the water is drained, and its remains are removed with a compressor or blown out through a flexible hose. The hose is fixed by thread if it has a union nut and the design features allow this. If you leave water, it will take away part of the thermal energy.
Solder spools: At high temperatures, the material wets the base and spreads across it, gets into the smallest gaps and stretches, resulting in an intermediate layer of base and solder combination
Solder is preferred in the form of a wire or rod: when soldering, the molten end will be well immersed in the flux, which will stick to it. If the wire lays on the exchanger itself too intermittently or loosely, the preheating was weak. After work, the soldering area is sometimes coated with heat-resistant paint for better insulation.
Over the next two weeks, the soldered area is checked daily for integrity. At the first detected leak, you should contact a specialist. If it appears in the first fortnight, it means the soldering was of poor quality.
The flux is suitable for universal use, as well as gel soldering flux. Avoid rosin, unusual options like aspirin and others.
Making a homemade heat exchanger
To make a heat exchanger with your own hands. many nuances must be taken into account. Only after carefully considering all stages of work, the end result will be a device that can provide the optimal temperature in the house. The main advantage of a device made by yourself is that the price of such a product is much lower, because you will only have to spend money on purchasing materials.
To ensure the maximum level of heating at home, it is necessary to choose the right material for the heat exchanger. Each metal has its own level of thermal conductivity. For copper, this figure is 7 times higher than for steel, so 2 pipes of the same diameter can provide different levels of heating. Therefore, copper is the best option for such a device. The price of this material is quite reasonable.
As for determining the power of the heat exchanger, these calculations are quite difficult. This is due to the fact that too many factors influence this indicator. However, on average, one meter of coil with a diameter of 50-60 mm is capable of producing 1 kW of thermal power. This indicator can be used as a starting point when making calculations.
Design features when making it yourself can be very different.
You can weld a pipe in the form of a coil or a regular rectangle, but there is a list of rules that you should definitely pay attention to:
- The diameter of the inner part of the pipe should not be less than 5 mm. Otherwise, the water may simply boil.
- To prevent overheating of the metal, the wall thickness must be at least 3 mm.
- There should be a gap between the walls of the firebox and the heat exchanger, the size of which is 10-15 mm. After all, metal tends to expand.
A water heat exchanger has these basic rules. Its manufacture (with proper welding skills) will not be difficult. The right approach to your home heating system will ensure comfortable living conditions.
Be sure to read these materials:
- Chimney pipe in a bathhouse
- Heat exchangers for hot water supply
Tips and tricks
- It is important to design a heat exchanger correctly , calculate economic efficiency, the percentage of hydraulics, indicate heat losses, calculate the design according to the geometric parameters of the unit and its components, and calculate the thermal insulation of the device.
- simpler design for making it yourself
- You can connect the heat exchanger to the system using fittings , place one at the bottom for cold water inlet, the second at the top for hot water inlet.
- When installing the exchanger, install the pipes at a slope according to the diagram.
- When installing the unit to a furnace and using coal for combustion as a material for the exchanger, it is better to choose cast iron; it is durable and fireproof.
- To make an exchanger with your own hands, take any model as an example and follow its parameters.
- When using the stove for heating and water supply purposes, the exchanger should absorb no more than a tenth of the heat generated.
- Pellets are good fuel and cheap in price, they do not emit soot, which is very important for cleanliness.
- Check the seams at the exchanger , you must not allow them to leak; under pressure or high temperatures, the entire structure can become unusable.
- Make the calculations correctly , otherwise your work will cost you dearly.
- A heat exchanger of the pipe-in-pipe type is easy to clean , lasts a long time, is simple to manufacture, and can operate under pressure. It is considered the most acceptable option for making it yourself.
As you can see, making a heat exchanger yourself is not difficult. For a simple design, a tank, two copper tubes of different diameters, a coil and a fan are enough. Thanks to the device, you can not only heat the room, but also cool it.
If you wish and follow consistent steps, you will assemble a design no worse than a store-bought one, the house will be warm and cozy, and the device will work flawlessly for a long time.
Greetings to all! I needed a liquid heat exchanger. I looked for ready-made solutions and was surprised by the prices... I decided to try it myself. Fortunately, all the materials were found at work. There are not many photos, but the essence is clear. I'm waiting for comments)).
Things to remember
With natural circulation of the coolant, the heat exchanger should be placed above the furnace at a distance of 1.5 - 2.5 m. Due to the constant change in geometric parameters, the pipes cannot be fastened to the wall tightly enough. It is necessary to provide a small gap.
It is important to remember that if the stove is used not only to heat the house, but also to heat water, a maximum of 10% of the total amount of heat generated should go to the heat exchanger. When using a structure with an expansion tank for heating, the volume of the latter should be selected so that the water in it can heat up to the required temperature in two hours
The return pipes should have a smaller diameter than the coolant supply pipes. The material intended for sealing threaded connections is selected with a sufficient level of heat resistance.
If the house is not intended for permanent residence, but is used only from time to time, then it is better to refuse water heating. It is advisable to fill in special antifreeze instead of water if you plan to heat a stove with a heat exchanger in the cold season. This will prevent pipes from bursting. Remember that adding coolant when the furnace is fully heated is unacceptable.
How to make your own device
It’s easy to make a simple coil yourself from a copper tube. For a chimney with a diameter of 100 mm, a copper pipe with a diameter of ¼ inch and a length of 3-4 m is suitable. Threaded fittings should be soldered to the ends of the pipe. Then the tube is filled with fine sand, twisted and wrapped around the chimney.
It is advisable to leave a small distance between the turns - then the pipe from the chimney will be heated by both heat transfer and infrared radiation. It is convenient to do this work with an assistant. The sand is then washed out of the pipe with water under pressure. Connect the pipes leading to the radiators and expansion tank.
The Kuznetsov heat exchanger is made using welding. The simplest option is to make a housing from a gas cylinder or large diameter pipe.
For manufacturing you will need the following materials:
- Gas cylinder, large diameter pipe (300 mm) for the housing.
- Pipe with a diameter of 32 mm (it is better to take one piece with a larger diameter - up to 57 mm). The length of the blanks is 300-400 mm, the total quantity should be sufficient for cutting the blanks.
- Two small pipes of the same diameter as the chimney; It is advisable to use a chimney pipe - if the chimney is prefabricated, then on one side of the structure the pipe will have a socket, which is necessary for installing the heat exchanger.
- Two pieces of steel sheet, sufficient to cut out the end caps of the housing.
Air heat exchanger manufacturing technology:
- A large pipe or cylinder is cut to the required size.
- 9 blanks of the same length are cut from thin pipes.
- Circles are cut out for the plugs.
- 9 holes for small diameter pipes are cut in the circles; if one tube of larger diameter is taken, then a hole for it is cut in the center.
- Thin pipes are inserted into the holes of the plugs, attached by welding, and then welded.
Holes with a diameter equal to the diameter of the chimney are cut in the sides of the body.
A structure of thin tubes and plugs is inserted into the body and welded at the junction of the plugs and the body of a large pipe.
The pipes are inserted into the holes on the sides of the body and also boiled.
What materials can be used
The ideal option is stainless steel (for example, food grade austenitic stainless steel 08Х18Н10 or AISI 304) or copper. Industrially produced products are sometimes made from titanium. But the price of these materials is quite high. But they are durable, do not rust, are reliable and durable. If you have a potbelly stove in the garage or a homemade heater from scrap materials in the bathhouse, it is quite possible to use ferrous metal (carbon steel).
You can use a high-quality corrugated stainless steel pipe. Galvanized corrugation is an undesirable and short-lived option. Aluminum pipes can also be used for the coil (just not for chimneys of solid fuel stoves).
Sometimes galvanized steel is used, but it should be borne in mind that during welding work the zinc layer evaporates, and all the advantages of galvanizing (corrosion resistance) come to naught. At temperatures above 400 °C, zinc begins to evaporate (zinc vapor is toxic), so you should not use galvanization for heat exchangers on the chimneys of solid fuel boilers.
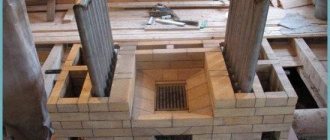
Instructions for building a stove heating system with a water circuit
- A hole is being dug.
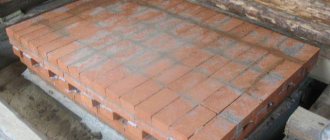
- A “cushion” is laid, consisting of broken bricks, crushed stone and medium-sized rubble. The width of this layer is approximately 20 cm. Natural materials are compacted and filled with cement mortar.
- Bricks are being laid. It is laid in two rows on cement, and covered on top with a waterproofing layer of roofing felt, parchment and roofing felt.
- A brick foundation is being built with clay mortar.
- The first continuous row is laid. In the second row, an ash chamber begins to form, for which a special door is installed. The third row repeats the previous one.
- The fourth row is formed. It serves as the basis for the fuel chamber made of refractory bricks; grooves are provided on it for installing the grate.
- A U-shaped boiler made of steel is installed. Two pipes are welded to it - one at the top for supply, the other at the bottom for return. It also has a rectangular hole through which heated gases will escape.
- The fifth row is laid. It is necessary to provide channels behind the side and rear walls of the boiler. Two small doors are installed on them to remove soot.
- A sixth row is formed, in which a hole is provided between the gaps made in the previous row. This is a suction channel to increase draft in a heating furnace. The door for the fuel chamber is also installed here.
- The wall is being laid out. It should be taken into account that fire-resistant bricks are laid around the door leading into the combustion chamber and above the fuel boiler.
- Cast iron stoves are being installed on which food can be cooked. A metal corner is attached to the entrance of the heating and cooking chamber.
- Chambers are formed, a channel is made on the back surface, and doors are installed.
- The facade of the cooking chamber in the 16th row is covered with a metal strip. And then it itself is covered by laying bricks on specially laid metal strips.
- A steam exhaust valve is installed to ventilate the furnace and an upper flue is formed.
- 35 rows are laid, on which the construction of the chimney begins.
Some people want to use a ready-made stove or fireplace, combining it with a water circuit. In this case, you will have to disassemble them almost to the ground in order to install the register.
Mayevsky crane
Heat exchanger structure
You can make a heat exchanger with your own hands at home.
The equipment consists of fixed and movable plates, each with holes for the movement of the medium. Many other smaller secondary plates are installed between the main plates, so that every second of them is rotated 180 degrees to its neighbors. The secondary plates are sealed with rubber gaskets.
The second important element of maintenance is the coolant. It flows through corrugated stainless steel channels. Cold and hot media move across all plates, except the first and last, simultaneously, but from different sides, preventing mixing. At high water flow rates, turbulence occurs in the corrugated layer, which increases the heat transfer process.
The device is connected to the pipeline using holes on the front and rear walls. The coolant enters from one side, passes through all channels and leaves the equipment on the other. The inlet and outlet holes are sealed with a special gasket.
The plates that form the channels are a very important element of maintenance. When choosing a heat exchanger, its performance characteristics must be taken into account. The higher the requirements for the equipment, the more plates it must contain. Their number is responsible for the overall efficiency of the device and the ability to heat a certain room.
Water circuit installation process
Register for water stove heating
For efficient operation of equipment for a heating water system, it is necessary to install a so-called register, which is a boiler or heat exchanger. It is also often called serpentine. Such a register is placed in the stove firebox.
A water stove heating scheme for a private house consists of the following elements:
- combustion chamber;
- ash pan;
- sealed oven door;
- hatch for cleaning the oven;
- special surface for heating the oven;
- injector;
- gate;
- cutter;
- convection pipes;
- grate
When making a container yourself, it is important to take into account that only welding is used to connect parts. When connecting heating pipes, you need to use special connection elements in the form of fittings, couplings, etc.
Using this type of design for your home will make it possible to save money on a boiler, for which the manufacturing materials will cost much less than if you buy a ready-made one. The best option is to use a regular metal pipe for water heating, in which holes are simply made for the outlets and inlets of the pipeline.
Washing methods
There are simple variations that practically do not involve any expenses, there are budget ones with minimal investments, and professional ones - they cost much more, but are highly effective.
How to flush the secondary heat exchanger of a gas boiler in one way or another? And when is it logical to use them. It all depends on the volume of deposits.
In the simplest situation, mechanical cleaning is sufficient. The outside of the VT ribs are cleaned. The work uses any hard brush, spatula, scraper or cable. It is very important here not to damage the plates.
The second method is washing with a special composition. In practice, it is combined with the first method and follows immediately after it.
The part is placed in a container with an acid mixture. Type of acid used: hydrochloric or citric. Suitable proportions: 100 grams per 10 liters. Water.
Acids can be replaced with any anti-scale preparations. After 30-40 minutes, the VT is removed from the container. The remaining scale is carefully wiped off.
At the same time, the coil is also cleaned. A special steel brush is used here.
The third method is chemical. More aggressive substances are pumped through the VT using a special pump. It attaches to the pipes of the part.
We recommend: Rinnai double-circuit gas boilers: instructions and technical specifications
Suitable tools for the job are shown in this table:
| Facilities | Description | Proportion to water: grams: liter | Water temperature | Product price (RUB) |
| Lemon acid | Popular folk remedy | 100 : 10-12 | 50-70°C | 50 – 1 sachet. |
| Thermagent Active | A versatile liquid with a powerful effect | 1 : 9 | 40-50°C | 1500 – 10 kg canister. |
| STEELTEX Cooper | One of the most effective preparations, but suitable for working with light alloy parts | 1:6 to 1:10 | 40-60°C | 1300 – 5 kg capacity |
| Detex | Concentrate with effective biological substances. Excellent cleaning of steel, cast iron and copper parts | 200-500 :10 | 40-50°C | 4900 – 10 l canister. |
| Hydrochloric acid | Effectively removes heavy scale | 100 : 10 | 50-70°C | 50 – 1 kg |
A hose is placed in the container with the mixture almost to the very bottom, one side connected to the VT, and the other to the pump. This creates the necessary circulation. The procedure lasts 30-40 minutes. Then the part is thoroughly washed with plain water.
The fourth method does not involve extracting the component. This is a hydrodynamic flushing of the secondary heat exchanger of a gas boiler. But it is carried out only by professionals. This requires special technology and compliance with safety criteria.
Its principle is to run a special composition through the boiler system under powerful pressure (1.5-2 bar). The work is done by a booster. Abrasive elements are added to the cleaning liquid.
This is the most effective method, gently removing all deposits and cleaning the part to a commercial appearance.
If you doubt the success of self-cleaning, you can order this service. All operations are carried out within a day. Their price tag is determined by the following factors:
- region,
- power and boiler modification,
- company's markup,
- the equipment and chemicals used.
In Moscow and the central region, clients pay about 3,500-9,000 for services. In St. Petersburg - 3,000 - 7,000 rubles. In other regions: 1700 – 4500 rubles.
Is it possible to install a heating register in an existing furnace?
It would be more correct, of course, to build the furnace around the manufactured register. But, if the stove is already standing, you can still build a water circuit into it. True, you will have to try hard - they are of considerable size and must somehow hold on. So the task is not an easy one. In addition, do not forget that you will have to make two more conclusions - to connect the supply and return pipelines.
The best option is to make a water jacket under the shape of the stove (this one is for a metal stove with burners)
Finding a place to locate the register is also not very easy. Its direct contact with fire is very undesirable, but it should be in an environment of hot gases. In this case, you can hope that the heat exchanger will last a long time.
How to calculate a heat exchanger
It is necessary to make a calculation of the coil heat exchanger, otherwise its thermal power may not be enough to heat the room. The heating system is designed to compensate for heat loss. Accordingly, we can only find out the exact amount of thermal energy required based on the heat loss of the building. It is quite difficult to make a calculation, so on average they take 100 W per 1 sq. m. with a ceiling height of 2.7 m.
There must be a gap between the turns.
The following values will also be required for the calculation:
- Pi;
- diameter of the pipe that is available (take 10 mm);
- lambda of metal thermal conductivity (for copper 401 W/m*K);
- delta temperature of supply and return coolant (20 degrees).
To determine the length of the pipe, you need to divide the total thermal power in W by the product of the above factors. Let's look at the example of a copper heat exchanger with a required thermal power of 3 kW - that's 3000 W.
3000/ 3.14 (Pi)*401 (thermal conductivity lambda)*20 (temperature delta)*0.01 (pipe diameter in meters)
From this calculation, it turns out that you will need 11.91 m of copper pipe with a diameter of 10 mm for the thermal power of the coil to be 3 kW.
Advantages and disadvantages
Designs with a built-in heat exchanger have many advantages:
- The system is energy efficient and economical. Brickwork will not require serious financial investments, the costs for pipes and radiators will be in any case, and the heat exchanger is an order of magnitude cheaper than ready-made boilers. When operating a stove, the cost of heating the house will be several thousand rubles for the purchase of firewood for the winter period.
- The design of a brick stove hides unsightly elements; if desired, a fireplace or decor can be added to the system.
- Heating of the room does not depend on the location of the structure; radiators can be installed anywhere
- A brick stove takes a long time to cool down; the water circuit will remain hot for several hours after the wood burns out.
Some publications list the advantages of the water circuit system as the possibility of installing it in a ready-made furnace, which is possible in principle, but in practice this option is associated with a large number of problems that have to be solved.
Disassembling and subsequent reassembly of the stove is the most necessary thing that will have to be done. The cost of correcting an incorrectly installed register is comparable to the cost of a new stove, so contact professionals for such work.
The disadvantage of this design is a continuation of its advantages; in order to make a stove with heat exchangers yourself, experience is required, both in laying bricks and in installing heating systems. If experience comes with age and the amount of material studied, then when building a furnace with a water circuit, its disadvantages should be taken into account:
The fireplace is a fire hazard; it is necessary to take measures to prevent fire from reaching flammable objects; The stove takes up a significant area of the house, design the rooms in advance, include a large heating system in the design of the room; The temperature near the stove will always be higher than in the rest of the room; The heating process of the oven cannot be stopped instantly. If you are using a closed loop system with a circulation pump, turning off the electricity (even briefly for a few minutes) and stopping the pump will cause the water in the heat exchanger to boil. To avoid this, provide a combined system for water movement in the circuit. If the heating system is not used regularly, the water must be drained, which leads to premature wear of the entire structure. Otherwise, the water will freeze, which will lead to the destruction of the entire complex of devices. You cannot light the stove without water in the circuit.
This will lead to the destruction of the register and the reconstruction of the stove in order to use the stove in the summer without “turning on” the battery using the original design of the installation of heat exchangers. There is a risk of carbon monoxide poisoning, as with all solid fuel heating products, special attention must be paid to the correct manufacture of the chimney.
Making a heating system in your home based on a stove with a heat exchanger and batteries is an economically viable solution, but the design and construction must be approached competently, taking into account all the nuances of the work.
System design
So, the purpose of the device is to transfer temperature from one environment to another. Heat sources and coolants can be various liquids, gases and steam. Unstable media are separated by a material that has a suitable thermal conductivity for this purpose. The simplest example of a heat exchanger is an ordinary room radiator. The heat source is heating water. The heated medium is the air in the room. And the separating material is the metal from which the radiator is made.
A big role in which intermediate material to use is its degree of thermal conductivity. The leaders in this indicator are silver and copper. But for obvious reasons, copper is most often used.
Heat exchanger device
Copper is 7.5 times better at transferring heat than steel, and plastic is 200 times worse than steel. It turns out that, other things being equal, 1.7 meters of copper, 12 meters of steel and 2000 meters of plastic pipe will transfer the same amount of heat.
Flaws
Despite many advantages, the installation of a heating element on a chimney pipe also has disadvantages. One of them, the most important, is a sharp decrease in the smoke temperature at the installation site of the heat exchanger. This can lead to deterioration of traction and the formation of condensation, increased soot deposition inside the pipe.
In addition, when connecting a heating system, for example, a garage, you need to calculate the volume of coolant to avoid boiling water and bursting pipes. Welds must be completely sealed.
Any heat exchanger design significantly increases the efficiency of the furnace. For trouble-free operation of the system, it is necessary to carry out a visual inspection of all its elements at least twice a year, and, if necessary, timely repairs, descaling, replacement of gaskets and other necessary maintenance work. In this case, water heating and heating systems will operate flawlessly for a long time.
How to make a booster for flushing a heat exchanger
The booster consists of a reservoir, a pump for water circulation and an electric heating element. There is no need to disassemble the heating boiler for flushing, just disconnect the pipes, connect a hose to one of them and pump a chemical solution through it into the unit. The solution will pour out through the other pipe, but you also need to connect a hose to it.
Of the chemical reagents, hydrochloric and sulfuric acid are mainly used; phosphoric and nitric acid can also be used.
Cleaning the heat exchanger is not difficult, but it is necessary to follow safety precautions, that is, first disconnect the device from the power source, be it gas, water, or electricity. Dismantling must be done carefully; a damaged seal can lead to leakage of the structure, and the equipment will quickly fail.
How to make a homemade heat exchanger
Multi-pipe register
The shape of a heat exchanger for heating made by yourself can be different. The most common option is a register made of several steel or copper pipes, but plate-type examples are also used.
The temperature in the combustion zone is very high, especially when burning coal. Therefore, increased demands are placed on the metal from which the heat exchanger elements will be made, the rationality of its design and the quality of the welds.
Materials for production
An example of using cast iron radiators as a heat exchanger in a brick oven
The task of water heat exchangers for heating is to ensure optimal heat transfer, and in this process the degree of thermal conductivity of the metal is important. For example, a steel pipe conducts heat 7 times less than a copper pipe. Therefore, with the same pipe diameter, to transfer the same amount of heat, you will need 25 meters of steel pipe instead of 3.5 meters of copper.
Copper heat exchangers are the most economical to operate, but also expensive. Heat exchangers made of steel pipes with a diameter of at least 32 mm are considered more affordable for self-production.
If you plan to heat the stove with coal, it is better to install a heat exchanger made of cast iron. This metal is stronger, and the walls of the device will not burn out for a long time.
Heat exchanger power calculation
It is quite difficult to calculate in advance the power of the heat exchanger for a heating system. To do this, you need to take into account too many factors: pipe diameter, coil length, thermal conductivity of the metal, fuel combustion temperature, coolant circulation rate, etc. The real ability of the heat exchanger to cope with its functions will become clear only after the heating system starts operating.
When calculating, you can estimate that 1 meter of pipe with a diameter of 50 mm, serving as a heat exchanger, will provide 1 kW of thermal power.
You can take as an example any well-known boiler model and, in accordance with its parameters, make your own homemade heat exchanger.
Design Features
A heat exchanger for water heating of a house, welded from smooth-walled pipes, is called a register. It looks like a kind of “grid” and is the most popular form of homemade heat exchanger. In addition to this design, simpler devices are also made in the form of a rectangular or cylindrical tank. The main thing is that the surface area for heat exchange is as large as possible.
When making a heat exchanger with your own hands, several conditions must be observed:
- the width of the internal voids in the heat exchanger must be at least 5 mm, otherwise the water in it may boil;
- the thickness of the pipe walls must be at least 3 mm so that the metal does not burn through;
- a gap of 10–15 mm between the heat exchanger and the walls of the firebox should compensate for the expansion of the metal when heated.
Installation features
The heat exchanger is installed inside the furnace during its laying
The easiest way is to install the heat exchanger simultaneously with the construction of the furnace. If you install it in an old stove, you will have to dismantle part of its brickwork.
- A tubular heat exchanger is installed on the prepared furnace foundation directly into the furnace cavity.
- When further laying rows of bricks, space is left for the inlet and outlet pipes of the device.
- After completing the laying of the stove, connect the heat exchanger to the heating system, fill the system with water and test fire the stove.
The video material offers useful tips for making a heat exchanger yourself:
So far we have only talked about heat exchangers in a water heating system
Let's pay attention to other areas of their application.
Power calculation
It is very difficult to make an ideal heating system without knowing the power of the heat exchanger. When calculating this indicator, the following parameters should be taken into account:
- pipe diameter;
- length of the heating device;
- thermal conductivity of the metal used;
- maximum fuel combustion temperature;
- fluid circulation speed.
If it is problematic to establish these initial values, you can use an average calculation, based on the fact that to obtain a power of 1 kW, you will need a meter of pipe with a radius of at least 2.5 centimeters.
Stove with a water circuit for heating a house: advantages
As already mentioned, a conventional stove is not able to provide uniform heating of all rooms in the house. In modern stoves and fireplaces, this problem is partially solved by installing a convection chamber to which an air duct system is connected. As a result, the flow of warm air from the stove is not left to its own devices, but moves in the limited space of the pipes and is regulated by valves, dampers, grilles and other additional devices.
However, air ducts are bulky, eat up useful space, and as their length and number of turns increases, heat loss increases. They need monitoring and maintenance: periodic cleaning of dust, soot and soot. The air itself has a low specific heat capacity; in order to transfer heat to a room remote from the furnace, forced injection of heated air masses by a fan is required. Therefore, water, as a coolant, is in many respects preferable to air.
Combined cottage heating system using a fireplace stove with a water circuit and solar collectors
Fact! The specific heat capacity of water is almost 4 times higher than the specific heat capacity of air. It is enough to compare 4.187 kJ/(kg×K) and 1.055 kJ/(kg×K).
Hot water is easy to transport through small-diameter pipelines, while transferring thermal energy over considerable distances. In addition, water is a harmless, non-flammable, non-toxic, chemically neutral and always available substance.
Kinds
There are 2 types of heat exchangers:
Surface
The most common type of heat exchanger, which has become widespread not only in building heating systems, but also in many production processes. Not only water, but also water vapor, various mineral oils and chemicals are used as a coolant that can be used to transfer heat in such devices.
Surface models are divided into recuperative and regenerative:
- Recuperative - transfer heat through the wall of the coolant.
- Regenerative - such heat exchangers operate in periodic mode. First, the hot coolant heats the surface of the heat exchanger, then the cold coolant is supplied to the walls that accumulated the heat.
Mixing
When using this type of device, hot coolant penetrates into cold coolant. As a result of this mixing, direct heat transfer occurs. This type of heat transfer is rarely used in a heating system.
Typically, the mixing method is used for solar heating of water, when the coolant from the heat generator enters a storage tank in which hot and cold liquids are mixed.
Advantages and disadvantages of stove heating
Traditional heating through a stove has both its advantages and disadvantages. Traditional stoves can be found even in the most modern homes. Stove heating systems can be used in private houses or cottages, in country houses or in the country. Among the advantages of such a heating system are the following:
- Simple and quick installation. A traditional stove can be built from inexpensive and readily available materials.
- Easy to operate and maintain.
- This heating system has a high efficiency rate. If the heating system is designed as correctly as possible, then this figure can reach 60%. The value of this efficiency is almost similar to the efficiency of a device that runs on liquid fuel.
- Modern stove heating can be combined with an appliance such as a fireplace. Thus, we will get not just a heating structure, but also a decorative element.
- By using stove heating you can create a cozy and comfortable atmosphere in your home.
- Thanks to furnace components such as dampers, you can regulate the temperature in your home.
The stove is an important element in the interior of the house.
The wood heating system also has its disadvantages. It would be wrong to hide such shortcomings, since they need to be taken into account when organizing stove heating:
- A significant part of the usable area is lost. A more efficient stove will be larger, which means there will be less free space in the room.
- It takes some time for the oven to heat up to the required temperature. The moment the stove is ignited does not mean that it is already starting to distribute heat into the room.
- The stove quickly pollutes the room in which it is located. This means that it will need to be cleaned periodically.
- Stove heating is not able to heat the house evenly. The temperature near the furnace will always be higher than in other parts of the building.
- If such a system is operated incorrectly, there is a risk of carbon monoxide poisoning.
- The risk of fire is higher.
Lighting up the stove is a lengthy process
Reasons for heat exchanger failure
The period of operation is determined primarily by how the water in the city water supply is disinfected. In Russia, either pure chlorine or chlorine dioxide is used. When the water flowing through the copper tube heats up, it causes a violent chemical reaction. Copper chloride is inferior to pure metal in strength, and therefore fistulas appear quite quickly. The luckiest people are residents of cities where tap water is ozonated.
We recommend: Kiturami gas boiler: design, technical specifications, operating instructions and owner reviews
But there are still very few such settlements. The high cost of the modern solution does not allow us to count on the rapid spread of ozonation. Moreover, now manufacturers have begun to save in every possible way. And if previously troubles happened quite rarely with thick tubes of heat exchangers, now thin, low-quality copper is used everywhere. The service life of products has significantly decreased.
Choosing the design of the device
When choosing a suitable heat exchanger for a furnace, you should strive to ensure that the total surface area of the finished product is as large as possible. This will ensure the most efficient heating of the room.
The most widespread are registers (coils). Such heat exchangers are made from smooth-walled pipes with a diameter of 40 - 50 mm. Outwardly, they resemble a characteristic L-shaped grille. For their manufacture, you can use not only round, but also profile pipes with a similar cross-sectional area.
The return and hot water outlet can be located either on one side of the register or on different sides.
The output option is determined by the design features of the furnace itself and the piping layout of the heating system.
The next most popular are rectangular or cylindrical tanks, inside of which there is a pipe or coil. The length of such a heat exchanger depends on the parameters of the furnace firebox. The heat exchanger installed on the chimney usually has a cylindrical shape. There is a pipe running inside it, the diameter of which is equal to the diameter of the chimney. The pipes are welded from below. Can be used both for heating a room and for heating water.
This design requires special attention. Due to the rapid cooling of combustion products, the draft in the chimney itself is significantly reduced. This helps slow down fuel combustion.
Installing the product on a heating and cooking stove requires special attention. Care must be taken to ensure that hot gases pass over the top shelf and enter the chimney at the front of the firebox.
In this case, the cooking plate can be located directly above the heat exchanger. It is also possible to manufacture a register without a top shelf. The so-called shelf consists of lower and side parts connected to each other by pipes.
Blitz tips
- To avoid scale formation in the heating system , you must use only distilled water. A large amount of distilled water for this purpose can be produced at home by passing water vapor through a “pipe-in-pipe” heat exchanger.
- Using a homemade device for heat exchange between gases formed as a result of fuel combustion and liquid, it is necessary to carry out all installation work with the utmost care so that, as a result of insufficient sealing of the chimney, carbon monoxide does not enter the room.
- When using boilers or stoves that use natural air draft in the chimney, the cross-sectional area of the chimney inside the heat exchanger should not be less than the area of the boiler or stove pipe.