Necessary tools
To form such a connection of heating devices, the following components will be required:
- Pipes : for the main line, it is advisable to choose a pipeline made of steel, galvanized or metal-plastic with the corresponding diameters of 2.2 cm, 2.2 cm and 2.6 cm. Polypropylene pipes are also allowed to be used, but not in a system with three or more radiators . The pipes extending from the main are made of the same materials, but have smaller diameters.
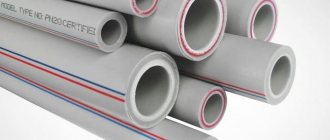
Photo 1. Cross-section of metal-plastic pipes of different diameters: a layer of metal between two layers of plastic is visible.
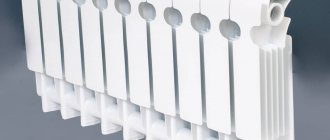
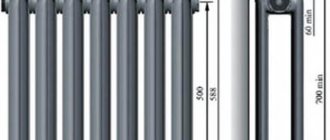
- Radiators : the choice of necessary equipment is based on personal preferences and expert advice. For such a scheme, the most optimal is 5 batteries , and for a larger number, a well-calculated project is required.
- Tapes for sealing threads on batteries.
- Thermostatic valves for regulating the heating of radiators.
- Fittings for connecting pipes to each other.
Direct components are also an expansion tank and a heating boiler.
Basic connection options
Connecting heating devices can be done in several ways. The level of heat loss, as well as aesthetic characteristics, will depend on the choice of a particular one. There are four basic options in total, all of which are worth considering in more detail.
Cross arrangement
The most effective in terms of heat output is the diagonal connection of the heating radiator with a single-pipe system. The coolant enters the upper compartment of the battery and exits directly from the lower part. With this option, it is distributed as evenly as possible throughout the entire structure.
Diagonal piping for heating device.
Saddle connection
In this case, the pipeline is connected to the lower pipes of the device on each side. With this installation method, heat losses increase to some extent. However, the arrangement of the elements can be considered advantageous when it comes to aesthetic possibilities.
Saddle battery connection.
One way connection
This technique involves placing elements on one side, but at different levels. That is, the supply pipeline is at the top and the discharge pipeline is at the bottom. Thus, it becomes possible to fully heat the last device.
The pipelines are on one side.
Bottom placement
This diagram for connecting heating radiators with a single-pipe system is relevant if the conductive elements are hidden under the floor. Without installing a circulation pump, this method cannot be implemented, since the coolant is supplied and discharged through the lower part.
The conductive elements are located at the bottom.
Preparatory actions
Before starting the process, a detailed design of the heating system for each specific room is calculated.
Then one of the serial connection options is selected: horizontal or vertical, based on the characteristics of the living space and personal preferences.
Then, focusing on the selected type of circuit, you need to decide on the coolant. For vertical connections, it is better to use antifreeze diluted in water, and for horizontal connections, use plain water.
How to connect two heating radiators, diagram
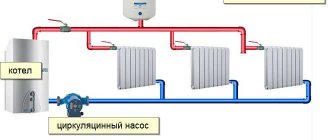
- Initially, with a series connection, the location of the heating boiler is determined. It is usually located in the basement on a special fire platform. The expansion tank is firmly fixed above it.
Attention! The height of the expansion tank relative to the boiler must be at least three meters.
- At the same time, proper adjustment of the chimney is thought out : the draft should be sufficient, and the smoke itself should go outside without remaining indoors.
- Afterwards the main pipeline is connected . It is important to avoid bends when laying.
- running along the perimeter of the entire house , parallel to which all the batteries run .
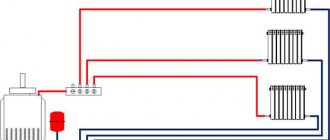
Photo 2. Diagram of serial connection of batteries in a one-pipe system with a boiler and circulation pump.
- Radiators are placed under window openings.
- Such a circuit should be closed on the heating boiler.
Attention! It is recommended to place a filter to clean the coolant from any impurities.
- It is also necessary to provide an element through which the system will be filled with water and drained.
- In a series connection scheme, you can add taps and thermostats to each battery.
With vertical piping, a circulation pump is included in the circuit for forced circulation of the coolant, and with horizontal piping , a slope of the supply pipe is created, and a Mayevsky valve is mounted in front of each radiator to remove excess air from the system.
Single pipe heating system
The single-pipe heating system of the “Leningradka” type has a fairly simple design. A supply line is laid from the heating boiler, to which the required number of radiators is connected in series.
After passing through all the heating elements, the heating pipe returns back to the boiler. Thus, this scheme allows the coolant to circulate in a closed circle, along the circuit.
Coolant circulation can be either forced or natural. In addition, the circuit can be a closed or open type heating system, this will depend on the coolant source you choose.
Today, the single-pipe scheme of Leningrad can be installed taking into account the requirements of modern construction regarding private housing. At your request, the standard circuit can be supplemented with radiator regulators, ball valves, thermostat valves, and balancing valves.
By installing these add-ons, you can qualitatively improve the heating system, making it more convenient for controlling the temperature:
- Firstly, you can reduce the temperature in those rooms that are used extremely rarely or not used at all, while it is always recommended to leave the minimum value to maintain the room in proper condition, or, conversely, increase the temperature in the children's room;
- Secondly, the improved system will allow lowering the temperature in a separate heating device without affecting or lowering the temperature of the next one after it.
In addition, it is recommended to include a circuit of bypass valves at the connection of heating radiators in the single-pipe Leningrad system.
This will make it possible to repair or replace each heating device independently of the others and without the need to shut down the entire system.
Installation of a horizontal single-pipe system
Installing a Leningradka horizontal heating system is quite simple, but it has its own characteristics that should be taken into account when planning a private house:
The main must be installed in the plane of the floor.
With a horizontal installation scheme, the system is laid either in the floor structure or laid on top of it.
In the first option, you need to take care of reliable thermal insulation of the structure, otherwise you cannot avoid significant heat transfer.
When installing heating in the floor, the floor covering is installed directly under the Leningradka. When installing a single-pipe heating system on the floor, the installation diagram can be revised during construction.
The supply line is installed at an angle in such a way as to create the necessary slope in the direction of movement of the coolant.
Heating radiators must be installed at the same level.
Before the start of the heating season, air bubbles are removed from the system using Mayevsky taps, which are installed on each radiator.
Features of installing a vertical system
Vertical connection diagram of the Leningradka system, as a rule, with forced circulation of coolant.
This scheme has its advantages: all radiators heat up faster, even with small-diameter pipes in the supply and return lines, however, this scheme requires a circular pump.
If a pump was not provided, the coolant circulates by gravity, without the use of electricity. This suggests that water or antifreeze moves due to the laws of physics: the changed density of liquid or water when heated or cooled provokes the movement of masses.
A gravity-flow system requires the installation of large-diameter pipes and installation of the main line at an appropriate slope.
Such a heating system does not always fit organically into the interior of the room, and there may also be a danger of not reaching the main line to its destination.
With a vertical pumpless system, the length of the Leningrad pipe cannot exceed 30 m.
The vertical system also has bypasses that allow dismantling of individual elements without shutting down the entire system.
Pros and cons of connecting batteries in series
Pros of serial connection:
- low cost of consumables;
- All types can be ;
- if necessary, pipeline;
- heating devices cover the entire perimeter of the room;
- easy installation;
- small amount of consumable material.
Minuses:
- complex process design;
- high heat loss coefficient : due to the characteristic elongation of such a line, the coolant cools towards the end;
- in the absence of a circulation pump, stagnation of the liquid moving through the radiators occurs and a decrease in the efficiency of the system as a whole;
- in the absence of thermostats on batteries, there is a lack of control over the heat supply.
Pros and cons of the solution
When installing such heating networks, the supply pipeline from the boiler is supplied directly to the first battery, and from it to the second, third and the rest. The working environment enters the devices one by one.
If radiators are connected to a home with a single-pipe heating system, then we can talk about the following advantages and disadvantages.
Main advantages
- The low price of the finished network is explained by the minimal consumption of the elements used;
- The supplied pipelines are quite easy to hide, since they are located in a single line;
- The structure of the system is quite simple, and this makes it possible to build it with your own hands;
- A heating network of this type can operate without forced circulation.
The simplest diagram of a single-line system.
Certain disadvantages
- There is no possibility to regulate the flow of working medium into heating devices;
- Such systems are not recommended for use if the length of pipelines is very long;
- In any case, replacing or repairing batteries will have to be done with a complete shutdown of the communication network.
Addition! When a heating radiator is connected to a one-pipe system, you can save up to 50 percent of the budget on pipelines when compared with a two-pipe communication network.
Methods for connecting heating radiators
Heating radiators are mounted on the wall, or, occasionally, on the floor. There are several ways to connect them.
The methods themselves are divided according to the side of the pipe connection (side, bottom) and according to the scheme for connecting several radiators at the same time (parallel, serial, cross).
The choice of a specific option is made based on several conditions:
- design number of radiators in the room;
- outlet side of connecting pipes: top, bottom, side;
- type of heating system: two-pipe or one-pipe;
- type of pipe laying: open or under plaster.
Let's look at connection methods in more detail.
Lateral
This option is the simplest and most common, since most radiator models have side pipe outlets. This is how it is calculated by the manufacturer.
The side connection is also convenient because unscrewing the nuts from the side is much more convenient than from below under the device body.
In addition to the bottom connection, there are wall-mounted radiators with top connection. The top side is usually clearly visible, so the connection will be visible and such a scheme is rarely used by manufacturers. The technological connection with it does not differ from the options with a bottom or side arrangement.
Lower
Bottom pipe connections are most often used when they are laid hidden under plaster. It must be taken into account that pipes with coolant, when laid even in non-combustible walls, require good thermal insulation.
Coolant temperatures up to 90 C do not pose a fire hazard. Thermal insulation is constructed so that only the radiator is heated, and not the wall from the inside. With properly designed thermal insulation, the efficiency of the heating system does not decrease.
Parallel
Powerful sections are connected in parallel. The advantage of this method is that the radiators are well separated from each other.
They can be replaced, repaired, turned off, and the operation of the entire heating network is not disrupted. The option is often used in private homes and autonomous heating systems.
Sequential
The sequential scheme is beneficial when low-power radiators are installed and there are a large number of them in one common heating system.
In a sequential circuit, maximum savings in connecting pipelines are achieved. That is why it can often be seen in centralized networks, while the two-pipe parallel circuit is practically never found there.
Cross
By cross we mean a combined connection scheme with parallel and serial connections.
This option is suitable when you need to use radiator models of different power. Many centralized heating systems are assembled using a cross pattern.
The best connection diagram for heating radiators and troubleshooting
All these losses that can occur on heating devices need to be taken into account only on large systems. The connection of heating radiators in a private house in a system with forced circulation (with a pump) can be any. If this affects the amount of heat given off, it will be completely insignificant. Choose the type of heating radiator connection that is most convenient in your case. He will be the best. It is important to correctly calculate the number of sections, and you will not feel a decrease in heat transfer by 7% or 15%: all calculations are taken with a margin, rounding up. So there is no reason to worry too much.
You have to worry when “the batteries don’t heat up” or heat up unevenly. But here you need to consider the specific situation in each case: connection, type of system and wiring. But there are several standard situations in which the reasons are also often standard:
- When coolant is supplied from above, the radiator remains cold at the bottom. The most likely reason is that the return line or the shut-off valve (if there is one) is clogged. You need to clean the faucet or replace a piece of pipe, depending on the situation.
- The top of the radiator does not heat up. Most likely, air has accumulated in the upper part. You release it using the Mayevsky crane. Heat exchange should be restored.
If the radiator is cold on top, bleed air through the Mayevsky valve - With a side or bottom connection with a bypass (jumper), a situation may arise when the radiator remains slightly warm when the riser is hot. This is possible when the bypass has a larger capacity than necessary. It turns out that a significant part of the coolant leaves through it. If at first the situation was normal, the valve located after the bypass is most likely clogged or broken. Clean or change it and everything should be fine.
In general, there are many situations and reasons. But most often, if previously the temperature on the device was normal, and suddenly it became cold, the reason lies in a clogged pipe or valve, in an overgrown pipe. Check everything, clean it. It should work. If there is no result, call a specialist. But he will most likely repeat your manipulations.
The reason that the batteries do not heat well is usually that the taps are clogged or the pipes are overgrown
Poorly heating radiators are one problem. You feel no less uncomfortable when the room is too hot. And this is often felt by those people who have installed metal-plastic windows. It immediately becomes very warm, at times, at moderate temperatures “overboard”, unbearably hot. You have to either open the windows often or close the supply valves. It’s difficult to call such an existence comfortable. But everything can be fixed.
There are several ways to adjust (lower or increase) the temperature, rather than close it completely. There are needle valves that allow you to change the coolant supply manually. You partially block the flow, less heat is released. It got colder - the tap was opened more - more heat began to be released. There are automatic devices - thermostats on batteries (radiators), they are called “thermal tap”, “thermostat”, “regulator”. This does not change the essence. By turning the head of this thermostat, you set the temperature you want to maintain in the room. And the device itself regulates the coolant flow. Temperature maintenance accuracy is plus or minus 1oC.
Types of heating systems
One heating circuit is usually used for several rooms. The radiators in it can be connected either in series or in parallel.
In this case, a parallel connection requires the supply of two pipes to each radiator: with hot coolant and return with cold.
Parallel connection is justified for devices with high heat transfer. Consistent - ensures pipe savings.
Connection to a one-pipe system
In a single-pipe system, several radiators are placed sequentially one after another in a pipe section. The circuit is convenient for lateral connection. Then you will need a minimum number of pipes.
It must be remembered that one closed tap will disrupt the operation of the entire group that is connected in series behind it. A single-pipe scheme is usually used on the scale of one room.
Connection to a two-pipe system
A two-pipe system requires twice as many pipes. This disadvantage is largely eliminated if cheap heat-resistant polymer pipelines are used.
When is a two-pipe system beneficial:
- the purchased radiators have too much power and massive design for serial connection;
- There is only one radiator installed in the room; in any case, two pipes must be drawn to it;
- Only one room needs to be heated (for example, a studio apartment).
A two-pipe design will provide a higher level of reliability than a single-pipe design. It will also be possible to install taps on radiators and each individual tap will in no way affect the operation of the others.
Two-pipe manifold parallel heating system
This horizontal wiring diagram has a closed structure, consisting of several branches, each of which is connected to its own devices.
As a rule, polymer or polyethylene pipes are used for such wiring - their strength and performance characteristics are quite sufficient for the normal operation of the system, and they are cheap. In such a system, the connection goes directly to the collector, which ensures uniform distribution of thermal energy throughout the entire heated area. With this scheme, the supply and return circuits operate independently of each other. The coolant passes through the radiators and is sent back for the subsequent heating cycle. The result is a closed system, the operation of which is regulated automatically.
Horizontal parallel wiring is quite suitable for arranging any projects, since the design includes several simple elements that are easy to customize
What is important is that when using this scheme, radiators do not need to be equipped with air vent valves
The system must have a good circulation pump - heating operation in the horizontal installation option under consideration is only possible if there is a pump. The distribution panel, in which all the equipment is located, is usually placed in corridors or bathrooms, and for multi-story buildings, the option of placing the panel in the basement is quite suitable.
The list of advantages of such a layout is as follows:
- Low cost of arrangement;
- Possibility of hidden installation;
- Possibility of combining several individual elements into one system;
- Possibility of full heating of large areas;
- No water hammer.
There are also disadvantages, and the most prominent among them are:
- Difficulty of installation;
- The need to use pipes of the same diameter.
Connection steps
The operating technology depends on the selected set of fittings and pipe material. If pipes are laid along the surface of the walls in a room, then the best option is classic metal pipes.
If heating lines are laid in advance under the plaster, or in specially designed channels, then a more modern option can be used. For example, polypropylene heat-resistant pipes.
Work with steel pipes is carried out with a standard plumbing tool kit. Plastic pipes and fittings require specialized crimping tools. They are not needed for all fittings. Many systems have a threaded crimp system.
How to properly connect a radiator in an apartment?
In an apartment with a gas boiler (such options are especially common in older buildings where it is possible to install a chimney), radiators are installed in the same way as in a private house.
However, much more often you have to deal with the option when the apartment is connected to a common centralized heating network. In this case, the choice of the required radiator model must be consistent with it in terms of power and type of connections available.
Radiator connection diagrams
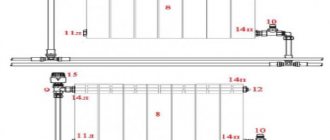
The figure below shows connection diagrams for a one-pipe and two-pipe system:
Let's take a closer look at the correct location of the valve, faucet, jumper and air valve:
What taps should be installed on heating radiators?
Various designs of taps are placed in front of heating radiators. They serve to solve several problems:
- Mayevsky valve - to remove air;
- a regular tap - to adjust the amount of circulating coolant;
- The tap can be used to completely shut off the water during repairs.
The use of plastic pipe allows the installation of simple rotary taps. In an autonomous heating system made of metal pipes, it is better to use threaded valves that do not cause water hammer when closing.
In private autonomous heating systems, taps are placed at the entrances to the premises, in front of vertical sections and in other places. Their presence turns out to be very convenient when carrying out repairs of individual sections of the network.
When is the best time to change heating radiators in an apartment?
It is best to replace it outside the heating season. These are all the summer months and part of the spring and autumn (determined by the climate in your region).
Before replacing, we check the condition of the taps. In older networks they usually do not provide complete coverage.
Is it possible to replace heating radiators in winter?
It is not advisable to carry out replacement while the heating system is on, but it is possible. The main requirement for this is reliable shutoff of the coolant outlet. You can use a standard faucet and additional accessories.
If the radiator is removed for a long time, then the pipe outlets can be short-circuited with a segment so as not to disrupt the operation of the overall system.
To keep your home warm, it is important to properly develop a heating scheme. One of the components of its effectiveness is the connection of heating radiators. It doesn’t matter whether you are going to install cast iron, aluminum, bimetallic or steel radiators, it is important to choose the right way to connect them.
The way the radiator is connected affects its heat transfer
Correct connection of heating radiators, connection of two batteries
Connecting heating radiators
Connecting heating radiators
When building a house or simply during a major renovation of a private estate or apartment, the installation of heating radiators should be done after elements such as doors and windows have already been installed. In this case, you must determine in advance which connection of heating radiators you will use, and in addition, of course, prepare the necessary materials and tools.
How to properly connect a heating battery? The process of installing the radiator itself does not take much time and effort. First of all, you need to install the battery mounts. Their number and location directly depends on the number of radiator sections. Next, we connect the pipes, install the radiator itself and connect everything. Let's look at an example of how to connect a heating radiator using polypropylene pipes.
Types of heating systems
The amount of heat that the heating radiator will emit depends not least on the type of heating system and the selected type of connection. To choose the best option, you must first understand what kind of heating systems there are and how they differ.
Monotube
A single-pipe heating system is the most economical option in terms of installation costs. Therefore, this type of wiring is preferred in multi-storey buildings, although in private buildings such a system is far from uncommon. With this scheme, the radiators are connected to the main line in series and the coolant first passes through one heating outlet, then enters the input of the second, and so on. The output of the last radiator is connected to the input of the heating boiler or to the riser in high-rise buildings.
Example of a one-pipe system
The disadvantage of this wiring method is the impossibility of adjusting the heat transfer of radiators. By installing a regulator on any of the radiators, you will regulate the rest of the system. The second significant drawback is the different coolant temperatures on different radiators. Those that are closer to the boiler heat up very well, those that are further away become increasingly colder. This is a consequence of the serial connection of heating radiators.
Two-pipe wiring
A two-pipe heating system is distinguished by the fact that it has two pipelines - supply and return. Each radiator is connected to both, that is, it turns out that all radiators are connected to the system in parallel. This is good because the coolant of the same temperature enters the input of each of them. The second positive point is that you can install a thermostat on each of the radiators and use it to change the amount of heat it emits.
The disadvantage of such a system is that the number of pipes when laying out the system is almost twice as large. But the system can be easily balanced.
Purpose of the heating system
In a private house or apartment, the optimal temperature must always be set.
which varies from 18 to 25 degrees. In winter, this figure can only be achieved with a high-quality heating system. Its efficiency must correspond to the area of the building, and the radiator connection diagram must also be selected correctly. It is heating devices that compensate for heat loss, which is mandatory in any room, since heat escapes through windows, doors and even communication elements.
You especially need to pay attention to what heating radiator connection diagrams exist and choose the best option. It is advisable to make a choice at the stage of building a house or apartment, but often you have to change a low-quality system, so you can work on a ready-made private house or apartment
But in this case, the installation will be more complex and specific.
It is considered the most optimal to connect heating radiators to a central heating system, since in this case an effective and reliable system is obtained that provides uniform and constant heating in the winter. However, many private houses are located at a certain distance from the city, so using a connection to centralized heating is not always possible.
https://youtube.com/watch?v=olrD9qxCAhM
This is why you have to create your own autonomous systems in a private home. which:
- must have high efficiency;
- if you want to do everything on your own, you can watch a training video to avoid mistakes;
- numerous nodes must be correctly formed and adjusted;
- installation must be carried out in accordance with all requirements and conditions;
- Reliable and correct piping of the system must be provided.
What factors influence the efficiency of a heating system?
To ensure uniform and high-quality heating of rooms in the house, it is important to know what elements affect it. These include:
- correct network wiring, which affects the heating efficiency and how evenly the rooms will be heated, and the cost of heating depends on this;
- competently selected equipment for the system, for which it is necessary to make certain calculations that will determine what efficiency, power and other parameters the main elements should have, and even fuel consumption depends on this;
- correct installation of the main components and elements of the heating system, which include pipelines, radiators, fittings and even a boiler with a pump, since if any actions are performed incorrectly, the heating will either not work at all or function poorly, so it is advisable to view the training manual in advance video.
Therefore, before installation of all heating elements is carried out, you need to concentrate on calculations and selection of the heating radiator connection diagram. It is necessary to select the batteries themselves, which will have the required efficiency and other characteristics. Other types of products intended for installation must be purchased and they must be of high quality. The work itself should be done by hand only after carefully studying the instructions and videos with sequential actions.
Where to put radiators
Traditionally, heating radiators are placed under windows, and this is no accident. The rising flow of warm air cuts off the cold air that comes from the windows. In addition, warm air heats the glass, preventing condensation from forming on it. Only for this it is necessary that the radiator occupies at least 70% of the width of the window opening. This is the only way the window will not fog up. Therefore, when choosing the power of radiators, select it so that the width of the entire heating battery is not less than the specified value.
How to place a radiator under a window
In addition, it is necessary to correctly select the height of the radiator and the location for its placement under the window. It must be placed so that the distance to the floor is around 8-12 cm. If you lower it lower, it will be inconvenient to clean, if you raise it higher, your feet will be cold. The distance to the window sill is also regulated - it should be 10-12 cm. In this case, warm air will freely go around the obstacle - the window sill - and rise along the window glass.
And the last distance that must be maintained when connecting heating radiators is the distance to the wall. It should be 3-5 cm. In this case, rising currents of warm air will rise along the back wall of the radiator, and the rate of heating the room will improve.
Serial connection of heating radiators: distance from the window sill and floor
With this installation, in order to ensure better heating of the room, specialists must observe special standards for the distance from the floor or window sill to the radiator itself:
- At least 10-15 cm from the very top of the radiator fins to your window sill, so that warm air can circulate freely in the room.
- From the floor to the lower ribs - at least 15 cm;
- 2-5 cm from the wall of the house;
- A certain number of sections so that the entire area remains warm;
- Installation of radiators is required under windows to prevent condensation.
- In corner rooms, powerful models are installed, which have 2-3 more ribs than other options.
- The radiator power is calculated adjusted for the insulation of the window with double-glazed windows.
Radiator connection diagrams
How well the radiators will heat depends on how the coolant is supplied to them. There are more and less effective options.
Radiators with bottom connection
All heating radiators have two types of connection - side and bottom. There can be no discrepancies with the bottom connection. There are only two pipes - inlet and outlet. Accordingly, coolant is supplied to the radiator on one side and removed from the other.
Bottom connection of heating radiators for single-pipe and two-pipe heating systems
Specifically, where to connect the supply and where the return is connected is written in the installation instructions, which must be available.
Heating radiators with side connection
With a lateral connection, there are many more options: here the supply and return pipelines can be connected into two pipes, respectively, there are four options.
Option #1. Diagonal connection
This connection of heating radiators is considered the most effective, it is taken as a standard and this is how manufacturers test their heating devices and the data in the thermal power passport for such a connection. All other connection types transfer heat less efficiently.
Diagonal diagram for connecting heating radiators with a two-pipe and one-pipe system
This is because when the batteries are connected diagonally, the hot coolant is supplied to the upper inlet on one side, passes through the entire radiator and exits from the opposite, lower side.
Option #2. Unilateral
As the name implies, pipelines are connected on one side - supply from above, return from below. This option is convenient when the riser runs on the side of the heating device, which often happens in apartments, because this type of connection usually predominates. When the coolant is supplied from below, this scheme is used infrequently - it is not very convenient to position the pipes.
Lateral connection for two-pipe and one-pipe systems
With this connection of radiators, the heating efficiency is only slightly lower - by 2%. But this is only if there are few sections in the radiators - no more than 10. With a longer battery, its farthest edge will not heat up well or will remain cold at all. In panel radiators, to solve the problem, flow extenders are installed - tubes that bring the coolant a little further than the middle. The same devices can be installed in aluminum or bimetallic radiators, thereby improving heat transfer.
Option #3. Bottom or saddle connection
Of all the options, saddle connections for heating radiators are the least effective. Losses are approximately 12-14%. But this option is the most inconspicuous - pipes are usually laid on the floor or under it, and this method is the most optimal from an aesthetic point of view. And so that losses do not affect the temperature in the room, you can take a radiator a little more powerful than required.
Saddle connection of heating radiators
In systems with natural circulation, this type of connection should not be made, but if there is a pump, it works well. In some cases, it’s not even worse than the side one. It’s just that at a certain speed of movement of the coolant, vortex flows arise, the entire surface heats up, and heat transfer increases. These phenomena have not yet been fully studied, therefore it is not yet possible to predict the behavior of the coolant.
Selecting a heating battery connection diagram
When the choice of the type of heating boiler is completed, the connection diagram for the heating batteries in the house is determined.
It can be single-pipe or double-pipe. The radiator installation itself is carried out in one of three ways:
- bottom;
- lateral;
- diagonal.
If, when deciding how to connect a heating radiator, a one-sided pipe connection was planned, then the number of sections on one device should not exceed 12 for gravity heating networks and 24 for systems equipped with a circulation pump.
If it is necessary to install a larger number of sections, you need to use versatile piping to the heating radiators. When installing heating devices, one should not forget about the throughput of the direct and return pipes, which depends on their diameter and roughness coefficient.
Effective heat transfer can be achieved provided that the batteries are optimally placed, or more precisely, by observing the installation distance of the devices in relation to the walls, floor covering, window and window sill.
The installation instructions and how to properly connect a heating radiator provide the following standards:
- the device should be located at a distance of 10 - 12 centimeters from the floor;
- it should be installed no closer than 8-10 centimeters to the window sill;
- the back panel cannot be placed closer than 2 centimeters from the wall;
- When installing batteries, it is necessary to provide for regulation of the degree of their heating, both manually and automatically. For this purpose, special thermostats are purchased (more details: “Adjustment taps for heating radiators, valve installation”);
- In order to repair or replace the radiator, valves, valves and manual taps should be provided. They will allow you to disconnect the product from the heating system;
- On the devices you need to install Mayevsky taps, such as in the photo. With their help, air trapped in the system is removed.
