Description and characteristics of the material
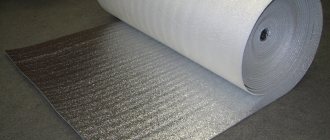
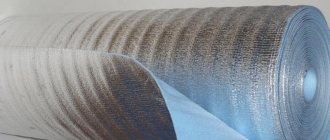
Adding a layer of foil to already known types of substrate changes their technical characteristics and increases their service life. The main difference is that the foil returns more than 30% of the heat back into the room, and in the case of a foil plug - up to 90%.
The backing for laminate with foil is available from:
- foamed polyethylene;
- polystyrene;
- traffic jams.
Foamed polyethylene
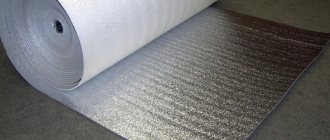
Foamed polyethylene backing is one of the most popular on the market. To improve its technical characteristics, manufacturers began to apply foil to one of its sides. Foiled polyethylene on sale is represented by the brands Izolon, Ecofol, Penofol.
Foaming of the starting material is carried out in two ways - chemical and physical, which is why they have different quality indicators, despite the fact that by name they are the same material.
To produce foamed polyethylene chemically, flame retardants and dyes are introduced into it. As a result of chemical reactions, gas-filled pores isolated from each other are formed in polyethylene. Such polyethylene protects well from noise from neighbors below entering the apartment, and has high vapor permeability and thermal insulation.
A significant disadvantage is its low strength, which is why it quickly shrinks under the laminate. The combination of polyethylene and foil increases the service life of the material, adds waterproofing properties, and significantly enhances the effectiveness of thermal protection due to the reflective properties of the foil. Can operate in temperatures ranging from 40 degrees below zero to 70 degrees above zero.
Foaming of polyethylene by physical means is carried out in special ovens, where pores are formed under the influence of high temperatures. The molecular bond of such a structure is more stable, which affects the performance characteristics of the material - it does not shrink for a long time. Therefore it has a higher price.
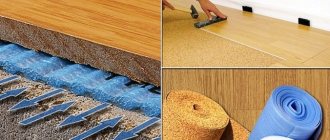
Foil polyethylene is produced in the form of rolls with an area of 50 m2, with a thickness of 2 mm to 10 mm (material 4-10 mm thick is used only for insulating walls and ceilings, as well as for installing heated floors).
The cheapest member of the family is “Izolon” made from NPE polyethylene (non-crosslinked polyethylene). Its average price in Russia is 600 rubles per roll. But the performance characteristics of the material - sound and heat insulation properties, durability - are the lowest of all types of substrates.
The material made of cross-linked polyethylene (PPE) has high rigidity and strength, with good elongation resistance, and does not lose its qualities for 25 years. Such substrates during operation are capable of performing at the same level as expensive substrates. In accordance with the quality, the price of “Isolon” made of PPE polyethylene starts from 29 rubles/m2 (1,450 rubles per roll).
Experts note one feature: the lining under the laminate made of 4 mm thick NPE polyethylene has absolutely identical quality indicators to the 2 mm PPE backing, but the latter has a much longer service life.
Polystyrene
The polystyrene foil backing consists of foil and foam glued together - polystyrene foamed under the influence of high temperatures. The material has a fine-porous structure. Available in slab form. It has:
- sound absorption - 23 dB;
- impact strength (dynamic) - 30 mg/m3;
- low thermal conductivity - 0.035 W/m2;
- bending strength - 0.25 MPa;
- compressive strength - 0.16 MPa.
The given indicators allow us to draw the following conclusions:
- under static and dynamic loads the substrate does not lose elasticity;
- absorbs noise well;
- is a good insulator.
Adding a layer of foil not only improves the above characteristics, but also adds a new property - waterproofing, which is important in rooms with high humidity or the risk of water spilling on the floor. The price of such material is quite high - from 90 rubles. per stove.
For information: professional builders consider foam and polystyrene to be different materials, which often leads to confusion. Polystyrene foam is any foamed plastic, polystyrene is one of the types of foam plastic.
Cork
Cork backing has many advantages:
- durable;
- durable;
- environmentally friendly;
- good insulation;
- has a high level of sound absorption;
- completely eliminates the errors of the concrete screed.
At the same time, there are significant disadvantages:
- cannot be installed in damp areas;
- requires mandatory waterproofing;
- collapses under prolonged static pressure (under heavy furniture).
Adding a layer of foil to the substrate eliminates these disadvantages. The only negative remains - the high price. For example, a 2 mm substrate can be purchased from 180 rubles/m2, 3 mm thick - from 250 rubles/m2.
Pros and cons of foil backing
Adding a foil layer to traditional types of substrate improves the quality characteristics of the material:
- durability increases (firmness and elasticity lasts longer);
- sound absorption increases;
- thermal insulation increases;
- Improves protection against mold, insects and mice.
At the same time, new qualitative characteristics appear:
- The ability of the substrate to reflect heat back into the room. Studies show that the reflective ability of foil to return heat to the apartment reaches 90% in some cases (the minimum value of the indicator is 30%);
- Properties of vapor and waterproofing.
The disadvantage for a substrate made of NPE polyethylene is a short service life, for other types of foil substrate it is a high price. However, this cost of foil pads is justified by the high quality of the product.
Possessing new properties, a substrate with foil becomes indispensable when installing heated floors and laminate flooring in wet rooms, for example, in the kitchen (in the bathroom and toilet, ceramic tiles are usually laid on the floor). Its use in dry rooms is not financially justified, since here the problem of heat conservation can be solved by other, cheaper methods.
Types of heated floors
Before we get acquainted with foil underlays for installing floors, let’s find out what types of heated floors exist and can be used in rooms for various purposes. Depending on the type of system, different types of foil material are used, differing in certain properties.
Laying water heated floors
- Infrared thermal film. This is a thin film material equipped with heating elements, which is placed under the finishing coating. Thermal film differs from other types of underfloor heating in the heating method - it uses special radiation, like the sun's rays, to heat all objects around it. It is considered the best type of heated floor for laminate.
IR thermal film
- Heating cable and cable mats . In both cases, the heating element is a special thick cable that is laid in the concrete screed and heats it, and then the floor covering itself. In the first option, when laying the wires, the specialist himself determines the distance between the cable sections, and in the second, the wire is already built into special mesh mats - there is no need to calculate the distance, which makes installation of the heated floor system easier. This type is characterized by high energy consumption - it spends a lot of energy precisely on heating the concrete screed itself in which it is located, which reduces its efficiency.
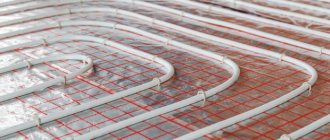
- Water heated floor. The system is a pipe laid in a screed according to a certain pattern, into which hot water is supplied from the heating system. The coolant in this case is water, not electric current. The disadvantage of such a warm floor is the risk of leakage, and the height of the ceiling in this case is reduced, because in order to cover the pipes with a screed, you will have to use quite a lot of cement mortar (you will get a thick layer). And not every management company will allow you to install such a heated floor system.
Water heated floor
One of our articles will help you calculate a warm water floor . In it you will find a special calculator, calculation examples and installation instructions.
How to style
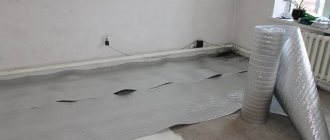
When faced with an unusual underlay, many buyers do not know how to put the underlay under foil laminate flooring. They also don’t have an answer to the question of which side to put the foil backing on. Foamed polyethylene is cut to size and left rolled out for a day.
Then the first sheet is laid, with the obligatory approach to the walls at the points of contact. The height of the overlap is 5-10 cm (if the substrate is visible above the floor, it is carefully cut off with a construction knife and covered with a plinth). Be sure to lay the foil side up.
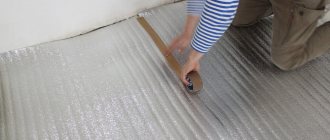
Since it is strictly forbidden to walk on the foil, the laminate is installed on the laid sheet. Then the second sheet is rolled out, touching the walls at the beginning and end, and end-to-end with the first sheet. The seam is glued with a special metallized tape.
The sheet substrate is laid in the same way as brickwork is laid - the connecting seams should not coincide. Wall climbing is not allowed. The sheets are laid close to each other. The seams are sealed. Just as with polyethylene underlayment, a row of underlayment is laid down and slats are placed on top of it.
During work the following must not be allowed:
- coincidence of the seams of the substrate with the locks of the laminate;
- creasing of material when applying to the wall;
- gaps between laid canvases or substrate slabs;
- gluing metallized tape together.
In addition to laminate, such a substrate is also used for linoleum. And here many novice builders have the desire to make a sandwich: floor base-foil backing-chipboard-linoleum. They are driven by the desire to provide water and sound insulation, as well as dampen floor vibration when walking.
So how to put a backing with foil under the chipboard? No way. If the subfloor is wooden, then when attaching the chipboard to the base with self-tapping screws, the foil will be torn, and the point of laying such a substrate is lost.
On a concrete base, chipboard falls between two layers that do not allow steam to pass through: foil on the bottom, linoleum rubber on top, which is extremely undesirable. Practice shows that chipboard very often swells in such a situation.
There is another problem here: chipboard raises the floor, which does not always match the floor level in other rooms. Here it is better not to use additional layers of material at all, but to put a backing on the screed, and linoleum on top of it.
The foil backing for linoleum does not lie under the chipboard, but on the chipboard. In this case, it performs all the functions that are inherent in this type of material (details about the functions of the substrate can be found in the work “Which substrate to choose for laminate”).
For reference: if instead of chipboard you have to install plywood, then everything said for the first material also applies to it.
Laying methods
Let's consider which side is the correct way to lay the insulation with foil on the floor.
Heat-saving properties depend on how correctly the insulation is installed.
Foil reflects infrared radiation, therefore, the metallized layer must be laid so that it faces the inside of the room.
Insulation of concrete floor
Place the casing with the foil side down
Most often, the rolled material is fixed to the concrete base using a special glue made on the basis of rubber.
Installation sequence:
- We prepare the surface. We level the slab so that there is no large difference in height. We seal all cracks and cracks with cement mortar.
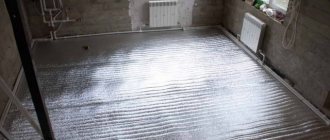
- We spread the material on the floor with the foil layer facing up and cut it to the required length. We move the strip aside and apply glue to the place where it is laid. Let it sit for a few minutes according to the instructions for the glue. We lay and press the material well. We place the strips close to each other.
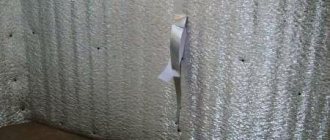
- We secure the joints with foil tape, which is sold in hardware stores.
For additional insulation of cold floors, wooden logs can be laid on top, the space between which is filled with slab insulation. Floorboards or sheet material (OSB, fiberboard, chipboard) are placed on top of it. For an interesting comparison of foil materials, watch this video:
You can secure the material with double-sided tape glued around the perimeter or dowels.
Wood floor insulation
It is most convenient to lay the material on an adhesive layer
It is most convenient to lay foil insulation on a wooden floor, which has a bottom self-adhesive layer.
If you bought material without an adhesive base, then you need to fix it with staples using a construction stapler or with double-sided tape.
Related article: How to sew curtain tape: step-by-step instructions
Laying sequence:
- We remove the baseboards, remove debris and dust using a vacuum cleaner.
- If the boards have uneven surfaces, we sand them with a special machine and, if necessary, sand them (remove the top layer of the board).
- We seal all existing cracks with wood putty.
- We prime with an antiseptic composition.
- We measure the room, cut the roll, and lay it up with foil. It can be easily cut to size using sharp sewing scissors.
- Lay out the strips end to end. We wait a day for the material to settle and straighten out. If the heat insulator has a self-adhesive base, gradually remove the protective film and press it tightly to the surface. We lay the next strip end-to-end.
- We fix the joints of the strips with foil tape.
Once the material has been laid, the selected flooring can be installed.
Foil insulation for heated floors
When laying insulation under heated floors, lay the material with the foil facing up so that it reflects heat into the room
The base for heated floors must be flat without differences in height or defects. All errors must be eliminated.
Stages of laying thermal insulation with a layer of foil:
- We lay out the foil material in strips end to end, and glue the joints with special tape.
- We install a system of electric or water heated floors on top.
- We lay hydro- and vapor barrier material. It will prevent concrete from leaking onto the floor heating elements.
- We fill the screed with a thickness of 30-50 mm, depending on the type of heating elements and the functional purpose of the room.
Warm floors can only be turned on after the screed has completely dried. This will take about a month.
Insulation under floating screed
Having bought a two-layer material, you don’t have to bother with the question of which side to lay the insulation on
It is characterized by the fact that the slab is not rigidly fastened to the concrete screed; thermal insulation is laid between them.
Installation sequence:
- We prepare the base and eliminate all defects.
- We plaster the lower part of the walls.
- We stick damper tape around the perimeter of the walls; its height should be equal to the thickness of the floor: from the slab to the floor covering.
- We prime the base in two layers. Apply the next layer after the previous one has dried.
- We lay thermal insulating foil boards with the foil facing up. We use a metallized coating that is resistant to cement mortar. We lay the slabs strictly in a horizontal plane, close to each other. Uneven laying of insulation boards contributes to the formation of cracks in the concrete solution.
- We glue the joints of the plates with tape.
- We pour the concrete screed.
Related article: Wallpaper in Provence style: photos in the interior, for the walls of the kitchen, bedroom and living room, floral, country and Provence collection, children's companions, in the hallway, video
Lightweight and durable insulation with a layer of foil is becoming increasingly popular among consumers and professional builders due to its high heat retention and ease of installation. For more information about isolation, watch this video:
We looked at how to properly lay foil material for high-quality floor insulation. Thermal insulating material is always laid with foil on the outside; if you lay it the other way around, it will not retain heat fully.
What thickness to choose
The optimal thickness of any substrate is 3 mm. It allows you to level out screed errors of up to 1 mm. A 2 mm cork substrate will also cope with this task, due to its high density and elasticity.
If the height of the floor screed differs by 1-2 mm, a substrate 4 mm thick will be required, 2-3 mm - 5 mm thick. For more significant floor unevenness, the problem must be solved using a self-leveling mixture.
The appearance on sale of substrates with foil is caused primarily by the appearance of heated floors. When laying laminate flooring, they allow you to better retain heat in the apartment and protect the substrate from high humidity in the room.
Substrate thickness
It’s important to choose the right underlay from the very beginning so that it fully complements the laminate. This material varies in thickness, composition and level of sound insulation. Before choosing the final option, it is recommended to determine your needs and scope of work. In addition, the condition of the foundation is assessed:
- if the subfloor is flat, then thin material will do;
- If there are small irregularities on the surface (up to 2 mm), then before laying the laminate it is worth laying a material of greater thickness.
Some people believe that when working with laminate it is worth using the thickest underlay. Often, not one, but two substrates are purchased at once, and laid in two layers to increase the effect of sound and heat insulation of the floor.
Important! If the material underneath the flooring is too thick, it will sag, which can cause the boards to become deformed or even break.
If you purchase a substrate that is thicker than necessary, the laminate locks will become damaged over time. And if the locks are deformed, then the boards themselves will soon bend, and the floor will begin to creak heavily.
Material thickness
Attention! You shouldn’t bother and buy the underlay from the same company as the laminate. If you lay material from another manufacturer under the floor covering, nothing bad will happen.
