What does distance affect?
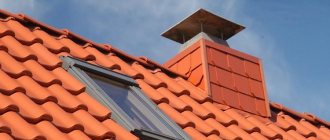
Consumers who are faced with the need to install a hood for the first time believe that the main problem lies in the installation of the equipment. However, an equally important task is to determine the optimal distance between the hood and the stove. The efficiency of the installed structure depends on this parameter.
Due to a low-mounted hood, the volume of soot deposited on the filter increases and the steam absorption area decreases. If the equipment is installed high, the system performance will decrease, as a result of which it will be necessary to constantly increase the power.
The hood is installed in accordance with the manufacturers' recommendations (given in the instructions). There are no uniform standards determining the height of the forced ventilation system.
Factors that influence height calculation
When determining the optimal distance from the slab surface, the following factors must be taken into account:
- height of the tallest person in the house;
- ceiling height in the kitchen;
- slab size;
- plate type;
- type and performance of the hood;
- features of the room layout.
In addition, when determining the location, you need to take into account the regulatory requirements that apply to electrical equipment and forced ventilation systems.
Man's height
Hoods remove odors that appear during cooking. Accordingly, such equipment must be installed at a height that will ensure efficient operation of the device. However, it is equally important to consider the ease of use of the hood. That is, the structure must be mounted so that a person who regularly cooks on the stove does not experience discomfort (does not hit his head against the body).
Kitchen height
The height of the ceiling in the kitchen does not play a determining role when choosing where to install the equipment. In this case, it is necessary to take into account the manufacturer's recommendations. The only exception is installation in a kitchen with a low ceiling. In such situations, it is recommended to purchase hoods that can be mounted low above the stove.
Dimensions and type of hob
The size of the cooking surface also does not play a decisive role. This parameter affects the choice of equipment that provides forced ventilation. However, the location where the hood can be installed depends on the type of hob.
Gas stove
When choosing an installation location, it is recommended to consider the following factors:
- device power;
- convenience when preparing food;
- risk of fire.
Each manufacturer gives its own recommendations regarding the choice of installation location. The Bosh company, in order to increase the performance of its own devices, insists on the need for installation at a level of 55 centimeters, while the Russian manufacturer Saturn advises placing it at a height of 75 centimeters.
Electric
The installation height of the hood above the electric stove depends on the type of ventilation system design. Horizontal models are recommended to be mounted at a distance of 65 centimeters, vertical ones - 40-55 centimeters. In both cases, it is necessary to take into account both the general recommendations of the manufacturer and the person’s height.
Layout features
It is optimal if the equipment is installed in close proximity to sockets and a ventilation shaft. But both factors do not play a key role, as do other features of the kitchen layout. It is only important to organize the removal of air from the equipment to the ventilation shaft, for which special ducts are laid.
See also
How to change the bearing on an Indesit washing machine with your own hands
Type and power
Inclined models are installed closer to the slab than horizontal ones. The installation height is also determined depending on the power of the device. The more efficiently the device sucks air, the greater the distance from the hob to the hood.
We carry out installation of the hood - stages of work
Before you begin installation, you need to calculate at what height to hang the hood. The actual DIY installation process involves several steps:
- Secure the hood mount to the wall.
- Connect the device to the air duct system (or place a carbon filter inside).
- Make an electrical connection.
There are two main nuances of attaching the hood to the wall:
- The device must be installed with maximum reliability;
- The distance from the stove to the hood must be correctly determined.
What height should a kitchen hood be installed? It depends on both its type and the type of hob:
- If the model is installed for an electric stove, then the distance at which the device must be hung is at least 70 cm;
- For a kitchen hood with a gas stove, the minimum height is 80 cm.
Some craftsmen who prefer to do the installation themselves claim that for both gas and electric stoves the optimal distance is precisely 700 mm. Indeed, such a height is considered sufficient for a kitchen hood (even a recirculating one, which includes a carbon filter) to effectively purify the air in the work area.
However, it is worth understanding that more heated air will rise from the gas stove - the product’s power may not be enough, the filter or other structural elements may be damaged. It turns out that by maintaining the minimum permissible distance, you risk the performance of the device, and if you decide to mount the device at an increased height from the stove, you can significantly lose power.
Further work on installing a hood in the kitchen with your own hands is as follows:
- The kitchen hood must be hung on the wall. Here it is very important to correctly calculate the height above the slab and carry out the markings. The device must be mounted along a special axis corresponding to the center of the hob. It is better if the selected hood has eccentric fasteners - it allows you to adjust the nuances of the location of the equipment above the stove within 5 mm.
- You need to install the hood and connect it to the air duct system. The position of the device should be calculated in such a way that the length of the boxes is minimal. The air duct is installed to a ventilation duct designed to remove air from the room. You can install the air duct into the ventilation duct using a special sleeve. The resulting connection is compressed with clamps and lubricated with silicone for a tight seal.
- It is impossible to solve the question of how to install a hood in the kitchen without an electrical connection. The power of the device, as a rule, is low - this means that there is no need for a special calculation of the wire cross-section or installation of a separate circuit breaker. It is advisable to provide a wire in the kitchen right away and hide it in the wall. If this was not done, then you will have to hang the socket outside and connect the wire, hiding it in the external ventilation duct.
Main types of exhaust devices
The installation procedure for exhaust devices may vary depending on the type of model selected.
Recirculation
Such models do not remove air from the kitchen. Devices of this type, due to the carbon filter, remove third-party odors. The air passes through the recirculation hood and returns to the kitchen. The ease of operation of such devices lies in the fact that during installation there is no need to connect the duct from the equipment to the ventilation shaft. The main disadvantage of recirculating models is that carbon filters require regular replacement.
Flow-through
Flow-through models remove soot and oily fumes from the kitchen. These devices require connecting the duct to the ventilation shaft. Flow models are also equipped with a filter. The latter prevents grease from entering the ventilation shaft. For a flow hood to work effectively, the dimensions of the device must match the dimensions of the hob.
Combined
Combined models combine the features of the previous two. Due to the built-in fan, such hoods are capable of removing large masses of air. Because of this, the equipment must be connected to a ventilation shaft. And the carbon filter allows you to turn on the air recirculation mode.
Types of devices
Before installing a hood, you need to decide on the specific type of household appliance. The most popular types of devices today are:
- island;
- fireplace;
- corner;
- built-in;
- filtering.
Exhaust devices are equipped with different types of filters:
- Hoods for gas stoves with carbon filters. They are distinguished by the effective elimination of unpleasant odors and fatty particles. They work primarily on the principle of air recirculation.
- Devices with a metal cleaning grid (grease trap). Suitable for gas stoves and kitchens that have access to a ventilation shaft. If it is missing, installation is not recommended. Their main advantage is the high-quality absorption of fumes and unpleasant odors. Equipped with aluminum filters.
If the hood in the kitchen is installed correctly and professionally, the air will be effectively cleaned of fumes through a filtration mechanism and then redirected back into the room. As for units equipped with grease traps, they do not filter contaminated oxygen, but remove it outside.
There are also universal models that provide not only filtration, but also air removal. It all depends on the specific requirements and criteria.
Some apartments do not allow you to connect an exhaust hood to the ventilation system. For such cases, it is necessary to install household devices that operate on the recirculation principle (air filtration and redirection back into the room). What system is needed in each specific case is up to the owners to decide, but we recommend purchasing units with carbon filters.
Varieties
The type of hood plays a decisive role when choosing the location and method of installing such devices.
According to the general form
Hoods are of the following types:
- built-in;
- island;
- hanging;
- retractable
Thanks to such a variety of shapes, you can choose a hood that will match the features of your specific kitchen layout.
Built-in
Models of this type are built directly into the kitchen furniture, so that most of the hood is hidden in the cabinet. Such devices require direct connection to the ventilation shaft. Metal grilles are responsible for air filtration in these models, which must be regularly cleaned of carbon deposits and grease.
Built-in appliances are convenient because they are suitable for almost any interior. The only drawback is that for such equipment it is necessary to separately make a box of appropriate size.
Ostrovnaya
The design of some kitchens involves installing a hob in the center of the room. In such cases, it is recommended to install island exhaust devices that are attached directly to the ceiling.
Hanging
Hanging models are considered the most common. Such devices are attached to the wall above the hob. A box goes from the equipment to the ventilation shaft.
Retractable
This hood is a type of built-in appliance. The main feature of such equipment is that the panel that provides air filtration is retracted inside the structure when the device is not in use.
According to the shape of the air intake
Regardless of the type of hood, each such equipment is of an inclined or horizontal type. Both factors determine the order and features of installation of kitchen appliances.
Inclined
Such models are distinguished by the presence of a flat suction surface, which is located at a certain angle to the plate. This design feature forces manufacturers to place fans at the top of the case.
The attractiveness of inclined models is due to the fact that such devices reduce the risk of fire and make it easier to replace carbon filters.
Horizontal
In such models, the suction surface is parallel to the floor. These units can be built-in and placed above kitchen islands.
Features of installing a built-in hood
Installing a built-in hood with your own hands is quite possible, although it has its own characteristics. Here you also need to correctly calculate the height above the stove, but the main nuance is how the device is attached.
The built-in model in the kitchen does not need to be hung on the wall - it is fixed in the kitchen furniture, in a cabinet with a specially made hidden cavity. By the way, recirculating hoods can be connected in the same way - their power will be quite enough for small kitchen spaces.
After the equipment is fully connected, its functionality is checked. The final stage is the installation of a protective casing that hides the air ducts. After this, you can enjoy clean air.
Support the project - share the material with your friends on social networks:
At what height are inclined hoods hung?
The inclined hood should hang at a distance of 60 centimeters from the hob. This height ensures maximum efficiency of the device. Also, at such a distance a person does not experience discomfort when preparing food.
The installation height of inclined models plays an important role in the further operation of this equipment. Therefore, if the choice fell on this type of exhaust devices, it is necessary to work out the kitchen plan in advance.
See also
Which bagless vacuum cleaner to choose, rating of the best manufacturers and models
Features of installation of horizontal devices
It is optimal if horizontal models are located at a distance of 80 centimeters from the hob. However, this parameter varies depending on both the design features of the specific equipment and the manufacturer’s recommendations.
In particular, low-power equipment should be installed closer to the hob.
In addition, horizontal devices cannot be placed close to the ceiling covering. This requirement also applies to recirculating models. During installation, it is necessary to ensure air removal from the hood. That is, you need to lay the box up to the ventilation shaft, for which you should leave free space between the hood and the ceiling covering.
Requirements for air ducts and electrical networks
The hood parameters determine the load experienced by the ventilation system and electrical wiring. Failure to follow installation instructions may result in the following situations:
- change in pressure level in air channels;
- increased load on the hood motor;
- poor air conductivity;
- intensive air flow from the ventilation shaft.
To avoid such problems, it is necessary to take into account the features of the ventilation duct in the house at the stage of selecting a hood, and follow the following recommendations at the installation stage:
- reduce the distance from the hood to the ventilation shaft;
- use pipes of the same diameter;
- install air exhaust ducts strictly according to level;
- maintain an angle of 90 degrees if it is necessary to change the direction of the pipe.
Manufacturers of exhaust hoods do not recommend extending the hood cable connected to the outlet yourself. This can lead to oxidation of the wires, which will ultimately cause overload and equipment failure.
When installing an exhaust hood, it is recommended to place the power sources so that, if necessary, you can quickly turn off the kitchen appliances. It is especially important to do this to ensure free access to individual elements of equipment during cleaning. Otherwise, if you come into contact with a metal case or other parts, a person will experience a strong electric shock.
Important points
Experts highlight several important aspects that deserve attention during the installation of the device.
- Filters are cleaned or replaced every 2-3 months (taking into account the intensity of use). Large amounts of fat and residual substances can cause the structure to catch fire.
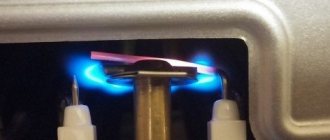
- The installation height of the hood above the gas stove is 65-75 cm. If you install the device too low, it will not cope with the load and the increased temperature, which can lead to failure of the unit.
- The “golden” rule for selecting exhaust hoods is that the hood should be the same.
- The kitchen appliance is connected to an electrical network independent from the main part of the house.
During installation, observe safety precautions. Preventative cleaning of the hood from burning is carried out once every 2 quarters, under medium loads. Knowing at what height it is better to mount the device, you can save a small amount on the services of specialists.
Where should the outlet be installed?
Sockets are installed in accordance with the requirements of the state standard. Manufacturers recommend deciding in advance the location of the hood and connecting the power source to the required distance before installing the device.
When laying electrical wiring, you must adhere to the following rules:
- avoid a large number of bends, which increase the load on the exhaust device;
- ensure the tightness of the pipes in which the wiring is laid;
- Bring the socket as close as possible to the equipment being installed.
In addition, you need to consider the size of the load experienced by the electrical grid. Modern hoods consume little electricity. But if there are many appliances installed in the apartment (house), then it is recommended to connect a separate line from the electrical panel for the device that ensures air exhaust from the kitchen. This will reduce the load on the network.
Installation stages and types of kitchen hoods
All forced ventilation units for the kitchen are divided into two main classes.
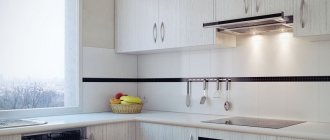
- Open hoods, fully visible.
An open hood is installed between cabinets
- Built into a closet, semi-hidden.
With built-in hoods, only the lower part is visible
Also among open devices there is a classification by location. Such hoods can be island or wall-mounted, and the latter can be corner.
Depending on the control method, the classification is as follows:
- remote (with remote control);
- push-button or touch.
Photo gallery: different types of kitchen hoods
The island hood hangs separately from the headset
Wall-mounted hood is mounted to a vertical surface
The recirculation hood does not have a ventilation duct
Some hoods can be controlled remotely
Installation stages
Installation of exhaust devices is carried out according to the following algorithm:
- selection of installation location and marking;
- fixing the device (to the wall or in the closet);
- pipe connection from the ventilation shaft;
- connection to a power source.
Each stage of work must be coordinated with the manufacturer’s recommendations.
Hood installation
The hood can be installed in two ways: mounted on the wall or built into a cabinet. Depending on the chosen option, the order of work changes.
To Wall
To hang the hood on the wall, you will need to perform the following steps in the order given:
- Measure the distance from the hob to the hood and put the corresponding marks on the wall.
- Draw a horizontal line along the marks, keeping the level. The lower part of the hood should border on this strip.
- Measure the center of the drawn line and draw a vertical strip along the new mark, also maintaining a level.
- Measure the distance from the bottom of the case to the device mounts and mark the corresponding marks on the wall.
- Drill holes on the wall according to the marks and insert dowels.
- Install the device starting from the top. Then level the device horizontally and secure it.
- Place a plastic duct from the hood to the ventilation shaft.
If necessary, you need to cut off the corrugation on the hood if the device falls below the marked marks. All joints near the ventilation duct must be treated with sealant.
Into the cupboard
Installation of an exhaust device in a kitchen cabinet is carried out according to the previously described scenario. But in this case it is necessary to follow a number of rules. The bottom of the cabinet should be located strictly along the horizontal strip marking the distance from the hood to the hob. To install built-in appliances, it is recommended to order furniture according to an individual sketch.
See also
What kind of breakdown does error E20 appear in an Electrolux washing machine and what to do?
In the upper part of the cabinet you need to cut a hole for the corrugation or ventilation duct. Then the hood is placed inside the box and fixed to the walls. Next, the corrugation is brought to the corresponding hole and secured. Upon completion of the work, the cabinet is attached to the wall. The joints of the corrugations must be coated with sealant.
Electrical connection
The exhaust device is connected to the power source using three wires. Before starting work, the device must be grounded. There is no need for the last procedure if the apartment has European sockets. If such a device is not available, you need to attach a wire that will act as a grounding conductor to the metal part of the hood.
An important point is that such work can be performed if you have the appropriate qualifications. The “zero” cable must be connected to the dead neutral in the electrical panel (pipe or plate on the wall).
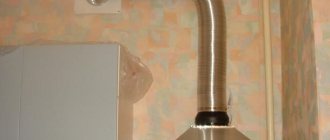
How to equip an air duct correctly?
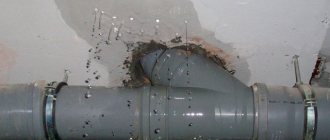
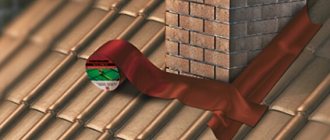
The installation procedure does not depend on the type of duct selected. First you need to purchase or manufacture an anti-return mechanism. If the second option is chosen, then you will need to create a box with a cross-section corresponding to the diameter of the air duct. Then in this housing it is necessary to place an anti-return valve, which consists of two sheets of metal connected to each other, which open like the wings of a butterfly. This mechanism is mounted in front of the ventilation shaft exit.
After this, the air duct is fixed. The latter is laid with a minimum number of bends. This approach allows you to reduce the level of load experienced by the fan in the hood. At the end, the duct is attached to the wall. All joints must be additionally treated with sealant or polyurethane foam.
Aluminum
Aluminum pipes are convenient because they bend well, thereby simplifying the installation of the air duct. This option is preferable for those who have not previously installed a hood. Aluminum pipes are capable of stretching, thereby eliminating errors when calculating the length of the air duct. Also, the corrugations do not create noise or vibration when the hood is operating.
The main disadvantage of this option is that aluminum pipes have an unattractive appearance. Therefore, corrugations are usually hidden in a suspended ceiling or a special box.
Plastic
Plastic air ducts are the best choice for apartments and houses. Pipes made of polyvinyl chloride have a neutral white color and do not emit extraneous noise during operation of the exhaust device. The main disadvantage of plastic air ducts is their more complex installation compared to corrugated ones. In particular, during installation it is necessary to strictly maintain a 90-degree angle when changing direction.
Plastic square
This version of the air duct is no different from the previous one. The only difference is that square PVC pipes are easier to install. This is explained by the fact that, thanks to this shape, the individual elements of the air duct fit into each other more accurately and more rigidly, thereby reducing the consumption of sealant.
How to install a hood in a closet
To ensure that installing a hood over a gas stove causes the owner a minimum of hassle, several important points should be taken into account. The individual characteristics of a specific model of kitchen appliance, the type of filters, the location of the ventilation shaft, etc. are taken into account.
Installation of a firecracker (anti-return mechanism)
Let us dwell in more detail on the features of installing an air cracker. First of all, it is worth installing an aluminum or galvanized product. A wide range of such solutions are now on sale. It is mounted directly in front of the ventilation shaft.
To ensure maximum convenience, it is better to install a hood above a gas stove in a private house in a cabinet located above the base of the hob. Installing the housing into a kitchen unit does not cause any difficulties. Then the holes and cracks are filled with polyurethane foam, thanks to which the device is fixed very securely. Due to this, the resonance of the household appliance during its operation is leveled out.
It is not recommended to install the firecracker immediately. First, you should place the exhaust device and mark the places where the holes will be located. For convenience, the cabinet is first removed, and the necessary cuts and shapes are made inside.
Cutting inside the kitchen unit will be simplified if the diameter of the hole is marked with several through holes (in a circle). After this, a jigsaw is inserted and a hole is made with its help. They should be on every shelf, if there are any in the closet. This will simplify the installation of the air duct.
Duct installation
Installation of the air duct is carried out in the following sequence:
- You need to insert a piece of A4 paper into the holes, and fold it at the top so that it is square.
- Then it must be carefully trimmed, leaving a few centimeters for reserve. The corners are notched and bent outward.
- After this, hang the cabinet with the already fixed corrugation on the wall. Cracks, holes and areas with joints are sealed with silicone, which will avoid loss of power.
Kitchen hood installation sequence - The product is attached to the cabinet.
- After this, the exhaust device is finally screwed into the headset.
- The sheet is attached with a clamp.
- The air duct is combined with the ventilation shaft. To do this, you can use universal glue, sealant or connector.
During installation, it is necessary to minimize the number of bends of the corrugation or plastic pipe. This will ensure good traction since cornering reduces power by an average of 10% in each knee.