Malfunctions and their elimination
To ensure trouble-free operation of a pellet boiler, it is first necessary to correctly position and install the heating equipment.
The installation area must be strong, capable of supporting not only the weight of the equipment itself, but also the weight of the bunker filled with pellets. Walls and floors must be insulated with non-combustible materials. Installation of ventilation and smoke exhaust is carried out only from non-flammable, durable and high-quality materials.
There are several relatively simple malfunctions in the operation of pellet equipment, which can easily be corrected independently:
- an increased level of fuel consumption can be caused by low-quality pellets, or a sharp drop in temperature outside;
- the appearance of sparks from the chimney pipe is most often caused by clogging of the ash pans with combustion products;
- the appearance of smoke and popping noises when opening the door of the heating boiler is usually the result of clogged fire and chimney pipes;
- Insufficient heating of the room is observed when the boiler power is incorrectly selected, the number of heating radiators is insufficient, or there is an air lock in the system.
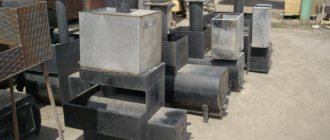
As practice shows, it is advisable to purchase the most complex components and elements in ready-made form. A burner, firebox, oven doors, sensors and programmers, a fan and a factory-assembled electric motor are always preferable to do-it-yourself equipment.
Boiler Assembly Guide
Pellet boilers have a rather complex design. The instructions for assembling them will also be difficult and multi-step. For greater convenience, the assembly process of each main unit is considered separately. Buy or make the necessary elements, and then simply assemble them into a single system.
Burner
Burner
It is highly recommended to buy this element of a pellet boiler ready-made. The burner is where you will spend the most money.
Making a burner yourself is almost impossible for the reason that this part of the boiler is not simply a container for igniting loaded pellets, but a complex control and regulatory mechanism.
Pellet burners are equipped with special sensors and have several preset programs that allow you to achieve the most efficient fuel consumption and ensure the most efficient heating of your home.
Housing and heat exchanger
You can handle the assembly of the housing and the manufacture of the heat exchanger yourself. It is best to make the boiler body horizontal - with this placement of the unit, maximum heating efficiency is achieved.
It is recommended to use fireclay bricks to make the body. You simply assemble a kind of box without a top cover and place a heat exchanger in it with connected pipes and other elements. Brick is recommended for the reason that it accumulates heat much more efficiently than cast iron, steel sheets and other popular materials.
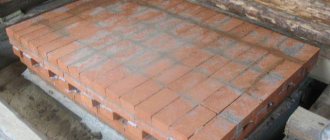
Fireclay brick
The heat exchanger of a pellet boiler is a system of pipes interconnected and connected to the heat supply pipes of a private house.
First step. Assemble a rectangular heat exchanger from square pipes. To do this, cut the pipes into pieces of the required length and weld them into a single structure.
Second step. Make holes in the profile that serves as a vertical post for connecting round pipes.
Third step. Prepare holes in the remaining front pipes for drainage and water connection pipes. Hot water will be discharged through the top hole, cold water will be supplied from below.
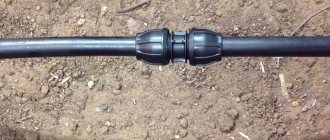
Use metal pipes with a length of 150 mm. Next, you can use polypropylene pipes. Be sure to install ball valves where the pipes connect to the boiler. Additionally, you can install filters if necessary.
Fourth step. Weld the back of the unit to its front and weld the side pipes.
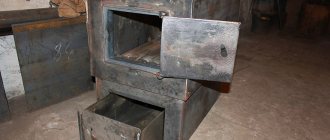
At the same stage, select a convenient place to connect a chimney pipe with a diameter of 10 cm. At the bottom of the heating unit, provide a small chamber for collecting ash. Also, the design of a pellet boiler necessarily includes a firebox. More about him later.
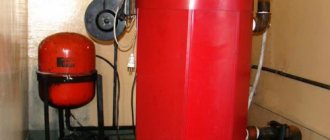
Pellet boilers
Firebox
In the firebox, as already noted, pellets are stored and from here they are supplied to the burner.
First step. Prepare the necessary materials and equipment. You will need an auger with a diameter of 7.5 or 10 cm, an electric motor and a metal casing. You will connect the engine to the pellet burner control unit.
The function of a metal casing can be performed by any container of suitable volume with sufficiently thick walls.
Second step. Install the inlet pipe of your auger into the discharge mouth of the casing. Connect a corrugated plastic pipe to the other part of the auger to supply granular fuel to the burner.
In conclusion, all you have to do is assemble all the listed elements into a single structure. Do this and proceed to installing the boiler.
Instructions and recommendations for production
Initially, make a drawing of the device you want to install and buy sensors that will allow your device to work with minimal intervention from you.
The first step in making a pellet boiler with your own hands is to make the boiler body in the form of a fireclay brick box; it should be made horizontal to achieve maximum heating efficiency. In addition to brick, the body can be made of steel or cast iron, but brick retains heat longer.
Next, you should assemble a heat exchanger from square pipes. You need to cut the pipes to the required length and weld them into a rectangular structure. Make holes in the vertical profile for supplying round pipes. Holes must be made in the front pipes for supplying hot and cold water.
Pellet boiler diagram
Cold water is supplied from above, a pipe for hot water is from below. Use metal pipes for supply. Cut ball valves into them. Use a cutting torch or welding torch to cut the holes, then use a grinder to cut the holes. Then you should check the structure for leaks; to do this, plug the bottom hole and pour water into the top hole.
If there is no leakage, install the heat exchanger in the housing, taking into account that the distance between the walls of the housing and the heat exchanger pipes must be at least 1 cm.
Connect a chimney pipe with a diameter of less than 12 cm. The diameter of the pipe should be slightly larger than the diameter of the outlet on which the pipe is placed. Seal the connection between the pipe and the hole. The pipe must be made of heat-resistant material. At the bottom of the housing, install a metal ash chamber with a handle for easy ash removal.
Install a hopper, the bottom of which should be sloping towards the feed. The larger the volume of the bunker, the longer your boiler will operate in independent mode without your participation. To connect the housing and the hopper, you need a metal casing with thick walls into which the auger is installed.
The auger can be made from tire wire or purchased ready-made. The drive to the auger is made through a gearbox from an electric motor. The electric motor is connected to the control unit. A corrugated pipe for feeding pellets is mounted to the auger. Making a homemade burner is quite difficult, since it is not only an ignition element, but also a device that regulates the flame.
Factory pellet boiler burner
To make it, you need to take two square metal pipes with sides of 8 cm, weld one to the other in the form of an irregular inverted letter “T”. The upper vertical part is the compartment where the pellets enter; in the lower part there is combustion and an influx of air for combustion. On the left side, which is connected to the firebox, make a screen.
The upper part into which the pellets are poured must be welded at an angle. To prevent incoming pellets from blocking the air supply, it is necessary to insert a metal plate into the upper structure, the lower part of which is made according to the principle of a comb, the teeth of which are bent into a semi-oval for better air supply. . You can use a burner from a gas can as an ignition element.
Principle of operation
Fuel is supplied to the combustion chamber via a transport auger from a special container designed for storing pellets. The device does not have a direct source to provide natural draft, so it is equipped with a burner. Thanks to the presence of a special fan, it pumps air and ignites the fuel the moment the device turns on.
Thermal energy is transferred to the coolant through a heat exchanger. Flue gases are removed through a chimney pipe. Due to the presence of a small amount of mineral elements in the pellets, a small amount of ash is formed.
Through the grate, the ash is removed into a special ash pan chamber. As soon as the pellets in the combustion chamber burn out, the temperature drops. This is recorded by a special sensor. After this, using an auger, the pellets are automatically fed from the loading tank into the combustion chamber.
Pellet boilers must be installed in compliance with certain requirements for the installation site.
Choosing a place
It is better to install the unit in a separate room due to its impressive dimensions. The best option is a room with a temperature of at least +10 °C.
Installation outside the building is not recommended. However, when placing equipment outdoors or in a garage, pipes should be located underground below the freezing level to reduce heat loss.
Preparing the floor and walls
It is necessary to level the floor in the place where the equipment will be installed. The platform must be strong enough to support the weight of the device itself and the pellet hopper. Non-flammable plates should be fixed to the walls and floor. There must be a place for pellets near the device.
Ventilation and chimney
We install ventilation and a chimney made of non-combustible material. The latter, as a rule, is displayed on the roof, protruding above its surface by at least half a meter. It should be protected from precipitation and insulated.
The cross-section of the chimney pipes must be larger than the diameter of the hole intended for removing exhaust gases from the equipment.
Care should be taken to maintain the chimney by providing a special tightly closing opening for cleaning it.
Installing equipment
Having prepared the site, we install the device itself. We install and connect the burner, hopper, auger and automatic control panel. Communications are connected to the equipment through ball valves.
This will make the system easier to maintain. It is advisable to install filters. After connecting all the elements, a test run of the heating system is performed.
Heat exchanger manufacturing
DIY pellet boiler assembly diagrams.
The next stage in the manufacture of the boiler will be the manufacture of the heat exchanger. It is easier to make it using square pipes as front pipes, and round pipes as connecting pipes. Cut the required number of square and round pipe blanks. Using a gas or welding cutter, cut holes in the front pipes for round pipes that will serve for water supply and drainage. Carefully process the holes with a grinder. Now you need to weld the side pipes.
For this job, it is recommended to have the help of another person to securely hold the parts in the correct position when welding. Check the tightness of the heat exchanger seams by placing it vertically and carefully pouring water into it. If the tightness of the seams is not broken, the surface of the heat exchanger will remain dry.
Manufacturing of the main body and assembly of the boiler
Weld the main body of the boiler from sheet steel 4-6 mm thick. It is necessary to provide two installation doors at the front and rear of the housing for servicing the boiler. Line the combustion chamber with fireclay bricks.
The main masonry should be done on a level concrete foundation. Install the heat exchanger into the main body of the boiler. It is important that a small gap is maintained between the inner walls of the housing and the heat exchanger.
Install a fan in the upper part of the housing above the heat exchanger to create forced draft.
Important: after finishing installing the boiler, test it.
Device
The structure of a pellet boiler with the designation of the most important elements and components (click to enlarge)
Before you start work, you should evaluate your strengths. Making a boiler requires good training, knowledge, skills and is much more difficult to make than a gas or electric one. It is no coincidence that finished products of this class are very expensive.
In addition to the pellet burner for the boiler. which is almost impossible to do at home, all other elements of the design will have to be done independently. It will take a lot of work for the result to meet expectations.
Having experience in such work, assembling a heat exchanger and laying out a combustion chamber from fireclay bricks is quite a feasible job. You can also handle installing the burner, but you will have to work hard with the fuel supply system. This most important node in each specific case turns out to be exclusive. It is necessary to ensure an uninterrupted and reliable supply of fuel pellets to the burner (read about boilers with automatic fuel supply here).
The density of pellets is high, and a large number of them cannot burn at the same time.
Please note: the supply of fuel and air in pellet boilers is always forced. It is almost impossible to ensure the correct mode during manual control unless you are constantly nearby
Therefore, the device is equipped with automatic systems, and they cost a lot
It is almost impossible to ensure the correct mode during manual control unless you are constantly nearby. Therefore, the device is equipped with automatic systems, and they cost a lot.
This is a factor in the high cost of the entire structure. One or more programmers cope with the task without outside interference. Even a small fuel bunker can autonomously heat a house for up to three days. If you assemble a more solid structure with a large supply of pellets, then the service life can be increased significantly.
Expert advice: It is very important to accurately calculate the air supply. If there is not enough air, pellets may not burn, but smolder, and if there is too much air, there will be heat loss, which will be blown into the atmosphere
Additional costs will also be incurred for the purchase of a motor for the screw mechanism and its automatic connection. Before assembling a pellet boiler with your own hands, you need to draw up drawings of the future boiler, calculate its dimensions depending on the area of the available space for its installation.
The main part of a pellet boiler is the burner
The decision to make a pellet boiler with your own hands is not a cheap one, but the finished product will cost even more. The main element of the device is a burner, which is purchased separately.
Similar to factory models, the main focus is on assembling the body and fitting all components. Assembly kit includes:
- Sheet steel 4-6 mm for the manufacture of the boiler body.
- Bunker material. It can be made from sheet metal (a thickness of 1-2 mm will be enough), multi-layer plywood, or wood.
- Screw. It is selected according to size or, if you have the skills, you can do it yourself.
- Chimney pipes. Metal or asbestos and mounting kit.
- Control system. Provides automatic control over the operation of the boiler.
- Motor for operating the screw mechanism.
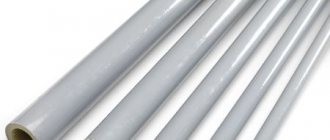
- Pipes for heat exchanger. Square cross-section products are recommended.
- Pipes and fittings for connecting the heating system.
- Fireclay brick, if the combustion chamber is made stationary.
- Grate. It will provide air access to the combustion site.
Making at home
The technology for producing pellet fuel seems simple, but at home its production is not always cost-effective and quite difficult. One of the main problems when creating a production line in a private sector is the lack of special equipment - a granulator. You can find household models on sale, but their cost is quite high.
Of course, you can make a pelletizer yourself , but this is a difficult task. It is not enough to produce all the parts needed for the machine: precise adjustment will be required during assembly. Before you start making a pellet press with your own hands, you need to properly evaluate your existing skills.
The second problem is the availability of materials for making pellet fuel. It is worth thinking about the possibility of producing granules at home only if it is possible to regularly obtain raw materials, and it should be free or have a minimal cost. Only in such a situation will it be possible to provide yourself with high-quality, environmentally friendly fuel.
It should also be said that the use of machines with flat dies allows one to avoid the secondary crushing cycle. They are equipped with toothed rollers, thanks to which the chips are ground to the required state. It is impossible to do without drying sawdust , and to solve this problem, many craftsmen assemble drum dryers of a simple design. You should also remember that the best material for making pellet fuel is coniferous wood. It is not possible to make pellets from poplar, linden or willow.
Starting and maintaining the boiler
Before the first launch of the structure, you will need to invite a specialist to check all elements for compliance with safety requirements. It is not recommended to switch it on yourself.
Start-up is carried out only after checking the unit for compliance with the selected scheme. The tightness of the chimney, bunker and the boiler itself must be checked. Before starting, you need to make sure that the heating system is full and the pressure in it corresponds to parameters suitable for operation. All instruments and automation must be in working order.
Caring for the unit is not difficult. As it burns out, it is necessary to add fuel, clean the stove from ash, and also monitor the performance of the automation elements. Separately, you will need to check how the burner and ignition system work.
Features of a pellet boiler
Solid fuel pellet boiler
The unit in question is one of the modifications of an ordinary solid fuel boiler, optimized for operation using special pressed pellets as fuel.
- The granules used are a very inexpensive fuel, second only to main gas in this indicator.
- By assembling a pellet boiler, you can provide economical and efficient heating of your own home.
- In addition, pellet boilers are one of the safest types of heating equipment for private use.
How to load fuel correctly
Firebox and chimney
The picture shows an empty firebox. How does the stove work and how to use it?
Unlike, for example, “bubafoni”, the blower pipe is inserted directly into the firebox with the pins down. They should rest against the bottom, with the blower located in the center.
- Fuel loading begins.
- Fuel is loaded up to the chimney level.
- Sawdust must be compacted.
- The better the sawdust is compacted, the more efficiently the stove operates, and this significantly affects the operating time.
- In this case, as the fuel is compacted and loaded, the blower must be slightly rocked to the sides so that a small gap is formed between the blower and the compacted fuel.
- Otherwise, the ignition process will be significantly delayed.
Sawdust boiler cost
Scheme of operation of a solid fuel boiler.
Heating with sawdust is quite profitable. It is necessary to clarify that the design itself usually has a decent cost, but during operation it justifies itself. After all, you can heat your apartment with any waste; a long-burning boiler will process everything. You don’t have to constantly search for fuel; it is consumed very economically. Such a boiler can warm the space around it for about a week, depending on how much raw material is put into it. Of course, the most profitable thing would be not to buy it in a store, but to make it yourself.
If we talk about how long a long-burning furnace can operate, we cannot fail to mention the Popov boiler. It has a very high efficiency, as it is capable of generating 1 kW of energy per hour from 100 g of sawdust. That's a pretty decent amount of heat. In practice, this figure causes a lot of controversy. Some owners of such heating devices confidently state that they are not capable of producing more than 500 W per hour. Whether this statement is true or not, a long-burning boiler is very expensive on the market. How to make a long-burning boiler with your own hands? Now no one doubts that it is very profitable to use sawdust on the farm. Making it yourself is not as difficult as it seems. Although it is necessary to have a good understanding of the principles of its operation. The raw materials that enter the oven must be well compacted; they are laid in several layers. The more firmly it is compacted, the better, thereby increasing the efficiency of the device. After all, even an ordinary stove can show good results if you use carefully dried firewood (but it will take at least 2 years to dry). This is too labor-intensive a process, which is why no one does it.
The simplest homemade sawdust boiler may outwardly resemble the familiar potbelly stove. But such a stove will be able to work for a good half of the day with only one refill. A similar design can be used not only for heating, but also for smoking meat or fish.
Before starting work, you need to prepare all the materials:
Diagram of a long-burning boiler.
- raw material tank;
- steel sheets 2-3 mm thick;
- steel sheets 4-5 mm thick;
- welding machine;
- Bulgarian;
- brick;
- cement mortar;
- rectangular pipes with a profile 60x40 mm;
- round pipes with a diameter of 40 and 50 mm.
The first step is to make 2 cylinders from steel sheets. The diameter of one cylinder should be slightly larger than that of the second. The smaller cylinder will need to be inserted into the larger one and a lid attached on top. You can also make the lid yourself from the same steel. The bottom must be welded from below. The thickness of the bottom and lid should be twice that of the walls of the tank (approximately 5 mm).
The pipes need to be selected so that they fit perfectly into each other: then it will be easier to assemble the structure. The rectangular pipes will be in a vertical position, and all the others should fit into them. Therefore, holes of the appropriate diameter must be made in rectangular pipes. 2 pipes must be connected to the boiler. One for hot water output, and the second for cold treatment. Therefore, holes with a diameter of 5 mm are also made in the walls of the boiler.
Now you can start welding the pipes. This must be done very carefully so that there are no gaps left. Water pipes should be welded last. The open ends of the pipes are thoroughly welded with small pieces of steel.
A homemade sawdust boiler should not allow water or smoke to pass through. Therefore, it must be checked for leaks. This is easy to do with ordinary water. It just needs to be poured into the pipes. If a leak is found, the holes will need to be sealed.
Now that the entire structure is fully assembled, it will need to be mounted into the furnace frame. This frame may look like a regular box. To assemble it, you will need bricks and cement mortar. It is best to assemble such a frame in advance, and not at the last moment.
Self-assembly of the boiler
You can assemble a long-burning boiler with your own hands. Drawings, videos and photos of the assembly are presented on the Internet. The diagram must contain the following elements:
- In the lower part there is an ash pit with a blower.
- A cast iron grate is placed above the ash pit.
- A grate is built into the bottom of the firebox. The camera must have a secure door.
- The working part of the heat exchanger is made above the firebox area.
- Next, the chimney pipe is installed.
Before starting work, you should perform design calculations, decide on a diagram and draw a drawing of the finished product. A do-it-yourself boiler makes it possible to create a device to suit your individual requirements.
Quality control
Before loading and igniting the unit, it is necessary to check the tightness of the water jacket and check the quality of the welded joints. This will require an air compressor. You can test seams in two ways, which are very reliable:
- Hydraulic. The entire container is filled with water, a compressor is hermetically connected to the fitting, which should create an excess pressure of 2-3 bar. Water does not have the property of being compressed, so it will flow through all uncooked places.
- Pneumatic. Pressure is created without water, and all welds are coated with soap foam using a brush. The bubbles will show where air is leaking through. During the test, the pressure drop can be monitored using a pressure gauge on the compressor.
There is such a type of solid fuel heating source as a sawdust mine boiler. Its design and operating principle are different and more complex, although it is also quite possible to make it on your own. It works due to the fact that sawdust is burned in the lower part of the unit, pouring there from the bunker, this can be seen in the figure.
The process continues in smoke pipes, which intensively heat the coolant. The principle of afterburning wood gases (pyrolysis) is used. Operation efficiency is increased by installing an air blower - a blower fan. Making a boiler using sawdust and tyrsa with your own hands is not so difficult in practice, but it will definitely give a noticeable economic effect both during production and during further operation.
How to do
Making containers yourself is not particularly difficult. You can make a frame from a metal corner, cover it with boards, plywood, weld metal of the appropriate shape to the corner, etc. What you need to pay attention to when developing the design is that most bins have at least one inclined wall, which guarantees uniform pouring of granules. There may be more difficulties with a screw device, but you can always buy a ready-made one. It will still be cheaper than buying a branded one. For example, a MAFA Mini bunker with a volume of 300 liters costs 500 euros, a bunker from the same company, but with a volume of 750 liters costs 900 euros.
It’s easy to make a pellet hopper yourself
To manufacture a screw device, you need: a screw of the required length and diameter of 75-100 mm (2), a metal pipe of a larger diameter than the screw (1), a motor that is controlled from the burner (3). We insert the auger inside the pipe, connect the motor, and insert the pipe into the hole in the lower part of the pellet hopper.
Screw device
There are no particular difficulties foreseen in the manufacture of a pellet bunker. No special technique or any supernatural abilities are needed here. Sometimes the so-called “locking” effect occurs when the pellets “hang” at a certain height. The problem is solved with a “tedder”: a small-diameter pipe to which not very long pieces of wire are welded. This “tedder” is connected to a separate motor.
Pellet hopper with tedder
If desired, the presence/absence of pellets in the bunker can be monitored with special sensors. But this capability is usually implemented in large volume silos that are rarely visited and inspected. What types of pellets are there, what is their difference, read the article Pellets for heating: types and features of use.
Design and principle of operation of pellet boilers
To install such a solid fuel installation yourself, you will need to work hard, and first understand how it works and what it consists of. The heart of the pellet unit is the burner device, which performs almost all the main functions and is connected to the boiler controller, acting on its commands. Burners designed for burning pellets are of two types:
The difference between them is as follows. A retort pellet burner is a bowl (retort) filled with fuel from below via a screw, and air is supplied to the combustion zone by a fan through holes located on the sides of the bowl. During operation, the flame column is directed upward, which must be taken into account by the boiler design.
A flare burner device is a pipe, which is also a combustion chamber, where a screw feed of pellets occurs at one end, and a powerful flame torch directed horizontally comes out of the other. This is achieved by forcing air into the chamber from the same side as the fuel.
Note. Flare-type burners are used more often than retort burners, since the latter have problems with supplying low-quality pellets. To assemble a boiler installation with your own hands, it is also preferable to use a flare burner device; below we will explain why.
In the future, we will consider the operation of the unit with a torch burner, since this design is better suited for our purpose. So, the combustion chamber in the form of a pipe is located inside the boiler, and the outer part of the burner consists of a housing with a feed screw and a fan for forcing air. To operate the electric ignition and maintain the flame, the design also includes a control board, a photosensor and an incandescent element. At the top of the housing there is a fuel supply pipe.
The process goes like this: at the controller’s command, the auger delivers a small amount of pellets into the chamber and stops. The glow element turns on and at the same time the fan turns on, causing the fuel to ignite. The appearance of a stable flame is detected by a photosensor and notifies the control unit, which turns off the incandescent element. Then work begins in normal mode, the screw conveyor resumes supply, and the fan pumps in the required amount of air. At the command of the same controller, pellets are poured into the burner through the nozzle, moved there from the loading hopper by an external screw conveyor.
Note. Many manufacturers use a fuel hopper mounted directly above the burner nozzle, which allows pellets to pour into it independently without an additional conveyor.
Now it’s worth considering the design of the pellet boiler as a whole. The design of the unit body is typical for all solid fuel installations; it consists of an internal chamber made of steel or cast iron, enclosed in an outer casing filled with water - a water jacket. To extract heat from flue gases, the design can provide 2 types of heat exchangers:
In a water-tube heat exchanger, the coolant flows through pipes, washed by combustion products and transferring their heat to it. But such a device is rarely found in solid fuel boilers; usually the opposite is true in them: flue gases pass through the pipes, giving off combustion energy to the water jacket, this is a fire-tube heat exchanger. In order for the boiler to operate efficiently, the heat exchanger is made of two or three passes. This means that the flue gases, passing through the flame tubes, change their direction to the opposite direction twice or three times, making 2 or 3 moves. This allows them to transfer maximum heat to the water jacket, and at the exit to the chimney to obtain a temperature of no more than 150 ºС.
The working process goes like this: the burner burns fuel and heats the chamber walls, which heat the coolant. In turn, combustion products, under the influence of natural draft and fan operation, pass through the flame tubes, also giving off heat to the water jacket, and are discharged into the chimney. The combustion intensity is controlled by the controller based on a signal from a temperature sensor immersed in the coolant at the outlet of the unit. This is the operating principle of pellet boilers: to automatically regulate the combustion process and, if necessary, increase or decrease the supply of fuel and air to the burner.
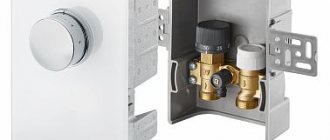
Pellet boiler wiring
In practice, the installation of a pellet boiler is not much different from the installation of other solid fuel “brethren”. The main task here is to correctly place all the equipment along with fuel supply devices. Remember that passages of at least 700 mm wide must be maintained between the units of the units, and there must be a space of 2 m in front of the front panel of the unit.
If, when igniting any solid fuel boiler after stopping, coolant from the heating system is supplied inside, then toxic condensate mixed with ash and soot will form on the inner walls of the firebox. To prevent this process, which eventually destroys the metal, piping schemes for pellet boilers with a mixing unit are used during installation.
Here the main role is played by a three-way valve, whose task is to prevent coolant from the system from entering the jacket of the unit until it warms up. At this time, water, driven by the pump, circulates in a small circle from the supply pipe directly to the return pipe through a three-way valve. As soon as it reaches the set temperature, the valve will begin to mix water from the system into the return, eventually stopping the movement in a small circle. In this case, the piping of a boiler operating on pellets should include installing a pump on the return, not the supply, pipeline. We should not forget about the safety group with a safety valve and pressure gauge, which must be installed on the outlet pipe of the heater.
Industrial model
On the modern market of heating devices, there are many models of boilers that use wood, or more precisely, its crushed waste, as fuel. Depending on the technical characteristics of the product, sawdust stoves can heat only a house or, in addition, outbuildings. There is a standard scheme that allows you to provide hot water supply for the heating system and household needs, where the main element is a double-circuit solid fuel pyrolysis boiler. Heat productivity in this case depends on the power of the sawdust boiler, as well as the quality and quantity of the specified fuel.
Advantages of modern units
The main advantages of factory-made heating devices for the home are:
- maximum automation of fuel combustion and stable maintenance of the required temperature. Chip boilers independently control how full the storage hopper is, from which sawdust is fed into the boiler by screw. Due to the fact that the automatic safety system is triggered in time, the fire augers do not allow the flame to spread back to the bunker;
- The automatic mode of ash ejection into a special collection relieves owners from stopping the system for manual intervention in the cleaning system. In this case, heating boilers using sawdust stop their operation only in case of problems in order to eliminate them;
- The sawdust heat generator is environmentally friendly, because here combustion is not accompanied by the release of ash from the chimney into the atmosphere, and the heated air goes through several degrees of purification from heavy particles, and only then enters the room. Meanwhile, the ash deposited by a special cyclone is disposed of without harming the environment;
- the vast majority of boilers operating on pressed or loose sawdust are distinguished by reliable operation and high heat transfer efficiency;
- full automation of the control system, which scans equipment for faults and alerts the operator about possible errors in operation, if any.
Disadvantages of factory-assembled boilers
This type of device that generates heat has practically no disadvantages, except that their cost, depending on the brand and model, can be very high. Also, sometimes problems arise with replacing failed components, which need to be ordered from the manufacturer and wait for the goods to be delivered, which is problematic during the heating season, when stopping the system is very undesirable.
- The process begins with the automatic feeding of sawdust into a hopper equipped with a system of moving floors, from where it enters the conveyor.
- The compressed or loose wood material is stored in a hopper until the sawdust burner compartment is empty, after which the movable floors come into operation. When the tank is completely filled, fuel will not be supplied until the tank begins to empty.
- At the next stage, wood chips from the hopper are fed into the boiler using a wood chip and sawdust auger.
- After entering the combustion chamber, the fuel is burned in full due to air supply. Further, the boiler operates continuously according to the same cycle discussed in these four points.
Do-it-yourself pellets: making your own granulator
One of the modern types of solid fuel for stoves, fireplaces or boilers for home heating systems are pellets - compressed mini-briquettes that are obtained from logging waste or wood processing industry enterprises. Thus, two important tasks are solved at once - providing consumers with fuel and rational disposal of waste, which previously was often simply burned without any benefit.
DIY pellets
Pellets are very convenient to use, especially since boilers have been developed specifically for this type of fuel, equipped with capacious loading bins and lines for automatic continuous supply of pellets into the combustion chamber (more information about this can be found in the corresponding publication on our portal ). Many models of such heating devices are intended for domestic use in autonomous heating systems of private houses. Therefore, the growing interest of owners of individual housing in finding reliable suppliers of this type of fuel is understandable. Many homeowners, moreover, wonder whether it is possible to make pellets with their own hands.
This article will discuss the main advantages of granular solid fuel, the technological stages of its production process and the equipment necessary for this. Those readers who want to make pellets with their own hands should realistically evaluate the available possibilities, weigh the pros and cons in order to be convinced of the rationality and economic justification of this approach to the problem of independently providing their own homes with granulated fuel.
What are pellets and their main advantages
Pellets are compressed mini-briquettes (granules) of a cylindrical shape with a diameter of 4 to 8 ÷ 10 mm, a length usually from 15 to 50 mm. The raw materials for their production can be a variety of materials.
A wide variety of materials can be used as raw materials for the production of pellets.
- Most often, waste from wood processing plants is used for granulation - sawdust or small shavings. Such pellets are of the highest quality.
- Wastes from logging and primary wood processing - bark, branches and even dried leaves or pine needles - are also processed.
- They actively use waste from agro-industrial technologies as raw materials - straw, sunflower husks, cake, grain waste remaining after flour milling lines or cereal production.
- Pellets are made from peat - in this form, this type of fuel will provide maximum energy efficiency.
- At large poultry complexes, lines for the production of pellets of chicken manure are often installed - problems of both recycling and waste-free production are solved.
- Modern processing technologies make it possible to use even sorted municipal solid waste for the production of pellets.
Of course, pellets made from various materials differ greatly in quality and in their potential energy output. It is customary to distinguish three main types of such granular fuel:
Pellets themselves can differ in quality class
- Premium class pellets are considered optimal for use in autonomous heating systems. They are made exclusively from highly purified wood waste. They are distinguished by a pronounced light shade and uniformity of structure. Such pellets have a minimum percentage of ash content - the non-combustible residue is only up to 0.5% of the total mass of the fuel. The vast majority of pellets produced for mass consumption belong to this class. Perhaps the only significant drawback of this fuel is its fairly high price.
- Pellets of the so-called industrial (industrial) grade may include a certain small percentage of particles of bark, soil impurities, foliage or pine needles. Their ash content is, of course, much higher, but their energy intensity is still quite high, which makes it possible to use them in a home heating system, subject to more frequent preventative maintenance on boiler equipment. But the cost of such fuel is already significantly lower. They are noticeably darker in color than “premium class” pellets.
- The lowest-grade pellets on an industrial scale are obtained from agricultural waste and other materials. Their ash content is very high - up to 4% or even more, and they are not distinguished by their high energy intensity. However, their low price makes their use in large boiler houses profitable.
By the way, some types of pellets can be used not only as fuel for combustion in stoves and boilers. They are used, for example, for fertilizing and mulching the soil, as adsorbents and cat litter fillers.
What other positive qualities do pellets have:
When pellets are burned, non-hazardous substances that participate in natural metabolism are released into the atmosphere.
- They are among the most environmentally friendly types of fuel - the content of harmful and active substances in exhaust gases is minimal. This is mainly water vapor and carbon dioxide, which are easily absorbed by plants.
- Pellet fuel lends itself well to pyrolysis, and this makes it possible to use it in appropriate, highly efficient long-burning boilers. The use of automatic loading lines allows minimizing human participation in the operation of boiler equipment.
- Such fuel is very compact and does not require large areas for organizing its storage. Transportation of the necessary fuel reserves will also require much less costs.
Pellets are easy to transport and store
- No chemical additives, adhesive mixtures or modifiers are used in the production of pellets. They do not have unpleasant odors, are not capable of causing allergic reactions, and can be stored even in close proximity to residential premises.
- The heat transfer of high-quality pellets, especially in volumetric ratio, exceeds most types of ordinary wood and coal.
- Pellets are not subject to processes of internal rotting or decay. This virtually eliminates the possibility of their self-ignition.
- Quite often, pellets are also the most inexpensive type of high-quality fuel in the region, especially if there are production enterprises involved in their production - long-term contracts can be concluded for certain volumes of wholesale supplies.
Find out how to make a pyrolysis boiler with your own hands from our new article.
Prices for garden waste shredders
Garden waste shredders
What is the technological process for making pellets?
The entire technological process for the production of granular solid fuel is divided into several stages.
Scheme of technological stages of pellet production
- Initial preparation and primary crushing of raw materials. If possible, wood or agricultural waste is sorted, cleaned of unnecessary impurities and transferred to the primary crushing line.
Stationary crusher for primary grinding of wood
Conventional crushers, stationary or mobile, which are used in logging or wood processing enterprises, and sometimes even in private households, produce chips with a size of 30-50 mm and a thickness of 1-2 mm.
- The next mandatory step is drying the crushed raw materials. For the further production process, it is required that the residual moisture content of the wood does not exceed 12 ÷ 14 percent. To do this, the raw materials are sent to drying units using a drum or aeration operating principle.
Drying unit of aerodynamic principle of operation
- The dried wood is transferred to the fine grinding line. Most often, hammer crushers (mills) are used here, which reduce the wood chips to the state of fine sawdust or even “wood flour”. The maximum fraction of wood particles at the output should not exceed 4 mm. The typical density of the material at the output of this production line is about 150 kg/m³.
The hammer mill brings the raw material to the required fine fraction
- It often happens that after drying and final grinding, the residual moisture in the crushed raw materials will not be enough to form strong granules. To eliminate this problem and bring the humidity to the required 10 ÷ 12 percent, a water treatment cycle is carried out - saturating the raw materials with hot steam or ordinary water. Steam is used when using hardwood or old wood that has lain for several years as a raw material. For softer varieties, water immersion is usually used.
- Once the required humidity is achieved, the raw materials are transferred to the pressing line. In special installations, it is pressed through matrices that have cone-shaped holes of a certain diameter. The special shape of the channels promotes maximum compaction of sawdust. In addition, under the influence of pressure and an inevitable increase in temperature, wood has a special substance - lignin, which is always included in its biochemical composition. Lignin promotes strong bonding of the smallest fragments into a fairly dense pellet structure.
Molded pellets emerging from a cylindrical matrix.
Matrices can be cylindrical or flat type. The raw material, pressed into cylindrical briquettes, is cut with a special knife at each full rotation of the matrix, thereby achieving approximately uniform linear dimensions of the resulting pellets.
Approximate diagram of pressing pellets through a cylindrical matrix
Cylindrical matrices are most often used in stationary industrial installations. In compact models of granulators, preference is given to flat matrices using two or more rollers.
In small-sized installations, round flat matrices are more often used
- The pellets obtained at the exit from the pressing line are cooled, as they can have a temperature of up to 65 ÷ 90 degrees, dried naturally, and then packaged in bags and sent to the finished product warehouse, to retail chains or directly to consumers.
Video: full production cycle of pellet production
Production of pellets on a private farm
What seems quite simple in the industrial production of granular fuel will not always be possible or cost-effective when trying to organize this on a personal scale. The problems lie in the following:
- To produce pellets, it is necessary to have specialized equipment - a granulator. Similar low-capacity installations are produced by some companies (European or Chinese), but their cost is quite high, sometimes reaching several hundred thousand rubles. You can order a similar machine from private craftsmen who have mastered the production of such equipment - there are a lot of offers on the Internet. However, individually manufactured high-quality equipment costs, perhaps, no less than factory equipment.
In numerous articles on various sites you can find the statement that such equipment is not difficult to make yourself. It is unclear what motivated the authors of such publications when they painted such rosy pictures. Indeed, you can make a granulator yourself, but this process cannot be called uncomplicated. Preparation of the necessary parts, assembly of the rotation transmission mechanism, precise adjustment of all moving parts taking into account the enormous loads arising during the granulation process is a task of a high degree of complexity, accessible to craftsmen who are well versed in the properties of metals and their processing technologies. High-precision turning, milling, welding, and plumbing work will be required, requiring real, professional qualifications. Before you start manufacturing, you need to very soberly assess your capabilities.
- The second important aspect is the availability of raw materials. If you plan to make pellets at home, as they say, “from scratch,” then you will need installations for crushing the material and its mandatory drying. Will this be economically profitable, not even from the point of view of purchasing equipment, but from the point of view of the energy consumption of all processes? In mass production, this pays off in large quantities of processed products, but to meet the needs of an individual farm, a negative balance may develop.
It is probably advisable to take on the production of pellets at home if it is possible to regularly and practically freely obtain ready-made raw materials - crushed shavings or sawdust. Then, perhaps, it will be profitable not only to supply yourself with granulated fuel, but also to offer finished products for sale to other homeowners.
By the way, many granulation devices with a flat matrix do not require a secondary crushing cycle - heavy, powerful toothed rollers can handle this, which should grind the chips to a state suitable for pressing pellets. True, in most cases it is impossible to do without drying wood chips, but resourceful craftsmen make the simplest drum dryers using old metal barrels.
Video: homemade drum dryer made from barrels
- It should be noted that not all wood is fully suitable for making pellets. For example, attempts to granulate sawdust from linden, willow or poplar are almost doomed to failure - the material does not “sinter” well and crumbles at the slightest mechanical impact.
Coniferous wood is considered optimal for these purposes - its natural resin content contributes to the production of stable, durable granules.
Find out how to make biofuel with your own hands, and also evaluate production possibilities from our new article.
What is needed to make your own granulator?
Finding exact drawings of an installation for making pellets at home is very problematic. Those craftsmen who are engaged in the manufacture of granulators are very reluctant to share their secrets, and if they allow someone to use the developments tested in practice, then for very serious money.
The principle of the design and operation of a small-sized installation, its main components, their fastening and interaction are presented in the attached video.
Video: device of a small-sized pellet granulator
So, to assemble the granulator you will need:
- Flat round matrix. It can sometimes be purchased in stores - they are used to make granulated feed. Self-production is also possible, but requires professional tools and equipment. It is necessary to very accurately cut a circle of metal with a thickness of at least 20 mm, mark and drill a hole for mounting the matrix on the shaft with a groove for rigid fixation to transmit rotational force.
The main working parts are the matrix and the block of ribbed rollers.
The pressing holes must have a conical configuration tapering downward - to make them, a special cutter is required, made at the desired angle.
The overall diameter of the matrix can be different - the larger it is, the higher the performance of the device, but the more powerful the power drive will be required.
Video: how the matrix is made
- The second most important structural unit is the powerful rollers with a serrated working surface. They are seated on the shaft through rolling bearings. This unit itself has a hole in the center, which is mounted on the rotating vertical drive shaft, also through a bearing. The pressure of the rollers to the matrix is adjusted using a large diameter threaded nut. When assembling the apparatus, the shaft with rollers is fixed in the eyes of the housing, remaining motionless during operation. The dimensions of the rollers, naturally, must correspond to the working plane of the matrix with holes.
- The body itself is made from a pipe or a cylinder from a metal sheet is welded. The internal diameter must correspond to the size of the matrix, so that its rotation is ensured, but with the minimum possible clearance.
Usually the body is made collapsible. This simplifies the maintenance of the device.
Lower part of the housing with installed gearbox
A gearbox will be installed in the lower part, transmitting rotation from the pulley to the vertical working shaft, so that a rotation speed of approximately 70 - 100 revolutions per minute is ensured. The housing provides a window with a tray for exiting finished pellets.
In the upper, working part there is a matrix and rollers
In the upper, removable part of the body, the actual working unit of the device will be located - the matrix itself with rollers and a shaft fixed with special locking screws on which they are mounted.
Granulator in disassembled state
- The entire structure must be based on a powerful frame - a bed, which can be made from a rolled metal profile (channel, angle, I-beam). Dynamic and vibration loads during operation are very significant, and the frame must be able to easily withstand them. Here, on the frame, installation of an electric drive is usually provided, connected to the gearbox of the apparatus by a belt, chain or cardan drive.
Layout option for granulator and electric drive on a common frame
- The electric motor must be guaranteed to ensure the operation of the installation under maximum load, without overheating itself. Typically, even a small device will require an electric drive with a power of about 15 kW.
- It is advisable to provide a cone-shaped loading hopper placed on top of the housing cylinder - this will significantly facilitate the supply of raw materials for molding pellets.
If everything worked out, the necessary parts and components have been manufactured and carefully fitted, the device operates confidently in “idle mode”, then you can carry out the first test run with loading of shavings or sawdust - neatly formed pellets should appear at the output.
Video: operation of a small-sized pellet production plant
However, the proposed granulator scheme is not at all some kind of “dogma”. Craftsmen also come up with their own designs. The video below shows an installation for producing auger-type pellets - its operation is in many ways similar to the familiar home meat grinder. The only thing is that such a scheme will require raw materials that have been crushed to the smallest fraction - the auger will not be able to grind even small chips.