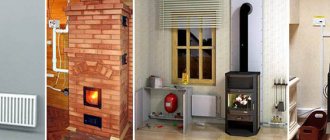
Installing a stove in a country house or country house is a very popular thing today.
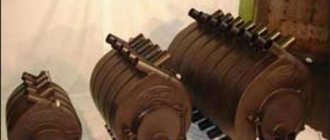
Bell furnace
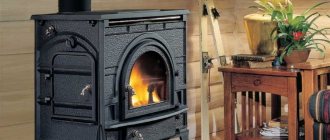
Despite the appearance of modern heating devices on the market, many people prefer the good old brick stove, which for many centuries served as the only source of heat and cooking in the house. Such designs are especially relevant where there is no gasification.
Time does not stand still. The good old “Swedish” and “Dutch” stoves have been replaced by new and more improved bell-type stoves, which are in no way inferior to their duct counterpart. The design of the bell-type furnace is distinguished by a fundamentally new method of using hot gas.
Operating principle of a bell furnace
The Kuznetsov bell furnace (popularly called “Kuznetsovka”) was named in honor of its creator, I.V. Kuznetsov, who began developing a new heating scheme in the early 60s of the last century. The unique technology of “free movement of hot gases” immediately gained recognition and became very popular all over the world.
Kuznetsov bell furnace: operating principle
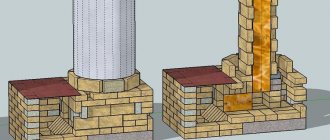
The peculiarity of “Kuznetsovka” is that heated gases pass and circulate through the pipe due to their own gravity, as opposed to “forced” movement through the chimney. We all know from physics lessons that warm air rises, displacing cold air. But, unlike duct prototypes, here the heat does not come out of the pipe, but is collected under a hood. Gradually it cools down there, and is replaced by gusts of hotter air rising upward.
The main difference between a channel furnace and a bell-type furnace is the principle of hot gas movement. In the first, the smoke seems to be pulled upward through the pipe, and in the bell-shaped pipe it is pushed out. The cap itself can serve as a container for heating water, cooking, drying, etc. Thus, the bell furnace can perform a double function.
Kuznetsovka stove
That is, according to the functional characteristics, “blacksmiths” can be divided into:
- sauna stoves;
- ovens for cooking (bread, cooking, cauldron, barbecue, grill, etc.);
- fireplace;
- heating stoves;
- combined type.
The most common are the combined types with the ability to cook food and heat the entire house. Although the style and shape can vary, the operating principle of a bell-type stove remains the same.
Scheme of gas movement in the furnace
To make it easier to understand the basic operating principle of the Kuznetsov stove, imagine a fire lit in the open air. Due to unlimited access of air to the fire, the fire produces little heat. Now let’s try to cover this fire with a metal cap, leaving a small gap at the bottom so as not to completely extinguish the flame. Hot air will rise, heating the walls. Gradually cooling, the air will begin to fall towards the left opening while a new portion of hot air takes its place. This is the principle of free movement of hot gases, which I.V. Kuznetsov successfully applied it in his development.
Design Features
Today you can find more than 150 types of design on the Internet, but no matter what shape or style of execution they are, all stoves are built using the same method. The designer, when creating a scheme for laying a bell-type furnace, set himself two goals: productivity and efficiency of the heating system.
It is not so easy to build such a structure. It is necessary to strictly adhere to the guidelines developed by I.V. Kuznetsov. orders. The inventor pays great attention and attention to the arrangement of the internal channels of the bell furnace.
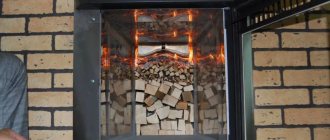
The hood is a separate chamber for retaining heated gas, which helps save fuel and increase the efficiency of the furnace.
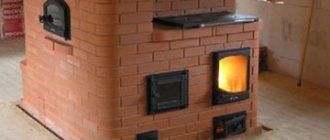
The standard design of the “blacksmith” involves the presence of two caps. The lower one is combined with the combustion chamber, and the second hood is located in the upper part of the stove. The task of the first bell is to separate gases into cold and hot streams. This is what distinguishes a bell-type furnace from a channel furnace, where heated air, under the influence of draft, freely escapes outside. Here, the hot gas flow coming out of the furnace tends upward, where it lingers under the first hood and accumulates heat for a long time.
Further, the flow tends through the passage into the second chamber, where it is also delayed under the second ceiling, since the passage is located at the base. As a result, hot air accumulates heat in the stove for a long time before exiting through the chimney. This gives high efficiency - up to 95%. If we compare it with the efficiency of a traditional Russian stove (channel), this is 45-50% more.
In addition to the free movement of gas, a bell-type furnace also involves mechanical flow control. For this purpose, valves are installed in the structure. They, as necessary, can delay and redirect hot flows. The “summer” valve is intended for the warm season, when the stove is used as a hob for cooking. By opening the summer damper, a stream of hot air will rush up the chimney without going under the second hood.
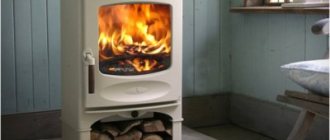
Bell furnace for heating a house
Types of designs with an oven
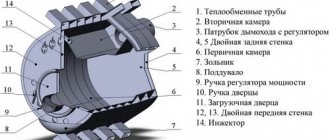
Kuznetsov furnace
It is installed in rooms with minimal space possibilities, while the design and decoration are selected individually. A special feature of this type of furnace system is its high efficiency, which for such devices is more than 80% along with a small amount of soot formed during operation. The design is suitable for placement in any area of the room; it is possible to place several similar stoves at once. Any type of solid fuel is suitable for the firebox.
Swedish stove with oven
In construction practice, it is known to use two variants of the stove system: IP1 and IP2, which includes an oven. The design consists of 30 rows, like the Kuznetsov stove. Provides a summer operation mode without heating the room using valves. Taking into account the direct stroke valve system, it is possible to heat the pipe up to 150 degrees in a relatively short period of time. Instead of an arch, which is typical for Kuznetsov’s design with rapid heating, the Swede uses an ordinary brick covering.
Bykov's device
The thick-walled structure has a simple laying pattern and a rectangular shape. This type of stove provides for placing the device in 2 rooms at the same time. Nevertheless, the Bykov design has significant differences in its structure from bell-type structures. The lower region includes 2 gas channels: ascending and descending. The upper part has the shape of a sieve, the cap of which is divided by 5 channels.
Advantages of a bell furnace
If we compare the blacksmith's furnace with other brick analogues, it has great resistance to deformation. It heats up quickly and retains heat for a long time. Even with the damper not tightly closed, the resulting heat can remain in such a stove for a long time.
- long-term operation;
- low formation of soot and soot (it burns almost completely, turning into ash);
- Efficiency – up to 80%;
- lightweight design that can be mastered even by a beginner;
- improved heating system compared to its duct counterpart;
- easy and practical to maintain - there is no need to clean it often;
- does not crack;
- versatility of construction (in a house, apartment, bathhouse, etc.)
- large selection of shapes and designs;
- there is no need to take into account the height of the chimney to ensure good draft;
- high speed of kindling;
- the design allows you to install a large heating element;
- the oven heats up evenly;
- the oven takes longer to cool down compared to its brick prototypes.
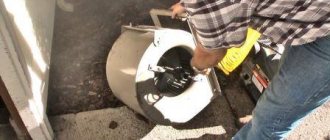
Ignition of "Kuznetsovka"
Solution for two-bell oven
The classic version of the stove structure involves a clay solution. Each specialist knows his own recipe for the ideal mixture for a brick oven with bottom heating. The building mass must necessarily include high-quality clay of sufficient fat content, as well as fine-grained sand, which, together with the clay base, must have the consistency of thick sour cream. After the mixture is ready, a quality check takes place. Balls are rolled out of the mass and baked in the oven. If, after cooling, the item does not crack, the solution is of acceptable standards. When such a ball is thrown from a height, and it does not lose its shape and remains intact, then the mixture can be considered ideal for work.
Basic installation rules
- The inner shell of the furnace must be surrounded on all sides by empty space, since the brick will become very hot during operation of the furnace.
- The location of the furnace heat source can vary depending on the type and shape, but it should always be located at the bottom of the hood.
- Every third row of brickwork must be tied with metal wire. This will strengthen the bond and prevent further deformation of the oven.
- The shape of the cap can be of any shape and size.
- When installing the stove, take into account the fact that when heated, all metal elements (grid, door) will expand. Therefore, all these parts of the furnace system must be installed with a reserve for expansion. A fireproof gasket must be installed between the brick and the metal.
- When lighting a finished stove for the first time, you do not need to immediately set the maximum temperature. The kiln must be fired gradually, starting at low temperatures.
- After installation, the stove should be treated with a refractory compound.
Today there are a huge number of varieties of bell-type furnaces, because progress does not stand still. Kuznetsov himself only laid the foundation for this new type of heating system, and his followers around the world are already making their own adjustments and working to improve the stove. Of course, it is much easier to build a stove at the stage of building a house. But often people think about the need to place such a heating device after the walls have been built. Here, when developing a scheme, you will have to take into account the height of the beams, the location of the partitions, the roof, etc.
If the stove is installed during the construction of the house, then it is better to position it in such a way that it heats 2-3 rooms at once.
It is simply physically impossible to describe the instructions for laying all types of bell-type stoves, so in this article we will present a classic version of installing a bell-type stove with your own hands. By following our instructions exactly, you will definitely be able to assemble a high-quality, beautiful and functional stove.
The dimensions of the furnace, of course, can be different - the volume of material will depend on this. But under no circumstances should the order be changed!
What materials will be needed to install the stove?
Before you begin construction work, stock up on all the necessary materials. In order for a bell-type stove to please you with its functionality and appearance for many years, the materials must be of good quality.
| Fireproof mastic (ready-mix) for laying fireclay | Fireproof mastic (ready-mix) for laying fireclay. |
| Fireclay brick | Refractory brick for firebox (fireclay) SHA-8. |
| Brick M150 | Ceramic brick (grade not lower than M150). |
| Cement | Clay, sand and cement for laying bricks and creating foundations. |
| Plywood sheets | Plywood for formwork construction. |
| Steel plates | Steel plate. |
| Armature | Metal wire or reinforcing rod. |
| Corner | Steel corner. |
| Wooden blocks | Wooden blocks (50x50 mm) – 4 pcs. |
| Oven doors | Doors and latch. |
| Foil | Foil for the first layer of brick (according to the size of the foundation). |
| Combustion stove | Furnace stove. |
| Grate | Grate. |
Tools for laying a bell furnace
- construction mixer or drill with an attachment;
- Circular Saw;
- pliers (for tightening the wire);
- Master OK;
- shovel;
- building level;
- Bulgarian;
- construction gloves.
Let's start installation: step-by-step instructions
Step 1. We think over the design of the bell furnace and draw a diagram on paper.
Before starting work, you must clearly know how wide your oven will be. It must be drawn on paper, calculating all the necessary parameters.
- Calculate the size of the hole for the foundation. Keep in mind that it should be 10 cm wider than the heating structure itself.
Furnace foundation
Step 2. Laying the foundation
Before installing the stove, you need to take care of the base. It must be solid and perfectly smooth to prevent cracking of the structure and deformation in the future. Laying the foundation is a very important step that needs to be taken seriously.
For a concrete floor, the foundation will act as a kind of platform, raising the stove itself 20-30 cm above the floor level. We make the formwork according to the dimensions of the foundation and fasten its corners with wooden blocks (50x50 mm). We pour sand 15-20 cm thick at the bottom of the foundation, compact it well, and only then slowly pour in the solution. The foundation of the main house should not be connected to the foundation of the furnace. They have different weights, which means the shrinkage will be different.
Scheme of laying the foundation of the furnace
If you are making a stove in a wooden floor:
- We draw the size of the future foundation with a marker on wooden boards and cut a hole around the perimeter with a circular saw.
If the stove is being built in a wooden house, then fire safety rules should be taken into account. It is necessary to lay a sheet of asbestos between the furnace structure and the ceilings.
Preparing the furnace foundation
- We dig a hole 80 cm deep and 1.5 m * 1 m wide. Make sure that all walls are smooth. For this it is better to use a bayonet shovel. Pour sand into the bottom of the hole 15 cm thick and tamp it down thoroughly. It is necessary to wait for the sand to shrink (within 2 days).
- Let's start creating the formwork. You can use any old wooden doors or unnecessary boards to install the formwork, but, ideally, it is better to take plywood. We measure the length and width of the boards according to the dimensions of the foundation, lower them into the hole and connect them with screws. If the formwork is not all immersed in the ground, then we additionally connect the corners with wooden blocks (50x50). If the formwork is immersed in the pit to its full height, then you don’t have to do this.
- We reinforce with a metal rod.
In some wooden houses, the floor is raised above the ground by 50-80 cm. In this case, you will need to dig a hole under the foundation by 20-30 cm. That is, you need to “go deeper” in any case, but take this difference into account.
- Prepare a cement mortar (sand+cement+water) and slowly pour it into the hole. Try to pour in layers, stirring lightly with a shovel each time. This will allow excess air to escape and create a stable base. Let the foundation dry. This will take at least a week, but sometimes you have to wait 20-25 days for the solution to completely set. There is no need to rush in this matter, since the operational properties of the furnace depend on the strength of the foundation.
- While the solution is still wet, it is necessary to clearly determine with a building level how level the site is. Adjust if necessary.
- To do this, take a building level and check the place where the stove will be installed.
- When the solution has completely hardened and the foundation is ready, you can begin laying the stove. Don't rush to build the stove. The foundation must be strong and solid; the further operation of the furnace depends on this.
- Lay a layer of reflective foil under the first layer of brickwork. This will prevent heat loss and redirect the direction of heat flow from bottom to top. Take material slightly larger than the perimeter of the foundation. After laying the brick, you will then need to cut off the edges evenly with a knife.
Order diagram of stove masonry
Practical steps
In this article we will only touch on the basics of practical masonry. To help you understand the issue in more detail, familiarizing yourself with the videos that are available in abundance on the Internet.
For example, here:
If you want to understand the issue comprehensively and get to work “fully armed,” we recommend purchasing a textbook on stove laying. For example, Simakov V.G. "Stoves, fireplaces, barbecues." Moscow, EKSMO, 2011.
On the website of I.V. Kuznetsov, in the section bell furnaces, drawings (called orders) for furnaces of any purpose, power and configuration are available for review and downloading without restrictions.
Materials
If you plan to install a stove according to one of the existing projects, then you should receive two documents for it: a specification that lists all the necessary materials in the option: name of material / brand / required quantity / average price on the market. The last point must be clarified on the date of the decision to lay the furnace.
As a rule, regardless of the chosen option for the future bell furnace, for its construction you will need to purchase:
- Fireproof mastic (special dry mixture for laying fireclay bricks);
- Refractory brick (fireclay);
- Ceramic single solid brick (from M150 and above);
- Materials for preparing masonry mortars: cement, clay, sand;
- Multilayer plywood sheets for formwork;
- Steel sheet for the floor in front of the fire door;
- Rebar and reinforcing wire;
- Steel corner;
- Planed wooden beam;
- Stove fittings (latches, doors, views);
- Metallized foil;
- Hob (if the stove is a heating and cooking stove);
- Grate.
Video. Preparation of clay mortar for stove masonry
In a large metal container, you need to combine the clay with water and soak it for 2 days. After this, pour the sand into the container and mix well with an electric drill with a mixer attachment. When the mixture is well mixed and no two materials are separating, check the consistency of the solution with a trowel. If the mixture slowly slides off the tool, then the solution is ready. You can start laying bricks.
Step 4.
Laying the 1st level of the furnace
Before you start laying bricks on cement mortar, it is better to immediately lay out each row on the floor “dry”, according to the ordering scheme. The diagram shows that on some rows you will have to divide the bricks into ½, ¼. Where you have to grind bricks, use the manual method so as not to disturb the technical properties of the material and its aesthetic appearance.
- Row No. 1. The brick will be laid evenly over the entire area of the oven. The first row is continuous, keep even corners. Start from the side walls of the “blacksmith”, laying out using the spoon method, moving from right to left. (Figure 14). The brick is laid longitudinally in length. We lay each next layer with its edge in the center, and fill in the missing part by cutting the required size from a new brick.
- We lay row No. 2 of bricks. At this level we install a blower (according to the previously developed diagram) and a window for cleaning the oven (there can be 2 of them). The design of the bell-type furnace allows the cleaning door and ash pan to be placed anywhere, but the window must be located below the firebox. Here you will need to divide one brick in half and install them so that they protrude outward from the common row. When you lay the second row, you should not connect them with mortar. Upon completion of construction work, you will need to clean the stove from fallen clay. And after you clean the oven, then secure them with a solution.
In order to correctly install the blower doors and windows, it is necessary to thread a knitting wire into the existing holes, make a loop and twist it with a rope. Place between bricks. If there are no holes in the factory parts, then you need to make them with a drill with a metal drill attachment. Use pliers to twist the loop as tightly as possible. For now, the doors need to be secured with bricks for stability, but not connected with mortar. This will need to be done after laying the third row.
Scheme of the furnace masonry
- We place row No. 3 similarly to the previous one. From the 3rd row we begin to raise the firebox itself, laying it out of heat-resistant brick. Between the front wall of the stove, lined with red brick, and the firebox itself (made of fire-resistant brick), we lay basalt cardboard or corrugated foil. After burning out, it will create a perfectly even thermal gap of 5 cm.
The main feature of the Kuznetsov stove is its “floating” firebox. That is, it must be a free-standing module, separated from the furnace body by a dry seam. The refractory brick (fireclay) should not fit into the regular brick of the furnace body with any protrusions.
Features of the Kuznetsovka furnace masonry
- We make row No. 4 a little narrower (by 1.5 bricks) in order to reduce the connector for the combustion products to fall off (you can see it in the diagram). We design it in such a way that a partition appears in the far corner from the firebox leading to the upper compartment.
- We lay out row No. 5 similarly to the 4th row, only you need to put a grate on top of the reset rim. We lay it without mortar and fill the gaps with sand.
- Row No. 6 is laid in the same way.
Here we begin to install the combustion door with a gap of 5 mm. We carefully set it plumb to check the level deviation. In the same way as in the 2nd row, when you installed the ash pan, you need to secure the door in the brick with metal wire.
In order not to move the door while you continue to line the row, secure it with strands and press the ends of the strands on top with a brick. This will allow you to continue working without worrying about the door being out of level.
- Row No. 7. We take a chimney 0.5 bricks wide from the firebox into the adjacent air chamber.
- Row No. 8 is laid in the same way as row seven.
- Row No. 9. We build out the walls of the firebox with fireclay bricks. Here a passage is formed between the firebox and the first hood to remove combustion products (visible in the diagram).
- Row No. 10 is laid out in the same way as the previous one.
- On the 11th row, half-brick work becomes masonry of a whole brick.
- Row No. 12 - a fireclay grate is laid out. Again we continue to lay in half a brick according to the ordering scheme indicated above.
- Row No. 13 - the same installation as on the 12th row.
- Row No. 14 – remove the sheathing and leave 2 chimneys.
- Row 15 is similar, but on row 16 we use whole bricks instead of halves. We close off two chimneys into the air compartments.
- 17th row. Use a steel plate to block the movement of smoke. Thus, the channel that you created on the laying of row No. 4 now remains the only one.
Scheme of the furnace masonry
Step 5. Laying the second level of the furnace.
- Row No. 18 is laid similarly to row 17, but on this row we attach a fence plate, which is fixed on three sides with cement mortar.
- Row No. 19. We build a column at the very top of the structure. Behind the stove we make a small cavity (the width of a brick) so that the smoke escapes through the pipe.
- Row No. 20. We lay it in the same way as the 19th row.
- Row No. 21. We lay this row so as to block the channel leading to the pipe. The smoke will come out through the sinus that you left below (on the 19th row).
- Row No. 22. From a quarter of a brick, make an exhaust hood that comes from the steam collector. We cover the steel part of the ceiling.
- Row No. 23. We put it in the same way as row No. 22.
- Row No. 24. In this row, it is necessary to connect the chimney with a steam collector through a closed channel
- Row No. 25-26. We lay it in the same way as the previous row.
- Row No. 27. Installation of the fence plate.
- Row No. 28. We cover the structure with a brick roof.
- Row No. 29. We make an additional layer similar to the previous one.
- Row No. 30. The row is almost completely covered with brick.
- Row No. 31. Lays the base of the pipe. We install a pipe with a diameter of 1 brick.
- Row No. 32. The chimney pipe is formed.
Step 6. To make the stove have an attractive appearance, you can carefully round all its edges by hand grinding. This must be done after the construction work has been completed.
Step 7. Treat the created oven with a refractory compound.
Step 8. Light up the stove. There is no need to immediately set the maximum temperature. The oven should gradually “burn out”. Start with the lowest temperature and then turn up the heat.
That's all! By following the instructions, and most importantly, without disturbing the order of the masonry, you will definitely be able to assemble a reliable, beautiful stove that will last for decades.
At the end of this article, we suggest watching a video in which you can see the stages of laying out the Kuznetsov furnace.
Features of Kuznetsov sauna stoves
Widely used metal sauna stoves have several disadvantages - low heat capacity, the location of the combustion chamber directly in the steam room, which forces fuel to be loaded directly into the steam room, and this is inevitable waste. The most significant disadvantage of such stoves is heating only inside the steam compartment. The dressing room and washroom remain unheated.
Kuznetsovka sauna stoves are free of these disadvantages. The design of the stove provides for its installation in the wall between the steam room and the washroom/dressing room.
Kuznetsov furnaces with a hood
If, a priori, a stove is the construction of a cap over a fire, then, in principle, we just need to achieve normal heat transfer and effective circulation of warm air. Therefore, a good oven
- Keeps warm perfectly.
- Efficiency is at least 75, and sometimes even 93%.
- It warms up from bottom to top, which allows you to take long breaks between stacks of solid fuel, sometimes up to 3 days.
- Can be used for a long time.
Kuznetsov's bell-type stoves provide uniform heating of the rooms of a cottage or house with a minimal temperature difference between the floor and the ceiling. The chimney of such a stove is less clogged with soot.
The diagram shows how simplified the air circulation is in Kuznetsov’s bell furnaces
By the way, the bell-type stove was originally used in industry and it was only 60 years before the principles of its operation were adopted for heating domestic premises. Most often it is brick and can be quite small.
It’s true, it’s even easier to make than a channel one, because you don’t have to calculate the height of the pipe.