Installation features
Solid fuel units, double-circuit and single-circuit, are prone to the formation of condensation in the combustion chamber, which causes corrosion and damages the metal. In order to avoid this effect, a mixing unit is added to the piping circuit, which includes a three-way valve and a bypass. Thanks to the valve, the coolant circulates through a small circuit until it heats up to the required temperature, after which access to the boiler for coolant from the heating circuit opens. Solid fuel boilers with this type of piping are safe to use and last as long as possible.
Heating unit piping
The closed-type heating system is designed to operate in autonomous mode and use temperature sensors to maintain a comfortable microclimate. This is taken into account when choosing the type of boiler - it is recommended to use an automated unit. Gas and electric boilers are equipped with automatic equipment; if a solid fuel boiler is connected to the heating system, it is better to choose a long-burning unit, pyrolysis or pellet.
Security group
The coolant supply pipeline at the boiler outlet is equipped with a safety group, which is responsible for monitoring the operation of the heat generator. It includes a pressure gauge (measures pressure), an automatic air vent (for bleeding gases), and a safety valve (discharges excess coolant at high pressure). A security group (SG) can be purchased ready-made or installed on the collector with appropriate devices purchased separately.
Expansion tank
Closed-type heating involves the installation of a device to compensate for the increase in the volume of the heated coolant. A membrane expansion tank is a sealed container with an elastic internal partition of a pear-shaped or disk shape. The heated coolant, having increased in volume, stretches the membrane and fills part of the reservoir. As it cools, the volume of the liquid decreases, and the membrane tends to take its previous shape, displacing the coolant from the container. Due to this, a certain level of pressure is maintained in the system.
Operating principle of a membrane expansion tank
The volume of the membrane tank is calculated specifically for each system. It must be at least 10% of the total coolant volume in the circuit (boiler capacity, all heating devices and pipes), if we are talking about water, or 15% if antifreeze is selected as the coolant.
Circulation pump
Water circulation is ensured by a special pump, the selection of which takes into account the thermal power, the heated area, the length of the pipeline, the layout of the autonomous system, the diameter of the pipes and a number of other factors.
It is recommended to choose a wet-type circulation pump, where the coolant passes through the rotor - with such a device, the heating system is much less noisy during operation. Installation of the system involves installing a pump in the return pipeline.
Correctly installed circulation pump
If the system is designed for operation with natural and forced circulation, depending on the availability of power supply, it is necessary to provide a bypass through which the coolant will bypass the pump.
Filling the system
For home craftsmen setting up autonomous heating with their own hands, it is important to figure out in advance how to properly fill the heating system in a private home in order to prevent the formation of air pockets. To start heating for the first time in a private house, it is advisable to invite a specialist who will check the correctness of the circuit and the quality of installation of the elements, and check the operation of the boiler
But in the future, after maintenance work, the heating system will again need to be filled with coolant, so you need to know how to do this without errors
To start heating for the first time in a private house, it is advisable to invite a specialist who will check the correctness of the circuit and the quality of installation of the elements, and control the operation of the boiler. But in the future, after maintenance work, the heating system will again need to be filled with coolant, so you need to know how to do this without errors.
Heating system filling pump
Filling with water
At the top point of a properly installed heating system there is an automatic air vent. Before filling the circuit with water, the valve must be fully opened to allow the displaced air to escape through it.
The return pipeline is installed at a slope and a drain valve is installed at the lowest point, which allows the coolant to be removed from the system. Nearby, just below the boiler unit, there should be a pipe with a check valve, which serves to fill the heating system.
A water supply pipe can be connected to the pipe; in this case, to fill the heating system with water, just turn the valve. In the absence of a stationary pipe, the pipe is connected to the water supply using a flexible hose. Filling a closed heating system with water requires that the water be supplied at a pressure slightly higher than the design operating pressure.
Checking the battery after filling with water
The supply of water to the system is completed when all heating devices and pipes are filled - coolant begins to flow from the upper air valve
. At the final stage of filling, close the upper air valve and open the Mayevsky valves on all batteries one by one to eliminate air bubbles. Water injection stops when all air has been removed from the system and the pressure gauge on the safety group shows the design pressure (1.5 atm or more, depending on the characteristics of the boiler).
If a closed heating system uses a double-circuit boiler with a water make-up module, the procedure involves connecting the filling hose to a special tap for pumping coolant, which is part of the module.
If we are talking about a system with a gas boiler and a water circuit, it is important to know how to start the unit. The front cover is removed from the boiler to provide access to the pumping circulation pump
After filling the system with your own hands and checking it for leaks, turn on the unit, setting the operating mode. From the pumping circulation pump, which begins to gurgle, lightly unscrew the cap with a screwdriver so that the air comes out and water begins to drip. Then the lid is screwed back on and after 3-4 minutes the operation is repeated two or three times at short intervals. The unit will become quieter and the burner will ignite. Check the pressure gauge and briefly open the supply valve to create the design pressure.
Filling with antifreeze
The use of non-freezing liquid as a coolant has its own characteristics. Let's figure out how to fill a closed-type heating system with antifreeze, given that it cannot be filled through an expansion tank or supplied from a water supply.
Filling with antifreeze
The system is filled as follows
:
- Option 1. Non-freezing liquid is pumped with a manual pressure test pump, which will provide the required pressure.
- Option 2. An electric pump is used that is capable of pumping liquids with different densities.
- Option 3. Filling is done through a hose, the lower end of which is connected to the non-return valve, and the upper end is raised above the top point of the system (to the attic, roof, second floor). Upon completion of the work, the remaining coolant is drained from the hose into a substitute container.
Legal basis for replacing heating devices
The heating system of an apartment building is a complex mechanism that requires special settings at the beginning of each heating period and periodic adjustments during heat supply. Equipment and pipelines are common property of the house; they are on the balance sheet and in the area of responsibility of the management company or housing office of a multi-storey building.
The management company (hereinafter referred to as the management company) bears administrative and financial responsibility for maintaining the general house heating system in a technologically sound condition. This allows the management company to perform one of its main functions - providing utility services to supply residents of an apartment building with heat in full during the entire heating season.
Unauthorized interference with the operation of the system, dismantling - installation of heating radiators in the apartment - is unacceptable. This directly concerns those who live in multi-storey buildings with a riser coolant supply system.
Changing the general house heating system will affect the supply of heat to all apartments connected to the riser. Unauthorized interference is legally defined as a gross violation and entails administrative and financial liability.
The Criminal Code has the right to force the tenant to restore the changes made and impose an administrative fine. Affected neighbors have the right to sue for costs incurred, especially when the heating shutdown caused harm to their health.
The issue can be resolved if you follow the rules for installing heating radiators in an apartment and do it legally. To do this, a user who decides to make changes to the heating circuit must sequentially go through several steps before obtaining permission. Visit the control service of the management company, write an application asking them to send a commission to decide on the possibility of replacing heating devices, changing the connection diagram, and installing additional radiators.
The application is written in any form addressed to the head of the Criminal Code. The manager of the management company is obliged to accept the application, register it under the incoming number indicating the date of receipt, and put a stamp. Keep an eye on this. The Criminal Code is given 5 days to consider the application and make a decision.
If the decision is positive, the commission draws up a diagram of the arrangement of devices and piping, determines their number and permissible type, makes a hydraulic calculation, and determines the timing of the work. The project or scheme is approved by the management company, an energy saving organization. After completion of the work, the system is pressure tested, connected to central heating, and an acceptance certificate is drawn up.
The process is lengthy, requiring material and moral costs. The result will be an official permit for dismantling - installation of heating radiators in the apartment with the possibility of changing the connection diagram, installing additional devices. It is recommended to carry out work in the summer months, before the onset of the heating season.
For residents of apartment buildings with floor-to-floor zoning of central heating, such problems do not arise. The apartment-by-apartment wiring system provided for by the project allows any changes to the circuit without the approval of the management company, even installing heated floors and connecting them to central heating.
Expansion tank for closed heating system
The expansion tank is designed to compensate for changes in coolant volume depending on temperature. In closed heating systems, this is a sealed container divided into two parts by an elastic membrane. At the top there is air or inert gas (in expensive models). While the coolant temperature is low, the tank remains empty, the membrane is straightened (picture on the right).
Operating principle of a membrane expansion tank
When heated, the coolant increases in volume, its excess rises into the tank, pushing back the membrane and compressing the gas pumped into the upper part (in the picture on the left). This is displayed on the pressure gauge as an increase in pressure and can serve as a signal to reduce the combustion intensity. Some models have a safety valve that releases excess air/gas when a threshold pressure is reached.
As the coolant cools, the pressure in the upper part of the tank squeezes the coolant out of the container into the system, and the pressure gauge readings return to normal. That's the whole principle of operation of a membrane-type expansion tank. By the way, there are two types of membranes - disc-shaped and pear-shaped. The shape of the membrane does not affect the operating principle in any way.
Types of membranes for expansion tanks in closed systems
Volume calculation
According to generally accepted standards, the volume of the expansion tank should be 10% of the total coolant volume. This means that you must calculate how much water will fit in the pipes and radiators of your system (it is in the technical data for radiators, and the volume of the pipes can be calculated). 1/10 of this figure will be the volume of the required expansion tank. But this figure is only valid if the coolant is water. If non-freezing liquid is used, the tank size is increased by 50% of the calculated volume.
Here is an example of calculating the volume of a membrane tank for a closed heating system:
- the volume of the heating system is 28 liters;
- expansion tank size for a system filled with water 2.8 liters;
- the size of the membrane tank for a system with non-freezing liquid is 2.8 + 0.5 * 2.8 = 4.2 liters.
When purchasing, select the nearest larger volume. Don't take less - it's better to have a small supply.
What to look for when purchasing
There are red and blue cans in stores. Red tanks are suitable for heating. The blue ones are structurally the same, only they are designed for cold water and cannot tolerate high temperatures.
What else should you pay attention to? There are two types of tanks - with a replaceable membrane (they are also called flanged) and with a non-replaceable one. The second option is cheaper, and significantly, but if the membrane is damaged, you will have to buy the whole thing
For flanged models, only the membrane is purchased.
Place for installing a membrane type expansion tank
Usually they place an expansion tank on the return pipeline in front of the circulation pump (if you look in the direction of flow of the coolant). A tee is installed in the pipeline, a small section of pipe is connected to one part of it, and an expander is connected to it through fittings. It is better to place it at some distance from the pump so that pressure differences are not created. An important point is that the piping section of the membrane tank must be straight.
Installation diagram of an expansion tank for membrane-type heating
A ball valve is installed after the tee. It is necessary to be able to remove the tank without draining the coolant. It is more convenient to connect the container itself using an American nut. This again makes installation/disassembly easier.
Please note that some boilers have an expansion tank. If its volume is sufficient, installing a second one is not required
The empty device does not weigh much, but when filled with water it has a significant mass. Therefore, it is necessary to provide a method of mounting on the wall or additional supports.
The heating expansion tank can be hung on a bracket. Make a support platform. The tank on legs can be installed on the floor.
Types of water heating
Everything that was said above mainly concerns radiator heating of a private house. But there are two more types: underfloor heating system and baseboard radiators.
Warm floor
The attitude towards warm floors is ambiguous. On the one hand, this is actually the best option for uniform heating of rooms. On the other hand, if the floor base is not washed frequently, then dust will always rise up. For allergy sufferers this is a big problem.
Heated floor pipework
But heated floors are used, especially since it is in private homes that they have the optimal operating mode. In principle, there is nothing complicated in installation. You just need to choose a pipe laying scheme, because the circuit will be quite long, and the coolant passing through it will gradually cool down. That is, in the end there will be no trace left of its temperature (and this is no more than +55°C). Therefore, most often the pipe is laid either with a snail or a double snake.
Laying schemes for heated floors
Related article:
Before installing “warm floors” in a private house, you must first insulate the floor base itself. Without insulation, most of the thermal energy will go into the concrete floor. That is, efficiency will decrease. This suggests that heated floors are a costly construction.
You only need to lay heated floors on top of insulation.
Baseboard heating
A warm baseboard is a kind of symbiosis of a warm floor and radiators. In appearance and internal design, it is a compact metal radiator; in terms of the connection method, it is a heated floor. Purely structurally, it is a copper pipe on which aluminum or steel plates are mounted, performing the functions of heat-reflecting ribs. Everything is covered with a metal casing on top.
Heating baseboards around the perimeter of the room
The devices are installed along the perimeter walls or only along the outer walls; they are connected to the boiler in series. The connection is made with small diameter plastic pipes. Often a pipe from underfloor heating is used for this.
The principle of heating rooms with baseboards is that the main part of the thermal energy is spent on heating the walls, which then radiate heat themselves. A smaller part of the heat works on the principle of convection.
The walls heat up, which then radiate thermal energy
Heating radiators and their calculation
Many people know in general terms how heating works in an apartment building. Very often you see cast iron batteries in apartments connected to a centralized system. Such radiators are not suitable for autonomous heating in an apartment. They have too large a capacity, so you have to heat a lot of water. And besides, cast iron also takes a long time to warm up. Therefore, when using cast iron batteries, there will be excessive gas consumption, and as a result, large financial costs.
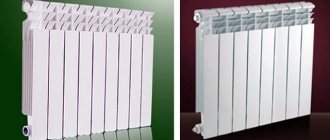
When making heating repairs in an apartment, you should pay attention to radiators made of other materials. Experts recommend installing modern batteries made of steel, aluminum or bimetal (read: “How to install heating radiators in an apartment - a quick guide”)
All of them are suitable for low pressure heating systems (this is typical for small water circuits) and can also withstand high temperatures. If necessary, you can even combine radiators and a “warm floor” system in one circuit. As for how to improve heating in an apartment, it is recommended to install aluminum radiators. But they are quite difficult to operate (read: “Heating in an apartment: diagrams and features of the project”). If the content of alkalis in the water is high, it is necessary to add neutralizers to the system. It is also unacceptable for copper to enter the circuit, since the interaction of this metal with aluminum leads to their oxidation and, accordingly, destruction. In addition, aluminum radiators are not affordable for everyone.
Before purchasing radiators, you need to calculate the required power and number of sections
If the question arises about how to make the apartment warm, then this stage should be given special attention
To calculate the number of sections in a radiator, you can use the formula Sх100/P if the ceiling height is no more than 3 meters. The area of the room is designated by the letter S, and the rated power of one section is P. Typically, the power of a section is 180-200 W. The number 100 is the required number of watts per square meter of area. The result is denoted, for example, by the letter K.
If a do-it-yourself apartment heating system involves the use of panel radiators that are not divided into sections, then a different formula is used for calculations. In this case, you will have to calculate the power and size of the batteries. The formula looks like this: P=Vx41. The initial power is denoted by the letter P, the volume of the room is V. The number 41 is the number of Watts required to heat one “square” of area.
For example calculations, you can take a room with a height of 2.7 meters and an area of 15 “squares”. This means V=2.7x15=40.5. Now it’s time to calculate the power of the radiator. The resulting formula is as follows: P=Vx41=40.5x41=1660.5. Since there are no heating devices of such power, it is worth choosing a radiator with an indicator of 1.5 kW.
After completing the calculations, you can buy radiators. Heating distribution in the apartment should occur according to a well-designed scheme.
How to make heating yourself, detailed video:
DIY heating schemes in a private house
How effective the heating will be depends on the characteristics of the mounted circuit. A do-it-yourself heating scheme in a private house can be implemented in different ways. We invite you to familiarize yourself with the available options to choose the best option.
You can always choose the appropriate option
Do-it-yourself diagram of a single-pipe heating system for a private house
The single-pipe scheme assumes that the coolant from the boiler begins to move along a single line, and then returns back through it. Radiators are connected to the main line at both ends. A correctly installed one-pipe heating system for a private house with your own hands works as follows:
- The coolant heats up to +75÷85°C and begins to move through the pipeline. Having reached the first radiator, part of the hot water fills the battery, and the rest continues to move through the pipes;
- after passing through the radiator and releasing heat into the surrounding space, the water mixes with the coolant, reducing its temperature by a couple of degrees;
- On the next radiator the situation repeats. As a result, significantly cooled water enters the last battery, which reduces the amount of heat given off.
The scheme and procedure for installing single-pipe heating involves building up a section of radiators, starting from the second one from the boiler, in order to ensure uniform heating of all rooms of a private house. Water heating works quite efficiently if it contains no more than 5 batteries. In a multi-story building, several risers are often installed. This vertical scheme assumes the presence of stably operating 3÷4 batteries.
The one-pipe model is not always effective
Scheme of a two-pipe heating system
A stable and reliable option that supplies radiators located in different rooms with coolant heated to the same temperature. Heated water moves through one pipe, and cooled water returns through another.
Depending on the chosen wiring, the two-pipe circuit can be:
- Tupikova. The coolant supplied through the corresponding branch fills all radiators, and returns through the return branch. Balancing allows for uniform heating of all batteries;
- Along the way. Loop-shaped heating scheme for a country house. When performing the installation yourself, you should ensure that the coolant along the main and return branches moves in the same direction. Suitable for a fairly long circuit;
- Collector. A suitable option for a large private house. To power each radiator, a separate two-pipe branch is used, connected to the distribution comb.
Dual-circuit circuit allows better heating of all rooms
Scheme of water heating of a two-story house
When installing a system in a two-story building, a gravity-flow scheme is rarely chosen. Here, the best choice is water heating in a private house with forced circulation. The circuit can be one-, two-pipe or beam.
The scheme is selected individually
Collector heating circuit for a one-story house with forced circulation
The collector (radiant) water heating system includes a collector, which is a device used to collect coolant. Two pipes are connected to each radiator: forward and return. This heating scheme with forced circulation of a one-story house makes it possible to best hide the pipes being laid. Moreover, each room can have its own temperature.
A special cabinet is used to place the collector. The disadvantage of this scheme is the increased cost due to the need to purchase new equipment.
The collector circuit will be expensive
What else can be done to improve heating in the apartment?
If you set yourself the task of how to improve heating in an apartment, then perhaps the measures listed will not be enough for this. In many cases, a good result can be achieved by ordinary window insulation, which reduces heat loss. A heat-reflecting film located on the wall behind the radiator may also be useful. Together with the fact that the heating will be replaced (pipes and clogged radiators), such measures will ensure the flow of additional heat into the apartment.
Foil screen behind the radiator
In those cases when you want to have complete independence and not depend on the timing of the start-up of central heating, you should think about how to convert the heating in the apartment to individual heating. This task is far from simple, but if you have a gas water heater installed, then it is quite possible that you will be able to get permission to turn off the central heating and install your own gas boiler.
Of course, this will require significant financial costs and lengthy approvals, which will not necessarily be completed successfully. But replacing the heating system (central with individual) will allow you to adjust both the temperature in the apartment and the ability to turn on the heating at any time you need according to your needs.
In many cases, especially in old houses, the heating has been running for many years, and sometimes the pipes become clogged with salt deposits, and even begin to leak due to corrosion. One of the measures to improve heating in an apartment is replacing pipes, risers and radiators.
Installing heating: diagram and procedure
Do-it-yourself water heating is carried out according to a clear action plan.
So, you have drawn a diagram of a private house, future batteries are marked on it, the length of the pipes has been calculated, you have already decided on the heating system of the house, you have studied the video and are ready to begin construction work with your own hands.
If possible, the system of sections should be wider than the window unit.
However, in practice this is not always followed. If the windows of a private house do not allow cold air to enter the room, then the total length of all sections may be less than the window.
Installation of radiators is carried out precisely at the level and always below the window opening. Beauty is, of course, important, but not paramount.
An accidental slope, even a small one, will create the effect of an underground river - the murmur of liquid will be heard from the side of the raised edge. Therefore, check the installation with a level.
It is important to maintain distances from the floor and from the walls. The ideal distance from the battery to the wall is 3-5 m, and to the floor - no more than 10 cm
To remove accidentally trapped air, it is worth installing a valve or Mayevsky tap.
A groove is connected to the hung radiators. Calculate so that there is a groove 4-6 mm deep from the fitting to the edge - when heated, the pipe may expand.
Use lengths less than 10 meters or weld in bends to accommodate thermal expansion.
There are options for using copper or stainless steel pipes, but reinforced polypropylene pipes have proven themselves most well in the price-quality combination.
They are relatively inexpensive and easy to install.
There are different models for connecting radiators that conduct water heat supply.
The lower scheme (inlet and outlet are connected to the lower branch pipes of the sections), it is fraught with heat loss of 12-15% and uneven heating of the batteries.
It should be taken into account when there is a risk of sand and suspended matter getting into the system - they will be carried into the mud filter. https://www.youtube.com/embed/BZ7Al3p9iO0
With a one-way connection, the inlet is mounted to the top of the section, and the return is mounted to the bottom of the same section. With this connection, all sections are heated evenly.
If the number of sections is significant, then it is optimal to use a diagonal connection. It differs from one-sided in that the outlet is mounted to the bottom of the opposite section.
When the connection diagram for the heating radiator sections is clear, we proceed to installing the pipe system.
Of course, it’s worth watching the installation video and practicing on the scraps left after the installation of the pipe in the groove is completed.
We melt the pipe and fitting with a soldering iron heated to 260 degrees. The alignment must be done by pressing the smaller section into the larger one.
Classification of water heating systems
As mentioned above, heating is divided according to the method of movement of the coolant into: natural circulation and forced.
Heating system with natural coolant circulation in a one-story house
Let’s immediately make a reservation that a heating system with natural circulation is best used in one-story houses. The thing is that the coolant cannot rise high even at a temperature of +95°C. Of course, no one limits the height of the distribution; it’s just that the system itself will work ineffectively.
Schematic diagram of heating with natural circulation of hot water
The essence of natural circulation is the movement of water under the influence of the laws of physics. But there is one nuance here that you need to know when installing heating yourself. This is the slope of the horizontal contours from the boiler towards the radiators and from the radiators to the boiler. This figure should be at least 0.5%. That is, this is enough to force the water to move by gravity.
What you need to pay attention to when installing heating without a pump:
- The boiler must be located in the lowest place relative to all pipework. The optimal height difference is 0.5÷1 m.
- The expansion tank is installed above the entire pipework. The height difference is up to 0.5 m.
- The riser leaving the boiler must be directed vertically upward.
- The speed of coolant movement in the system must be no less than 0.1 and no higher than 0.25 m/s. To achieve this, it is necessary to accurately calculate the diameter of the pipes used, taking into account the temperature of the water at the outlet and inlet.
- If heating of this type is equipped with a closed expansion tank, then it is installed at the level of the boiler. In this case, it is necessary to install an air vent into the system, which must be installed at the highest point of the pipe distribution.
Scheme with forced water circulation
Heating diagram for a one-story house with forced circulation of coolant
This scheme differs from the previous one not only in the presence of a pump, but also in the location of the pipes. There is no need for installation at an angle
This is very important for those who are assembling a heating circuit for the first time.
But there is one very important nuance in this system.
Correct pump installation location
It should be noted that the heating scheme with forced circulation can be used not only for one-story houses. If you accurately calculate the power of the circulation pump, it will easily pull several floors. Although experienced plumbers recommend installing several boilers with separate pumps for a large house with several floors.
Related article:
Do-it-yourself water heating. Common mistakes
- The wrong power boiler has been selected . This usually happens when the boiler power is selected back to back, without taking into account a number of factors - the presence of an additional external wall (in corner apartments), lack of thermal insulation (for example, for a non-thermal insulated house, 130-300 W/m2 is required, and for a thermally insulated house with modern windows - only up to 70 W/m2), the apartment is on the first or last floor, etc. How to avoid mistakes - make a careful calculation, taking into account all factors. Detailed information about them can be easily found on the Internet.
- Insufficient chimney height . As a result, there is not enough draft, and the boiler automation turns it off. How to avoid mistakes - choose the correct chimney length. For a gas boiler this is a minimum of 4 meters, for others - 5 meters (with the exception of a gas boiler with a coaxial chimney).
- Use of pipes not intended for heating systems . For example, they install polypropylene pipes PN10, which are intended for either a cold water supply system (SDR11) or a hot one (SDR6). A PN16 or PN20 pipe is required. How to avoid mistakes - choose the right pipes, carefully read what they are intended for.
- The use of pipes made of different materials . Firstly, this can lead to large internal stresses due to different coefficients of thermal expansion. Secondly, the occurrence of electrochemical reactions (corrosion) at the joints of pipes made of different materials. For example, you cannot connect copper and aluminum pipes. How to avoid the mistake of using pipes from the same material.
- Installation of radiators not intended for this system. There are two restrictions:
- according to the permissible pressure in the system (applies to a centralized heating system);
electrochemical compatibility of materials (which we discussed above).
- Incorrect connection of radiators - mixing up the input and output when connecting shut-off and control valves. This leads to loss of heat transfer from this heating device. How to avoid mistakes - connect the radiator correctly in accordance with the instructions.
- No emergency drain (relevant for autonomous heating systems).
- Firstly , it makes repairs difficult.
- Secondly , there are situations when it is necessary to urgently drain water from the system or reduce the pressure. How to avoid a mistake - provide for an emergency drain (and it is better to do it into the sewer system).
How to avoid mistakes - choose the right radiators in accordance with operating conditions.
Two-pipe system with bottom wiring
Next, we will consider two-pipe systems, characterized by the fact that they ensure uniform heat distribution even throughout the largest households with many rooms. It is the two-pipe system that is used for heating multi-storey buildings, in which there are a lot of apartments and non-residential premises - here this scheme works great. We will consider schemes for private houses.
Two-pipe heating system with bottom wiring.
A two-pipe heating system consists of supply and return pipes. Radiators are installed between them - the radiator inlet is connected to the supply pipe, and the outlet is connected to the return pipe. What does this give?
- Uniform heat distribution throughout the rooms.
- Possibility of adjusting the temperature in the rooms by completely or partially closing individual radiators.
- Possibility of heating multi-storey private houses.
There are two main types of two-pipe systems - with bottom and top wiring. First, we will look at a two-pipe system with bottom wiring.
Bottom wiring is used in many private homes, as it makes heating less visible. The supply and return pipes pass here next to each other, under the radiators or even in the floors. Air is removed through special Mayevsky taps. Heating schemes in a private house made of polypropylene most often provide for just such wiring.
Advantages and disadvantages of a two-pipe system with bottom wiring
When installing heating with bottom wiring, we can hide the pipes in the floor.
Let's see what positive features two-pipe systems with bottom wiring have.
- Possibility of masking pipes.
- The ability to use radiators with bottom connections makes installation somewhat easier.
- Heat losses are minimized.
The opportunity to at least partially make heating less visible attracts many people. In the case of lower wiring, we get two parallel pipes running flush with the floor. If desired, they can be placed under the floors, having provided for this possibility at the stage of designing the heating system and developing a project for the construction of a private house.
If you use radiators with bottom connections, it becomes possible to almost completely hide all the pipes in the floors - the radiators are connected here using special units.
As for the disadvantages, they are the need for regular manual removal of air and the need to use a circulation pump.
