In what cases is insulation of a log house with mineral wool used?
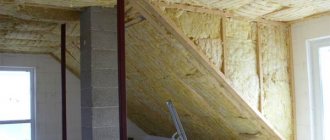
No matter how professionally a house is built from beams, gaps still appear between them. Cold will penetrate even through microcracks, which makes living in such a house uncomfortable. Therefore, insulating the outside with mineral wool is a good way to retain heat.
Information about the types of timber and its selection can be read here.
Insulating the outside of the house with mineral wool will allow:
- Insulate the room as much as possible.
- Save space inside the house, because the insulation will be attached outside.
- Reduce heating costs.
- It's easy to do the work yourself.
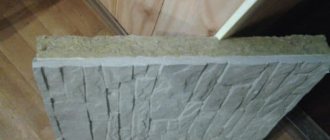
- Upon completion of the work, the building was covered with siding, due to which the building acquired a beautiful modern look.
Any wooden house is subject to shrinkage. Therefore, over time, cracks will still appear in it, and then insulation will need to be done. To perform the work efficiently, you need to prepare the necessary materials, tools, and also follow the technology.
Differences between external and internal insulation
External insulation allows:
- protect wooden walls from temperature changes that lead to deformation;
- prevent exposure to moisture and mold formation;
- reduce heat loss and heating costs.
External insulation allows you to protect wooden walls from temperature changes.
Internal insulation in the absence of external insulation is ineffective. In this case, the cold penetrates through the walls, but does not enter the room. The negative impact on wood (freezing, condensation, moisture accumulation) remains. The walls will gradually collapse, become deformed, and under the layer of mineral wool, fungus and mold will form on wooden surfaces.
It is necessary to insulate the building from the inside if it is not physically possible to carry out installation work from the outside: the proximity of other buildings, a house for several owners. In most cases, the installation of insulating material on the inside is carried out as an addition to the exterior finishing.
For example, if the external insulation turned out to be insufficient due to the wrong choice of wool thickness.
Necessary materials
Basic materials that will be required for work:
- Minvata
- Primer
- Vapor barrier material
- Waterproofing material
- Slats for wooden sheathing (4 cm thick, 10 cm wide)
- Dowels
- Wood screws
- Butyl acrylic tape
- Construction staples
Read how to choose the right self-tapping screws here.
The first material you need to purchase is mineral wool. When choosing this material, you need to pay attention to its density, which should be at least 55 kg/m3. The packaging must also indicate the purpose of the mineral wool (for outdoor use).
Mineral wool can absorb moisture, which not only reduces the energy efficiency of the building, but also promotes the formation of fungus and mold. Therefore, it is necessary to provide waterproofing and vapor barrier. The waterproofing material allows moisture to pass through in the form of steam and protects the mineral wool from the street side. And the vapor barrier prevents moisture from entering from the side of the building.
Benefits of mineral wool
Mineral insulation
Composition and characteristics of mineral wool
Mineral wool brand Izorok
Minvata Technofas
Why has mineral wool become such a popular insulation material for private construction? The answer to this question is simple - due to the totality of its advantages, this material is superior to other insulation materials in certain characteristics.
- Mineral wool does not burn. It can only melt, and only at very high temperatures. Therefore, this insulation is better suited for buildings made of wooden beams or logs than combustible foam.
- Mineral wool is easy to handle - it does not require the use of special equipment, like ecowool. The installation process is simple - take it out of the package, cut it (if necessary), lay it, and secure it with dowels or glue.
- Mineral wool does not shrink over time and is not attractive to rodents, insects, fungus and mold. In addition, it is able to retain its properties for several decades.
- And like any good insulation, mineral wool has extremely low thermal conductivity values - 0.03-0.047 W/(m*K) depending on the type of material and the outside temperature.
About mineral wool brands
How to choose the right material for insulation
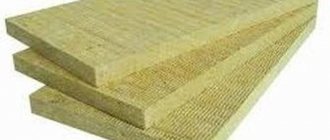
When selecting insulation, and in our case mineral wool, you need to pay attention to the form in which it is produced. To carry out work on cladding a building from the outside, it is more convenient to use a slab. Based on the composition of mineral wool, there are 2 types of mineral wool: stone and glass wool. Stone has a yellow-brown or greenish tint and is made by melting rocks to form fibers. Glass wool is produced by melting quartz sand and glass and then blowing it into fibers. Has a yellow color.
If we talk about the fire resistance indicator, then stone wool has a higher indicator. Glass has higher elasticity, which makes it easier to install. But in construction, stone wool is given greater preference.
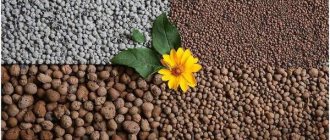
Types of material
There are several types of mineral wool, the differences being in the raw materials used for its production. They have different densities, fiber structures and thermal conductivity properties.
Stone wool
Stone or basalt wool is the densest variety. It is produced from hard rocks: gabbro, diabase. They can add blast furnace slag and charge. To increase the astringent properties during melting, mineral components (clay, dolomite, limestone) are included in the raw material. Their content is up to 35%.
Stone wool is one of the most environmentally friendly and reliable heat insulators.
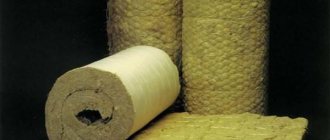
If we compare stone wool with other types, we can note that the former has a denser structure and less elasticity. It is produced only in slabs, not in rolls. It is less susceptible to shrinkage and more moisture resistant.
The thermal conductivity coefficient is low - 0.035-039 W/(m*K), i.e. its insulating properties are higher.
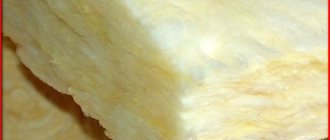
Glass wool
Glass wool is made from dolomite, limestone, sand, borax, soda, glass. The composition does not include formaldehyde. Acrylics are used as a binder. Thanks to this, it is considered environmentally friendly.
Glass wool is a fibrous mineral thermal insulation material.
The disadvantages of insulation include the ability to accumulate moisture and its long-term removal. This reduces the insulating qualities of the material. Glass wool is less dense, it can sag and shrink. Therefore, heat loss at home increases after several years of operation. The advantage is its softness and elasticity, which allows it to fill cracks. Thermal conductivity coefficient is 0.03-0.052 W/(m*K).
Slag
Slag is produced from waste from the metallurgical industry - from the slag left after smelting cast iron in blast furnaces. The material is as pliable as glass wool, but less dense. Compared to stone brands, it is less moisture resistant. The thermal conductivity coefficient is the highest - 0.04-0.07 W/(m*K).
Slag wool is a type of mineral wool that is used for insulation.
Preparatory work
Preparatory work begins with cleaning the wood from various debris and dust. To do this, you can take a hard bristle brush and clean the surface. You can use a regular clean, dry cloth. The next step is to treat the surface with a primer, which will prevent the formation of fungus and mold.
A special antifungal primer will protect the wood from rotting.
After applying the composition, you must wait some time until it is completely absorbed. It is advisable to carry out work in dry weather, otherwise wooden walls may absorb excess moisture.
After this, you can begin installing the vapor barrier. It is a special film that prevents moisture from entering the insulation from the room. To do this, the film is attached to the wall using construction tape. The sheets should overlap each other with an overlap of 2-3 mm. The joints of the material must be sealed with butyl acrylic tape.
Why is a ventilated facade needed and how to make it?
After preparing the surface, you can begin insulation with mineral wool. But first you need to make a ventilated facade. It is a frame made of wooden slats. Due to this, an air space is formed between such a frame and the insulation sheets, through which air circulates. This provides:
- Minimal moisture absorption by insulation
- Rapid evaporation of moisture
- Protection against the formation of fungus and mold
- High energy efficiency
Waterproofing that will be installed on top of mineral wool does not protect 100% from moisture seeping through it. This special film is a breathable material, so it allows steam to pass through itself, which then penetrates into the mineral wool. And the use of a ventilated façade is an excellent solution for quickly evaporating unnecessary moisture.
In order to make a wooden facade, you will need:
- Perform markup
- Stuff horizontal slats
- Stuff the vertical slats
- Insert mineral wool sheets into slats
- Stuff wooden planks up to 3 cm thick on top
Marking is necessary to orient the future location of the slats. You can make marks on top of the vapor barrier with a marker. First you will need to attach the horizontal slats, which will be longer. They are attached to the wall of a wooden house using wood screws. After this, vertical (small pieces) are stuffed between them. This created a frame in the form of a mesh.
If a sheet of mineral wool measuring 600×600 is used, then the internal dimensions of the frame cell should be 598×598.
Sheets of mineral wool will be inserted into each cell of the frame. This material compresses quite easily and will hold tightly.
After assembling the frame, it also needs to be primed, which will increase its performance characteristics. After installing the mineral wool, strips are placed on top, which will ensure air circulation between the insulation and the frame.
Selection of mineral wool
7 best mineral wool manufacturers
When you go to a hardware store, you will see many types of mineral wool with different characteristics. The question arises: what characteristics should a material have that is suitable for insulating a house from the outside?
- Type – stone or basalt wool. Slag wool or glass wool is not the best choice for the walls of a residential building. The reasons are high alkalinity and the content of substances that are harmful to humans (especially slag wool).
- Density – from 80 kg/m3 and more. This is due to the fact that the laid material experiences heavy loads. And so that under their influence the insulation does not wrinkle, does not lose its shape and thermal insulation qualities, it must be dense enough.
- Dimensions - most mineral wool for external wall insulation is sold in the form of slabs with a length and width of 1200 by 600 millimeters. The thickness varies and can range from 50 to 150 millimeters.
- Since insulation is carried out from the outside, the mineral wool must be hydrophobic. By absorbing water, this insulation loses its thermal insulation properties by 50-70%. It is worth considering that high humidity outside and its sudden changes are not at all uncommon. Therefore, the ability not to absorb moisture and condensation is very important for mineral wool. However, this is not enough, therefore, when insulating the walls of a wooden house, take care of high-quality hydro- and vapor barrier.
Types of mineral wool
Separately, it is worth discussing the issue of the thickness of the thermal insulation layer. Wood itself has some insulation qualities, and therefore does not require such a large layer of mineral wool as for construction made of concrete or sand-lime brick. For example, in mid-latitude conditions, for a wooden house with a wall thickness of 15 centimeters, a layer of insulation of 10 centimeters would be optimal. If the walls are even thicker, 20 centimeters, then the required layer of mineral wool will be half as much.
Of course, if you live in a region with a sharply continental climate and severe frosts, then the thickness of the wall insulation should be higher. And if sheets of mineral wool 50 or 100 millimeters thick are not enough for thermal insulation, they need to be laid in two layers.
Calculation of insulation thickness online
The table below shows materials that meet the requirements and are suitable for wall insulation.
| Name | Length and width, mm | Thickness, mm | Density, kg/m3 | Thermal conductivity, W/m*K | Price per 1 m3, rub. |
Baswool VENT FACADE 80 | 1200 by 600 | 100 | 80 | 0,035 | 3052 |
TechnoNIKOL Technovent Standard 50 | 1200 by 600 | 72-88 | 0,036 | 3100 | |
Paroc FAS 3 | 1200 by 600 | 100 | 120 | 0,04 | 3450 |
ISOVER Facade | 1200 by 600 | 100 | 100 | 0,037 | 6700 |
Prices for mineral wool
Minvata
Insulation with mineral wool
After assembling the frame, you can begin installing the mineral wool sheets. To do this, the material is inserted into each cell of the frame. For those cells that are smaller in size than a sheet of mineral wool, adjustment will be required. The insulation is cut with a hacksaw to the required size. The installed mineral wool is additionally secured to the wall with self-tapping screws.
In order to make insulation more effective, you can use 2 layers of mineral wool insulation. This method can be studied in more detail in the video.
After installing the insulation, it is waterproofed. Regular film will not work for this. You will need special waterproofing protection (membrane) that ensures the passage of air.
For waterproofing you need:
- Pre-measure the pieces of waterproofing and cut them.
- Attach to mineral wool with construction staples
- Connect the joints with butyl acrylic tape
After this work, you need to make a ventilated facade. Wooden slats are placed on top of the mineral wool with waterproofing using wood screws.
Thermal insulation of a wooden house with mineral wool
The main insulating material for both wooden beams and the entire building as a whole will be mineral wool. The process of its installation usually does not cause any difficulties, especially if you prepare all the necessary devices and materials in advance.
- Dimensions of sheathing cells. It is recommended to use beams with a section of 50x50. The thickness of the frame will directly depend on the number of layers of the selected insulating material. For installation of a single layer, a 50x50 section will be sufficient. When arranging a pair of layers, the required cross-section of the timber is 50x100. You will need antifungal impregnation, as well as screws, anchors and a waterproofing film.
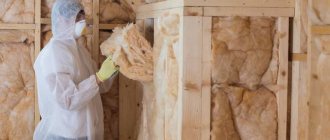
- Pre-treatment of the insulated surface. Before you begin thermal insulation of the building with your own hands, you will need to treat the surface of the walls two or three times with antifungal impregnation. This technique will allow you to get rid of mold and damp damage to the materials. It would also be nice if you additionally treated the walls with fire-resistant impregnation.
- Vapor barrier and waterproofing layer. The rough side of the film should be directed towards the wall, since it is this side that conducts moisture. The smooth side, on the contrary, prevents moisture from penetrating through the obstacle. If the work is carried out according to all the rules, there will be no fear of the appearance of drops of condensation. A special construction stapler is used to secure the film. The material is laid with wide overlaps (at least 10 cm), then taped with adhesive tape.
- Assembling the sheathing. For subsequent work, installation of the frame will be required. First, the timber is secured to the corner of the building end-to-end with self-tapping screws. The gap between the remaining elements of the sheathing must strictly coincide, and the material itself must be in a vertical plane.
- Laying mineral wool insulating base. The material must first be cut into pieces. For subsequent work, you will need a set of anchors; they will help secure the material to the wall surface. First you will need to drill several through holes into which the anchor fasteners will be attached. After fastening, they need to be wedged so that they can hold the cotton more tightly.
- Outer waterproofing layer. This step involves re-fixing the waterproofing material (shiny side out). Then condensation will not accumulate on the surface of the thermal insulation, which helps to extend the service life of the materials used. To securely attach the film, use a stapler.
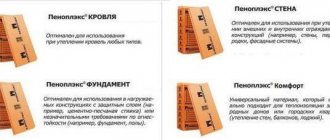
Penoplex insulation
Mineral wool can be replaced with other materials. For example, you can use penoplex. This material does not absorb moisture well, due to which it is not susceptible to rotting. It is quite strong and durable, so it is often used as insulation.
But still, if we compare mineral wool and penoplex for insulating a wooden house, it is preferable to go with the first. After all, mineral wool is a breathable material, which is a favorable factor for wood, which also allows air to pass through. If we talk about penoplex, it is vapor-proof, so the wood will have reduced access to air. And this, in turn, will lead to rotting of the walls.
To minimize the destruction of wood when insulating it with penoplex, it is necessary to provide a ventilated façade. Due to this, moisture will evaporate quickly.
Algorithm of actions for insulating wooden buildings
External insulation of wooden buildings is recommended to be carried out using the following technology:
- It is necessary to prepare the surface. Clean the walls from dirt, caulk the cracks, treat the wood with an antiseptic.
- Secure the vapor barrier film. The flooring should be overlapped, and the joints should be taped with acrylic tape. For installation you will need a stapler with staples.
- Arrange the sheathing. It is better to select the pitch of the vertical strips according to the width of the basalt slabs. Secure the timber with nails. If a metal profile is used, self-tapping screws will be required.
- Place insulation sheets into the frame. Seal the gaps with pieces of cotton wool. The slabs must be fixed using umbrella dowels.
- Secure the vapor barrier membrane.
- Install the lathing to secure the finishing material. Attach the beams to the frame.
- Secure the siding.
External insulation must be done in a certain sequence.
Some experts are against installing vapor barriers directly on the wall of the house. It is believed that it contributes to the accumulation of condensation inside the mineral wool, and this will lead to its wetting and increased thermal conductivity.
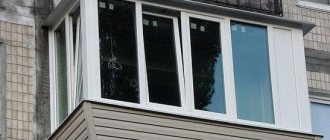
Using siding
After the construction of the ventilated facade, its cladding will follow. For this, the best option is to use siding. It is best to choose vinyl siding. This option is the most budget-friendly of all types of cladding.
When installing siding you need to follow several rules:
- Install it on a pre-prepared sheathing (in this case, on a ventilated facade)
- Siding fasteners do not need to be tightened too much. But at the same time, make sure that they do not unwind.
- When attaching the panels, force must be applied from bottom to top. This will allow the upper element to easily connect to the lower one.
Siding is quite easy to maintain. When dirty, it can be easily washed off with water from a hose. If necessary, you can use a soap solution with a soft sponge.
Do-it-yourself thermal insulation technology for walls under siding
Siding makes it possible to hide thermal insulation, protect materials from environmental influences and give the house a finished look. In order to maintain a comfortable microclimate indoors and not disrupt gas exchange, a consistent process of external thermal insulation is required.
Preparatory activities
Preparing the façade before covering:
- Measurements are taken and the places where the load-bearing elements are attached are marked.
- Clean surfaces from dirt, dust, and building material residues.
- Treat with an antiseptic solution, wait for complete absorption and drying.
- Seal the cracks with moss, felt, and tow.
- Cracks are sealed with latex-based wood sealant. Large gaps are pre-closed with acrylic tape.
Before covering, the façade is measured and cleaned of dirt.
Frame installation
To ensure that the metal frame has low thermal conductivity, mineral wool is placed in the grooves of the parts. Construction installation process:
- Markings are made along the vertical side of the house corresponding to the location of the guides.
- Suspension holders are secured along the lines with self-tapping screws at intervals of 25-35 cm, and the side parts are bent. They have many holes, thanks to which the profile can be installed at any distance from the wall.
- Its horizontal elements are mounted from pieces of suitable size, which will create additional stability and rigidity.
- Around window frames and doorways a solid metal sheathing is made.
All guides and frame parts must form a flat plane.
Installation of wooden sheathing is carried out according to the same principle, but it is attached to the facade without auxiliary elements. Basic moments:
- The cross-section is selected based on the thickness of the insulation.
- For the job you will need nails and dowels.
- The beams are treated with an antiseptic and fire retardant.
- The guides are positioned horizontally or vertically. This depends on the siding scheme.
The metal frame is secured with self-tapping screws.
For the second level of sheathing, slats of smaller width are used.
Laying insulation
Mineral wool in slabs is suitable for wall insulation. Rolled materials tend to gradually deform under the influence of gravity, which violates the tightness of the thermal insulation. Installation process:
- First, a horizontal beam is installed at the base for stability, which does not violate the general plane of the frame.
- The mats are placed between the racks in rows from bottom to top, spaced apart without gaps and close to the wall. If necessary, the slabs are cut into fragments of the required size. In metal guides, mineral wool must be inserted into the grooves.
- When laying a double layer, the first will be thicker, the second thinner. In this case, the joints of one level of wool are covered with slabs of the next one. This will additionally protect against heat loss through the cracks.
- When installing a double frame, first make a horizontal or vertical sheathing and lay mineral wool. The guides are nailed across the top first and the insulation is secured.
- To lay the wool around the windows, strips of the required length are cut with an allowance of 5 cm. They are pressed tightly to the surface so that they do not bend outward.
Mineral wool is suitable for wall insulation.
Windproof membrane
Windproof membrane is a multilayer construction fabric based on polypropylene fiber. It allows steam to pass through but retains water. Protects mineral wool from cold air currents, precipitation, mechanical damage and heat loss.
The membrane is secured to the frame parts with self-tapping screws and special plastic washers. Allowances of 10-15 cm are left on the canvases, the edges are taped.
Steam and waterproofing
The vapor barrier membrane ensures natural gas exchange in the insulating structure. But its outdoor use for year-round homes is impractical. Such a barrier will prevent excess moisture from leaving the wood.
Vapor barrier is designed to reliably protect the insulation.
The waterproofing function is provided by windproof and diffuse type membranes. They prevent water from getting on the insulation, but allow steam to pass through them freely.
Ventilation gap
For sufficient air circulation and evaporation of condensate, a technical gap of 3-5 cm is left between the siding and the membrane. To do this, install a counter-lattice of 5x5 cm slats.
Frameless method
With the frameless method, mineral wool is attached to the wall surface with a continuous layer of 1 layer.
The brackets are installed on the prepared surface according to the markings. Their length depends on the thickness of the insulation. The wool slabs are placed on the brackets and secured with self-tapping screws and clamping washers. The cracks and gaps are filled with pieces of heat insulation. If there is a second row, it is laid so that it overlaps the seams connecting the first slabs to each other.
A windproof membrane is installed on top of the insulation. Using the same screws, it is firmly fixed so that it does not move away from the thermal insulation.
The next stages will be the installation of a ventilated facade and finishing.
Advice from professionals
When insulating a wooden house from the outside with your own hands, it is recommended to follow the advice of professionals:
- Use mineral wool as insulation, which allows air to pass through well and allows the wood to breathe.
- Use steam and waterproofing that protect the insulation from excess moisture.
- Make a ventilated facade so that moisture does not accumulate in the insulation, but evaporates in a timely manner.
- Before starting work, you need to think about insulating openings for windows and doors. After all, due to the insulation, they will go deeper into the building.
Insulating a house made of wooden beams with mineral wool can be easily done without outside help. The correct choice of materials and adherence to technology will help to obtain the highest quality results. Your home will be provided with good thermal insulation for a long time.