Making warm beds in a greenhouse: types of heating
Solar heat warms the beds only by the beginning of May, in some regions and by the end of May. Artificially heated soil is suitable for planting plants as early as March, while the root shoots are in comfortable conditions, which contributes to their strengthening and plant growth. In addition, the heat generated by the earth helps warm the air in the greenhouse.
Advantages of warm beds:
- Early planting and achieving maximum yield in the first summer months;
- Getting good results even on relatively fertile soil;
- Reducing the need for plant nutrition;
- Increasing the fruiting period;
- Reducing water consumption during irrigation;
- Weed control.
Preparing a warm bed in a greenhouse is carried out in autumn or early spring. There are several options for heating the bed: electric cable, water pipes, biological compost. When using a cable, it is laid under the soil in advance and heated using electricity. These designs are highly efficient, but expensive to maintain.
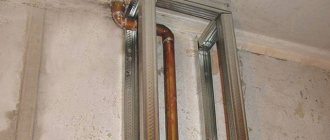
Water heating is used using special pipes made of polymer material, which are laid under the ground.
Hot water flows through the pipes, capable of heating the earth. For biological beds, plant residues and manure from livestock farming are used. The heating element is the rotting process, as a result of which the soil temperature rises. This is the most economical way to heat beds. Each method has its pros and cons. The gardener selects the most appropriate option based on his own views on growing plants.
Option #3 – warm the soil using a natural method
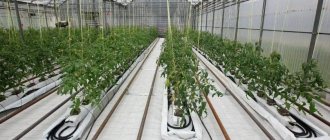
You can start organizing such beds as soon as the snow melts. It’s good if the greenhouse is in a sunny, spacious place - each bed will need about a meter wide.
First of all, make sure that you do not lose water - it will be needed for the process of rotting and the release of temperature. Therefore, if your soil is peaty, place a layer of scalded sawdust at the very bottom of the bed or cover it with an old cloth. Pour the litter itself with a solution of potassium manganese.
The second layer will be various plant remains, of which you can collect quite a lot in the fall. Even the foliage is suitable. Place everything at the bottom of the bed and add a little soil, sprinkle with chalk or wood ash, 2 cups per square meter.
Do the third layer of a warm bed like this: mix six buckets of peat or humus, a bucket of sand and a little sawdust and add 1 tbsp. superphosphate, urea, 2-3 tbsp. wood ash, 1 tsp. potassium sulfate, 1.5 tsp. boric acid and 1 tsp. zinc sulfate. This is a classic mixture.
Now water your bed on top and sides with five to ten buckets of warm water per square meter. After that, cover it with film for a week or two. After this time, remove the film and moisten the bed - as soon as it settles, you can start planting.
You need to plant it like this:
- Make an earthen roller in the center of the ridge, thereby dividing it into two parts - this way rain and irrigation water will flow directly into the holes.
- On both sides we make large holes 60 cm apart. The depth is about the bayonet of a shovel, the width is like a three-liter jar (you can even use it for the convenience of forming holes).
- We sow dry seeds in each hole and cover it with a layer of soil from 2 to 5 cm.
- We water and cover the finished bed with transparent film - preferably reinforced. Secure it to the sides of the fence or simply press it to the ground with stones. This way the garden bed can warm up even more.
In fact, the hole itself, made in this way, is a small greenhouse - the seeds in it are warm and humid, they quickly swell and hatch. They grow until they literally poke into the stretched film. Just at this point they will have more than one true leaf, and it is important not to let them overheat under the film during this period - especially on a sunny spring day. Has the seedling grown and already buried itself? Make a cross-shaped cut above the hole, bend the corners inward, and help the plant straighten. And it doesn’t matter whether all the seeds in the hole have sprouted - leave them all, there will be enough space for them and the harvest will definitely please you. If, at the moment when the plant needs to be released into the wild, and the weather and temperature are not yet pleasant, then simply cover the bed with a special material - preferably lutrasil - or put several arcs and cover them. It will be like a greenhouse within a greenhouse - that’s all.
When it comes to compost, the modern market has also given the gardening industry another great thing – the garden shredder. This made it possible to easily add valuable nitrogenous materials to the beds - branches, leaves, green tops. Here is the answer to how to make a warm bed in the spring without much hassle, where sweet peppers, tomatoes and cucumbers will grow with great pleasure.
What else is good about warm beds with compost is that it provides valuable help to the soil itself - after all, a monoculture is often grown in greenhouses and greenhouses, and this leads to the fact that the soil “gets tired” quite quickly. Pathogenic spores and bacteria accumulate in it, and greenhouse plants often begin to get sick. As a result, the soil has to be completely changed every three years - and this is not only a particularly labor-intensive process, but also unsafe - you don’t know what ailments and problems you will introduce into the greenhouse with new soil, and what you will have to deal with this time.
Setting up a warm bed allows you to further enrich it with valuable elements - without any chemicals. And it is best, as the long experience of gardening in Russia shows, to put mowed grass of winter wheat - immature - in such beds. When its grains decompose, they produce EM bacteria, which have a truly colossal effect on soil fertility.
You can also create a warm bed in a greenhouse using manure - when it starts to “burn”, it emits such heat that you can almost get burned.
Heating the soil in a greenhouse using an electric cable
Cable heating of greenhouse beds allows you to maintain the soil temperature as accurately as possible, which makes it possible to effectively grow plants.
The main advantages of an electric heating system include:
- The ability to grow any, even exotic crops;
- Increased productivity;
- Ability to regulate soil temperature;
- Easy to install cable system;
- Long service life.
To arrange the bed, it is necessary to remove up to 40 cm of top soil. Next, lay thermal insulation material so that energy does not escape into the lower layers of the earth. Prepare a cushion 5 cm high with sifted sand, pour water on it and compact it.
To protect the cable from various rodents, you need to install a special mesh over the sand.
Next, lay the electrical cable on the mesh like a snake. The laying distance between the tape should be no more than 20 cm. Using special clamps, secure the wire to the mesh, cover it with sand and compact it, creating another pillow. Next, in order to avoid mechanical damage to the cable during excavation work, lay another mesh and cover the entire structure with earth. Thanks to this device, plants can be grown in greenhouses regardless of weather conditions, using additional lighting in autumn and winter. In return, the family will receive fresh vegetables at any time of the year.
Arrangement of a soil heating system
Main varieties
When looking for information on how to warm the soil in a greenhouse, you may find several different options. Each of them has advantages and disadvantages, and yet experts recommend paying attention to the most popular schemes.
READ ALSO: Warm floors in a greenhouse: tips and tricks
Among them:
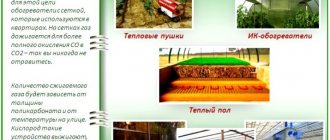
Heat guns also heat the soil, but only on the surface
- Surface heating using infrared heaters for greenhouses, radiators or convectors. This system is the easiest to install, but its effectiveness specifically for soil is low. On the other hand, the use of surface heating allows you to significantly increase the air temperature, which is sometimes also important.
- Water heating . This system works on the principle of a water-heated floor through which warm water circulates. The system is quite complicated to install, and therefore it is recommended to install it either for large greenhouses, or for greenhouses and winter gardens adjacent to a residential building.
Water heating system
- Electric heating . Due to the wide distribution of heating cables, films and mats of various configurations, electric soil heating systems are rapidly gaining popularity. At the same time, their effectiveness is partially offset by factors such as the high price of components and electricity tariffs.
Below we will tell you how you can arrange soil heating using some of the methods mentioned here.
Water circuits
As we noted above, a water heating system will be most effective if the greenhouse is located near a residential building. In this case, the heat source can be a household heating boiler or water heater, and then you do not have to buy a separate device.
Such a system is installed according to the following algorithm:
- We lay thermal insulation material on the base of the greenhouse. It is cheapest to use polystyrene foam with a thickness of 50 mm or more, but to reduce heat loss, foil types of insulators are optimal: penofol, isolon, etc.
- As an alternative, you can use special mats for heated floors: they protect against energy loss and allow you to securely fix the pipes with warm water.
Heating pipes on a thermal insulation layer
- We place plastic pipes with coolant on the substrate. In this case, the installation should be carried out from the walls to the center of the room - then the liquid will cool evenly.
Note! It is not worth using pipe models with a high heat transfer resistance, since heating will be ineffective.
- We connect the heating circuit to the water heating system. It is very important that the thermostat located at the input is calibrated, since the optimal temperature is no more than 40C.
READ ALSO: Do-it-yourself greenhouses and greenhouses under film on a summer cottage
We cover the water heating pipes with a layer of soil about 40 cm thick. This way we will ensure an increase in the temperature of the substrate and protect the roots from the “steam room effect”.
Cable heating
A system based on a heating cable is much simpler to operate. To create such a system, you can use regular kits for heated floors, or you can use specialized models for greenhouses (Green Box AGRO or similar).
Cable heating diagram
Advice! When selecting materials for laying in the ground, we focus on a power of about 70-100 W/m2. The cable should be no more powerful than 18 W/m, since more productive models can damage the root system, tubers and root crops.
Installation of a cable heating system is carried out as follows:
- As in the previous case, we lay thermal insulation on the base.
- On top of the thermal insulation we place a cable attached to the mounting grid. The mesh is needed to ensure that the cable turns do not move when backfilling and ensure uniform heating.
Cabling
- Next, the instructions recommend forming a protective layer. To do this, we completely fill the heating elements with ash, and lay the cheapest floor tiles on top (preferably ceramic, not clinker).
- We fill the soil on top of the tiles with a layer of 30-40 cm.
We connect the removed contacts to the thermostat. We separately connect the sensor, which we place in the bed itself to a depth of no more than 15 cm.
Use of film materials
Instead of thermal cables, it is quite possible to use film materials to ensure a comfortable temperature in the root zone.
Installing such a system with your own hands is also not difficult:
- We clear the base of soil to a depth of at least half a meter. If the greenhouse is built not on the ground, but on a solid foundation - even better!
- Place a layer of dry sand about 5 cm thick at the bottom.
- We lay a roll or slab heat insulator on top of the sand cushion. We cover energy-saving materials with a waterproofing membrane or thick polyethylene.
- Next, we proceed to installing the thermal film. We cut the roll of material into pieces of the required length, and then connect it with the supplied wires. In this case, it is necessary to ensure that all contact points between the wiring and the carbon film are carefully insulated.
- We lay out the heating elements in the greenhouse, and then cover the film with polyethylene.
READ ALSO: Dome greenhouse - we consider the features and carry out installation
Photo of thermoelements before backfilling
- We pour sand again on top of the waterproofing. This time the layer can be about 20 cm. We moisten the sand and compact it.
- We fill in the soil in which we will grow the plants. The layer thickness is from 30 to 35 cm.
- We connect the cables brought to the surface to temperature sensors and a thermostat distributed throughout the beds.
Note! Using a film heater inside the soil significantly reduces its power. That is why in thermal engineering calculations it is necessary to operate with a quarter of the rated power of the carbon thermal film.
The temperature regulator must be calibrated so that in the seedling beds the substrate has a temperature of about 30C, and in the main beds - from 20 to 25C, depending on the type of plants being grown.
A simple greenhouse with heated soil with your own hands
Water heated beds also have a number of advantages. Firstly, the condensate formed on the pipes additionally moistens the soil. This design provides uniform heating of the air in the room. To heat the greenhouse, you will need a gas or electric boiler; you can also use a small wood-burning stove made of brick or metal.
You need to purchase a smoke outlet pipe for it. The choice is made in accordance with the configuration of the heater.
To install a furnace or boiler, it is necessary to prepare a foundation; for a brick structure, a concrete foundation. A metal boiler can be placed on a sheet of asbestos and cement mixture. Next, the structures provide stability and attach the chimney, hermetically sealing the connection points.
Insulation of beds with pipes, necessary work:
- Remove soil 35-40 mm thick;
- Material for thermal insulation is laid at the bottom of the resulting trench; foam plastic is usually used;
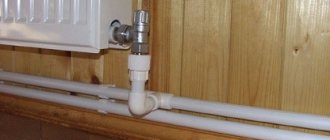
- Water pipes are placed on top and connected to the heating system;
- Fertile soil is laid on top of the pipes.
This heating method is considered optimal, but it is necessary to ensure that the temperature of the water in the pipes does not exceed 45 ° C, otherwise you can burn the roots of the plants.
Warm bed in a polycarbonate greenhouse: biological method
The biological method of heating beds is made using natural biofuel placed in the subsoil layer. Plant residues, sawdust and manure are used as filler, which is spilled with water for the rotting process. Such beds are the most economical design.
Warm beds running on natural fuel are usually divided according to the type of construction:
- In-depth, when fertile soil is removed, a trench is dug, compost is laid and filled with soil on top so that it is level with the total mass of the earth;
- Raised beds, the top layer of soil is removed from the surface and placed in special wooden boxes, which serve as protection against shedding and washing away of the soil during operation;
- A hilly bed, laid without a box on top of the main platform;
- A combined option, when the lower layers with organic matter are laid at ground level, and the fertile soil layer is fixed with a box.
To make a structure for a combined warm ridge, you need to mark out places for future plantings. Then carefully remove the layer of turf, putting the fertile soil aside. Next, you need to dig a trench up to 60 cm deep. To protect against freezing, foam plastic or closed plastic containers are placed at the bottom of the trench. Next begins the first layer of organic matter, consisting of large branches, wooden chocks, and large plant objects.
This layer will play a drainage role. Then a paper backing consisting of waste paper is laid.
After this comes a layer of finer organic matter, food waste, tree leaves, and small grass stems. Next, add ready-made compost, or semi-rotted manure, to begin the rotting process. We install a pre-prepared box into which we will pour fertile soil. Each laid layer must be thoroughly watered. We cover the last layer with fertile soil. Soil enriched with organic matter is perfect for planting tomatoes, pumpkins and cucumbers. The rotting process can warm the earth for 2 months.
How to warm the soil in a greenhouse in spring
Having a polycarbonate greenhouse, you want to start sowing plants in early spring. To do this, it is necessary to warm the soil and air in the greenhouse.
There are various ways to increase soil temperature:
- Electric heating with air, a simple and affordable method, you need to purchase a heater-fan and connect it to electricity;
- Electric heating of beds with a cable, an easy-to-install system that allows you to heat the soil to the required temperature and maintain it in this condition;
- The infrared method, using special lamps, a feature of this option is the ability to heat only the plants without increasing the air temperature in the greenhouse;
- Water pipes serve as an excellent heating element for the soil, beds and shelving while moistening the soil with condensation.
The secret to quickly warming up the greenhouse soil for early plantings
Many people ask me how I manage to populate my greenhouses with plants so early?
And everything is very simple. For plants to live, both the tops and roots need to be warm. The plant will get sick or simply die if the ground is cold, even though the air in the greenhouse is warm. To make the soil in the greenhouse warm up faster, I use an IR (infrared) heater. I have it attached to the ceiling of the greenhouse. And all the radiation is directed downwards - to heat the ground.
IR heater in a greenhouse
I only turn on the heater at night. I live in a private house, and there are greenhouses in my yard. Those who have greenhouses located at a remote distance from their place of residence will need to set a timer to turn the heater on and off.
During the day (February-March), the air from the sun in greenhouses warms up to +30°C, or even more. And the soil is heated by the air during the day. Well, at night it’s the IR heater’s turn to work.
Heat guns, oil heaters and blower heaters heat the air inside the greenhouse.
Remember, in childhood, in the book by Eduard Uspensky, the cat Matroskin from Prostokvashino wrote a letter to the Solar Institute and asked the scientists to send him a small home sun? So his dream (request) could now come true. They say that the waves emitted by an IR heater are similar to the effects of sunlight - they heat the surface of the earth, and only then the earth shares the heat with the surrounding air.
When installing this type of heater on the ceiling, the floor will be constantly warm. The use of such devices allows you to maintain optimal air humidity, they do not burn oxygen, and the air does not dry out.
Unlike other heating systems, devices with infrared rays rank first in terms of efficiency (efficiency factor). Such heaters are really very economical and really quickly warm the ground, preparing greenhouses for early planting.
And in general... I'm thinking... move your bed to the greenhouse, or what?
Ads by
Look at how many health benefits there are from an IR heater:
- The emission spectrum of IR devices is the same as that of sunlight.
- When heaters are operating, animals prefer to be within their radius of action.
- IR devices heat the air in the room evenly, without burning oxygen.
- The devices are used in medicine for the prevention and treatment of various diseases.
- Devices with infrared radiation help normalize the general condition of the body.
- Increases melatonin in the blood.
- Improve sleep and relieve insomnia.
- Such heaters have been proven to have an anti-inflammatory effect. Therefore, they are widely used in medicine for therapeutic purposes.
- Heaters are used to treat skin diseases and infections.
- The use of IR devices helps to normalize a person’s weight and get rid of extra pounds.
- IR heaters are used to restore the health of athletes after injuries.
This is only my second year using these heaters.
The time frame is too short for any concrete conclusions. But it is a fact that the earth is warming up quickly and the air is not drying out. Well, as for the treatment of infections and diseases, time will tell. If only point 10 doesn’t affect the plants, they’ll suddenly lose weight))
Today is 04/27/2018. And my tomatoes in the greenhouse are already like this:
Whose merit is this... I don’t know... Maybe it’s my love and care that has this effect on tomatoes, or maybe it’s IR waves)) PS I also have raised beds in the greenhouse. This also very much contributes to the rapid heating of the soil.
Examples of warm beds in a greenhouse (photo)
- Author: admin
Rate this article:
- 5
- 4
- 3
- 2
- 1
(2 votes, average: 5 out of 5)
Share with your friends!