Effectiveness of increasing ground temperature
Maintaining normal microclimate parameters is very important when growing plants, especially heat-loving ones, because the growth rate, as well as the crop’s resistance to diseases, depends on temperature.
Find out how to make a vegetarian greenhouse with your own hands.
Equipping a greenhouse with soil heating guarantees compliance with these standards; in addition, the advantages of this method include:
- Keeps you warm. The loss of resource through the soil is eliminated.
- Planting is not tied to the season, which makes it possible to grow crops at any time of the year.
- High growth rate. In warm soil conditions, the horse system develops more intensively, which, in turn, affects the ground part, including the fruits.
- Increased productivity.
- Plants are not afraid of frost.
Types of soil heating system: main varieties
There are three ways to heat the soil:
- natural;
- biological;
- technical.
With the first method, the soil is heated by the sun, with the second - with biological materials that, when decomposed, release heat (manure, straw, leaves).
We will consider the technical method and its types in more detail in subsequent paragraphs. Did you know? In Iceland, greenhouses are built on geysers.
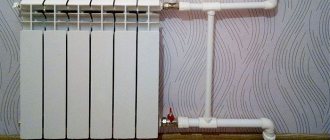
Water circuits
A universal method that allows you to maintain the temperature of both soil and air. The idea is to lay a heating system from a small boiler room or from a central system under the top layer of soil.
- Pros:
- uniform heating of the area;
- does not reduce air humidity;
- moistens the soil through condensation formed on the pipes;
- availability.
Cable heating
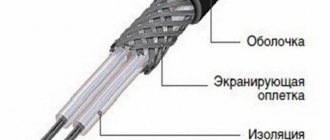
A new and most effective method in which the heating element is a cable placed like a snake in the thickness of the earth.
- Pros:
- the ability to grow any crops;
- high plant growth rate;
- increasing productivity;
- automatic temperature control;
- durability of the installation;
- ease of installation;
- availability.
Air heating
Air from the heating device moves through pipes built into the soil. An alternative is heating using a stove installed in a pit, and the chimney is launched underground, which allows heating the air and soil.
Important! Air heating dries the air very much, so additional installation of a humidifier is recommended.
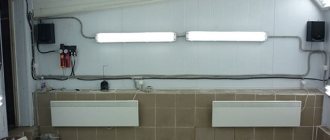
To quickly take action and increase the temperature, you can use portable heating devices: convectors, air heaters, air guns, etc.
- Pros:
- availability;
- durability;
- ease of installation.
Heating with plastic pipes
By laying plastic pipes under the top layer of soil, you can organize both water and air heating. It all depends on which heating element you choose. For soil heating, it is advisable to use plastic pipes - they do not rust, have a longer service life, and also release heat faster, but it is worth remembering that the temperature in the system should not exceed 95°C.
You will be interested in learning how to make drip irrigation in a greenhouse with your own hands.
Film materials
In this case, infrared film is used, which has a number of advantages:
- does not affect air humidity;
- indicators are adjusted automatically;
- it is possible to create different temperature zones;
- suppresses the growth of pathogenic microorganisms;
- ease of installation;
- service life is about 30 years.
Closed cycle of air exchange in the greenhouse DUM2 - air cooling, heating and aeration, huh?
There is a DUM2 greenhouse under polycarbonate, 8 meters high. Today I’ll assemble another one, 4 meters. I liked the greenhouse and was pleased with the harvest. With drip irrigation it didn’t cause any trouble. But it has a big disadvantage, in my opinion – ventilation. The lack of normal vents “on the roof” does not allow it to be fully automated, so that only people can go there to pick up the harvest. So far we have been using automation of the “good neighbors” type, but this will not last long, and this automation malfunctioned a couple of times, bringing the temperature in the greenhouse to 55 degrees. Again, in the land of “evergreen tomatoes” where I live, the climate is extremely sharply continental, the depth of soil freezing is 2.7 meters, we plant seedlings in a greenhouse at the end of May, because there may be frosts. Difficulties, so to speak. While rummaging through the Internet, I came across an interesting idea: on the website elitegarden.ru there was an article about a smart greenhouse and a closed heat-air exchange cycle. Now for some reason this page is not there, but I still have it. They wrote:
A traditional greenhouse has the problem of heat loss, which causes huge temperature swings between day and night. In a “smart” greenhouse, this problem is solved by one of the most elegant inventions - a closed cycle of air and heat exchange. Under the soil along the entire greenhouse there are 6 plastic (asbestos-cement) pipes. Their lower ends are brought to the surface and covered from debris with a mesh. The upper (northern) ends are connected into one transverse collector. From the collector there is a vertical pipe - a riser, on which a household exhaust fan with a power of 15-20 W is installed. The fan is capable of servicing 3-4 pipes with a diameter of 70-100 mm. On a sunny day, even in winter, when it is -10°C outside, inside the “smart” greenhouse it is +10-20°C. The fan sucks air into the pipes and drives it through the pipes along the entire greenhouse. The air gives off heat to the soil. The cooled air is blown back into the greenhouse and heated again. During the day, the soil warms up to +25°C and above - ALL SOIL becomes a heat accumulator. Thus, without any heating, with a daytime frost of -10°C and a nighttime frost of -15°C, the temperature in the “smart” greenhouse is: +18°C during the day, +12°C at night.
I’ll try to attach thumbnails, but here are links to larger photos:
I decided to improve the beds in the greenhouse by raising them 40 centimeters from ground level and fencing them with slate (I couldn’t find any cheaper fencing material). And it comes to mind to lay penofol - or isover, (I don’t know which is correct) on the ground for thermal insulation, a small layer of earth, and then if you put pipes like this, drilling 4-6 mm holes, for condensate drainage and aeration. I read about aeration - plants love it very much. It would be possible to stuff 0.5 liters of water bottles inside the pipes - as a heat accumulator and cooler, because I began to respect bottled water - dark and green plastic bottles placed around the perimeter of the greenhouse, with water, heating up during the day, gave off heat well at night. From the same site:
The soil pipe system is a ready-made system of “atmospheric irrigation” (dew settling in the soil). This is a condensate collector! Passing through cool pipes, warm air releases a lot of water - it falls in the form of condensation on the walls of the pipes. Using special holes in the pipes, the liquid is evenly distributed throughout the soil. All day long, and in summer - the entire first half of the day, water evaporated by leaves and soil is forcibly returned to the subsoil system. External watering is practically not needed.
I don’t agree about the unnecessaryness of watering, but the idea, it seems to me, is sound.
Such is Manilovism. Early soil heating in spring, cooling in summer. Is it worth the bother? I would be grateful if forum members criticize this plan. Thank you.
How to make heating?
Installation of the systems is carried out according to a single principle - the heating element is placed underground, according to the following algorithm:
- Remove the top layer of soil, approximately 40 cm.
- Level the bottom, then add 5 cm of sand and compact it.
- Spread a thermal insulating film on top, for example, polystyrene foam - thanks to this, it is possible to retain heat and prevent it from escaping deep into the soil.
- Fill in 5 cm of sand.
- Lay a stainless mesh with 5–10 cm cells.
- Laying of heating elements.
- Cover with wet sand - a layer 5 cm thick.
- Cover everything with a net - both plastic and stainless steel are suitable for this purpose. This layer is necessary in order to protect the heating source from any damage.
- Finally, we fill the structure with fertile soil - for this, the initially removed layer is mixed with fertilizers.
How to install soil heating in a greenhouse using a cable?
Ease of installation is another plus in favor of automated cable heating systems.
Let's consider several mandatory conditions that must be met for the system to function properly and efficiently for a long time.
- Before installing the cables directly, it is necessary to take care of the protective layer: it can consist of sand backfill or welded mesh. To do this, the soil layer must be removed to a depth of about 40 cm.
- Then the bottom is lined with insulating material that does not collapse under the influence of moisture (foamed polyethylene / expanded polystyrene). This layer will reduce heat loss.
- Sand is poured over the insulation, compacted and spilled with water.
- The cable is laid on the prepared “base” with a snake in 15 cm increments. For convenience, you can use mounting tape or a 50x50 mm mesh. The cable is sprinkled on top with a layer of sand 5-10 cm high.
- To reinforce the layer and protect it from mechanical damage, a chain-link mesh is laid on top of the sand layer.
- When the system is installed and covered with a protective layer, soil can be poured to a height of 30-35 cm.
- To monitor the operation of the system and to avoid problems, a temperature sensor should be installed in the ground in a protective corrugated tube.
Tips for gardeners
When choosing a system for heating a greenhouse, it is important to consider the cost of its operation, as well as the existing location. In the case of water heating, it is only advisable if the greenhouse is located near the house, which allows it to be connected to the central system, since the construction of a separate boiler room is financially intensive. Electric heating devices consume quite a large amount of electricity, which will affect your utility bill; in addition, they dry out the air, which negatively affects plants and requires the installation of a humidifier.
In terms of cost-effectiveness ratio, cable heating is considered the most optimal: for a room with an area of 24 m², 92 m of cable with a power of 1650 W is sufficient. The success of the procedure also depends on how long the heat is retained in the room.
Find out how to heat a greenhouse with a heating cable.
To do this, you should think about thermal insulation of both the room itself and the heating elements. Now you know how to make a room warm with your own hands, why thermal insulation is needed in a greenhouse, and also what technology to choose, taking into account the cost-effectiveness ratio. Grow vegetables in the temperature conditions required for them, which will help you fully recoup your costs thanks to high yields.
Air heating device options
1. One of the most primitive methods of short-term heating of a greenhouse, which can be created in a hurry, consists of supplying air heated from a fire into the greenhouse. To do this, you will need a steel pipe with a diameter of about 60 cm and a length of 2.5 m, which must be laid in the center of the greenhouse. One of the ends of this pipe must be outside. By organizing the supply of warm air through it, for example, using a fire or stove, you can quickly heat the room.
Gas convector - an economical solution for heating a greenhouse
2. Another simple way to organize heating in a greenhouse is to use a heat generator that supplies heated air into the room through a polyethylene hose. To install it, you will need a perforated polyethylene sleeve, which is suspended from the ceiling and connected to the generator.
Attention! A significant disadvantage of this method is the inability to warm the soil, which is why the root system of plants develops poorly. In addition, this heating method has a significant impact on the air humidity in the greenhouse, significantly reducing it.
3. You can heat a small polycarbonate greenhouse using a gas convector, which is a fairly economical heating device that creates an air flow and forces it to move across the entire area of the greenhouse. The disadvantage of this method is the need to arrange the distribution of gas pipes, as well as the need to place the beds at some distance from the convector.
For medium and large-sized greenhouses, at least 2 convectors may be needed, which makes heating the greenhouse quite expensive. In addition, when using gas convectors, combustion waste is released into the air, which can negatively affect the growth and development of cultivated crops. To neutralize them and ensure free access of oxygen, care should be taken to install a ventilation system.
A fan heater will quickly heat the greenhouse, but this is a rather expensive option.
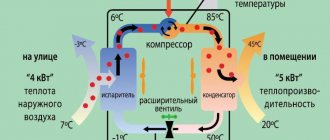
4. An effective, but at the same time quite expensive way to heat a greenhouse is to use a heat fan, heat gun or heat pump. When using any of these devices, you can use the temperature controller to regulate the air supply temperature. To avoid burning the leaves of nearby plants, you should use a pipe laid in trenches under the beds and brought out to the outside, to which a heat fan is attached.
To heat the greenhouse evenly, you can use 2-4 fans at the same time, placing them around the perimeter of the greenhouse. During periods when heating is no longer needed, a fan can be used to ensure free air circulation.
Attention! The advantage of using fans to heat a greenhouse is the active movement of air masses inside the room, preventing the accumulation of moisture on the walls.
Furnace Burelyan
