As absolutely everyone knows, greenhouses are necessary for growing crops and maintaining their vital functions. And they can vary in size from the smallest to the largest plantations. Naturally, not the same heating source will fit all sizes. The larger the greenhouse, the more powerful the source will be needed. And it is even more desirable that heating be available all year round.
But those who run a business can afford to install industrial heating in huge greenhouses. What should those who want to install a small heating system in a greenhouse at their dacha do? You can safely do this yourself! Let's take a closer look at which heating to choose and how to install it in a greenhouse?
Solar Heating Options
At the moment, the number of people who use solar heating, especially in greenhouses, is quite large. And this is absolutely not surprising, because this is a very profitable and quite economical option that will soon pay for itself.
Typically, these types of heating are done by professional farmers and gardeners in order to grow fruits and vegetables according to the rules and send them for sale.
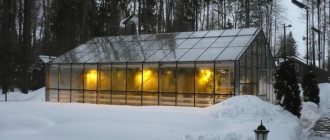
And of course, it is simply physically impossible to grow plantations in the fresh air all year round, since winter is coming. And it is for this reason that greenhouses, greenhouses and similar structures are built. And if greenhouses are used only in warm seasons, then greenhouses are designed for year-round use.
And if we consider a greenhouse, then we need to take into account all the subtleties in order to create the best possible conditions for growing crops. But we move straight to the next question - what is the best heating system to connect to greenhouses? And we will consider the solar one!
Let's start by figuring out which heating option to choose? Well, if we consider it from the category of inexpensive and simple, then, of course, heating using solar energy will come first.
And in order to use it, you will need to install a greenhouse in the best place, where there is a lot of sun throughout the day. Do not forget that the material from which the structure is built is also extremely important.
- Polycarbonate is primarily used for the construction of greenhouses. Why he? Because it gives an excellent greenhouse effect due to its cellular structure.
It turns out like this: in each of its individual cells there is air, which acts as an insulator.
- There is also another material that can be used - glass. It is with its help that you can create both a greenhouse and the sun's rays will pass through the glass. About 95% of the sun's rays will enter through the glass. And in order to collect as much of this energy as possible, you can make a structure in the form of an arch. Moreover, to make the structure more prepared for winter, you need to install it along a line from east to west.
How to build a solar greenhouse
Since the designer of this amazing smart greenhouse lived in a region with a rather mild climate, he adapted it specifically to it. If you want to get similar results at higher latitudes, you will have to make some changes to it. For example, make the slope not 15-20, but 35-40 degrees. Use fan heaters rather than ordinary ones. Or even use heaters or stoves on particularly cold days. Watch the video in this article before starting construction to clear your doubts. So, the sequence of activities for the construction of a vegetarian garden is as follows:
- Choose a location for the greenhouse, giving preference to a southern or southeastern plot of land. The ideal option is a slope adjacent to the main wall of the building.
- If there is no slope, you will have to create it yourself, maintaining an angle of inclination that corresponds to your latitude.
For reference. Slope steepness for areas located at 550 N latitude. (Moscow region), should be equal to 25-30 degrees, at 500 N latitude. – already less, 15-20 degrees.
- Make a monolithic strip foundation around the perimeter of the future greenhouse. During pouring, place anchors or mortgages in it for mounting frame elements.
- Lay pipes for the air exchange system over the entire area, adding expanded clay under them to evenly distribute moisture. It is better to take plastic water pipes with a diameter of 100 mm.
Air circulation system design
- Pour inside the previously prepared fertile soil mixture, humus or peat.
- Mount the frame from antiseptic-treated wooden blocks or galvanized profile pipe.
- Cover the frame with covering material. Cellular polycarbonate with a thickness of at least 6 mm is best suited for this purpose.
Finished greenhouse - outside view
- Seal all joints to prevent outside air from entering the greenhouse.
All that remains is to arrange the beds, placing them from top to bottom in steps, and you can plant the plants, allowing the earth to warm up properly.
Pros and cons of solar heating
Let's briefly look at the main advantages and disadvantages of this type of heating. Let's start with the strengths:
- if you know how to use it correctly, you can literally get all your money back in 2–3 years;
- It is also possible to get hot water.
Now let's highlight the weaknesses:
- initially you will have to spend a lot of money;
- performance will vary depending on the conditions around and what time of day. In winter and at night, thermal efficiency will decrease.
You can leave it like that, but you can add to the greenhouse and place a solar battery inside it. How to do it? You will first need to dig a hole approximately 40 centimeters deep and 30 centimeters wide. Place insulation there and bury it with sand. And not with fine sand, but rather coarse sand. And cover this place with plastic wrap on top. The last layer is the earth.
We'll also give you a little advice! Another material you can use is extruded polystyrene foam. This material is absolutely not afraid of moisture and, moreover, it is not susceptible to deformation. It has a fairly high level of strength, as well as a high level of heat retention.
It turns out that at night the greenhouse will easily retain the heat that has been accumulated during the entire daylight hours. The only drawback is that it is better to use only in the summer.
At this time, heating with solar energy using a collector is extremely popular. What parameters are needed to use it:
- must be installed only on sunny days;
- the level of insulation of the greenhouse must be at the highest level;
- financial opportunities.
And what’s most important and good is that you don’t have to pay for solar energy, it’s a natural source. But of course you can’t rely on the sun alone, because it won’t shine all year round.
In this case, solar collectors are used, the cost of which is about 30 thousand rubles. Although the price is not so exorbitant, before that you will need to think about how the heat will be supplied?
What does heat storage provide?
The operation of a greenhouse is based on the entry of solar energy into the shelter and its accumulation there due to the properties of the covering materials . However, even in winter, the amount of this energy far exceeds the needs of plants. The excess is simply reflected into space and does not bring any benefit from it.
If we use solar heat accumulation in a greenhouse , then the resulting reserves can then be successfully used for heating. The advantages are obvious : the temperature in the greenhouse is maintained at the desired level without consuming expensive energy resources for artificial heating.
Read also: Classification of daylily varieties with descriptions and photos
Types of collectors for small greenhouses
As you may have already understood, there are several types of collectors that you can safely use in your greenhouse. Let's take a closer look at all the types:
- Air manifold. Let's briefly look at the principle of operation. The air is first heated, which then enters the heated compartment. In general, heating itself is carried out under natural conditions and with air exchange. But there is also a forced way - with the help of fans. We also note that depending on which heating system is chosen, the location of the collector will also depend. Let's say, if you chose the natural path of air exchange, then you will need to place the collector pipes in the lower part. And if the air flow is carried out with the help of fans, then the location does not play a role.
- Water collector. This option will cost more than the previous one. But it also has other advantages and differences compared to others. First of all, the difference is in reliability and stability of operation. The essence of hydronic heating is that it is the same as heating a house. The only difference is that the location and controls are slightly different. Also, not radiators are used, but pipes are taken. They are specially located along the walls and at the same time in the ground at a depth of approximately 50 centimeters.
- Vacuum manifold. And this heating option differs from water heating only in that it uses a different method of heating water, or rather, vacuum tubes are used. It turns out as follows: a vacuum is formed between the pipes (external and internal). It is precisely this that is considered a heat insulator. And during heating, steam is formed, which accumulates and is then sent into the system.
To install any of these systems, which in the future will delight you with an excellent harvest, you just need to choose the right one. In fact, the air type is better used for small greenhouses and areas and so that the climate is not harsh.
But it is better to buy a water and vacuum collector for large greenhouses, huge areas, and they also tolerate harsh climates more easily.
Do-it-yourself heat accumulator for a greenhouse
It is almost impossible to place such a heating device in a ready-made greenhouse. Therefore, it is necessary to create it even before building the frame. The sequence of actions here will be as follows:
Read also: What to feed little ducklings
- It is recommended to install fans in the inlet and outlet pipes (taking into account the direction of air flow). For the option with natural circulation, the outlet pipes will have to be made higher than the inlet pipes .
The use of solar thermal energy storage devices in greenhouse farming can significantly reduce the cost of its maintenance. At the same time, the costs of materials are fully recouped by the additional harvest, and there are no costs for specialists at all, since everything can be done with your own hands.
Let's summarize
As you already understand, each of the systems is quite good, but not every one is suitable for harsh climates. So before you buy right away, it’s better to analyze well and understand which collector is best for you? And only then go shopping!
And in general, in the lives of many modern farmers and gardeners, greenhouses and greenhouses have taken root very much and this is not at all surprising! After all, these are such unique buildings that allow you to grow crops using all technologies! So you can safely go ahead and purchase heat and install solar heating on it!
Do-it-yourself "sloth"
The models of heat accumulators offered by the industry do not contain complex components, which allows you to manufacture them yourself if desired.
The quickest and easiest way to create a heat collection container is to use a large black trash bag. The bottom of such a bag is already hermetically sealed. The bag is placed on the ground, water is poured halfway into it, the edges are twisted and tied, and then placed in the aisle.
The disadvantage of this design is its fragility. It is much safer to use plastic pipes used for sewer installation.
To do this, select a pipe of maximum diameter: the more liquid that fits into it, the more efficiently the product will work. When choosing the length of the pipe, you should proceed from the dimensions of the greenhouse and ease of use. The outside of the pipe should be coated with black paint.
The ends of the pipe are tightly welded or sealed with plugs of the appropriate diameter. A hole is cut in the center of the pipe to fill with water and a plug is selected for it. A container filled with liquid with a stopper installed in the hole is ready for use.
Read also: How to grow pinnate carnation and care for it
Advice. To avoid carrying heavy containers around the garden, fill the battery with water in the place where it is intended to lie. To make the process easier, use a funnel.
Operating principle of a heat accumulator for a greenhouse
Heat accumulators for use in greenhouse structures are made using durable black polyethylene film. The standard thickness of such a film is 250 microns.
The end part of the film structure is hermetically and reliably sealed, which ensures the complete absence of leakage of the coolant, which is ordinary water. A special valve is installed to fill and drain coolant into the battery.
The received and stored solar energy is accumulated and converted into heat
The principle of operation of a heat accumulator is extremely simple and is based on the use of the natural properties of water:
- during the daytime, the water in the battery absorbs the maximum amount of thermal energy represented by solar heat;
- in the evening and at night, when the temperature in the greenhouse structure decreases, the battery begins to release the accumulated heat.
Thus, the received and stored solar energy is accumulated and converted into heat.
Heat accumulators for use in greenhouse structures are made using durable black polyethylene film

