The first thing you need to do is decide on the circuit diagram for supplying coolant to the battery. Since aluminum radiators are produced in sectional and panel types, it should be noted that they are connected in exactly the same way.
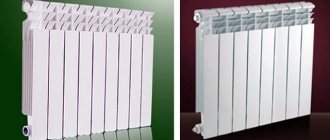
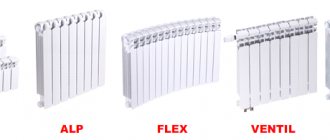
Aluminum radiator
Types of systems
- Single-pipe system - one pipeline is installed through which the heat source is supplied and the waste liquid is discharged. It is better to use in cases where a small number of batteries are installed. This is usually done when heating apartments where the riser runs in all rooms. With this scheme, each subsequent radiator will be colder than the previous one, but the number of pipes running through the room is reduced.
- A two-pipe system is the best method of design, making it possible to maintain a uniform temperature of the heating fluid throughout the entire circuit. When installing such systems, the supply line is usually located under the window sill level, and the return line above the baseboard.
We will consider below how best to connect heating radiators in one case or another, after we analyze each connection method separately.
- Lateral - with this method, the supply and return flow are supplied from one side. Works well with heating structures with up to 15 sections;
- Diagonal - best used on long heating elements. Communications are connected to the top hole on one side and the diagonally opposite outlet.
- The lower one is the least effective option; it requires high pressure in the coolant along the entire length of the heating structures. To maintain heat transfer, heaters with an increased number of sections are used. To ensure normal temperature in private homes, it is used only if there is a sufficient power pump in the heating system.
Aluminum radiators in St. Petersburg: https://spb.sdmclimate.ru/obogrevateli/obogrevateli-radiatory-otopleniya/radiatory-otopleniya-alyuminievye
Features of aluminum radiators
The main characteristics of aluminum radiators are light weight, relatively low cost and the ability to operate at high coolant temperatures. In addition, aluminum radiators look much better than their cast iron counterparts. The service life of the products in question can exceed 10 years, and all this time the metal will not be exposed to corrosion.
There are two options for aluminum radiators:
- Standard (European) . Such devices are designed for a pressure of no more than 6 atmospheres. As a rule, European-type batteries are used to install heating systems in private houses.
- Reinforced . This category of batteries can operate at a pressure of up to 16 atmospheres, which allows them to be used in apartment buildings.
The devices in question have a sectional design, so the assembly of aluminum heating radiators and their installation are carried out in exactly the same way as these operations with other sectional radiators. The batteries are installed under windows or attached to walls. Depending on the connection diagram, pipes can be connected to the batteries on one side or on both.
The number of radiator sections is selected depending on heat losses and required heat transfer. When choosing the batteries themselves, you need to take into account the operating pressure at which they can operate, the temperature regime of the heating system and the pressure testing of the system.
Often, aluminum radiators are equipped with additional parts, including:
- Racks and brackets;
- Plugs;
- Mayevsky crane or automatic air vent;
- Set of sealing gaskets;
- Shut-off valves or thermostats.
General rules for installing radiators
The battery is attached to the wall with special brackets. It can be installed openly, which is most optimal, recessed into a niche or covered with decorative finishing elements. When deciding how to properly install an aluminum heating radiator, you need to take into account that when closing the heat source, a loss of up to 30% of power is possible. Having made this choice, it is better to lengthen the heating devices through additional sections.
Any connection method will use three of the four radiator holes. Close the unused channel with a plug.
The two connection points to the system will act as input and output. On the third, always the top one, you need to connect the Mayevsky valve, through which air is removed after filling the system with coolant.
According to the design standards establishing how to correctly determine the connection location of an aluminum heating radiator, the following dimensions must be maintained:
- There should be a free space of at least 10 cm between the top of the radiator and the window sill. If the distance is made smaller, the rising warm air will heat the window sill rather than heat the room.
- The gap between the floor and the heater should not exceed 12 cm. As this gap increases, the heating of the lower part of the room deteriorates.
- You need to retreat from the wall to a distance exceeding 2 cm. At a shorter distance, the free upward flow of warm air masses behind the sections is impossible, as a result, thermal energy will go into the wall.
Often people, without thinking about where and how to properly connect a heating radiator in an apartment or other room, reduce the efficiency of this device. In this case, losses will account for a considerable part of the precious heat.
- Installation under an element protruding from the wall by 3 - 5 cm - about 4%.
- Placement in an open niche - up to 7%.
- Partially closing with a grill - up to 15%.
- By installing the grill over the entire area of the heated parts - up to 30%.
For lateral and diagonal connections, it is better to arrange the entrance through the top channel. When the coolant is supplied from below, the heating efficiency decreases by up to 15%.
The top plane of the battery must be in a horizontal position.
Trying to follow the conditions for how to most correctly and conveniently connect heating radiators, do not forget to use a supply tap that has a digital or dot scale on the adjustment handle. The presence of this option will allow you to easily set the amount of incoming liquid.
When assembling the connections of the coolant supply and discharge pipelines with outlets to the radiator and at the connection points of heating kits, taps should be used that allow you to disconnect the battery from the system if it is necessary to repair or replace it. This mechanism is called “American”.
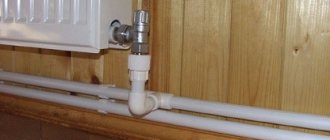
The laying of pipes connecting the radiator to the system is carried out after installing the sections.
When choosing how to properly connect heating radiators, we will consider each combination of the type of system and method of connecting the heaters.
Types of radiators for piping
Heating radiators differ in shape, design, and material.
The type of radiators for piping a living space must be thought out at the construction stage so that the building is prepared in advance for the installation of the entire heating system. Heating devices differ according to several criteria.
According to the material used in their manufacture:
- Cast iron ones were at the peak of popularity in Soviet times and are still often found in apartments. The advantages of this type of device include a long service life and low requirements for coolant - you can use any liquid in them without thinking about its quality. Among the disadvantages, it is worth noting the appearance - such batteries are difficult to fit into the modern design of the room. In addition, a cast iron radiator has very low thermal conductivity, which significantly increases fuel costs.
- Aluminum ones have a variety of designs and high thermal conductivity. The only drawback is that the aluminum radiator is very sensitive to water quality. It should be well filtered before use.
- Steel can be panel or tubular. The first option belongs to the budget category, but has high heat transfer. Such radiators are unpretentious, therefore they are widely used in residential and office premises. The second option belongs to the “premium” category. Such devices have a long service life, high thermal conductivity and an attractive appearance.
- Bimetallic ones have a long service life and have a high level of heat transfer. The only drawback is that bimetal is expensive.
- Copper ones are the most resistant, they hardly wear out during operation. Design features allow the use of water and antifreeze as a coolant. Such batteries dissipate heat, increasing heating efficiency. The disadvantage is the very high price.
- Plastic ones are a budget option for those who want to save money. They are light in weight, easy to install, fairly wear-resistant and inexpensive. Disadvantage - the coolant should not heat up more than 80 degrees.
Connection diagram for a one-pipe and two-pipe heating system
When connecting radiators to a heating system, two connection diagrams are used. If you choose the wrong method, heat loss can reach 50%.
- The single-pipe design allows the use of a minimum number of pipes. A serious drawback is that devices connected in series heat up unevenly. Those located closer to the boiler heat up more, while those located significantly further from it can remain cold. This effect is observed on the first floors of multi-storey buildings, where the coolant moves from top to bottom.
- Two-pipe wiring diagram. Two pipes are used here. One is the coolant supply, through which hot water flows from the boiler, the second is the return line, the cooled coolant returns to the heating tank. With this scheme, the batteries heat up evenly, which reduces heat loss.
The installation of batteries has its own characteristics due to their type and wall material. For heavy cast iron radiators, you should choose massive holders made of thicker metal. For lightweight aluminum, bimetallic or steel, thinner brackets are used.
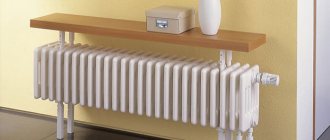
There are also corner radiators. They are mounted in the corner of the room and can have different designs and construction options.
Single pipe system, side method
One-pipe system, side method.
- Two tees are installed on the supply line. The opposite terminals are oriented along the pipe, and the side ones towards the battery. Their locations are selected in such a way that they correspond to the inlet and return outlets.
- The American type valves described above are mounted on the tees.
- The outlet from the shut-off device located on the coolant inflow side is connected to the battery inlet.
- A pipe is laid from the outlet to the remaining tap.
One-pipe system, bottom method
- On the riser, as close to the floor as possible, two tees are mounted in series, and locking devices are installed on both.
- From the tap of the supply side of the pipe, a branch is laid along the floor or lower part of the wall to the nearest lower inlet of the heater.
- As close as possible to the supply outlet, the far lower opening of the sections is connected to the return flow valve.
The three previous methods are acceptable only if the distance from the supply pipeline is short. For this reason, professionals use them to solve the problem of how to connect a heating radiator in an apartment where risers run through each room.
Two-pipe system, side method
- Choose a convenient place on the supply pipe, preferably as close as possible to the radiator, on its outer side (to the left or to the right) for installing the tee. When determining the position of the tee, you should take into account the need to turn the tap in the direction of the entrance to the battery using an angle.
- A valve is mounted on the tee, as in the one-pipe system.
- From this tap a connection is made to the upper inlet channel of the radiator.
- The lower hole on the connection side of the sections, which in this case will serve as an outlet, is connected to the return flow pipeline according to the same principle. For the aesthetic component of the design, it is advisable to observe the analogy of a mirror image of the supply part of the circuit.
Installation
The installation of aluminum radiators can be ordered from a special organization or done by yourself. In this case, you need to know the sequence of actions and how to carry them out most correctly.
Preparatory work
Before you begin installing radiators with your own hands, you need to calculate their mounting locations and install the bracket. To do this, a calculation is made based on the building rules for installing a radiator:
- At least 10 cm from the window sills,
- About 12 cm from the floor,
- From 3 to 5 cm from the wall.
The bracket must be secured to the wall using dowels, sealing the holes drilled for them with cement mortar. The radiator can be floor-mounted, that is, it can be supplied with a floor holder - a stand. At the same time, it should be attached to the wall lightly, only to maintain balance.
Radiator assembly
Before connecting, the radiator itself needs to be assembled, that is, the necessary elements must be installed:
- Screw in the radiator caps and plugs,
- Connect the shut-off valves,
- Assemble thermostats
- Check the reliability of the nipples,
- Attach air valves
A diagram of how to disassemble an aluminum radiator and reassemble it should be included with the new device.
Attention! In order for the valves to do their job correctly, you need to immediately calculate that their outlet heads are facing up.
The radiator can then be secured to the bracket. In this case, the hooks must be located between the sections. The bracket is also involved in the process of adjusting the installation level of the radiator.
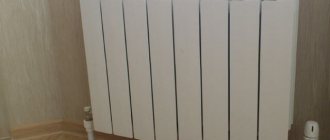
Connection diagram
The connection diagram for an aluminum radiator can be:
- diagonal,
- lateral,
- lower
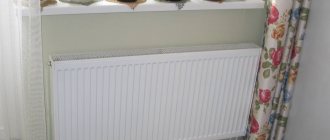
Aluminum radiators with bottom connection mounted on a floor bracket
Interesting! The connection diagram affects the quality of heat transfer, since in some options some of the thermal energy is lost. Thus, the side circuit of a single-pipe system takes up to 15% of the battery’s heat.
Two-pipe system, bottom method
Two-pipe system, bottom method
- The supply and return pipelines are laid above the baseboard, along the floor or under it.
- The outlet through which the coolant flows is connected to any of the lower holes of the set of sections. The procedure for performing the work is the same as in the two previous options.
- A return flow of liquid is mounted on the lower opposite channel. The mirror principle with respect to the incoming pipes is observed.
Important
In order not to violate the calculated order of how to connect aluminum heating radiators, two conditions must be met.
- When arranging the outlet from the supply line to the battery and the outlet of the return flow, it is imperative to use pipes with the cross-sectional area specified by the section manufacturer.
- The diameter of the main supply and return pipelines must be at least twice the diameter of the branches.
In most cases, the heated liquid is supplied through mains from above. But sometimes, especially in buildings from the middle of the last century, this order can be violated. Before starting work, check the direction of the coolant supply with your local operating authority.
Removing air from radiators
When the system is filled, air accumulates in the upper corner of the battery not used for connection, which must be removed. To do this, you need to place a liquid container under the pre-installed Mayevsky tap and open this device.
After waiting until the output stream is smooth, without splashing or air bubbles, the tap should be closed. After this, go to the next battery in the chain and perform the same actions.
It is required to start from the radiator located first on the supply pipe. After finishing the round, go around the second circle, check that all the air has been removed. If necessary, duplicate the entire process several times.
Now, knowing how best to connect heating radiators in an apartment or house and paying attention to each stage of work, it is not difficult to provide the desired warmth and comfort in your home.
If you do not have sufficient experience in construction work, lack tools or confidence in your abilities, it is better to entrust such a responsible task to professionals.
Nuances of connecting radiators
If there is not enough heat, the radiators are connected to each other.
In some situations, to increase the efficiency of heating the rooms, you need to connect the heating radiators to each other. Linking can be done in three ways:
- Serial connection - one pipe is used. Heating appliances warm up unevenly.
- A parallel connection involves the use of two pipes. Bimetallic radiators are connected to each other through the upper and lower outlets.
- When connected through, the coolant passes through the heater system without being retained in the batteries.
The most reliable and economical way to connect two heating batteries together is considered to be in series, the easiest to implement is through.