Smoking is the oldest method of preserving food. Meat, fish, and lard soaked in smoke do not spoil for several weeks or even months. But today such processing is used not only to extend the shelf life of food. The unique taste and aroma are what is valued in homemade smoked meats. We suggest building a smokehouse with your own hands according to all the rules in order to always have your favorite dishes on the table without chemical additives and preservatives.
Description and principle of operation
The smoking process is the same for all types of smokehouses. Chips or sawdust from deciduous trees are loaded into a special container. After ignition, smoldering begins without the formation of an open flame.
The emitted smoke envelops the products and penetrates into their very thickness. The process can last from 3-4 hours to several days. For draining fat, a tray is attached below. After smoking is completed, the product is kept in the air for some time to remove any remaining smoke, after which it is ready for consumption.
Cold smoking
There are many options for making a smokehouse out of. The main feature of cold smoking is the presence of an extended chimney in the design.
The operating principle of all cold smoking smokehouses is the same. As for the design features, it all depends on your imagination and the materials at hand.
By looking on the Internet at videos and photos of smokehouses made by yourself, you can get a lot of useful ideas.
Types of smoking
Processing of the food product is carried out in a certain mode. Smoking can be cold, hot or combined depending on the temperature inside the chamber:
- Hot smoking is carried out at 30-50°C. The product is simultaneously subjected to heat treatment and impregnated with smoke. Cooking time does not exceed 2-4 hours. Such products have a short shelf life.
- Cold smoking lasts much longer - up to several days, the optimal temperature is no more than 18-30°C. The product gradually matures, as a result of which it acquires a characteristic “smoked” taste and smell.
- Combined smoking is a short-term exposure at high temperature, which is gradually reduced. The product cooks faster than cold smoking, but is stored for a long time.
The smokehouse can be intended for only one type of smoking or be universal. Some types are used for drying or drying foods.
Specifics of a cold smoked smokehouse
Making a cold smoked smokehouse with your own hands is quite easy. Manufacturing requires the use of a special drawing, detailed diagrams, and visual materials.
Expert opinion
Nikolay Osipov
Smoker with 10 years of experience. Knows how to prepare the product and smoke it correctly. You can ask him a question by clicking on the button on the right
Ask a Question
Smoke that affects food should not contain carbon monoxide. It is important to properly make a special smokehouse device, equipping it with a chimney of sufficient length. When smoke passes through it, all harmful substances will remain on the walls. As for the chamber where the cold smoking process takes place, it must have a lid; it will trap the smoke. This element should be thought through in advance, noting all the parameters in the smokehouse diagram.
Good to know! The classic lid can be easily replaced with some available tools. A good option would be damp burlap, which should be thrown over the camera. It will dry out over time, so you will have to moisten it with water every 2 hours!
Features of hot and cold smokehouses
The main components of the smokehouse design are the smoking chamber, the firebox or the fireplace for wood chips, etc. But with the hot or cold method they are arranged differently. A hot smokehouse is a compact device where there is no pipe between the firebox and the chamber; smoke is supplied without pre-cooling. Therefore, cooking takes place quickly and at a higher temperature.
In cold smokehouses, a mandatory element is a long chimney, moving through which hot gases cool. At the same time, they are cleaned from resinous substances and moisture. Cooled smoke enters the chamber, envelops the food and is then discharged out through the exhaust hole.
The length of the chimney reaches 2 meters or more. For uniform cooling, the chimney is insulated or laid underground.
Rules for using the smokehouse
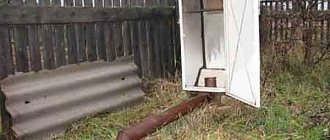
The refrigerator-shaped design is easy to use. Before you make a smokehouse from a refrigerator and start using it, it is important to understand simple rules for safe operation, time and temperature conditions. The temperature specified in the recipe must be observed. For smoking large pieces of meat, the degree of smoking is always higher than for small ones. It should be borne in mind that the time required to smoke fish and chicken is much lower than for pork and beef. When cooking meat, distribute the pieces evenly over the grill. Overlays and overlaps of large pieces onto small ones are best avoided.
You should not often open the smokehouse door, as the cooking conditions will be disrupted.
The procedure for using a smoking cabinet made from a refrigerator:
- Cold smoked:
- firewood suitable for smoking is prepared in the required quantity;
- a fire is lit in the firebox;
- the smoking cabinet is warming up;
- prepared products are laid out on racks or hung on hooks;
- the smokehouse is locked;
- wait for the cooking time according to the recipe;
- The supply of firewood and the combustion power in the stove are controlled.
- Hot smoked:
- the power supply to the oven installed in the smokehouse is connected;
- a container with wood chips suitable for smoking selected products is installed on the heating element;
- products are laid out or hung;
- the door closes tightly; if necessary, the junction of the door and the body is covered with tape;
- the smoke exhaust pipe is placed in a window or exhaust vent;
- the exhaust fan turns on;
- the start time of cooking is recorded.
Types of smokehouses
The industry produces a fairly large assortment of ready-made smokehouses. They are made of stainless metal in the form of a container with fittings for connecting a smoke generator and a smoke exhaust. But these devices are not cheap, and their performance is low.
It is much more economical to build a smokehouse with your own hands from existing or even scrap materials. The design can be of 2 types:
- portable - often used for hot smoking, convenient for a hike or outing;
- stationary - used as a universal option, installed on the foundation.
The dimensions of your home smokehouse can be made to any size depending on the volume of processing that suits you.
Design features of a wooden smoking cabinet
The base of the cold smoked cabinet for fish and meat is a wooden frame made of pine beams with a cross-section of 40x40 mm. Case drawings can be seen below. The dimensions of the frame are 1x0.5x0.5 m. It is not difficult to make it yourself, the device is very simple. This is quite enough to produce homemade products in the required quantities. Moreover, the resulting internal volume is optimal for the power of a small cold smoke generator (combustion chamber volume up to 3 liters) of the ejector type, operating on wood chips.
Schematic drawing of a cabinet for a smokehouse
Smoking cabinet body
The frame is covered with your own hands on three sides with boards 25 mm thick and up to 100 mm wide. You can use regular lining as cladding. The properties most suitable for the best taste of fish and meat are boards or linings made of linden, aspen, alder or other hardwoods. If this is not available, then you can sheathe the frame with softwood lumber. It is somewhat worse due to its resin content, but after several smoking sessions it is saturated with smoke, and the characteristic odor disappears and the device becomes completely ready for use.
The smoking cabinet must be airtight. This is ensured by installing a hemp rope seal at each board joint. If lining or floorboard with a tongue/groove joint is used, then the sealant is optional, but desirable. And when covering with your own hands with a regular board with a flat edge, all the cracks must be caulked.
Caulk the joints with hemp rope
Hemp rope is the optimal solution. As an alternative, you can use tow. Anyone can do this with their own hands.
Door
A door is made to the full height of the front wall. It is assembled with your own hands on a frame made of 0.25x100 mm boards in such a way that the frame boards fit tightly into the opening, and the protruding part of the sheathing covers the joint from above. A food-grade rubber seal (from a refrigerator, for example) is installed around the perimeter of the entire opening. If this is not available, you can do this with a felt strip.
The whole advantage of do-it-yourself designs is that there is an unlimited number of technical solutions for the same unit. As a rule, the most available materials are used and it is impossible to say that they are the only acceptable ones. Therefore, variations in the installation of this or that structure are welcome.
We recommend: Do-it-yourself smokehouse made from medical bixa
The door is hung on two hinges, external or mortise - depending on your skill level, and is equipped with a latch. The door, like the walls, must be completely sealed with hemp or tow. This is a necessary condition for cold and hot smoking with your own hands.
Roof
The upper part of the smokehouse is made in a single-slope version with a backward slope or in a more beautiful gable version. When choosing a gable option, a rafter system with a slope length of 55-60 cm is assembled. If you have some experience, anyone can do everything with their own hands. The roof is completely sealed.
If you plan to install a smokehouse for fish and meat outdoors, then the upper part of the casing needs to be primed and painted with any oil paint. The roof in the smokehouse, even if it is used for hot smoking, does not heat up too much, so there is no need to worry about the paint peeling off, and the paint will protect perfectly from rain or snow.
Don't forget about the chimney
A chimney equipped with dampers and scrapers is mounted in the roof. It can be made from either wood or metal pipe. It's not difficult to make.
Preparation of raw materials
When smoking, the temperature does not rise to such a level as to kill all putrefactive microorganisms in the products, so the raw materials are pre-prepared. The most common methods are dry salting or soaking in a concentrated salt solution. The fish must be gutted, washed, and covered with plenty of salt. After 2-3 days, the salt is removed and soaked for 1-2 days. After this, the raw materials should weather and dry. For smoking at a temperature of 20-30°C, 2-3 days are enough. The thicker the flesh of the fish, the more time is required for each operation.
Lard, cut into pieces 10-15 cm, is poured with a solution of salt and spices. The concentration is checked with a raw egg - it should not sink. The lard is kept in the refrigerator for 3-5 days, dried and smoked for 1-2 days at a temperature of about 30°C.
Meat and poultry have a denser texture. They are salted for 5-20 days in the refrigerator under pressure, then ventilated in a draft. Smoked for at least 3 days. Meat and fish must be thoroughly dried or cured before smoking. If moisture remains in the pulp, smoke will not be able to penetrate the thickness of the product, which will cause a sour or bitter taste.
Smoke generators
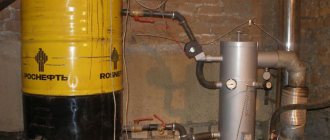
Smoke generators are often used as a source of smoke, which can be purchased ready-made or made by yourself. They are more compact and economical - sawdust for smoking requires 2-3 times less. The reason for the high performance of the smoke generator is the creation of forced air movement using a compressor or fan.
You can build a smoke generator yourself from scraps of metal pipes, a grate for an ash pan and a compressor. Thrust is created in the pipe due to holes in its lower part and a compressor at the outlet. The smoke from the smoldering wood chips moves upward, where it is regulated in the outlet socket using an ejector. The lid is removable for loading and cleaning.
How to make it yourself
First of all, you need to decide on the size of the smokehouse. This will help you choose the optimal design and solve all operational issues. The main criterion for choosing the size of the complex will be the number of products that need to be processed. The larger the family, the more food needs to be smoked. Taking into account your needs, you can choose the size of the cabinet and the performance of the combustion chamber.
The next step is to choose a location for a stationary smokehouse. If there is no desire (or opportunity) to purchase (make) a smoke generator, it is easier to get by with a traditional design with a smoke channel in the ground and a regular covered fire. This option has a significant advantage over more advanced systems, since its implementation does not require anything other than the cabinet itself. On the site there is always something to cover the trench and smoldering wood chips. Using a smoke generator allows you to transport it with you on fishing or hunting trips, but it will require storage and maintenance.
Assembling the smoking cabinet
If you need a stationary smoking chamber, it can be built from boards or other available materials. At the same time, it must be remembered that there will be food products inside, so the quality of materials must be appropriate.
To make a wooden cabinet you will need clean planed boards. Since high temperatures are not expected, softwood can be used. You need to choose clean boards, without blue or resin pockets. If possible, it is better to use birch or aspen boards.
Birch and aspen are not used to prepare wood chips for smoking. Construction waste will have to be disposed of, removed or incinerated.
To make a cabinet, use the usual tools:
- power saw, jigsaw or hand saw;
- electric drill;
- screwdriver, hammer, pliers;
- tape measure, ruler, square.
In addition, fasteners are needed - nails, screws, and sometimes threaded connections are used.
Construction stages:
- Making a working drawing. A sketch is drawn up, all details are listed with dimensions and notes. This is an important stage that allows you to detect and correct a lot of errors in advance.
- Preparing parts. According to the drawing, blanks for the frame, walls and top cover of the cabinet are made.
- Assembly. All parts are connected using nails or screws.
- Cabinet installation. Recesses are dug in the ground where the supporting elements of the cabinet are placed. Then they are covered with soil and carefully compacted. The legs must first be waterproofed by wrapping them in roofing material or covering them with several layers of hot bitumen.
- Installation of the cabinet roof. To protect from precipitation, make a pitched roof, or cover its upper part with a piece of roofing material. Some users cover the cabinet with polyethylene, nylon fabric or other materials during downtime.
The given instructions are not the only possible ones; each master is free to make changes to it that seem necessary to him.
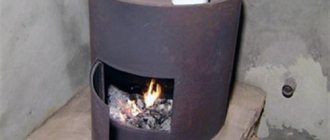
Making a brazier
Typically, wood chips are set on fire to produce smoke. The container into which it is loaded is covered with a special box or lid that reduces the ability of active combustion. The wood chips smolder, emitting a large amount of smoke. The easiest way is to make a firebox buried in the ground. It is small, but quite effective for processing products. The main task is to ensure free passage of smoke to the smoking cabinet, for which the firebox level is made lower than the height of the lower part of the smokehouse.
- A depression is made in the ground, the size of which depends on the size of the firebox.
- Fire bricks are laid to form the base of the fireplace. The first row is not fastened with anything.
- The walls and roof of the fireplace are made of refractory bricks. A clay solution is used for the connection.
- Install a cast iron firebox door (a standard model from a conventional stove will do).
All that remains is to arrange the chimney, and the smokehouse will be ready.
Construction of a smoke channel
This is the simplest stage of construction. A ditch is made in the ground, the depth of which is about 30-40 cm (per shovel bayonet). Then the walls are covered with brick, a pipe is laid in it, or the walls are left as is. The last option is the simplest, but the ditch will have to be dug up again every year, as the walls will crumble. If there is frequent rainfall in the region, it is better to cover the trench with some material and fill it with soil. A good option would be to lay sheets of flat slate or similar material.
It is necessary to ensure that small rodents or birds do not settle in the closed trench.
Both ends of the trench should be connected to the cabinet and hearth. Smoke from smoldering wood chips should flow freely into the smokehouse.
First start of the process
When the construction procedure is completed, a batch of wood chips or small lumps is loaded into the firebox, they are set on fire and the combustion mode is adjusted. Check the efficiency of smoke entering the cabinet. If no problems are found, the products are hung into the container and processing begins.
A homemade smokehouse allows you to obtain exquisite gourmet quality products. If the design is not too complex, practically no costs will be required for its assembly. The efficiency of such smokehouses is in no way inferior to their factory counterparts, so users prefer not to waste money by making their own complexes.
Wooden smokehouse for hot and cold smoking
Wooden smokehouses are traditionally popular. They have significant advantages over other structures made of brick or metal:
- wood “breathes” well;
- does not accumulate condensation on the surface;
- over time it does not become saturated with an unpleasant odor.
To make a smoking cabinet, lumber from deciduous trees is used - aspen, linden, ash, oak. Conifers can also be used for external cladding.
Schemes and drawings
It is convenient and easy to work with wood, which allows you to create different geometric shapes as you wish. If you draw up a diagram or drawing of a cold smoked smokehouse, it is much easier to calculate the materials and determine the plan for future work.
Diagram of a smokehouse with a chimney
The simplest smokehouse is a box with a single or gable roof. More complex designs can be polygonal, cylindrical, or in the form of a triangular pyramid.
Drawing of a box with a roof
The dimensions of the smoking cabinet must correspond to the volume of loaded products. If you smoke in small portions, a compact box with an area of 0.3x0.4 m is sufficient. For large batches, the dimensions can be increased to 0.6x0.6 m or more.
Tools and materials
For production you will need:
- board or lining made of deciduous trees;
- pine beams and boards for cladding;
- insulation - sawdust, mineral wool, dry expanded clay;
- handles, hinges;
- brick, foundation mortar;
- door for loading sawdust and cleaning the firebox;
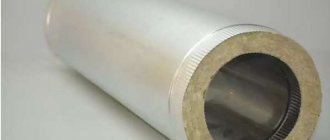
- chimney pipe;
- roofing material - slate, flexible or metal tiles;
- carpentry tools;
- fasteners;
- screwdriver;
- impregnation for wood.
For the interior arrangement you need a pallet, gratings, and hooks. Heating element - if it is intended to maintain smoldering using electricity. To control the thermal regime, you will need a thermometer.
Foundation
The base for the smokehouse can be a structure made of concrete, stone, or brick. A supply pipe is pre-installed, with the help of which the draft will be maintained.
The foundation is laid out according to the dimensions of the chamber, and a metal frame under the door is immediately installed in it. Chips will be loaded through it and cleaning will be carried out.
It is advisable to line the inside of the firebox with fireproof fireclay bricks or tiles.
Frame and sheathing
The above-ground part is a frame sheathed on both sides. It is made of timber, installed on the foundation and secured with bolts or studs.
For internal cladding, boards made of alder, oak, and linden are used; the outside can be lined with pine. To prevent rot, the outer skin is impregnated with a wood antiseptic. The inside of the cabinet is not treated for two reasons - firstly, the impregnation releases substances that are not entirely useful when heated, and secondly, smoked wood practically does not rot.
To load products, you need to install an insulated door in one of the walls. It should close tightly enough so that smoke does not escape through the cracks. Mount the hinges and screw on the handles.
This smokehouse also has a wood burner, combined with a chamber under a common roof. The tree is stored nearby and is always dry, which is very convenient.
Roof
The roof can be made of any roofing material, but with additional insulation. The top of the smoke exhaust pipe should protrude a few centimeters beyond the ridge to create draft.
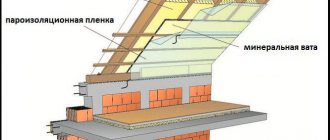
Insulation
To ensure that the temperature remains constant, a layer of expanded clay or sawdust 5-7 cm thick is poured between the inner and outer lining. Expanded polystyrene cannot be used - when heated, it emits deadly styrene gas, which can penetrate smoked meats and cause poisoning.
In the example, the insulation is covered with cling film
Interior arrangement
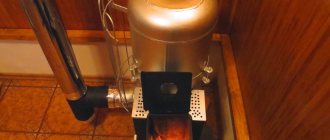
The smokehouse is equipped with grates, slats or hooks for laying or hanging raw materials, a tray for draining fat, a thermometer, and a fan (for drying and drying the product).
An inlet for the chimney is installed in the floor or at the bottom of the cabinet. The pipe itself and the firebox are located outside. An exhaust pipe is installed in the roof to allow smoke to escape.
Fire precautions
Inside the cabinet during cold smoking the temperature does not exceed 30°, so the risk of wood fire is almost zero. But if the smokehouse is universal, that is, it is also intended for hot smoking, then overheating is possible in the part where the wood chips smolder. You can solve this issue in two ways:
- Isolate the fire-hazardous area with non-flammable materials that do not emit toxic substances when heated, for example, sheet metal with a heat-insulating gasket.
- Make a firebox out of blocks, stone or brick directly under the smokehouse. At the same time, it will serve as a foundation.
In our case, the firebox is made of stone, so there is no risk of overheating.
Exploitation
Sawdust is loaded into the combustion chamber and ignited. To maintain smoldering from below, you can install a “dry” heating element. Air supply is carried out through a supply pipe laid below the foundation. Before starting smoking, you need to wait a few minutes until the smoke lightens, since the first dark portions contain a lot of soot and resins.
Products are hung on hooks and the door is closed tightly. Smoking is carried out for the required time, regulating the temperature using a damper on the supply pipe. Then the smoked meats are ventilated in a draft for at least a day.
How to make a smokehouse with your own hands
Greetings to all! I decided to ask a question here about my own, so to speak, smokehouse, please don’t throw too many slippers at me. Here is the smokehouse itself.
Attached is a schematic drawing of my smokehouse.
Actually, this is what I’m racking my brains about and asking for help. How to get rid of temperature hysteresis inside the smokehouse? I just want to set the desired temperature near the product and keep it constant. Let me explain the drawing. The smokehouse itself, a box made of 12 mm plywood, with dimensions of 50*50*70 cm on the outside. The inside was lined with aluminum foil for baths. A tile with a power of 1 kW is installed below. It is controlled by a digital electronic thermostat. Above the tile, at a height of approximately 15-17 cm, there is a tray for draining fat. The hysteresis on the thermostat is set to 0.1 degrees, i.e. the bare minimum. About 10 cm from the top, on the side wall of the smokehouse there is a “mechanical” Thermometer, which shows the temperature we need in the “Drying, frying, cooking zone, which is also the smoking zone.” Below this thermometer, a “Digital” thermostat sensor is installed, at a distance of approximately 18 cm (this distance was selected empirically). If this sensor is installed next to a “mechanical” thermometer, then the heating temperature in the “green zone” goes up very much. This separation of sensors at the moment gave the same readings from both thermometers, both “mechanical” and “digital”. (Actual thermometer readings were verified outside the smokehouse and are almost identical). Why is this happening? THOSE. it turns out this way, the tile heats up, hot air goes up, but around the tile it is much hotter than in the area of the upper thermometer. The lower sensor, it turns out, heats up more than the upper one, and for some reason the readings at the moment are the same. How so? If there was no temperature difference, I could get by with only one sensor, I would put the sensor from the thermostat instead of the top one and that’s it. But it doesn't work that way. Let's move on. For example, the thermostat was set to 60 degrees. The relay turns on the stove, the stove heats up, heats the air inside the smokehouse, as soon as the upper thermometer shows 60 degrees, and the thermostat also shows the same value (for now, thanks to the spacing of these sensors), the relay turns off, and the stove turns off. But due to thermal inertia, the temperature inside the smokehouse continues to rise by about 2-3 degrees. As soon as the temperature has reached a certain maximum, approximately 62-63 g, it begins to fall. And since the hysteresis on the “digital” Thermostat is set to 0.1 g, this means the temperature will drop to 59.8-59.9 g and the relay will turn on the tile for heating again. But here again the inertia of temperature, only in the lower direction, towards cooling. Those. the tile has already started heating, and the temperature continues to drop, by about another 0.8-1.0 degrees. The whole process then continues cyclically. So we get a thermal hysteresis of approximately 4 degrees. Why does this happen? How can this hysteresis be reduced? Is it even possible to make the temperature inside the smokehouse constantly set? For example, how can I regulate the duty cycle of the voltage supply pulses to the tile, or the number of pulses? That is, for example, the temperature in the “green zone” reached what we needed, the tile did not turn off completely, but began to be gradually recharged, thereby the temperature would not drop. Is this even real? Maybe a PID controller or a thyristor controller can help with this? How then to implement this? Of course, drastic alterations are not advisable; I also don’t want to change the power of the tiles. But even if you install a tile, for example, with a power of 2 kW, i.e. 2 times greater, I think, everything will be the same, only the temperature will go up even more when the tile is turned off, the inertia will go up even more, only in less heating time, but the lower hysteresis for cooling will, I think, be less, but this is will give practically nothing. Am I right or wrong? Yes, and also, such work with a tray installed for draining fat, without it the entire process of maintaining the temperature changes for the worse, i.e. The upper tempra rises very much. On all 4 sides, between the walls of the smokehouse and the tray, there is a distance of about 2 cm. There is no fan inside. When drying, when frying with smoke and when cooking without smoke, the smoke generator fan is always on, although not much, but I think it moves the air inside the smokehouse. And it blows between the tiles and the pallet. It seems he explained it the way he wanted. Oh, and also, I didn’t line the smokehouse, because I plan to use it only in the warm months of the year.
Message modified: sser776, 21 June 2021 - 16:34.
How to make a cold smoked smokehouse from brick
This is a substantial capital structure, the construction of which will require some masonry skills. If you combine a smokehouse, a barbecue and a cauldron oven, you will get a wonderful mini-complex for preparing a variety of dishes in the open air.
The masonry is made in half a brick using cement-sand mortar. First the corners are drawn out, then the walls. The bricks are placed in a dressing with a seam of 0.5-1 cm.
Tools and materials you will need:
- container for mixing the solution;
- shovel;
- putty knife;
- bubble level;
- cord for beating rows;
- brick;
- cement;
- sand;
- water;
- crushed stone for filling.
The smokehouse can be vertical or horizontal. In the first case, the firebox is placed separately and connected using a pipe, in the second, the chimney is laid directly in the body of the stove itself.
The chimney laying is quite complicated. Hot gases must travel as far as possible, cooling evenly, so special orders have been developed for such options.
Selecting a location
It is optimal if the structure is located on a site with a slope. A smoking cabinet is installed at the top point, and the chimney is laid underground to the bottom point of the slope and connected to a chamber for burning wood chips.
Thanks to the pressure difference, a draft is created that actively propels the smoke in the desired direction. To regulate the speed and temperature, a damper is installed in the chimney. The longer the channel, the better the gases are purified from soot and toxic substances.
Often, for a chimney, a trench dug in the ground, 2 meters long, is used, which is covered on top with sheets of metal and covered with soil. In such conditions, the temperature remains constant for a long time, and cleaning is not required at all. Harmful resins penetrate directly into the ground, where they are neutralized by soil bacteria.
When choosing a location, you need to take into account the fire hazard of the structure, as well as the impact of smoke on others. It is desirable that the smokehouse does not “smoke” into the neighboring area and does not provoke conflicts.
Foundation
For brick walls, you can use a monolithic slab or reinforced strip as a base.
Foundation construction algorithm:
- Dig a pit to a depth of 30-40 cm.
- Fill the bottom with crushed stone and compact it.
- A 50 mm layer of concrete is poured.
- After setting, reinforcement cages are laid and another 50 mm of concrete is poured.
After 2-3 days they begin laying. You can put scraps of pipes, fittings and other metal into the tape. A mesh with a cell of 100x100 mm and a rod diameter of 6-8 mm is suitable for the slab.
Furnace laying
As a rule, the oven is not used directly as a smokehouse. Various dishes are prepared on it, including in a cauldron. But the smoke that is generated from the combustion of wood is quite suitable for smoking. Passing through the furnace channels, it cools sufficiently, is cleaned and enters the chimney. Products are hung inside on fixed hooks or grids.
The oven is laid out in a row, ensuring the tightness of the seams. Fireproof materials are used for the hot zone; this is not necessary for external masonry.
Simple brick cold smoked smokehouse with your own hands
The structure is a brick “house” connected to a smoke generator or firebox via a chimney. For hot smoking, the firebox is located in the lower part of the smokehouse.
Hooks for food are installed inside the building. During laying, an opening is left in one of the walls, where the box is subsequently mounted and the door is hung. A chimney is installed in the roof. To regulate the speed and temperature, it is advisable to install a valve.
How to smoke properly in a brick smokehouse
To begin with, you need to run the empty smokehouse 1-2 times. To do this, burn a certain amount of sawdust for 3-4 hours. This is necessary so that the brick becomes less wet. As a result of the test run, it is also possible to see leaking joints that allow smoke to pass through and eliminate them.
After testing, you can start smoking products according to your favorite recipes. A brick smokehouse retains heat well and is suitable for use in the cold season.
Made of brick and stone
This option is preferable for those who often smoke food. Otherwise, an extra building will appear in the local area - a home smokehouse, which will stand idle. A metal sheet or a barrel lid is suitable for the bottom of the chamber. The masonry is made of silicate or red brick and sand-clay composition.
Before this, the area under the smoking cabinet for cold smoking is weeded of grass, the top layer of soil is removed and the surface is leveled. Builders use strings and pegs for marking. A cold smoked smokehouse is built with your own hands as follows:
- Foundation. First, dig a hole 50 cm deep, where the formwork is installed. A layer of rubble stones is placed down so that there are gaps between them. Then a solution of cement and sand is poured in and crushed stone is added. A building level is used to level the surface. The formwork is covered with film and left for a couple of weeks.
- Base. On the prepared foundation, the master lays two waterproofing layers (roofing felt is suitable for this). After this, lay the bricks on a dry surface, while checking the parameters with the dimensions indicated on the sketch. The next batch is laid out on cement mortar.
- Walls. A clay-sand mixture is used for masonry. To ensure that the walls are even, the result of the work is checked with a level after each next two rows are ready. The laying is done from the corner part to the center. After laying two rows, the reinforcement is fixed, and the grate bars are installed above the fifth. To keep the oven airtight, the seams are completely filled with the mixture. Excess inside and outside is removed with a trowel.
- Doors, ledges and other parts. In the 8th row, corners for the lintel are built in over the ash pit and firebox, metal doors are secured in the openings and the wall is lined on the inside with fire-resistant bricks. In the 10th row, the master himself makes projections inside for the box with sawdust (for this, the brick is placed across the wall). The dimensions of the door must correspond to the parameters of the box, otherwise smoke will come out. In addition, builders do not recommend using polymer gaskets, since due to heating they can emit a synthetic odor that will permeate the food.
Read here - How to protect wrought iron fencing and stair railings
- Jumper. In the 20th row, a jumper is installed above the smokehouse opening. It is made from 2 reinforcement bars. Several rods are fixed above at a distance of 30 cm. They are designed for hanging products.
- Chimney. The ceiling for the chamber is made of bricks in the corners. To install a chimney, lay out a support platform on which it is attached, and coat the joints with a sand-clay mixture.
A homemade cold smoked smokehouse will be ready after an umbrella is installed at the top of the chimney. This detail will protect food from precipitation and debris. You can cook food in the oven after a few days. If smoke escapes through the gaps, they will need to be sealed with cement.
How to make a smokehouse from a barrel with your own hands
A strong barrel made of wood or metal is an almost ready-made body for a smokehouse. The volume can be anything - from 20 to 300 liters, the main thing is that toxic or strong-smelling substances have not been stored in it before. It’s almost impossible to get rid of the smell, and poisons are generally not something to joke about.
The best option is a stainless steel barrel. She is not afraid of condensation, which is released during smoking and settles on the walls. The metal should not be too thin so as not to bend under load.
Vertical smokehouse from a barrel
We offer a simple option - how to make a cold smoked smokehouse from a 200 liter stainless barrel:
- Place the cast iron stand with tray on a solid base, such as paving slabs.
- Cut off the bottom of the barrel, leaving the rim. It is needed so that sufficiently thin metal walls do not lose their rigidity under load and do not wrinkle. The cut part can be made slightly concave, fastened with a bolt in the middle and used as a pallet.
- Cut off the lid, moving 3-4 cm from the edge.
- Use a grinder to cut out the door at the bottom of the barrel and install the hinges. It will serve for loading wood chips, ignition and cleaning.
- Screw in bolts in several places around the circumference of the barrel to install the tray.
- To attach the grille, drill holes and insert rods.
- Place the barrel on the stand.
Now you can carry out hot smoking. To do this, pour sawdust into the lower cast-iron container, set it on fire, load the food and treat with smoke for the prescribed time. For cold smoking you need to attach a smoke generator.
Horizontal smokehouse
If you lay the barrel on its side, it can be used as a horizontal smokehouse. The container must be well secured. The bottom and lid are not cut off, but it is necessary to cut out a large hatch on top and make a hinged or removable lid. To prevent it from falling through, limiters are installed from strips of metal.
To stack food, you can use steel grilles from the refrigerator, which are fixed inside. A tray to collect grease is also required. And if you install it on another barrel, which serves as a firebox, the smokehouse will be very functional and convenient.
Homemade smokehouse. Manufacturing.
Manufacturing should begin by preparing all the necessary materials. So we have everything we need. We will make a smoking cabinet from clapboard. But there's no need to rush. Because everything must be done sequentially.
You need to start making a smoking cabinet by making two frames. Since these frames will serve as the frame of the cabinet. Because the skeleton of the cabinet (future walls) will be formed by connecting these frames together. We start by cutting 30mm x 30mm bars to size. Since for production you will need to cut four bars 390 mm long. There are also four bars 295mm long. So we cut them up. Since the design of the smoke generator is not given, I am not writing about it. Because on the Internet there are designs for every taste. See photo below.
Bars for wall frames.
Homemade smokehouse. Let's assemble the first frame, but don't rush.
Assembling the first frame. The second frame is exactly like the first.
After I assembled two frames, these frames need to be connected to each other. I connected it with 295mm long pieces of 30x30 timber. Thus, the frame of the future smoking cabinet was created. But before connecting the bars, it is advisable to drill holes at the joints for the passage of self-tapping screws. Because dry wood can crack.
This is what the frame looks like.
Now I cut two sheets of plywood 3-5 mm thick. Because I took what I had. Because there is no point in looking for other material.
Smoking cabinet. Floor and ceiling.
I will use one sheet for the floor. And its size is 355mm x 355mm. But for the ceiling the size of the plywood sheet will be different, 60mm wider. Wider because the roof will have a cornice. Since I cover the lower part of the cornice with this sheet of plywood. Here is its size - 379 mm in length and 415 mm in width.
A sheet of plywood for the floor and ceiling.
Now I am fixing the plywood to the ceiling. Since I took used plywood 3mm thick, I placed the clean side inside. Thus, I place the painted side outward. You need to coat the joints with sealant before attaching the plywood.
How to position plywood. Painted side out.
I made all the fastenings using self-tapping screws. Because it's stronger than nails. But you can also use nails. Moreover, you can combine them. But it is better to use self-tapping screws to fasten and connect parts. Because there are many reasons for this. Of course, one of the reasons is the strength of the connection. But there is another reason - if the need arises, you can remove a part, this can be done easily.
The next step in making a smoking cabinet is installing rafter beams. I made the rafter beams from a block of the same section. The length of these bars is 415mm.
Secure the rafter beams.
While there are no walls, we need to make a door for the smoking cabinet. Because it is more convenient without walls, since you can see from the inside how tightly the door fits.
Do-it-yourself smokehouse from a gas cylinder
Gas cylinders are used to store oxygen, propane or butane. They are made of thick metal that can withstand high pressure. If there are unnecessary containers on the farm, they are quite suitable for a smokehouse. The thick-walled cylinder does not deform, does not burn out, and corrodes very slowly.
From 3 cylinders you can make a durable universal smokehouse. In one there is a firebox, in the other two there are chambers for hot and cold smoking.
Preparation
Cutting gas cylinders is dangerous. Even empty, they can explode from heat. Therefore, you must first release the gas by unscrewing the valve and pour water inside to the very top. Only after this can you begin machining using a cutting tool.
Cutting and welding
First, the caps are cut into the cylinders. In order not to join the cut part while hanging, you need to make a cut, then weld the hinges and cut out the remaining part. All edges are ground to remove burrs, and handles are attached.
Tubes or brackets for installing gratings are welded inside a larger metal container. It is connected using a pipe to a flask of a smaller volume. If you are an experienced welder, you can weld both containers without cutting into the pipe.
Holes for the ash pan are cut in the firebox, and a grate is fixed above them. The third cylinder, which serves as a cold smoking chamber, must be placed last. Then the smoke, traveling a longer path, will be cooled better. For smoke removal, a vertical pipe is welded into the container. Devices for fastening products are installed inside.
Finishing
To protect against moisture, the metal surface is coated with heat-resistant paint. To make it convenient to move the smokehouse, it can be mounted on wheels. For decoration, forging and decorative metal fittings are used. It would be advisable to arrange a small firewood shed below.
Electrostatic smoker
Exposure to an electrostatic field significantly speeds up the smoking process. This effect is achieved due to the deep and rapid penetration of smoke into the thickness of the product, and neither the aroma nor the taste are affected.
Principle of operation
The products are prepared in the usual way and hung out in the smoking cabinet. Start the smoke generator. When the high-voltage generator is turned on, a positive charge is supplied to the copper conductors or grid attached to the walls, a negative charge is supplied to the metal hanger and then to the product.
The air space is ionized, a potential difference is created, which excites the mutual attraction of oppositely charged particles. As a result, smoke penetrates deeply into the product and at high speed.
It takes from 15 minutes to several hours to obtain smoked meats, which significantly saves time, especially when cold smoking. In this case, very little wood chips are used.
DIY making
An electrostatic smokehouse can be made from a conventional one through simple modernization. To do this you will need:
- high voltage generator;
- smoke generator with blower and air cooler;
- copper conductors.
If desired, the system can be made on batteries so that you can take it with you on a hike or outing.
High voltage generator
The first step is to purchase or assemble a high voltage generator. It consumes about 5 watts per hour, which is quite inexpensive for a short period of use. At the output it produces 30-40 kilovolts,
Cabinet preparation
The main thing in the design of an electrostatic smokehouse is the correct modernization of the cabinet:
- Secure the terminals to the wall of the structure.
- Stretch thin copper conductors inside the smokehouse, connecting them to the positive terminal. It is convenient to use plastic corners with drilled holes every 50 mm.
- Hung to connect to the negative pole.
It is better to insert the ends of the rod into scraps of polypropylene pipes and secure them. This will prevent a high-voltage charge from penetrating the housing.
Safety precautions
To prevent electrical injuries when working with equipment, you must follow the following rules:
- install the device on a dielectric pad;
- do not touch live parts of the circuit;
- Loading and unloading should be carried out with the power source turned off;
- do not allow products to come into contact with conductors;
- The electrostatic field lasts up to 10 minutes, so after turning it off you need to let it neutralize.
Do not allow moisture to get inside the devices. To do this, they are placed in protective plastic cases.
How to make a smokehouse from a refrigerator
An old cooler can be used as a ready-made convenient chamber for cold smoking with minor modifications. An inlet for the chimney and an outlet for the chimney will be required. Products can be placed on factory shelves.
For hot smoking, a more thorough modernization of the refrigerator is needed:
- dismantle plastic parts, including casing;
- secure a steel tray inside for draining fat;
- install the refrigerator on a stand made of bricks or blocks;
- cut a hole at the bottom for the chimney, at the top for smoke removal.
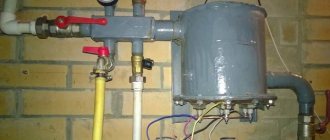
You can equip the fireplace inside the refrigerator itself. To do this, place an electric stove or heating element with a sawdust tray there.
DIY smokehouse from the refrigerator
Using the instructions, you can easily make a smokehouse from a refrigerator with your own hands for an open space in your country house or in your yard. To do this, follow simple steps. Let's look at 2 options: for cold and hot smoking.
Cold smoking
The following steps are performed:
- The refrigerator for the smoking cabinet is being modified: the internal lining, the plastic parts are dismantled.
- Fasteners are screwed in for installing grilles and hooks.
- In the lower part, using a drill and metal scissors, a hole is cut, corresponding in diameter to the inlet pipe for supplying smoke to the cabinet.
- A locking element in the form of a hook is installed on the refrigerator door.
- The stove is laid out of refractory bricks in the lower tier of the smokehouse; if there is no slope, then it is created artificially: a pit is dug for the firebox and a trench for laying the pipe.
- The elements of the smokehouse (firebox and cabinet) are connected with a pipe using a corner element prepared in advance.
- Additional holes in the upper part for this type of smoking are not cut; ventilation in the area of the door and other holes that appeared during the dismantling process are quite sufficient.
- A tray is installed in the space for the bottom shelf to collect dripping fat.
Hot smoking
A smoking cabinet made from a refrigerator can also be used as a device that performs the function of smoking indoors. The reason for this is the short cooking time using this method.
Do-it-yourself smokehouse from the refrigerator for the hot smoking method:
- The plastic part of the lining is removed from the inside of the refrigerator. The magnetic seal between the door and the body is left.
- Fastenings for grilles and hooks are installed.
- A locking element in the form of a hook is attached to the door of the smoking cabinet.
- All housing holes that appear after modification are covered with tape for tightness.
- A hole is cut in the top of the refrigerator to install an exhaust fan and secure a pipe to exhaust smoke to the street.
- An exhaust fan is installed in the prepared hole. A pipe is connected to it and led out through the window to the street.
- A tray for collecting fat is installed on the bottom shelf.
- An electric oven is placed at the bottom of the refrigerator. Its power cord is routed through a specially prepared hole.
- As a smoke generator for a smokehouse from the refrigerator, a thick-walled container with wood chips is installed on the stove.
Stainless steel smokehouse
Such a device weighs little, is easy to clean, and lasts a long time. With its small size, it can be used as a portable option.
A stainless steel smokehouse is a box with sawdust poured into the bottom. Grates with a tray are installed inside, the whole thing is closed with a lid with a water seal and a fitting through which the smoke will escape. A handle is installed to open the lid.
The chamber can only be made airtight by welding. They do not use ordinary electrodes, but coated ones designed for welding stainless steel. You can also weld stainless steel with a special wire in an argon environment.
Features of the design and installation of HK smokehouses
When choosing an example of such a design acceptable for repetition, you must consider the following:
- The chimney must certainly be built with some slope. This trick will create the necessary natural traction. If creating a slope is not technically possible, then artificial methods of creating forced draft should be used.
- With the dimensions of the chimney, certain recommended values must be observed. The length of the chimney duct should not exceed max = 7 meters, but it is not permissible to be less than min = 2 meters.
- If the chimney duct cannot be maintained in the above dimensions, then additional cooling of the smoke flow and a forced draft system will have to be used.
- In the simplest designs of stationary smokehouses, when a regular fire in a pit serves as a smoke generator, it must be taken into account that the depth of such a pit should not be less than 0.5 meters.
- Unfortunately, cold smoking is clearly not suitable for camping conditions. The difficulty of creating optimal conditions for smoking, the duration of the process itself, the specifics of the preparatory work and much more will not allow you to create a complete dish. In addition, processing products at low temperatures can cause undesirable consequences. It follows that when forays into nature it is extremely necessary to be content with hot smoking. It's fast, safe and extremely tasty.
Having mastered the fundamental principles of designing cold smoking devices, you can move on to practical actions. For your first trial design, as a rule, you do not need to grab the drawings of complex fundamental structures. For an initial practical acquaintance with the nuances of cold smoking, simple but successful smokehouses made from many available means are quite suitable. One such material is an ordinary metal barrel. It makes an excellent do-it-yourself cold-smoked smokehouse, which in terms of its quality indicators is in no way inferior to more respectable structures of this type.
Available materials for making a smokehouse
The main requirements that materials must meet are fire resistance and safety in terms of the release of toxic substances when heated. Often used are scraps of large diameter pipes, disused kitchen utensils, dishes, and even cardboard boxes or foil. Of course, these are disposable things, but they are very budget-friendly.
DIY smokehouse from a bucket
Other options
Since the maximum temperatures for cold smoking do not exceed max = 50 ºC, it is quite possible to use wood in the manufacture of the smoking chamber.
The picture shows a successful version of a wooden smokehouse, which can certainly become a true highlight of any landscape design. In practice, this design is not much more complicated than smokehouses made from metal barrels and turning it into reality will clearly not be difficult
Instead of a wooden box, wooden barrels are sometimes successfully used, which gives the structure a certain piquancy in appearance. Naturally, clay bricks can also be used for the smoking chamber in this design. But in this case, you will need to lay a more serious foundation, for example a strip foundation.
It is worth mentioning the possibility of simultaneous smoking of products in different ways. The figure shows the general principle of such a “smoking tandem”
From the above, it is quite obvious that a cold smoked smokehouse with your own hands is a fairly simple structure that is quite possible for anyone to build. And this despite the apparent cumbersomeness of the design.
How to choose wood chips for smoking
The best fruit trees in terms of smell and taste are apple, pear, cherry, and apricot. The grapevine gives a very pleasant aroma. Among forest trees, alder, beech, and oak have excellent smoke quality.
It is not recommended to use coniferous wood chips. It is too resinous and gives the product a bitter taste. In addition, burnt resin is unsafe for the body.
Certain recommendations are given for smoking various products. For example, apple and pear are considered ideal for pork, and pear and beech for lamb. But this is all individual, so make a cold smoked smokehouse with your own hands and choose to your taste.
From a barrel
An easier way to make a cold smoked smokehouse with your own hands is to make it from an ordinary barrel. To do this, you do not need to create a frame from scratch: the shape, parameters and material are quite consistent with the smoking cabinet. To install the grease tray, weld 2 fittings crosswise. A loop is made on the pallet for easy removal. The gratings are fastened with self-tapping screws or hinges welded inside the barrel. The lid can be made of wood (only hardwood is suitable) with holes to evaporate excess moisture.
To hang meat inside such a simple smokehouse, hooks made from fittings are used for home smoking: they are welded into the upper part of the chamber. In addition, you can secure 2-3 homemade grates made of rods and wire in the barrel. They are suspended in the chamber on a strong wire ring. They are useful for placing homemade sausages or fish fillets on them.