The principle of operation of a homemade heater made from a heating cable
In general terms, a homemade heater will work exactly like any other similar device: plugged into a power outlet and heating starts, unplugged from the mains and the device cools down.
If we go deeper into the details, then we need to understand the operation of the heating cable itself, find out its types, and installation technology. It works on the principle of a heating element: it converts electrical energy into thermal energy. However, the device here is completely different.
The heating cable consists of an internal heating core and protective sheaths
In general terms, the cable consists of three elements:
- One or two heating wires are located inside. The material used for its manufacture is a special metal alloy that has a certain resistance, which depends on the model of the product.
- The heating core is enclosed inside the protective shell, and there is a screen on top. It can also be different, depending on the model. For example, the screen can be made of a continuous layer of aluminum or a mesh braid of copper wire.
- The main shell is made of polyvinyl chloride. It protects internal elements from moisture and contact with a heated surface, for example, water pipes.
Important! The heating cable differs from a conventional heating element in its flexibility. It can be wound around a pipe, made into a snake, or given a different shape, but without sharp bends.
Externally, the cable heater looks like a regular wire wound into a coil.
Flexibility even allows you to create a heater from a heating cable and ceramic tiles, winding it on an element of finishing material in layers. However, not every type of heater is suitable for such a homemade product. There are cables that can and cannot be cut into short pieces. The size of the heater frame depends on this. For example, 10 m of wire that cannot be shortened cannot be wound around a small ceramic tile. Here the heater will need a large base.
Heating cables are divided into two main types: resistive and self-regulating. The cheapest is the first type. It is designed for heating pipelines with a cross-section of up to 40 mm, and is widely used in the installation of electric heated floors. The resistive heating wire can be laid in a spiral, snake, or strip method, but without sharp bends. Don't pull too hard. A feature of the product is constant heating throughout the entire duration of the current supply. For such systems, the presence of sensors is optimal. They respond to temperature and control switching on and off to avoid overheating.
Heating resistive cables come in three types:
- A single-core cable has only one heating core inside. It is covered with internal insulation, the next layer is copper braiding and external insulation. Maximum heating up to a temperature of + 65 ° C is allowed. It is impossible to cut into pieces, since the resistance increases with decreasing length. Consequently, heating increases and the insulation begins to melt. Not the best choice for a homemade heater. You will have to wind the entire length, for example 10 or 15 m, provided by the manufacturer. The heater will be huge. Single-core heating wire must not be cut into pieces.
- The heating two-wire wire is arranged in a similar way. The only difference is that there are two heating cores, each of which has its own insulating layer. A third exposed drainage vein runs across the top. All elements are braided with an aluminum screen and covered with external insulation. You cannot cut it into pieces in the same way. A two-core heating wire differs from its single-core counterpart only in the number of cores
- The zone resistive wire has two insulated conductors inside. A heating coil is wound over the insulation. Every 2 m it connects to current-carrying conductors. An incision can be made at this point. A two-meter piece is ideal for a small heater. The heating zone cable has a length of each section of 2 m
Of all three types, it is optimal to choose a zone resistive cable for a heater.
Due to the self-regulating semiconductor matrix, the cable can have different temperatures in different areas
The self-regulating heating cable is designed and operates on a different principle. A self-regulating semiconductor matrix is located between two insulated conductors. When the external temperature changes, it changes the resistance. Due to this, less or more current is supplied to the cores, which helps them cool down or increase heating.
Assembling a heater from a self-regulating cable is considered the best option. The wire can be cut into pieces. The system works without temperature sensors, as it regulates the heating itself.
Attention! When laying or winding, the resistive cable must not be crossed. At these points, overheating occurs, the insulation melts, and a breakdown occurs. The self-regulating wire is not afraid of intersections, which once again defines it as the best heating element for a homemade heater.
Step by step assembly
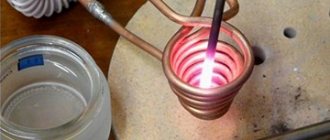
The glass you will use must have a completely clean surface. There should be no dust, dirt, paint or greasy stains on its surface. In order for the heater to work, you will have to form a surface capable of conducting current. For this you need a candle. (See also: Building a stove with your own hands)
Light a candle and slowly begin to ensure that the surface begins to become covered with a layer of soot. This needs to be done on one side only. Proceed in the same way with the second glass blank.
Next, step back about 50 mm (half a centimeter) from each edge of the glass and remove the soot with a cotton swab. Cut out strips from foil, the size of which corresponds to the size of the created conductive surface (black square). The foil plays the role of electrodes. Apply glue to the surface of the glass, on the side where the soot is located. Attach a piece of foil to the glue, but so that part of it extends beyond the glass.
A second glass is placed on top. The joints between the glasses should be carefully coated with sealant. The homemade electric heater is almost ready. (See also: How to make tiles for the stove with your own hands)
Now the homemade product must be tested and the current power measured. To do this, use the formula: P = I2R, where
P – current power
I – current strength in amperes
R – resistance in Ohm
If the received power falls within the permissible limits specified in specialized literature, then the device can be connected to the network. If not, then it's better to try to reassemble it. At the same time, keep in mind that the resistance directly depends on the layer of soot on the glass. That is, the larger the layer of soot, the lower the resistance and the more the glass will heat up.
So, if all the data corresponds to the norm, you can connect the device to the network. The ends of the foil left free are wrapped over the edges of the bottom glass and fixed with glue. Now the device can be checked for functionality. To do this, they turn it on and wait until it reaches its maximum temperature. It is approximately 40 degrees. (See also: DIY crucible furnace)
Using this scheme, even a schoolchild can make a homemade 12-volt heater. But still, for the final stage, it is better to equip such a device with special devices for control.
Pros and cons of a heating cable heater
For many, a homemade heater seems like a profitable invention from an economic point of view. However, given the fact that you will have to buy a heating element, the costs are not always justified. The advantages of such a heater include:
- Safety. The heating element is enclosed in a protective shell, which prevents burns or electric shock.
- Ease of manufacture. For example, to assemble a heater from porcelain stoneware and a heating cable, all you need to do is wrap the heating element around the plate, which is the base of the product, and connect the power cord with a plug.
- Wide range of uses. The heater can be used outdoors to heat pipes, inside a damp or dusty room.
For a heater made from a resistive cable, you will have to buy sensors and a control unit.
There are more disadvantages with a homemade one made from a resistive cable. Ordinary single- and double-core wire cannot be cut into pieces. Without sensors and a control unit, it is impossible to regulate the heating temperature. At the points of contact between the turns, overheating occurs and the insulation melts. Voltage surges can cause a current-carrying conductor to burn out. When using a self-regulating cable, the heater has only one drawback: its high cost.
How to make a heater from a heating cable
The presence of external insulation on the heating element simplifies the assembly of the heater. Due to the lack of direct contact of the current-carrying conductors with the base, even a metal frame can be used as the base. That is, it is not necessary to wind it on porcelain stoneware, asbestos or other dielectric.
The base can be a rectangular aluminum frame. Holes are drilled in opposite parts and the heating element is pulled through. The threads do not stretch too much and give a little sagging.
A frame made of aluminum corners can be used as the basis for a homemade heater.
If the resistive heating cable is two-core, the current-carrying conductors are connected on one side and a shaped plug is installed. At the other end, a network wire is connected to the cores. To regulate the temperature, the system is equipped with sensors and a regulator is installed.
A single-core resistive cable is wound so that both ends are on one side of the heater. A network wire is connected to each core.
Important! All exposed contacts are insulated with heat-shrinkable tubing. It can be used instead of a shaped plug if you want to save money.
The resistive and self-regulating cable is connected to the network cable using the terminals:
- First, cut off the outer insulation at the end with a knife. If there are two wires, one of them is shortened by 2 cm and bifurcated.
- The internal insulation is removed from the core and a small-section thermal tube is put on. They move it further along the vein. A piece of thick thermal tube is put on the cable, which will act as external insulation.
- The stripped end of the core is inserted into one side of the pressing sleeve and clamped with pliers. The bare end of the power cord is inserted into the other end of the sleeve and similarly clamped with pliers. The same is done with the second heating core.
- When the power cable is connected to the cores with sleeves, first cover the exposed contacts with small heat pipes and heat them with a hairdryer. A large-diameter thermal tube is placed on top to insulate the entire assembly. Warm up with a hairdryer.
After connecting, try plugging the power cord into the outlet. If everything is done correctly, the heater will start working.
Step-by-step assembly diagrams
Enough time is devoted to choosing an economical and effective option so that you don’t have to be disappointed later. Assembling an electric heater with your own hands is not so difficult that a novice master cannot handle it. The assembly principle of almost all designs is similar, therefore, having mastered the manufacture of one device, it is easy to switch to another.
Oil battery
Oil heaters are very popular. Their operating principle is very simple: the oil located inside the pipes is heated by a heating element inserted inside. This device is very easy to manufacture and has good efficiency and safety indicators.
Making your own oil heater is not difficult, you just need to follow the instructions
- Take a heating element (power - 1 kW) and an electrical cord with a plug for the socket. Some craftsmen install a thermal relay for automatic control. It is also purchased in the store.
- The building is being prepared. An old water heating battery or car radiator will do for this. You can weld the body of the device from pipes yourself if you have welding skills.
- Two holes are made in the housing: at the bottom - for inserting the heating element, at the top - for filling oil and replacing it.
- Insert the heating element into the lower part of the housing and seal the mounting location well.
- Fill in oil at the rate of 85% of the internal volume of the housing.
- They connect control and automation devices and insulate electrical connections well.
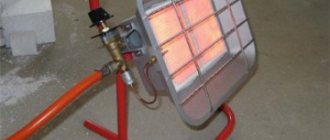
DIY infrared heater;
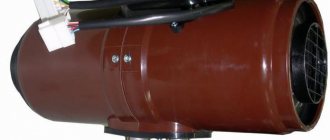
Mini garage heater
Sometimes a very compact heater is required for certain purposes. In such situations, a mini fan heater made from an ordinary tin can can help out.
To make it, take the following steps:
- Prepare a large tin can of coffee or other products, a computer fan, a 12 W transformer, nichrome wire with a cross section of 1 mm, and a diode rectifier.
- A frame is cut out of PCB according to the diameter of the can and two small holes are made in it to tension the incandescent coil.
- Insert the ends of the nichrome spiral into the holes and solder them to the stripped electrical wiring. For variability of modes and reliability, several spirals are connected in parallel and a power regulator is installed.
- Assemble the electrical equipment of the heater. All connections are well soldered and insulated.
- Mount the fan inside the can with bolts and a bracket.
- The electrical wires are secured well so that they do not overheat and do not fall into the cavities of the fan when the heater is moved.
- To allow air access, about 30 holes are drilled in the bottom of the jar.
- For safety, a metal grill or cover with holes is put on the front.
- For stability, a special stand is made from thick wire.
- Plug in and check the device.