General characteristics of the premises
A cellar is a storage area for workpieces. This is a free-standing object or buried in the ground. It can be located on the site or in the basement of a house, garage or barn. Usually, its construction is planned in advance or a house is purchased with a ready-made storage facility.
The walls of the storage area can be soil, cement or brick. Floors made of compacted soil or concrete. The ceiling can be wooden or concrete.
The temperature in such a room is constant, but in the cold season it can freeze. This will lead to crop loss.
Advantages and features of various covers
As for the hinged lid, firstly, it does not require additional space to open, like a hinged one. When opened, it does not lie on the floor or rest on furniture. And the entrance to the basement can be located as close as possible to the wall.
Secondly, the hinged lid can be made to any size. Equip it with additional stiffeners and heat-insulating materials. Of course, a reinforced and insulated basement hatch will have more weight. But if it is equipped with a lifting mechanism, then even a child can handle it. Moreover, it will not need to be torn off from the frame and set aside, as is the case with the removable version of the lid. The removable hatch must be both lightweight and durable. Therefore, they are made in small sizes, at which the combination of strength and weight becomes optimal.
Thirdly, installing rollers on a folding basement hatch cover makes the structure heavier. When open, folding doors take up more usable basement entry space than a hinged lid. In addition, folding the doors requires considerable effort.
Let's say it can be equipped with folding mechanisms and make the lifting process easier. But what to do with the technological gap between the sashes? Such a lid must have at least one additional seam at the border of the flaps. This seam will need to be protected from dirt getting on the hinges.
The optimal type of hatch for the basement is a floor-hinged hatch with one or two doors. The hatch should open fairly easily and not block the opening to the underground room. We will talk about the design features of the convenient hatch below.
Types of cellars for a private home
There are three main types of cellars in a house or on a summer cottage:
- Ground. The cellar is located on the plot. It is a separate building or an extension to a garage or utility room. The base is buried 0.5 m.
- Recessed. It is located in the ground at a depth of no more than 1.5 m. Usually this is a structure in the form of a caisson or a pit with a hatch.
- Underground. Located at a depth of no more than 3 meters. Maintains above-zero temperatures all year round.
Each type of object requires that the cellar be insulated according to separate rules.
External insulation of a bulk cellar
The most labor-intensive part of the work involves performing a number of actions:
- The soil surrounding the roof and walls of the cellar is removed.
Note. Sometimes it is not possible to excavate the soil. For example, when a cellar is dug into the ground and the resulting slopes are finished with brick. Such walls can collapse. In this case, users are advised to remove the soil at a distance of 100-150 mm. from the wall, and then gradually remove the rest.Additional protection from moisture will be provided by installing a crushed stone-sand cushion at a depth of 200-300 mm. from the base of the wall.
- Rigid insulation boards are installed or polyurethane foam is applied;
- all defects from the surface of the walls are eliminated;
- For further work, the roof and walls must be completely dry. Therefore, work stops until the walls are completely dry. As you can see, it is better to carry out work in the warm, dry season;
- Roof insulation is, in essence, covering the cellar with insulation. The technology involves laying roofing felt on top of the ceiling, filling the roof with a clay-straw mixture on top. The height of the filling on the roof is 0.4-0.5 m. The mixture is carefully compacted and covered with a dense film. The edges of the film are wrapped on the wall with an overlap of 150-200 mm.
- The wall is being waterproofed. Primer treatment will not help much in this case. It is better to use a solution of bitumen with diesel fuel (1:3), mastic, roofing material or a special film;
- the joints between the sheets are blown with foam;
Some craftsmen advise tightening the insulation with a polymer mesh to ensure the integrity of the sheet. Roofing material will cope with this task more successfully. But often the distance between the wall and the soil is simply filled with expanded clay, soil with a high clay content, or a mixture of soil, sawdust/straw and clay.If there is no ventilation in the cellar, it is advisable to take care of it at this stage.
- the resulting hill is covered with a layer of fertile soil 100-150 mm high. followed by planting herbaceous plants that will protect the cellar from sunlight and strengthen the soil with their roots.
Related article: Curtains and tulles: choosing fashionable shades
Indications for insulation
Deep cellars freeze due to melt or groundwater. Outdoor buildings due to exposure to low temperatures.
Indications for insulation are:
- lack of insulation in the finished cellar;
- new building;
- damage to thermal insulation;
- freezing of walls, floors, ceilings - accumulation of condensation and frost;
- the appearance of mold.
Also, an indication for insulation is product damage, even if there are no other visible signs.
Freezing of the walls is an indication for insulating the cellar
Thermal insulation of a cellar has many advantages, the main ones:
- frost protection;
- protection against condensation and mold;
- maintaining a stable temperature, optimal for storing supplies;
- protection from groundwater exposure.
Carrying out insulation work works as insulation and protection from water.
Materials for thermal insulation of cellars and their characteristics
A variety of insulation materials can be used as heat-insulating materials:
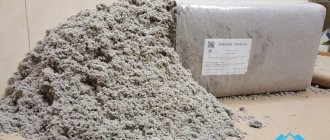
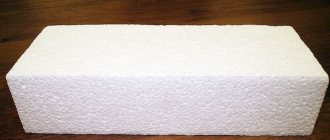
- Expanded polystyrene can be in the form of regular polystyrene foam or penoplex. The material is durable, insulates any surface well, and is safe – it does not emit harmful substances. The disadvantages of polystyrene foam are that it is flammable and does not allow air to pass through. Penoplex retains moisture well and is easy to install. The thickness of the foam varies from 20 to 150 mm, it does not wrinkle.
- Penofol. High-quality thin insulation with a foil layer. The environmentally friendly material is resistant to temperature fluctuations, does not allow moisture to pass through and is easy to install. Thanks to its reflective properties, it retains heat perfectly. Its thickness is from 2 to 10 mm.
- Liquid PPU insulation. A two-component mixture of isocyanate and polyol. Pros: adheres well to any surface, applied in a layer of any thickness, moisture resistant. Disadvantages - Requires a pressurized installation.
- Mineral wool. Available in the form of roll material, slabs of different thicknesses. The density of mineral felt is 100-150 kg/m3, slabs - from 100 to 400 kg/m3. Depending on the manufacturer, there are different thermal conductivity options. From Isover - from 0.032 to 0.044 W/mK, URSA - from 0.032-0.044 W/mK, Knauf - from 0.032 to 0.047 W/mK, Rockwool - from 0.035 to 0.045 W/mK.
Mineral wool adheres well to any surface, repeating design features, wear-resistant and non-flammable.
- Basalt wool. It has high resistance to heat and moisture retention, and is fireproof. Shelf-life Unlimited. It is stronger than mineral insulation.
Sand and expanded clay are traditionally used to insulate floors.
Poor quality fabric
This option is quite common, especially if you don’t make it yourself, but just buy it. Cold can penetrate into the room through it.
Here you need to look at the material the door is made of and then do insulation (see How to insulate a wooden entrance door. Several simple methods). Instructions for eliminating deficiencies are outlined below.
Wooden door
Insulating a cellar door is quite simple.
This is done as follows:
- We remove the fabric from the loops and immediately lay it on the leatherette. This will be our upholstery material. Although you can choose another;
- We inspect the door. It is likely that the boards have simply dried out and are eating cracks. In this case, take wood putty and seal the cracks. This is done using a rubber spatula;
Attention: Insulation can be done from the inside or outside. For exterior finishing, choose a material that does not absorb or allow moisture to pass through.
- We trace the contour of the wooden door and we get a mark on the material for making the cut. Only we still need to add to this size the thickness of the material and plus the level of inversion;
- Mark and cut. After this, apply glue to the plane; apply insulation. The adhesive base will fix it correctly. We are waiting for complete drying;
- We fold the insulation (see Insulation for doors: types and parameters) and nail the material to the canvas.
We wrap and fasten the dermantine
You can insulate a cellar door if the door allows cold to pass through. But if the door is made of metal, then this is done differently.
We insulate the door inside the leaf
Many people do not make doors from solid wood. They are often bought in retail stores, but later it turns out that they simply do not hold heat. There is only one thing that can happen here: there is no insulation in the middle or it is of poor quality.
So in this case we proceed as follows:
- Remove the fabric from the loops;
- Now remove the fittings and the top panel;
- Let's look in the middle. There is a frame and in the middle there are stiffening ribs, which are made from angle iron. We need to fill these cavities. For this, it is best to use synthetic material. It does not shrink over time and lasts much longer;
We attach the seal between the stiffeners
Attention: When insulating, some people try to use as thick insulation as possible. This cannot be done. The fact is that when deformed when attaching the top panel, the insulation contracts. Then it changes its structure and does not perform its functions. Therefore, you cannot squeeze it.
- We cut the insulation into the required size;
- Apply glue to the metal surface;
- Glue the insulation;
- We put on the panel.
We install seals
Having made the canvas, you need to pay attention to the connection of the box with the canvas. With a wooden structure, the material dries out and the connection is not tight.
When made from metal, it is practically very difficult to make a joint without gaps. To eliminate this, seals are attached.
Rubber compressor
So:
- Some people just buy foam seals and glue them on. But this material is not durable and the compaction is quite relative. Therefore, it is best to use rubber ones. They will do this job better and will serve for a long time;
- We select a seal. It can't be too thick. It's best to do the following. We take plasticine and wrap it in cling film;
- Place it on the box and press the door;
- We open and unfold the film and immediately see the thickness of the seal from the imprint. Now we just buy what we need.
Features of insulation
Absolutely all structural elements in the cellar are insulated. Penetration of cold through even one element threatens freezing.
Ventilation
Before carrying out work, you need to assess the condition of the old insulation. If it is partially missing, it should be removed and the ventilation duct should be cleaned of dirt.
Thermal insulation is produced with mineral wool, wrapping it around the structure. It is advisable to lay foil material on top. Can be secured with steel clamps.
Ceiling insulation
The ceiling in the cellar is most often made of concrete; in some buildings it can be wooden. Insulation of the cellar ceiling has a special procedure:
- Clean the surface from cobwebs, drips, dirt and loose particles.
- Cracks are sealed with cement mortar.
- The vapor barrier membrane is fixed to metal profiles or frost-resistant and moisture-resistant glue. This is a polymer material with perforation. Protects the surface from moisture.
- It is preferable to fasten the vapor barrier with galvanized profiles, as they will serve as lathing for the next step.
- The profiles are adjusted to the ceiling with dowels in increments equal to the width of the selected heat insulator.
- Attach sheets of polystyrene foam, penofol, and mineral mats to glue or screws.
- Seal the cracks with foam.
- After drying, cut off any protruding parts.
- Secure the finishing. It can be chipboard, plywood, plastic panels. Wood materials must be oiled 3 times, allowing each layer to dry. The top can be painted.
If the ceiling is wooden, then it is cleaned of mold and treated with an antiseptic. After this, the process is similar to the previous one. A vapor barrier, sheathing, and insulation layer are also secured.
We insulate the floor
Warming the cellar floor begins with preparing the base. It should be smooth, clean and dry.
The general procedure for working in the presence of a soil base:
- The soil base is further deepened by 20-30 cm and leveled.
- A drainage layer of crushed stone or expanded clay is poured.
- Lay 10 cm of sand on top and compact it thoroughly.
- Make a layer of bitumen mastic for waterproofing.
- Fill with expanded clay.
- Lay the reinforcing mesh.
- The concrete layer is poured.
- Leave to fully set depending on the brand.
- Finishing does not need to be done.
Insulation of the floor in the cellar
If the floors are concrete, then the order of work begins with pouring expanded clay. The result will be a double layer of concrete with insulation between them.
Wall insulation
Insulation of cellar walls is carried out as follows:
- The walls are cleaned of dirt. If they are wooden, then they will also protect against mold, followed by antiseptic impregnation.
- The cracks are sealed with foam (for wood) or cement mortar (for concrete cellars).
- Galvanized profiles are fixed along the entire perimeter in increments equal to the width of mineral mats and foam plastic.
- Thermal insulation is laid between the metal slats.
- Lay a layer of penofol on top of it and shoot the entire structure with dowels to the wall.
- Install the finishing material from particle boards or plastic.
Wooden surfaces are dried and painted several times.
Internal insulation of the cellar
The walls, ceiling, floor and doors are subject to thermal insulation from the inside. A few photos as an example of the finished result.
Finishing the insulated ceiling in the cellar with plastic lining
Tiling the insulated floor in the cellar
Thermometer in the cellar (temperature sensor)
Shelving in the cellar, insulated walls covered with plasterboard and painted
Insulating the cellar wall from the inside
Execution technology:
- the walls are inspected for defects;
- the cellar is emptied of contents, shelves and drawers are temporarily dismantled;
- detected defects are eliminated (protrusions are knocked down, cracks are filled with foam or sealant);
Increased attention is paid to the quality of the surface, because... significant irregularities prevent high-quality installation of foam plastic;
- the wall is waterproofed (with mastic or liquid rubber);
- Rigid insulation boards are fixed.
For this, umbrella dowels or glue are used. Attaching the foam starts from the bottom row and moves upward. In this case, in each subsequent row an offset of half a sheet is performed;
- a polymer mesh is attached to the insulated surface;
- the junctions of the sheets are blown with foam. If the gap is significant, foam cuttings are placed in it;
- apply plaster.
Note. To eliminate pockets of mold, it is advisable to treat the walls with a solution of lime and copper sulfate.
{banner_advert_2}
Insulation of the cellar floor
There are several methods of insulation that have proven themselves in practice. Let's consider floor insulation with expanded clay as the best option in terms of price/quality ratio.
Work order:
- after the concrete on which the beacons are placed and fixed has hardened, expanded clay gravel with a fraction of 5-20 mm is poured. At the same time, the thickness of the gravel layer depends on the load that will fall on the floor;
- A vapor barrier film is laid on its surface with access to the wall. The height of the overlap is equal to the height of the backfill;
- the floor is deepened to the depth of the future heat-insulating layer (200-300 mm) and leveled;
- Beacons are installed along the film. The first of them is at a distance of 300-400 mm from the wall. The rest are at a distance equal to the length of the rule that the screed will be equal to;
- reinforced screed is poured. The thickness of the screed also depends on the load.
Insulating the floor in the cellar with sand
Thermal insulation method using sand and crushed stone. This method can only be used for loose floors.
Sequence of work:
- if insulation is not used, the floor is filled with hot bitumen. It will perform the function of waterproofing;
- the sand-crushed stone cushion is carefully compacted;
- a layer of crushed stone is poured (100 mm);
- the floor is deepened to the depth of the future thermal insulation layer and leveled;
- a layer of sand (50 mm) is poured on top;
- Rigid thermal insulation material (for example, penoplex, expanded polystyrene boards) can be laid on the surface;
- the prepared floor is filled with reinforced concrete screed.
Insulating the floor in the cellar with sand
Insulation of the cellar ceiling
In the case of a buried or above-ground cellar, the roof of the structure needs insulation. Roof insulation work involves the use of soft or hard insulation, which is installed in accordance with the manufacturer's instructions.
As for the underground (buried, bulk) cellar, the ceiling of the room needs additional insulation.
Work order:
- plaster is applied.
- a layer of rigid insulation is installed;
- the concrete floor slab or wooden beams are treated with a penetrating waterproofing primer. The composition fills the capillaries and prevents water seepage. The wood is additionally treated with an antiseptic;
- the thermal insulation material is covered with a mounting mesh;
- Whitewashing is done with lime and copper sulfate.
Related article: Do-it-yourself hoe-hoe-flat cutter from an old saw blade
Note. The ceiling in the cellar is the most vulnerable place in terms of temperature conditions. Therefore, it is better to insulate it in two layers (100 mm).
Insulation of the ceiling between the cellar and the first floor of the house
Principles and procedures for cellar insulation
Cellar insulation is divided into external and internal.
External insulation
An external insulation option is necessary for detached rooms. It has many advantages: it protects against moisture penetration and freezing, and does not affect changes in the cellar area. Procedure:
- Perform waterproofing using bitumen mastic or upholstery with roofing felt.
- Apply a special composition for gluing walls with slab material. Usually this is cold mastic. It is applied to a layer of stone wool and polystyrene foam. Pressed tightly against the wall.
- The voids are sealed with polyurethane foam, the remains of which are then cut off.
- Lay a layer of penofol, securing it to the mastic.
- The top is covered with a galvanized profile or clapboard.
Insulation slabs must be laid from below, retreating from the ground.
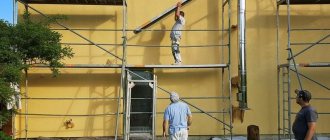
External insulation should be carried out during construction. If the cellar is already ready, then the work is more difficult to complete, since you will have to remove the old lining. In this case, it is advisable to entrust the work to specialists.
Internal insulation
How to insulate a cellar from the inside against freezing largely depends on its type. In general, the work procedure includes thermal insulation of the ceiling, walls, floor, ventilation and entrance area. All work includes the preliminary stage of cleaning the base, laying the frame for the ceiling and horizontal surfaces. Next comes laying out the insulation and finishing.
Step-by-step instructions for insulation
Most experts recommend using polystyrene foam as a heat insulator. To insulate a cellar in a garage, you should choose a material with a thickness of 40-50 mm. Such insulation will maintain a stable temperature for a very long time.
Foamed sheets have a cellular structure, due to which they have lightness and low thermal conductivity. You can do the installation work yourself.
Selecting installation tools
When insulating, you need to stock up on numerous construction tools:
- level;
- hammer;
- trowel;
- spatulas;
- glue;
- dowels;
- plaster mortar;
- primer and putty;
- brush for applying primer.
Preparing the premises
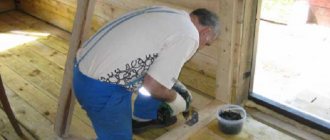
Before installation work, we clean the basement from dirt. If the surfaces are uneven, then we perform putty and primer. Moreover, the latter procedure effectively protects against fungus. We moisten the surface and polystyrene. This can be done using a garden sprayer.
You can also create a ventilation layer between the wall and the material. To do this, we attach a special frame to the wall, and then mount the slabs on it. Ventilation can be installed after laying the sheets, but you will have to use drywall.
There are two ways to attach the material to the surface: adhesive and fungal.
Fastening with adhesive method
The first method is mounting using an adhesive solution. This is a great option as the glue has excellent adhesion. We dilute the solution in a plastic container and mix well with an electric drill. After moistening the surface, apply the glue in the form of spots with a distance of 20 cm from each other.
Using a trowel, apply another layer of glue to the resulting stains. It can also be applied to the end parts, this will make it easier to join the slabs. Press the sheet against the wall and tap it well with your palm. The slabs should be laid from top to bottom, that is, from the ceiling to the floor.
Mushroom fastening
For the second method you will need dowels. These are small screws with a head. For this material, it is better to select disc-shaped screws, which can be metal or plastic. It is better to choose plastic products: they are not subject to corrosion and will not allow cold to pass through.
Using a drill, we make through holes in the wall and material for dowels. In the corners we leave indentations of 10-15 cm. When choosing the length of the screws, you should take into account the thickness of the polystyrene foam, plus 4-5 cm.
Eliminating cracks
After 5 days, when the glue has completely hardened, we seal the cracks with polyurethane foam using a construction gun.
Finishing
Finishing materials are attached to polystyrene foam using lathing. You can install drywall first, and install panels on top or simply paint. The most popular method is plastering.
Before plastering, it is recommended to perform a certain sequence of actions:
- prime the polystyrene foam coating;
- we perform reinforcement with a special mesh;
- level the surface, grind thoroughly;
- prime again;
- and do the finishing touches.
You can use mineral and acrylic plaster. A basement with an acrylic finish will last for decades. It also has excellent adhesive properties and protective functions.
Insulation technology depending on the type of cellar
Insulation of the cellar from the inside is carried out for all types of cellars, and external insulation is carried out for detached buildings.
Insulation of a ground cellar
Insulation of this type of cellar is carried out mainly from the outside. It is important to insulate the roof and walls. To insulate walls, follow the following stages of work:
- The soil is sampled to a depth of 200 to 300 mm and the roof is cleaned. For finished buildings, this stage is complicated by the fact that the walls are already finished with brick or other material. It is not advisable to touch it. You will have to carefully make a recess to the possible depth.
- At the site of excavation, a drainage cushion is made from a layer of crushed stone and sand.
- Waterproofing is made from bitumen mastic (this stage is carried out only on new walls).
- Thermal insulation is laid on the wall, slightly retreating from the sand and crushed stone cushion. Coat the slabs with cold mastic and glue them to the wall.
- Penofol or film is attached to the top with screws or dowels.
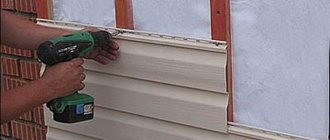
- Cover the wall with a profile or other finishing material.
Insulation of a ground cellar
The roof of a ground structure is insulated using rolled materials. Penofol is laid on the roofing material and roofing material is placed on top again. The final layer can be corrugated board or slate.
Insulation of a recessed room
In this type of cellar, the walls are half in the ground. To produce thermal insulation, you need to excavate the soil as much as possible to protect the wall from freezing. In the recess, drainage is made from a cement-sand cushion. Roofing felt is laid on top. The walls can be waterproofed with mastic, onto which slab insulation is glued. It is covered with roofing felt, shooting it with dowels.
When insulating a cellar roof, work is carried out as follows:
- The roof is covered with a clay-straw mixture to a height of 0.5 m. The components are first thoroughly mixed until homogeneous.
- Tamping is carried out. To ensure its quality there is a special manual roller.
- Cover with thick polyethylene, wrapping it on the wall with an overlap of up to 20 cm.
- Cover the roof with roofing felt or coat it with a mixture of bitumen and diesel fuel in a ratio of 1 to 3.
- Cover this layer with fertile soil 15 cm high. Then the roots of the plants will act as an additional reinforcement for the roof.
As a result, the structure will be a semi-buried hill, which is reliably protected from the sun and frost. The temperature in such a cellar optimally meets all the requirements for storing vegetables and preparations.
We insulate the underground cellar
Insulation of a cellar in a garage, basement or outdoors is carried out outside and inside. Performed both externally and internally. The hatch is insulated from the outside; the description is given below. From the inside, circular insulation of the floor and walls is carried out as described above.
Materials for cellar insulation
Despite the significant variety of thermal insulation materials, it should be taken into account that not all of them are suitable. The material for insulating a cellar must have such properties as the ability to maintain geometry, withstand water and soil pressure, have high insulating properties (table), and absolute hygroscopicity.
Related article: Elegant balcony: French version
Due to the above reasons, mineral wool or ecowool is of little use for thermal insulation.
If you arrange the materials in descending order, the following sequence will appear:
- insulation of the cellar with polystyrene foam . The most popular insulation. Indeed, in addition to its thermal insulation characteristics, polystyrene foam is distinguished by its low price and ease of installation. Polystyrene foam does not rot, is not hygroscopic, is biologically inert, is lightweight, and does not require the use of vapor barrier films or lathing. Mounted both outside and inside the room;
- insulating the cellar with sawdust or peat soil , which retain heat well and are unattractive to rodents;
- insulation of the cellar with polyurethane foam . PPU refers to sprayed insulation. Possessing all the properties of its predecessors, it is distinguished by its non-flammability and ability to fill the entire space (cracks, crevices). PPU creates a shell, which is the most reliable way to insulate cellars both outside and inside. At the same time, the cost of polyurethane foam is high, and application requires special equipment and the involvement of specialists;
- insulation of the cellar with polystyrene foam . Expanded polystyrene has all the characteristics of polystyrene foam. The only difference is the higher price, which is due to the higher density of the material, the integrity of the sheet structure (the ability not to crumble during installation), and the presence of a tongue-and-groove installation system;
- insulation of the cellar with expanded clay . Expanded clay, like any other bulk material, has a limited scope of application. As a rule, it is used for floor insulation. It can also be used for walls for external insulation of an underground (buried) cellar.
- insulation of the cellar with black soil . Used for external insulation. In this case, the earth is poured onto the roof of the cellar. However, with the current level of technology development, there are many more effective ways of insulation while maintaining the absolute environmental cleanliness of the site.
Nuances of thermal insulation of cellar doors and hatches
If the entrance to the cellar is located indoors, it is possible not to insulate it or to lay a thin insulator. You can stick penofol under the finishing coat.
The entrance from the street or the hatch must be insulated. The work is carried out as follows:
- Sheets of stone wool or expanded polystyrene, cut to size, are glued to the door. The top is finished with any material. The gaps between the frame and the wall are sealed with polyurethane foam.
- The hatch cover is covered with insulation on the outside and inside. A sheet of iron is fixed on top. If the lid is made for a new cellar, then a special frame is made to insert thermal insulation.
It is necessary to check the quality of the connection between the hatch and the door; there should be no gaps.
General description of hatches to the basement
Having arranged the basement, you can refuse to build some outbuildings in the yard. Even at the stage of designing a house, you should decide whether your house will have a basement. This room is not often used, like the attic. The entrance to it must be equipped with a tightly closing hatch. Then cold, humidity, odors, and noise will not penetrate from the room to the basement and vice versa. If you approach this wisely, you can install a hatch into the basement in any convenient place. The main thing is that the basement has a comfortable and safe entrance.
Important! When open, the hatch cover should open almost to a vertical position. The comfortable opening angle is 90°.
The lid, opened at this angle, is easily held in place by spacers and latches. And when going down to the basement you can lean on it. In addition, it does not clutter up the space of the entrance itself and does not require additional space around it.
All this applies to the hinged lid. Its advantages over removable, folding or folding options are obvious.
Insulation of a caisson for a cellar
The caisson can be made of polymer, reinforced concrete or metal. The shape of concrete and steel is most often cube-shaped, and plastic is cylinder-shaped.
This design is a modern version of an underground cellar and its insulation is carried out in a similar way. Before installing the caisson, the walls are insulated by pasting them with a heat insulator. Spraying polyurethane foam works best. It is easier to insulate a cylindrical caisson with liquid polymer.
Steel structures need to be insulated in several layers. They freeze more than others. When insulating, you can combine a layer of polyurethane foam with the laying of mineral wool or slab mats.
After the heat conservation work is completed, the structure is placed in the ground. The distance between the walls of the pit and the cellar is covered with crushed stone. The crushed stone is laid on top with roofing felt or filled with bitumen. The final step is to pour the soil.
The modern market offers caissons with insulation, but they are quite expensive. Therefore, it is easier to do the work yourself.
It is better to insulate any variant of the cellar during the construction of the house. But most often, ready-made properties are purchased, equipped with all outbuildings. The instructions given above are suitable for all possible types of cellars.