Surface preparation
Both the strength of the fastening and the durability of the façade stucco molding depend on the quality of surface preparation. Therefore, be sure to check the load-bearing properties of the facade wall on which the architectural details will be attached. The wall must be completely cleaned of mortar, mold, efflorescence, dust, dirt, grease and oil.
The wall is cleaned of mortar residues with a spatula, and of dust with a wide brush and rag. If you find hard-to-remove oil stains, efflorescence and mold on the wall, treat these areas with appropriate special compounds. Glued architectural parts must also be cleaned of dust and dirt.
The old plaster must be tapped over the entire surface - and knocked down in those places where voids are found or the plaster is loose and peels off. The surface of the wall must be strong, dry and level - therefore, plaster or putty any resulting irregularities larger than 10 mm. You can also use fiberglass mesh to restore the wall surface. In this case, wall unevenness should not exceed ±10 mm per 1 m2.
If the facade walls are brick, it is recommended to apply a layer of plaster 3–5 mm thick to the places where the products are glued.
Never carry out installation in bad weather. Base humidity of more than 5% interferes with high-quality fastening of architectural details - therefore, at the place of fastening, the wall must be dry and protected from moisture. Also keep in mind that installation should be performed at a temperature not lower than +5 ºC.
Mounting options
Architectural parts can be attached to the base either with one glue or, in addition to the glue, with the help of anchor devices (dowels, mushrooms) or embedded parts. In this case, it is the glue that ensures a tight, gap-free connection of the parts to the base.
Installation of facade decorative products using adhesive mixture
Installation of façade stucco molding on mushroom-type dowels and nails and adhesive mixture
Installation of facade decor using dowel-nails and adhesive mixture
Installation of a window sill made of façade stucco molding
Installation of window frames with facade decor
Facade decor made of polystyrene foam - the main reasons for its popularity
From this material it is possible to make decorations for the exterior of a house that imitate products made from other materials (natural stone, concrete, etc.) so skillfully that not every specialist will be able to tell at a glance that it is an imitation. The facade decor made of polystyrene foam has a reinforcing coating.
The popularity of using this material is determined by the affordable cost of finished products and installation for everyone and the ability to create a wide variety of parts. Facade elements made of expanded polystyrene are made, unlike other materials, based on modern non-molding technologies, that is, without the use of molds for pouring. To give finished products higher characteristics in terms of strength, resistance to the damaging effects of precipitation, and durability, an external protective layer is provided.
Execution of work
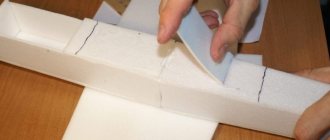
Using horizontal and vertical levels, mark the mounting locations for architectural details with a thin, sharp pencil (not a marker or felt-tip pen). Using an angle cutter or a miter box with a hacksaw, an iron ruler and a square, adjust the parts to the required dimensions for further installation. After adjusting the products to size, proceed to their correct installation.
To do this, take the product, place it on the gluing site and, using a drill or hammer drill, drill holes in the part and the wall where the dowel-nail or “mushroom” will be inserted. Number of holes for fastenings – 3–4 pcs. for 2 linear meters (for fastening iso-siding - 6 pieces per panel). In solid brick or concrete, the hole must be at least 50 mm deep, for all other materials - at least 90 mm. On the product, in the places where the fasteners are installed, it is necessary to drill out the protective layer along the diameter of the heads of the dowel-nails or “fungi” so that the heads do not deform the coating when pulled to the wall.
Using a spatula-comb, we apply the adhesive composition completely to the entire surface of the back side of the part (we use Ceresit CT 83 or Ceresit CT 85 adhesive solution, but they can be replaced with other adhesives of similar properties). We place the part on the gluing site and fasten it with a screwdriver or hammer onto the dowel-nails or “fungi”. The joints between the part and the wall are sealed with adhesive, squeezed out as a result of the part being pulled to the wall. We repeat all the above operations with the next product, leaving a gap of 2–3 mm between them (for parts over 350 mm in height or depth we leave a gap of 3–5 mm, for iso-siding – 5–6 mm).
If the dimensions of the decorative elements are very large, they can be secured using ordinary dowels (without a cap). The fasteners should be installed in the wall before gluing, so as not to damage the protective layer of the stucco elements. In this case, holes for putting on dowels are made from the inside of the element so that they do not reach the outer protective shell by 20–30 mm and do not damage the shell.
With such a dowel fastening, it is also necessary to ensure that the part is firmly pressed against the wall until the glue sets - secure the part with temporary supports.
The joints between the parts are sealed only 1–2 days after the final gluing of the parts to the facade.
If the parts are small (up to 350 mm), take façade assembly adhesive for gluing polystyrene foam (Ceresit CT 84, Penosil Fix&Go Montage or TYTAN Styro 753) and carefully fill all the seams until the adhesive composition comes out outside the part.
If the size is over 350 mm, we drill through holes on the part on the right and left (according to the diameter of the nozzle on the can of mounting adhesive) at an angle of 45º towards the seam. Then we push the adhesive composition through these holes so that it comes out from the outside of the part along the entire seam, including the holes made (as a result, after the glue dries, a so-called “lock” is obtained).
A day after it has completely dried, the glue that has come out of the seams is cut off with a stationery knife along the contour of the part.
At the place where two parts are glued on the right and left, a chamfer is cut at an angle of 45º to the thickness of the part’s coating, cleaned of dust and, using a spatula, sealed with elastic putty CMC Izolasyon (the putty can be purchased directly when ordering façade stucco).
After the putty has completely dried, the seams and previously sealed holes for dowel-nails and “fungi” must be sanded and cleaned of dust.
Again, the joints between the parts are sealed only 1–2 days after the parts are finally glued to the facade.
Coloring
After the treated joints have completely dried, the architectural detail is ready for painting with any silicone or acrylic facade paints - or for coating with water-based decorative plaster.
The acrylic coating on LEPNINAPLAST decorative parts does not necessarily require priming of the surfaces (but in our climatic conditions it is better to prime).
Paint and primer are applied to products with a brush or using a spray gun.
Acrylic paints must be used, or even better, water-based silicone paints.
WARNING : Paints and primers MUST NOT contain solvent or acetone. If the paint or primer you use contains solvent or acetone, cracks (webs) will appear along the surface of the product.
Note:
If the upper surface of the architectural details does not have a slope that ensures natural removal of water, it is highly advisable to install a drain made of galvanized steel or other metal along the entire length of the decor. The junction of the drain with the wall is sealed with sealant. When the thickness of the part exceeds 300 mm, it is better to mount the drain on its own supporting structure - it should not rest on the architectural part.
Required tools:
— level 2–2.5 m long; - angle cutter (carpenter's miter box); — painting chop cord; — metal tape measure, ruler; - plumb line; - pencil; - fine-toothed hacksaw; - hammer; - drill; — hammer drill; - mounting gun; - screwdriver; - breadboard knife.
Recommended Adhesives
Elements of architectural decor LEPNINAPLAST are mounted to the facade using mounting adhesive for facades. We recommend using the following adhesives: - Ceresit solution (CT 83); — Ceresit solution (CT 85); For gluing architectural parts together we recommend: - Ceresit assembly adhesive (CT 84); — Penosil Fix&Go Montage mounting adhesive; — assembly adhesive Tytan Styro 753.
Joining elements of facade decor made of foam plastic
The elements are marked and cut with a hacksaw to the required size and configuration, taking into account the required thickness of the joining seam between the elements.
The façade elements are joined together using foam adhesive. We recommend using polystyrene foam adhesive “ Styro753 ” manufactured by “Selena”. When applying foam adhesive, the setting time specified by the manufacturer on the can is taken into account.
In order not to stain the joints of decorative elements with assembly adhesive, before applying it to the surface of the base, cover with masking tape the places where the parts join each other. The masking tape is removed after applying construction adhesive to the surface of the base, and after removing the masking tape, foam adhesive is applied to the place where the parts join each other.
After complete drying, it is necessary to cut off excess dried foam glue. If voids are identified, reapply the foam adhesive, wait until it dries completely and, if necessary, remove the excess again.
