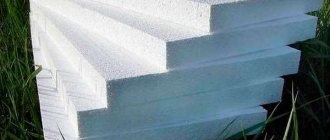
Insulating a house from the facade or from the inside allows you to save on coolant consumption during autonomous heating and retains heat during the main supply of hot water. On the facade, insulation protects the walls of the house, creating a barrier between dampness and brick or silicate blocks. One of the popular insulation materials is Penoplex, which is inexpensive and retains heat well in a building.
Insulation protects the walls from moisture and cold, but thermal insulation also needs protection, for which mesh and plaster are used. We will tell you below how to plaster Penoplex with your own hands.
Preparing for work
Before plastering the thermal insulation, prepare the necessary tools and materials. You will need:
- — Mesh for reinforcement,
- — Metal spatulas/scrapers,
- — Grater for abrasive,
- - Coarse emery,
- - Plaster.
We recommend ROCKfiber facade mesh SSA 1363-4SM - it has been tested in operation and will not create problems. The mesh has a fiberglass base and is impregnated with alkali-resistant polymers. The cell size is 4x4 mm with a density of 140−160 g/m2, the roll width is 110 cm, and the length is 50 meters. When purchasing a mesh, keep in mind that it is attached to the plaster (glue) with an overlap, so the roll covers 42-45 m2 of walls.
Metal spatulas or half-graters are chosen in different lengths - one applies the solution to the wall, the other applies it to the main tool. The optimal length is 30−50 cm and 8−15 cm.
A grater is useful for rough grinding the base layer of plaster; the sandpaper must be coarse, otherwise it will quickly wear off.
As for plaster, we recommend Ceresit CT 85 or CT 87 for Penoplex. This mixture:
- - Lets out steam
- — Resists mechanical stress and frost,
- — Meets environmental requirements.
CT 85 contains reinforcing fibers that give the adhesive strength and elasticity.
What is the best way to cover foam from the sun?
There are many commercials and advice from would-be experts that polystyrene foam is not afraid of water and frost, does not react to air humidity, and its only drawback is solar ultraviolet radiation. Such “tips” suggest not laying plaster over foam plastic, but covering it with a screen made of paint mesh and a thin layer of reinforcing glue until better times.
This cannot be done, if it is planned to finish the facade of the house with foam plastic and plaster, then the entire complex of work must be completed in a maximum of one season, and best of all, in two to three weeks, no more. Polystyrene foam does not provide an airtight layer without plaster; even when laid on good mineral glue and a primed surface of the walls of the house, it retains heat but allows water vapor to pass through.
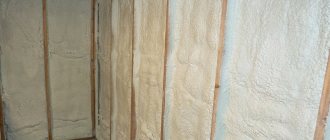
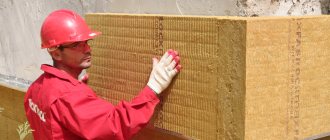
Mesh attachment
Penoplex reinforcement is necessary, otherwise the mixture will fall off the wall. To attach the mesh, the mixture is mixed to a medium consistency and applied to the surface in a layer of up to 3 mm. No omissions are allowed. A reinforcing mesh is applied on top of the glue and pressed with a spatula using upward movements. ROCKfiber or its equivalent is pressed into the adhesive, but do not press the mesh into the insulation.
The interval between applying the glue and gluing the mesh is up to 20 minutes; if the work is carried out on the sunny side, and there is no possibility of installing a canopy, then the time is reduced to 7-8 minutes - the less/the better.
The next sheet of mesh is glued end-to-end, covering the previous one by 10-15 cm.
For clarity, a short video:
Penoplex insulation reinforcement
A completely natural question arises: “Having attached penoplex to the wall, how to attach the mesh?” Based on the basic requirement of thermal insulation systems, the use of metal fasteners is strictly contraindicated, since the “cold bridges” created in this case will turn all efforts into a simple waste of money, time and effort. What to do? How is the mesh attached to penoplex if metal is contraindicated?
In the event that the thermal protection layer is mounted on a surface where the structure is not expected to move, the mesh for penoplex plaster is attached using an adhesive mixture (recessed into the adhesive layer, and if necessary, a second layer is made). If the mesh for penoplex is attached to the insulating material in those places where movement is expected, plastic dowels (fungi) cannot be dispensed with, or it is necessary to use thermal panels with a ready-made polymer-cement coating.
An approximate technology for creating a reinforced layer for subsequent application of plaster is as follows:
- On the surface of the penoplex 1 meter wide (standard width of the façade mesh), glue is applied with the smooth side of the spatula, which is distributed in an even layer using a notched spatula.
- The reinforcing element is applied to a fresh layer of adhesive and pressed into the adhesive layer with a smooth spatula (trowel).
- Plastering is carried out only after the reinforced layer has completely dried.
The following strips are laid overlapping (up to 10 cm).
During the work process, the question may arise: “If penoplex was used to insulate the external slopes, how to attach the mesh and how to achieve a smooth vertical surface for subsequent application of plaster?” Insulation of slopes of window and door openings is carried out as follows:
- Before fixing the insulation to the opening, you need to glue the façade mesh, wrapping it 15 cm onto the wall.
- Penoplex is attached to the glued mesh so that it protrudes from the wall by the thickness of the insulation plus 3 mm (thickness of the reinforced layer).
- Wooden strips are placed under the penoplex to create an expansion joint.
- The mesh for subsequent plastering is glued to the insulation (be sure to wrap it and glue it at least 15 cm to the wall).
- Before plastering, the corners are sanded with sandpaper or a special trowel, which allows you to create an even layer of plaster.
|
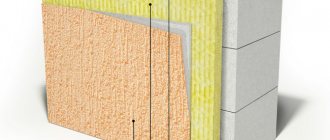
Priming
Unlike classic plaster, the layer of soil when plastering Penoplex is 2-3 mm. Its task is to hide traces of reinforcement on the surface and prepare the wall for putty or finishing grinding.
Primer is applied to Penoplex after the first layer has set and the wall has been roughly cleaned with an abrasive. Stripping is not necessary, but helps reduce the amount of glue used on the ground. At a temperature of 20 degrees. and average humidity, the leveling primer is applied after 6-12 hours (the setting speed also depends on the absorption of the wall material).
The primer is applied with the same spatulas or polishers that were used when attaching the mesh. The consistency of the plaster is thicker than when fixing the reinforcing layer.
Grinding
It is necessary to plaster Penoplex with a third layer under the putty; if you plan to apply decorative bark beetle, then this stage is skipped. The task of grinding is to perfectly align the texture of the wall. This will reduce putty consumption and speed up finishing work.
The finishing Ceresit CT 85 is made more liquid and applied 24 hours after the primer in a layer of 1-2 mm. The range of movement of the tool is wide. After completing the plastering, there are no minor defects on the wall, the surface takes on a mirror-like appearance, like a cat’s egg, to use the language of builders.
The technology is suitable for outdoor and indoor use.
Application of putty or bark beetle is allowed 2-4 days after the Penoplex has completely dried.
Polystyrene foam, penoplex and expanded polystyrene are very common insulation materials in modern construction. They are used as a heat insulator in residential buildings and industrial buildings. They are actively used for exterior and interior decoration.
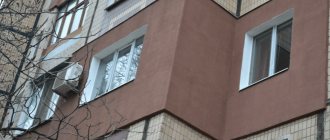
Tasks.
Using synthetic materials as insulating materials - polystyrene foam, polystyrene foam, penoplex, plastering performs the same tasks as in other situations. Penoplex plaster on the outside protects the facade from water and sunlight, and protects it from mechanical damage. Therefore, penoplex plaster on the outside of buildings is very common. Penoplex plaster is also used indoors.
Mixtures for “synthetics”.
The Russian market today represents several main brands intended for finishing synthetic insulation.
The most famous plasters for penoplex facades are “Ceresit”, “Ecomix”, “Stolit”. The approach to creating such materials varies from manufacturer to manufacturer. For some, polystyrene foam plaster serves only as a covering. The rest produce solutions of a universal type. They must first be glued foam or polystyrene foam under the plaster, and then finish them. This is convenient because it allows you to purchase only one product.
Expert advice: When finishing large areas, it is recommended to use mixtures of the same brand for plastering the entire building.
Generalists and specialists.
The most important thing is that the solution for finishing foam plastic, expanded polystyrene or penoplex must be specialized, designed specifically for working with synthetic insulation.
The choice in building materials stores is quite wide. Prices from different manufacturers vary significantly. It is important to understand that it is worth choosing a high-quality composition. This directly affects the quality of the wall covering and how reliable it will be.
It is convenient to use a universal one, suitable for all work performed in the process of plastering synthetic insulation. Options when one composition is used to glue the reinforcing mesh, and another when creating the leveling layer, are also acceptable. It is important to simply decide what is suitable and what is more profitable for you.
Note: There is no need to prime the penoplex before applying the plaster. At least this is not at all necessary, since the material has very good adhesion.
Stages of polystyrene foam reinforcement
- Coating the reinforced surface with special glue and embedding reinforcing mesh into it.
- Mesh pieces measuring 50 - 60 cm are applied to the corners of the reinforced surface.
- Covering the main surface covering half an area of no more than 1 m2. The mesh must be laid with an overlap (from 5 to 10 cm)
- After the reinforcing layer has dried, the surface is sanded with sandpaper.
- At the last stage, the treated surface is primed and a decorative layer is applied.
Types of solutions.
Plastering polystyrene foam and other insulation materials is most often carried out with mineral compounds. They are made from Portland cement and slaked lime. Add sand and stone chips as fillers. The resulting coatings are “bark beetle”, “fur coat”, “lamb”.
Acrylic and mosaic.
Acrylic-based foam plaster also includes stone chips. Ingredients that improve quality are added to it - in the form of modifiers and plasticizers. As a result, the acrylic mixture has higher elasticity values. They are less susceptible to abrasion and mechanical stress.
This type of plaster on polystyrene foam lasts from fifteen to twenty-five years. It costs more than mineral compounds, but it pays off. It is important to take into account that acrylic coating loses color quite quickly. This deficiency must be corrected by simply painting the surface with appropriate paint.
Most often, facade plaster on polystyrene foam and polystyrene foam is finished using various types of mosaic compositions.
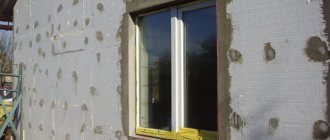
Finishing corners and slopes with a reinforcing layer
In any house there are quite a lot of problem areas where facade plaster experiences additional stress, these are the corners and slopes of windows. In addition, foam plastic usually “plays” slightly at the corners, so the corner areas have to be strengthened; the easiest way to do this is by laying an additional layer of mesh or installing plastic perforated corners under the façade plaster.
The internal corners of the walls are always reinforced by laying an additional patch. To do this, the reinforcing mesh for plaster is always placed a little further than the corner line, about 7-10 cm. After rubbing the canvas with the adhesive mass, cut out an additional tape from the mesh, apply it to the corner and glue it onto the foam with a double layer of adhesive mass. To ensure that no traces of the reinforcing tape are left on the reinforcing sublayer, which could spoil the decorative finish, the plaster is once again passed over with a wide spatula.
It is extremely important to reinforce the plaster with polystyrene foam on the window slopes. The technique of laying glue on the mesh is similar to the previous case, but there is a nuance - small pieces of fabric, especially for plastering horizontal slopes, must be secured to the insulation with staples.
The outer corners of the façade surface should always be reinforced with perforated corner profiles. The corner edges of the insulation sheets are too weak to maintain the ideal outer corner profile on the façade plaster. The profile for façade plaster is installed in this way. Apply the adhesive mixture to the corner line with a wide spatula in an even strip 15-20 mm wide on both sides. The corner profile is pressed into the plaster, and the side panels are rubbed into the adhesive base with a spatula.
It is best to install the corner profile before plastering the foam; with further adjustment and leveling of the layer of facade plaster, the work will be much easier. Moreover, it is easier to install all the small façade parts before plastering the polystyrene foam than to suffer during the process of applying the plaster.
More detailed instructions for finishing the facade with polystyrene foam and plaster are given in the video
Prepare the solution.
Compositions for plastering synthetic insulation are usually sold in dry form. Suitable for all three types of material - foam plastic, penoplex and expanded polystyrene. They need to be diluted, making sure to follow all the manufacturer’s recommendations. It is possible to plaster polystyrene foam with your own hands.
Expert advice: To glue construction mesh, the compositions are diluted thinner than the product manufacturer advises. For the leveling layer you need an even thinner consistency.
How to reinforce corners?
In order for the plastered surface of the penoplex to be smooth, it is necessary to secure the corners with a mesh. Slopes and window openings are also covered.
This is important: if you disturb the order, it will be problematic to obtain a good quality finish, since finishing corners and slopes after the walls are covered is much more difficult.
When gluing the mesh to the corners of the walls, it is worth considering some important nuances and following a proven scenario:
- cut a strip, thirty centimeters wide, and the length is equal to the length of the slope or about a meter;
- the strip is folded in the middle, smoothing the fold thoroughly;
- using a spatula, apply the solution to the corner; its thickness is approximately two to three millimeters;
- it is placed on the wall, pressed on with a spatula and smoothed, running the tool from the corner - along the sides and down;
- When the material is glued to the corners, they begin to glue it to the rest of the wall surface.
Adhesive for reinforcing mesh
The reinforcing mesh is glued only with the use of cement-based plaster-adhesive mixtures. This feature is due to the fact that the builder’s goal is not just to install the mesh, but to create a reinforced plaster layer on top of which decorative material will be applied. In addition, it is fixed in corners, in slopes and near doorways using perforated corners and fastening dowels.
Plaster-adhesive mixtures are divided into three types:
- Universal - suitable for application to any thermal insulation material, while ensuring good adhesion and, accordingly, have a long service life.
- For polystyrene foam boards - suitable for gluing reinforcing mesh onto foam plastic and penoplex.
- For mineral wool slabs - suitable for attaching reinforcing mesh to mineral and basalt wool.
Most of the mixtures are made on the basis of cement, so they give an alkaline reaction. They are designed to work with fiberglass reinforcing meshes that are resistant to aggressive alkali.
When purchasing glue, it is important to pay attention to its composition. There should be no chemically active additives that will “eat” the thermal insulation over time. If mineral and basalt wool are more resistant to various solvents, then polystyrene foam is a real sissy in this regard; only polymer and mineral adhesives are suitable for it.
As you can see, choosing a good adhesive for insulation and reinforcing mesh is not so difficult; you just need to take into account the combination of weather factors and the conditions in which the building will be located. And, of course, the material from which the insulation boards are made matters.
How to reinforce on a plane?
The technology for gluing reinforcing mesh onto a wall plane involves the following procedure:
- First, fragments one meter long are cut;
- then, taking a spatula 350 millimeters wide, apply the composition to the wall, creating a strip one meter long and ninety centimeters wide; It’s not worth cutting the canvas into larger pieces - it will be difficult to stick them, in addition, the composition dries out very quickly - it’s better to spread it out a little, stick one piece, then move on to the next one;
- applied with a thickness of about three millimeters;
- on the vertical sides it is not immediately glued to a distance of five centimeters from the edges; some experts believe that allowances should be left at least ten centimeters - this will create more stable joints;
- it is applied to the wall and smoothed with a spatula; movements are performed first from top to bottom, then from the center to the sides;
- it is important to ensure that the reinforcing material “sinks” into the solution; if this does not happen, the mixture is added a little; some experts believe that it should only submerge halfway; however, in any case, it is important that the solution is under the entire mesh (except for allowances); you should not skip sections - in the future, these “empty” places may cause peeling and disruption of the structure of the finish;
- the next layer is glued overlapping the previous one; their edges should overlap each other by about five centimeters; this will serve to create strong joints.
Important nuance: If you immediately glue the reinforcing layer, without leaving free edges, then when you further glue the next sheet, the glue will turn out to be too thick - the joints will stand out too much; and this can be visible even under a thick layer.
Installation of reinforcing sheet on plaster
To increase the mechanical strength of the plaster layer, a facade mesh is used, this will prevent the appearance of small cracks and guarantee long-term service.
Watch the video to find out more:
The first layer of glue on the wall should not be thin, since the reinforcing fabric is embedded in it. After the upper part of the canvas is secured, it is released to the ground and pressed in several places. Start heating the mesh in the adhesive composition using a large spatula. Use a small spatula to hold the mesh on the side, on top, so that the canvas does not go askew.
Note: When installing the mesh, the temperature should not be lower than 5ᵒ.
If you need to stick the mesh indoors, then the next step after drying for a day will be sanding the wall. This dirty and labor-intensive task must be carried out in special protective equipment: mask, goggles, gloves. It is produced using a grinding float with clamps.
Glue is a multifunctional building material, perfect for putty. After this treatment, it is easy to plaster the wall, and installing the finishing coating is simple.
Applying the structure.
Penoplex plaster is applied in two stages. The first involves creating a leveling layer. For this, a universal solution is used. You will need a wide spatula, thirty-five centimeters wide or more. Plus a small tool that is used to apply the material to the insulation. It is recommended to make the thickness of the solution approximately three millimeters. The mixture is applied in parts: first, one fragment of the wall is finished, then the next. It is important that the joints of the leveling layer and the mesh do not coincide with each other.
After it has been applied and allowed to dry for at least one day, it is rubbed off. The time interval from applying the solution to its grouting should not be more than four days, otherwise the mixture will become too hard and it will be difficult to grout. The quality of the grout should be as good as possible, because the final finish will be applied to this surface - a textured or decorative type material.
After grouting, it is primed. A roller wrapped in short-pile material is used. This is necessary for strong adhesion of the finishing layer to the surface. The type of primer depends on what kind of coating is planned. Compositions containing quartz particles are suitable for decorative mixtures. If the wall is to be painted, then the primer needs to be as uniform in consistency as possible, without inclusions.
Tips/recommendations for carrying out work
• Apply a layer of adhesive mixture to the foam using a wide spatula. The composition should not be distributed under the comb, as a thick layer will form. Subsequently, it will be more susceptible to cracking and deformation.
• Smooth the mesh placed on the glue with a wide spatula. All internal and protruding corners are pre-processed by installing metal perforated blanks.
• The recessed mesh is usually poorly covered with glue, so another ball of the mixture must be placed on top of the fixed mesh.
• To prevent the formation of cracks due to the application of a thick layer of adhesive solution, experts recommend covering the reinforcing mesh in two stages with intermediate drying.
• The ideal time of year to carry out façade insulation work is early autumn. At other times, it is recommended to focus on average air humidity and temperature indicators in the range from +5 to +25 degrees. The temperature regime determines the drying time of the treated surface (at +20° - 1 day, at +5° - up to 3 days).
• The foam sheets are laid from bottom to top, while the mesh is attached from top to bottom.
• Irregularities on the wall are eliminated by applying a slightly larger layer of plaster. Small differences can be removed with a grout mesh.
High-quality work will maintain the presentable appearance of the facade for more than 35-40 years.
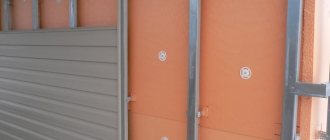
Decorative finishing for insulation.
When the leveling layer is primed and thoroughly dry, it is time to apply plaster to penoplex or other insulation. Decorative mixtures are applied evenly. Their thickness is determined by the diameter of the particles present in the solution. The larger the grains, the thicker it can be.
Those wishing to create additional surface structure need to take a damp sponge and go through the application. An alternative option is a grater with a spatula. It is recommended to paint façade plaster on polystyrene foam and polystyrene foam using special paints intended for exterior finishing.
Operating procedure.
In order for the coating to remain securely on the synthetic insulation and serve as long as possible, it is important not to violate the technology of applying plaster on polystyrene foam. Finishing of foam plastic with plaster should be carried out in the following sequence:
- prepare the solution correctly;
- make reinforcement on the surface of the insulation under the plaster;
- grout the mesh;
- apply a leveling coating according to all rules;
- rub it in;
- prime the surface;
- apply finishing coat.
Extruded polystyrene foam (EPP).
This is plastic in the form of sheets that can work under constant exposure to ultraviolet radiation.
The manufacturing method used gives EPP enhanced strength and thermal insulation characteristics. The composition of EPP is similar to polystyrene foam; they are based on one material – polystyrene. But, manufacturing improvements have given it hydrophobicity; it does not allow moisture to pass through or absorb. This is due to the absence of pores; the cells in it are filled with gas. For extruded polystyrene foam, dry plaster is used.