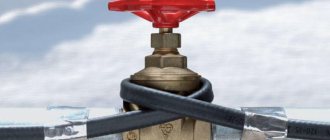
How they differ from resistive ones, their advantages and disadvantages, as well as all the points for choosing and laying such a cable ON pipes and IN pipes, read in a separate article.
Here we will look in detail at all the methods and nuances of connecting a heating cable to 220V power wires.
Such a cable cannot simply be twisted, wrapped with electrical tape on top and plugged into an outlet.
Maybe this design will work, but not for long. Among other things, the adhesive layer on the electrical tape tends to dry out gradually, which means that the joint will no longer be airtight.
For a short-term performance check, some people even use Wago terminal blocks. As a temporary connection, there is nothing “criminal” about this.
But if you want the cable to last its entire declared service life, then the connection must be made using more reliable electrical methods.
There are three options:
- modular
- with installation of coupling
- without installing a coupling
Modular connection method
The method is very expensive and problematic in terms of finding the required components. The most widely used heating cable for installation is the Raychem brand.
This manufacturer has a special system called FlexiClic.
There is no need to press, solder or twist anything here. The cable is sold in ready-made kits. The connection of one piece of cable to another, or to the supply wire, occurs through factory connectors.
You just snap them together, plug in the heating and everything works.
You can not only consistently build up straight sections along the water pipeline, but also make branches to the sides.
Just keep in mind that when extending two pieces of heating cable, you must use brands of the same power. Among other things, the joints will not have the same heating effect as the rest of the pipe.
Let us repeat once again that this method is not very common in our realities and is not cheap. Therefore, let's look at more “down-to-earth” connection options:
- with installation of the coupling through pressed sleeves
- without installation of a coupling with direct connection of the heating cable to a 220V network
Network connection
In order to connect the CSO to the electrical network, preliminary work will be required. Also, to avoid unforeseen difficulties during installation, you will need to stock up on the necessary tools in advance.
Set of tools and materials
Before proceeding with installation, you should immediately pay attention to the fact that the heating cable is not connected directly to the electrical network. To do this, you will first need to connect it to a cold wire, which will serve as an electrical conductor.
So, let's look at a set of tools for wrapping wires:
- pliers;
- platypuses;
- side cutter;
- construction knife;
- devices for stripping wire ends;
- crimping pliers.
You will also need a hair dryer and a ruler.
Connecting wires
Connecting a heating product to a cold wire requires a precise sequence. Therefore, in order to avoid mistakes, you should carefully read the following instructions before starting work.
Preparing the heating cable:
- From the end of the heating product, which will be connected to the cold wire, the upper sheath is carefully removed with a construction knife.
- Using a screwdriver, the protective screen is peeled off the wire, which is then rolled into a bundle.
- The matrix is removed from the edge of the wiring at a distance of 3 cm.
- In the cleaned area, the conductive wires are rolled into a bundle.
- Heat-shrinkable tubes of small diameter are placed on each electrical conductor.
- The conductors are connected by a large heat-shrinkable tube.
- After completing all the steps, the coupling is carried out with a construction hairdryer.
- Next, each wire is routed in opposite directions and “pants” are made using a platypus.
At the end of the preparation of the CSO for connection to the cold wire, sleeves are put on each end of the core and the protective shield harness. At the same time, making sure that all the sleeves are the same size.
The next step to connect the heating cable to the electrical network is to prepare the cold wire:
- Measuring 3 cm from the edge on the cold wiring, a radial and axial cut is made.
- Having thus freed the veins, they are stripped with a special tool.
Having completed all the above work, the stripped strands of the cold wire are placed in the sleeves of the heating product.
Important: The neutral and phase of the cold wire are placed in the sleeves of the current-carrying conductors of the heating cable, and the grounding wire is placed in the sleeve of the protective screen.
Having thus made both connections, the connection diagram for a single wire will be simpler. To do this, it will be enough to install a plug at the end of the cold conductor and plug it into the outlet.
It is also possible to use the cable for roof heating
As you can see, the technology for laying and connecting a heating cable is not as complicated as it might seem at first glance. When performing work, the main thing is to follow the entire installation sequence, not forgetting about accuracy and precision.
AdminAuthor of the article
Did you like the article?
Share with your friends:
Comments (2)
- Konstantin May 28, 2021 at 04:15 pm
connecting the heating cable
Answer
- Alexander February 26, 2021 at 12:24 pm
Hello, what wire cross-section (stranded or single-core) is needed when connecting a heating cable?
Answer
Coupling installation
What materials will you need?
- self-regulating shielded cable
- plug with wire and grounding pin
The wire must be three-core, copper. The cross-section is selected depending on the current load (cable power).
Mistake #1
Moreover, according to the instructions, it cannot be less than 1.5mm2.
Even if you have a very short section of low-power cable.
- wire stripper
- crimper for crimping sleeves
- coupling set
It is important to note that heat shrink tubing comes with and without adhesive.
Mistake #2
Do not use thin-walled tubing without adhesive.
They will simply insulate the connection, but will not create the required tightness. It is also desirable that the tube be of mid-wall thickness.
Thin walls are very easily damaged by external influences.
- construction hair dryer
- stationery knife
Cable preparation and cutting
First of all, use a knife to cut off the outer insulation from the self-regulating cable. The length of the cut depends on the brand and section.
Usually it is about 7cm.
The cut must be made carefully so as not to damage the grounding braid. Next, this braid needs to be unwoven.
The most convenient way to do this is with a thin screwdriver or an awl.
After unbraiding, the fibers are twisted into one braid.
We get to the inner thermoplastic shell. Make a cut at a distance of 4cm from the edge and remove the middle layer of insulation.
Hidden under it is the so-called matrix with copper conductors on the sides.
You cut through the matrix, heat this area with a hairdryer and pull the sheath off the cores.
When making a cut, do not damage the veins themselves. They are quite thin.
You can extract the veins in another way. Use side cutters to bite the corners of the matrix, and use pliers to forcefully pull out each vein.
Then remove the matrix and remaining insulation from the copper.
Next, put connecting sleeves on the ends of the cores and crimp them with a crimper on one side.
Mistake #3
Do not crimp sleeves with regular pliers.
They will never create normal contact at such a critical junction.
Mistake #4
Also note that it is recommended to install the sleeves in a “ladder” pattern, and not at the same level.
First of all, this applies to moments when you do not use insulated sleeves, but ordinary bare GML.
Otherwise, with sufficiently dense shrinkage, this place will be the most likely source of insulation breakdown. Sometimes one sleeve can even push through another.
After crimping, insert small heat shrink tubes onto each core.
The tube should creep and overlap the sleeve by a few millimeters. Heat it with a hairdryer and reliably isolate this area.
Be sure to allow time for the connection to cool down. After that, insert a wide heat tube onto the inner thermoplastic shell and heat it until the glue comes out.
It should equally cover both the section of the inner shell and the individual veins.
While this insulation has not cooled down, move the cores apart and use thin-nose pliers to flatten the middle for a few seconds.
You will get 100% reliable tightness and no moisture will get inside.
Let's move on to the power cable and plug. Remove the outer insulation from it.
Mistake #5
In this case, you cannot leave all three wires the same length.
The grounding conductor must be longer than all the others.
Pull the largest outer sleeve through the cable, and stretch small heat shrinks onto the working cores.
Then you insert the stripped wires into the sleeve on the heating cable and crimp them with a crimper.
Mistake #6
In this case, stranded wires do not need to be twisted before inserting them into the sleeve.
Otherwise, during crimping, some of the veins will crush themselves. This is the most common mistake when working with similar tips and sleeves.
People often ask, is it possible to simply solder the wires together without using any press pliers? Yes, you can. But this is provided that you have enough experience and skill in this matter.
Crimping of tips and sleeves is less prone to errors due to the influence of the human factor and almost always creates 100% reliable contact (provided the sleeve size is correctly selected).
Slide the heat shrink onto the sleeve and warm everything up with a hairdryer. There should be glue coming out from both ends of the tubes.
As a result, you will get a connection in which each working core:
- sealed from each other
- sealed from braid
Give the connection time to cool and proceed to grounding.
How to connect a heating cable to a power cable! | Contact-pro.ru
Thermo and Thermo EXD kits
made for quick and reliable connection of heating cables to each other and connection of the heating cable to the power cable. Special plug connectors enable simple electrical installation of cable heating systems combined with the highest degree of protection. Ex-version plug connectors can be used in explosion-proof heating cable systems. All elements of the system are certified.
Cable heating systems for pipelines, roofs and other objects have one thing in common: they are subject to extreme loads from the outside world and therefore must meet special electrification requirements. Whether planning, design or implementation, the decisive factor is above all the safe, fast and simple implementation of electrical installation concepts. This especially applies to change requests, expansion projects and temporary structures. Plug connectors in cable connection systems not only guarantee fast, error-free and flexible installation, but also significant savings in time and money.
Due to the use of special seals for flat cables, this system is suitable for any heating cables available on the Russian market.
The plug connector principle for use in cable heating systems!
Traditional heating cable cabling is characterized by time-consuming planning and installation processes, accompanied by annoying side effects such as unstructured cabling and lack of clarity in terms of material planning. With fully plug-in, prefabricated systems, these problems associated with power supply, distribution and device connection in cable trace heating systems can be solved. The main advantage of using plug-in systems compared to conventional installations using mounting kits and junction boxes: reduced error rates and reduced workload. Time savings of 70 percent, since labor-intensive connection work such as cutting wires, stripping and stripping insulation is no longer required, especially if installation is carried out in winter, as is customary in Russia.
Safe and fast installation of cable heating for the highest requirements!
Installers are more dependent than ever on the ability to carry out installation work quickly and flexibly. Thermo and Thermo EXD series of connection kits
provides you with a comprehensive network of pre-assembled and rigorously factory-tested electrical connection technology components that provide a universally connected and safe solution from the switchgear to any point of use.
Thermo and Thermo EXD
connection kits : a reliable and universal solution for cable heating systems!
Outdoor cable electric heating must operate reliably in difficult conditions and guarantee the highest level of safety for many years. The penetration of moisture or foreign bodies (for example, dust, oil, soot) in the open air will definitely mean failure of individual elements or the entire system. This is where the principle of plug connectors comes into play: round, removable mounting systems are designed to provide maximum protection from environmental influences. They can even withstand strong water jets or unplanned submersion or submersion.
You can find out the price of these connecting kits from our managers by writing to [email protected]
Grounding braid
If the cable is laid through a plastic pipe without any metal valves or clamps, then many do not even connect the grounding conductor.
With the ground not connected, the heating cable works without problems. The braid in this case performs only the function of additional mechanical protection.
There are even inexpensive self-regulating cables that do not have a braid in their design initially.
Mistake #7
If the pipe is metal or the heating is built into the water supply, then in no case can such heating be used without grounding.
As we said earlier, the ground wire on the power cable should be the longest. This is necessary so that the connecting sleeves are not located at the same level.
In this case, the coupling will be too thick. You put a shrink sleeve on the grounding, and insert the core itself into another sleeve.
From the reverse side, insert a braid twisted into it.
Mistake #8
At the same time, do not leave a large reserve and unnecessary rings, which will subsequently prevent the topmost heat shrink from “shrunk” tightly.
Crimp the joint with a crimper. The heat shrink on top acts as mechanical protection.
Sealing the connection is not so important here. At the very end, move the outer coupling and isolate all three sleeves and the connection itself.
Mistake #9
The most important thing here is to heat the coupling starting from the middle, gradually moving the hair dryer to the edges, and not vice versa.
There should be no air gaps or bubbles formed inside. And drops of glue should appear at the ends of the heat tube.
To ensure that the coupling sticks securely and fits like a glove, it is recommended to lightly sand the areas on the outer sheath of the cable before installing it.
Additionally, while the coupling is still hot, you can press it along the edges with pliers.
But this is provided that your cable is not round.
Features of single-core heating cables
I have already mentioned the first feature of a single-core heating cable; it is a high electromagnetic background. Therefore, when purchasing such a cable for indoor use, the presence of copper braiding is mandatory.
The second feature of a resistive cable with one heating core is the need to connect the cable to the power supply from two different ends. And this is easiest to do by looping the cable routing. That is, a single-core heating cable must be laid along a closed route, which is not always convenient. Or pull an additional power wire along with the cable, which is possible when heating a roof, but is unrealistic when heating floors.
Direct connection of heating cable without couplings
There is another way to connect to a 220V network - couplingless. The question is, why do we install the coupling?
Firstly, to ensure the tightness of the connection. And secondly, to save on the heating cable and not pull it into the next room to the nearest outlet or switchboard.
What if this “panelboard” is moved closer to the cable itself and placed directly on the pipe? We are talking about a regular sealed box with screw terminals inside.
In this case, the selfreg will have to be cut a little longer - by 15-20cm. And at the end, put the so-called end seal.
Similar kits are produced by Eltherm.
The procedure for preparing and cutting the cable is not much different from the previous method. We remove the external insulation.
We release the braid and twist it into a bundle.
We cut the middle layer and get to the matrix. Then we release the copper cores and remove the middle of the matrix.
We apply silicone sealant to the cutting area and pull the end “glove” over the conductors.
Instead of such special gloves, you can use thermal tubes. You put two narrow ones on each core, and then one wide one on top of them.
After heat shrinking, press the gap between the cores with thin-nose pliers so that the emerging glue reliably seals the joint.
A tube is also pulled over the grounding.
After this, all the veins and braid are pressed with sleeve tips.
The heating cable is inserted into the distribution box, and it itself is attached to the pipe through an L-shaped corner with clamps.
Power to the distribution box must be supplied through an RCD with a leakage current of 30 mA. The cable is protected from short circuits and overloads by a type “C” circuit breaker.
It’s even better to immediately install an automatic differential.
Select the rating based on the heating power. In addition to power, do not forget to choose the correct cross-section of the 220V power cable. The previously specified minimum size of 1.5mm2 may not be enough.
Mistake #10
Many people forget about the starting current.
Here is a measurement of the consumption of a small piece of heating cable during startup and after a couple of minutes.
Consumption of Samoreg at the very beginning briefly jumps three times. For example, a cable with a power of 40W/m and a length of 80 meters can show an initial load of 6kW!
Before direct connection, the insulation resistance must always be checked. At a test voltage of 2500V, the standardized resistance must be at least 10mOhm.
Insulation is checked between:
- braid and pipe
- braid and working cores
Calculation of the starting current of the heating cable
The maximum starting current of the heating section can be roughly calculated based on the total length of the heating cable in the system and its specific power.
An example of calculating the maximum starting current of a heating cable
There is a section of self-regulating cable with a specific power of 30 W/m and a length of 50 m. The rated power of the section at a temperature of +10°C is Pnom=30W/m*50m=1500W. This is the power of an already heated section. If power is applied to the cable in a “cold” state, its power will be several times higher than the rated value. For calculations, we take the starting current coefficient equal to 2.5-3 for Samreg and Alphatrace cables. The coefficient was determined during experiments with cables of these brands, as well as studying their physical and electrical properties. For heating cables from other manufacturers, this coefficient may differ either up or down.
Then, the starting (starting) power in our example is equal to Pstart = 3xPnom = 4500 W, starting current Istart = 4500/220 = 20.45 A.
Based on the found CT value, automatic and differential switches are selected to protect the heating section, as well as the type and cross-section of the power supply cable. For the section given in the example, a differential circuit breaker with a rated current Inom = 25A with a differential current Iout = 30mA is required