Causes and localization of leaks in the heating system
Leaks in the heating system occur for various reasons and in different places in the circuit: in straight sections or at pipe joints.
Leaks on straight sections
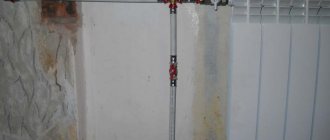
The cause of leaks in metal heating pipes that have been in use for more than one year in more than 95% of cases is corrosion (rusting) of the metal.
Even thick-walled galvanized pipes in heating circuits are eaten away by rust over time. The destruction of metal upon contact with water is a natural process that has not yet been completely overcome.
The trigger for metal destruction can be:
- mechanical, chemical internal damage to the pipe;
- changes in temperature or pressure;
- damage to the protective outer layer.
Note! If a leak occurs in an old heating pipe, then most likely this is a warning about total wear and tear of the entire system.
In autonomous heating systems, which are installed from modern polymer materials, leaks are caused by the wrong choice of pipes.
When the owner, out of ignorance or for reasons of saving money, purchases pipes for cold water or pipes not intended for use under pressure for hot water supply systems or a heating system. In this case, simply sealing the leak is not enough; often a complete replacement of communications is required.
Leaks at connections
Leaks in the connection area occur if the thread has become unusable (for example, it has become stuck and was torn off).
If there is a leak at the fitting installation sites, the prognosis for effective local repair is more favorable. Here you can fix a leak in the heating system by replacing a worn gasket that has lost its elasticity.
In more serious cases, it may be necessary to replace the connecting (adjustable) fitting or valve.
Leak at the junction or fistula
Butt joints are the most susceptible to leaks or fistulas. Unfortunately, installation of equipment is not always carried out according to accepted technology, which leads to leaks.
If this problem occurs at a joint in a metal pipe, then strengthening of the threaded connections will be required. To do this, the lock nut is first cleaned of any remaining sealant and other material. Next, the entire thread is sealed and re-tightened. The main thing here is to know when to stop; you need to install it as securely as possible without over-tightening the pipe.
If it is impossible to eliminate the leak in this way, you need to identify the defect on the thread itself. The damage is repaired by cutting additional turns. Then a special putty is applied, which has a high level of resistance to moisture, manipulation is carried out around the threaded connecting element. In some cases, only complete replacement of worn fittings will help.
As for the polypropylene pipe, cold welding can help here; it helps to reliably seal the product. To carry out the work, you need to carefully prepare the area by cleaning and degreasing it, selecting a polypropylene patch, and preparing a cold welding solution according to the instructions.
An example of eliminating a leak in a PPR pipe
The prepared solution is applied to both parts, then the patch is fixed on the damaged surface. To do this, you can use a tourniquet. You need to wait at least an hour; the system cannot be used during the day. It is during this period of time that cold welding will acquire its maximum strength. The remaining mixture can be stored in a plastic bag.
Another option for getting rid of leaks is to use a sealant; it is affordable and easy to use. It qualifies for several types:
- Neutral – requires a mounting gun, suitable for all types of surfaces;
- Acid is a rather unsafe solution, not suitable for pipes that do not have a high level of strength;
- Silicone – suitable for joints, quite versatile.
Methods for eliminating leaks in a straight heating pipe
A local leak of a metal pipe in its straight section (fistula) is the easiest option for self-remediation. There are several ways to deal with the problem without draining the water.
Mechanical method for eliminating leaks
The classic way to seal a leak is to install a crimping device on a rubber gasket while the heating system is running.
- The damaged section of the pipe is wrapped in soft rubber (for example, a bicycle inner tube). Secure the patch with metal wire, tightening it well in several turns along the length of the rubber.
- The rubber patch is secured with two narrow crimp clamps of the appropriate diameter.
- If there are several leaks, they are localized in close proximity to each other, then you can seal the leak in the heating pipe by installing a metal clip. This is a wide clamp with a built-in rubber gasket that tightens in two places.
Note! In this way, the leak is sealed temporarily, eliminating the problem for the period until a repair specialist is called or until the end of the heating season.
If the fistula has formed in a thick-walled pipe, then it can be repaired by installing a special self-tapping screw with a rubber seal in front of the cap. To do this, clean the leak area and screw in a self-tapping screw using a hand drill.
Note! You can use an electric drill only if there is no coolant in the system. Otherwise, you risk getting electrocuted if water comes out of the pipe.
Chemical methods for eliminating leaks
Manufacturers of repair sealants offer a lot of materials for sealing leaks in heating systems with metal or polypropylene pipes.
From available means, you can use automotive sealants for high-temperature operating conditions. The fabric is impregnated with this composition and the pipe is wrapped where the damaged area of the heating circuit is found.
This method of eliminating leaks is used not only in straight sections, but also in places of threaded connections or joining pipes of different diameters. This is justified if it is impossible to turn off the heating at the time of repairing the joint.
To seal leaks in heating pipes, the following chemically active substances are used:
- Two-component sealing resins based on epoxy.
- Adhesive silicone mixtures that quickly “set” (cold welding).
- Heat-resistant mixtures based on rubber.
Note! It is possible to seal a leak in a heating pipe using chemical sealants only when the heating is turned off and the system is empty.
The algorithm of actions is as follows:
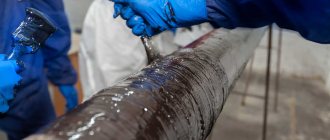
- The damaged section of the pipe is degreased, dried and a thin layer of sealant is applied to it.
- Wrap the repaired area with a special fiberglass tape. It serves as a reinforcing element in the mass of hermetic coating.
- The chemical composition is again applied to the serpyanka. The action is repeated.
Why does a leak occur?
The heating system is installed using metal pipes, which are characterized by a high level of strength and long service life. The only disadvantage of this material is its susceptibility to corrosion, which causes leaks in the pipes of the structure.
Of course, metal-plastic and polypropylene pipe options are also at risk of leakage. The reasons may be different, but there is only one solution - immediate repair.
Important information! Independent elimination of a defect in a heating structure is only possible if there is minimal damage; in other cases, you will need to call a specialist
When a leak is discovered, the main question is how to seal it. But to make the right decision, you must find out the cause of the leak. The main reasons stand out as follows:
- Exposure to the external environment and thermal agents provokes corrosion. The condensate created is capable of penetrating into the most vulnerable places of the pipeline, causing destruction of the structure at a certain point of communication;
- Installation and connection were carried out without following installation technology. This problem mainly affects welds, as well as in those areas around connecting elements and joints. An incorrectly installed heating system loses its tightness;
- An emergency situation occurs when heating units are not working correctly, worn-out fittings are used, or the pressure in the system is incorrectly set;
- Presence of mechanical damage. It is important to understand that physical impact can lead to a breakthrough, therefore it is recommended to place communications and all heating equipment in a hidden mode, where there is a low level of access.
Once the true cause of the leaking heating pipes has been identified, it is necessary to select a repair option. It is important to understand that repairing a defect during the heating season is temporary. Therefore, in the summer, it is advisable to revisit this problem and carry out major repairs of communications in order to avoid a possible breakthrough next winter.
Sealing leaks at joints
You can seal leaks at the connection points of the heating circuit in the following ways:
- Install a classic crimp clamp, first eliminating any unevenness with additional rubber bands.
- Seal the leak at the joint by wrapping it with several layers of soaked elastic fabric. As impregnation, you can use waterproof adhesives or ordinary nitro enamel.
- Minor damage can be repaired using baking soda and instant glue. Lightly moistened baking soda is rubbed into the gap or fistula until it fills the entire space. Super glue is poured on top. The substances instantly react with each other, forming a strong plug.
It is convenient, just in case, to have a ready-made kit at home for local repairs such as Siloplast. The kit includes an acrylic fistula pad and a tape impregnated with a special compound for sealing the leak. It is enough to wrap it around the pipe and moisten it with water. For such repairs it is not necessary to drain the water from the heating system.
Note! High-quality repair of threaded connections requires mandatory dismantling and diagnostics.
Actions in case of leakage
When urgent measures do not give a positive result, you need to drain the water from the system and make high-quality repairs to the damaged area.
For this:
- turn off the tap on the riser, warning your neighbors if it is a common valve;
- drain the water from the system.
Knot near the riser
One of the common damages is at the junction of the riser and the pipe. Leakage in this area may occur due to poor sealing of the joint. It is possible that when attaching the pipe, they did not put enough windings on the thread or did not tighten the lock nut.
The connection must be disassembled and re-twisted. Use tape or sealing thread to wind the FUM. It is advisable to replace the locknut. If the weld seam is leaking, then the water from the riser must be drained and the seam made again. To do this, you need to hire a welder.
Radiator sections
Radiator sections are pulled together. There are rubber gaskets at their junction points. Over time, the tie may loosen or the gaskets may become unusable. Water makes its way at the junctions of the sections. First, use adjustable wrenches to tighten the connection without removing the radiator.
If this does not help, then remove the faulty battery. Shut off the water supply, drain the water from the system and unscrew the radiator. Disassemble into elements, install new gaskets. Clean the sections from slag. Reassemble and install.
Battery input
Warm water flowed where the pipe enters the battery. This is a threaded connection consisting of a drive, a coupling and a lock nut. These elements are made separately and sometimes not from high-quality metal. In addition, if the battery is cast iron and poorly secured to the brackets, it creates pressure that deforms the joint over time.
This unit definitely needs to be replaced. It happens that it is impossible to unscrew rusted parts, then they are heated with a gas burner
This operation is carried out with extreme caution, having prepared fire extinguishing agents and fencing the work area with protective screens made of non-combustible materials.
Battery edge
If a crack forms in an accessible area of the battery fin, it can be temporarily neutralized. There are 2 types of welding of heating batteries: hot and cold.
If the battery registers are metal, then hot welding can help fix the leak. If they are aluminum or cast iron, then you can forget about it. In this case, cold welding will help. This requires a high-temperature, water-resistant plastic mass that reacts chemically with such metals.
The area to be welded must be thoroughly cleaned, degreased and dried. Knead the substance until it is homogeneous, apply a small layer and let it harden. Welding products such as ABRO STEEL or POXIPOL do an excellent job. The range of such adhesives is wide. You can select welding for the material from which the radiator is made.
Faucet or joint
When the source of the leak is a faucet, it must be replaced. If the tap has not been used for a long time, it becomes clogged with deposits and does not fulfill its task. However, if its rotating part is moved out of place, it can also leak. When choosing a new shut-off device, give preference to ball valves made of non-ferrous metal.
Leaks at joints can be eliminated by wrapping the damaged area with a bandage soaked in saline solution. After drying, cover the top with a bandage soaked in a mixture of plaster and cement.
Modern industry offers consumers plate glue for this purpose. You should wrap the finished strip around the leak area. When exposed to air, the polymer hardens and eliminates the problem. When using silicone sealants to eliminate leaks at faucet joints or threaded connections, choose neutral compounds. Acid-based sealant may promote subsequent metal corrosion.
How to eliminate leaks in hidden wiring pipes
To quickly seal hidden heating pipelines, use mustard powder or a ready-made special sealant. The existing substance is added to the expansion boiler and the system is put into operation. After a few hours, the sealant (or particles of mustard powder) will seal the damaged area, eliminating the leak.
Such repairs will give time to prepare for a complete restoration of the heating circuit. However, if a large damage has occurred in a hidden area, then the internal sealant is unlikely to help. The heating circuit will have to be drained and repaired immediately.
Note! If your heating has become unusable due to the natural aging of materials, then dismantling the hidden section of the circuit may not be economically feasible.
Affordable repairs begin with the correct design and installation of the heating system. All detachable connections must be accessible for inspection. Hidden areas must be made of high-quality, durable materials and not have detachable connections. Timely replacement of worn-out equipment will allow you to live peacefully in cold weather, enjoying warmth and comfort.
Source
Key methods to combat leaks
If it is not possible to immediately call an emergency team, you can use the following techniques:
- self-tapping bolt;
- plaster-cement bandage;
- sealant;
- rubber gasket and clamp;
- fabric with water- and heat-resistant adhesive impregnation;
- welding
The easiest way to eliminate a leak in a cast iron battery is to fasten a self-tapping screw in an identified hole.
The easiest way to eliminate a leak in a cast iron battery is to fasten a self-tapping screw in an identified hole. Next, you need to take care of installing a new radiator as quickly as possible.
Hermetic seal
You can purchase polymer or powder based sealant at a hardware store. In air, this composition polymerizes, with its help you can gain time to organize a full repair. Two-component variations harden after mixing all components.
Cold weld is a two-part sealant sold in compact tubes, usually containing epoxy resin and metal powder. Before using cold welding, the area must be thoroughly cleaned and degreased. It is necessary to remove paint and rust, preferably with allowances to increase the accessible contact area. Sharpening is easiest done using a stone, which is usually used for sharpening knives. The instructions on the tube describe in detail the method of use recommended by the manufacturer; please note that some varieties cannot be used in wet conditions - water can become an obstacle to full polymerization.
Manufacturers offer liquid welding and thick welding, with a consistency reminiscent of plasticine. Before use, you need to knead both components in your hands so that the polymer acquires a uniform color without inclusions, then it is applied in a thick layer to the defective area. It is advisable not to introduce water into the system until the composition is completely polymerized. When properly applied, after a few hours a durable coating is formed that prevents the release of moisture.
Clamp and gasket
This technique is applicable to repair damage at the junction of the heating device and the main pipe. You can use a piece of a bicycle inner tube as a rubber band; it is secured with a clamp or wire.
Moisture resistant glue
Another emergency temporary measure, convenient if it drips from the joint between sections. The fabric is impregnated with glue that is resistant to heat and moisture, and the problem area is wrapped with it. By the time it dries, the water will no longer appear on the surface. A two-component epoxy composition is perfect for solving this problem.
Moisture-resistant glue is another emergency temporary measure, convenient if it drips from the joint between sections
Bandage with cement and plaster
You need to prepare alabaster, cement, a small container of water at room temperature, a medical bandage and salt. The cement is diluted in a container so that the consistency resembles low-fat sour cream; you need to immerse a bandage cut into strips into the mixture and, after it is soaked, wrap the workpieces around the damaged area. Alabaster (gypsum) will be needed if it is necessary to carry out repair work without shutting off the water - this mixture sets faster.
Leaks that occur at the threaded connection are eliminated with salt. The fabric or bandage is soaked and rolled in salt, and wrapped around the joint. The above-mentioned cement bandage is applied on top.
Welding
This technique is only suitable for steel appliances; here you will need a welding machine. Arc welding is dangerous, it is better to use gas welding - this way you don’t have to worry about damaging the area around the leak.
Signs of depressurization
The heating systems are all built according to the same scheme - boiler - supply pipes - appliances - return pipes - boiler. It's looped. The pressure and circulation of the coolant in central heating systems is maintained using pumps. In private sector houses with an autonomous open heating system, pressure and circulation are provided by the boiler when heating. The cottages have an autonomous closed heating system, the coolant is always under pressure.
In heating systems, pressure control occurs using instruments, but small leaks are still difficult to detect; automation equalizes a slight drop in pressure. Pressure gauges are not installed in private houses. Therefore, in both cases, residents have only one way to control the tightness - visually.
When inspecting heating appliances and pipes suitable for them, pay attention to damp places. In areas of obvious leaks, water will drip or flow, leaving traces of rust. But those who hid metal risers in boxes that one of them is leaking will most likely find out from the neighbors to whom the water flowed
Causes and locations of leaks
There are only two reasons for leaks. The first is mechanical damage. Everything is clear here, but the second reason is corrosion. The cause of corrosion in heating is poor water treatment. In central heating, water treatment equipment purifies water from mechanical impurities and salts. This is not the case in private houses and cottages.
The presence of salts and electricity leads to increased rust formation.
The places that rust the most are threaded connections, welds, and bends made by heating. Often the fistula appears in straight sections without welds or threads. Perhaps these are pipe defects or a pipe installed that is not intended for heating.
When is the best time to repair heating pipes?
During the inspection we saw that the heating pipe was leaking, what should we do? Once some confusion passes, the answer will become obvious - fix the leaks immediately. But how and when to start a thorough renovation? Of course in the summer. When it’s warm and you can safely stop the heating and drain the water.
But you shouldn’t delay fixing leaks. If it really breaks through, the damage will be significant. It is necessary to temporarily repair the damage and begin repairs after the end of the heating season.
In modern systems that are designed and installed in houses, it is possible to completely turn off one or several branches, without stopping the boiler or riser. In this case, you can carry out repairs without waiting for the end of the heating season.
The heating battery is leaking: what to do depending on the type of defect
All recommendations can be specified in accordance with the location of the problem phenomenon; in this case, it is worth considering the 4 most common situations.
How to seal a leak between two sections of a radiator?
Here additional sealing of the joint area is necessary. The areas located between two sections of cast iron batteries, as a rule, have a rectilinear shape and are characterized by a small area, thanks to which the defect can be quickly found and eliminated in a short time.
It is worth using the following algorithm:
- strengthen the guide screw using a regular car clamp;
- You can make a clamp yourself using several steel plates (aluminum blanks will not work here). A bolted connection is used to tighten the loop;
- Before applying the clamp, the problem area must be isolated with a rubber gasket. It can be replaced with a rectangular piece of fabric soaked in epoxy glue.
You need to wrap the joint between the radiators very carefully so as not to overtighten the connection; the same caution should be exercised when using the clamp further.
Elimination of a defect at the junction of the riser and the pipe
Here, the cause of the appearance of moisture may be incorrect installation; the problem becomes noticeable after starting the heating system. The riser and pipe are usually connected by welding or threading; in both cases, careless assembly, inaccurate welding, and the use of pipes of different diameters cause leaks and necessitate immediate repairs.
If strong mechanical pressure is applied to this, for example, during children's play or when it becomes necessary to reach the top of the window, even small loads can cause a break at the joint or distortion. In this case, a temporary measure, as in the previous case, can be a clamp in tandem with a rubber gasket.
Repairing a crack in the radiator
The optimal solution may be to use classical welding, but this technique, firstly, is dangerous and labor-intensive, and secondly, it requires the availability of equipment and appropriate skills.
Cold welding is an excellent method for repairing a crack in a radiator
A suitable alternative is cold welding. The problem area of the radiator needs to be prepared - thoroughly dried and degreased. Next, you need to take a small cold-welded ball and press it firmly to the leak site. The material polymerizes within a few minutes; half an hour is enough for it to completely harden. This battery can be put into operation within a day, but after the end of the heating season it will need to be replaced - cold welding is considered a temporary measure.
Restoring the integrity of the heating pipe
To supply coolant, steel pipes are used, and bandages with a gypsum-cement mixture are applied to them:
- dilute the cement in a small container to a medium-thick consistency;
- prepare cuts of bandage approximately 30 cm long;
- bandages are soaked in cement mortar;
- with force, the workpieces are wound onto the damaged area in several layers to ensure the strength of the connection.
If it is not possible to turn off the tap, the first bandage to be wound should be soaked in an alabaster solution. The next layer can be used with cement dressings.
Repair methods
There are several types of heating repairs without draining the water, but with releasing pressure in the system, but all of them are only a temporary solution:
- welding repair using welding and brazing of steel and polymer pipes
- mechanical repairs using various devices: clamps, bandages, etc.
- chemical method using various chemical compositions (adhesives, sealants, cold welding, mixtures based on epoxy resin, etc.).
If circumstances force you to fix the problem yourself, then with some ingenuity and dexterity you can use other methods. Using available means - wire, rubber, screws, wooden choppers, etc.
On a running system
An operating heating system is always under pressure, even in open systems in small houses where expanders are used. Therefore, you need to understand how to seal a leak. And one method is suitable here - using a clamp and rubber or bandage.
The sequence is like this. Having found the location of the damage, measure the diameter of the pipe. You make or buy a clamp according to this size. It is necessary to take into account that the clamp covers not only the damage, but also several centimeters of the pipe in different directions. Be sure to put rubber under the clamp.
If the damaged area is small and the pipe diameter is more than 50 mm, it is better to use a factory bandage. It fits tighter than a clamp.
On heating systems with low pressure, you can use a rubber band and wire. Wrap it with a tourniquet, stretching it as much as possible, and secure it with wire.
On a stopped system
It is easier to work with the heating turned off. The pumps are turned off or the supply is cut off. The pressure needs to be relieved. Find the location of the leak and, depending on access to the damaged area, choose the most suitable repair method.
Installing a bypass in the heating system makes it possible to shut off the water to the radiator
Before the start of the heating season, you need to carefully check the system and all its elements for integrity, paying special attention to problem areas:
- welding and threaded connections pipe-pipe, pipe-battery;
- joints of two adjacent sections;
- straight pipes;
- places where elements are inserted;
- installation points for adapters, tees, branches, etc.;
- sections of communications hidden under floors, in walls, boxes, etc., and also experiencing high mechanical loads.
Required tools and materials
Depending on the method of repair, the set of tools and materials will change.
- Set of welding equipment and electrodes. Welding repair.
- Box or open-end wrenches ranging in size from 8 to 24 mm. When installing bandages and clamps.
- Latex gloves.
- Pliers and knife.
- Annealed steel wire 1.5-2.2 mm.
How to seal a leak
In connection, on threads and joints
All heating elements are assembled into a single system using threaded, welded, soldered and fitting connections. Any of them is the least reliable place and it happens - they leak. Leaks in pipe joints, whether metal or polypropylene, can be eliminated using epoxy resin-based glue. To do this, the surface of the metal pipe along with any damage must be cleaned of old paint and rust. You can clean it with a wire brush, sandpaper, or scrape it off with a knife.
If the water is still leaking, it is better to wait until it stops.
Prepare fiberglass or medical bandage. If the pipe has a diameter of 15 to 32 mm, the length of the fabric is approximately 30-35 cm. Then add a hardener to the glue base in the proportion specified in the instructions. You can add more hardener to increase the hardening speed. The main thing is not to overdo it, otherwise you won’t have time to finish before the glue hardens. Soak the fabric with glue and wrap the damaged area. Once hardened, the heating can be started. Work with rubber gloves. Leaks at the joints of polypropylene pipes can be eliminated in the same way.
