Preparation of materials and tools
Before adding sections to the bimetallic radiator, you need to prepare the following materials and tools:
- Section for retrofitting.
- Special wrench for pipes (gas).
- Intersectional seals for batteries.
- Set of heating nipples.
- Emery cloth.
- Radiator key.
- Side battery plugs with left-hand and right-hand threads.
- Paronite gaskets.
Preparation
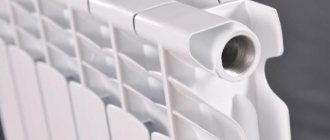
Before expanding the battery, it must be removed and properly prepared. The device is cleaned of dust and rust, after which the threaded hole intended for connecting the battery and the supply pipe is inspected. As a rule, over years of use, growths form on it due to increased water hardness and the presence of bleach in it.
It is imperative to get rid of these formations. To do this, use sandpaper to process the threaded hole. In this case, you need to observe special care, because even small residues of build-up will prevent the sealing of the gaskets. In the future, this leads to the appearance of leaks along the commutation interface.
Building process
Before you expand the heating battery, if it is cast iron, you should remember that this can only be done after the end of the heating season! After all, in order to add new sections of such batteries, it will be necessary to completely disassemble the batteries. And if this is carried out in winter, then the entire system will need to be shut down. And if you live in an apartment building, it is unlikely that any of your neighbors will agree to spend several hours without heat.
Therefore, such a process should be postponed until warmer times. How to build up a heating radiator made of cast iron? Let's look at the process in more detail. We will need the following tools:
- Radiator or adjustable wrenches;
- Nipples are clearly for cast iron radiators (the number depends on the sections);
- Special gaskets to install them between sections.
- Side plugs with gaskets.
Read more: Law on transport tax in the Moscow region
So, before you add a cast iron radiator, you will need to remove and disassemble it. Don't forget to turn off the water first!
If the batteries are not new, there may be a build-up of rust and dirt between the sections. To install the gasket and connect the battery sections, such build-up will need to be removed. This is done either with sandpaper or a wire brush.
Before expanding the heating radiator, you need to lay out our battery on the floor and additional sections.
When you attach the nipple, pay attention to the position of the thread. We begin to twist the nipple on the left, first it is best to attach it approximately 1 turn to the left of the heating radiator. We do the same with the right side.
It is imperative to ensure that the intersection gasket is placed only in the middle of the nipple. The radiator sections must fit snugly against the nipple. Now we insert the radiator wrench into the radiator, and use an adjustable wrench to screw the nipple into the radiator sections.
To make a high-quality expansion of heating radiators, you need to tighten the nipple three to four turns and move to the other side of the sections. We will tighten the sections one by one until they fit one another very tightly.
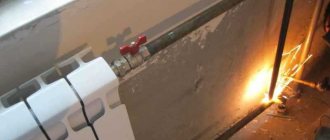
Now it's time to install special side plugs for cast iron radiators. Do not also forget about gaskets made of a special material - paronite. If there is rust on the surface on which the gasket is supposed to be installed, it must also be cleaned with sandpaper. And only now can you put the plug in. The plugs must be tightened tightly using a pipe wrench.
Extension - how to extend radiators correctly
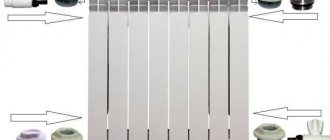
The sections of bimetallic radiators are connected in the following sequence of operations:
- The removed radiator is installed on a flat base, and an additional section is placed opposite it. It should be taken into account that one of its sides is equipped with a right-hand thread, and the other with a left-hand thread. Then you need to take the nipple, positioning it in such a way as to ensure that the threads on the sections being connected match. Next, it is screwed onto the left end of the battery by one turn of thread. Upon completion of the procedure, do the same with the element for the lower part of the radiator.
- After this, the sections prepared for connection are tightly placed next to each other. A seal is laid between them, measuring the distance to the nipple (for this you will need a radiator wrench). It is inserted to the measured length into a special niche at the reverse end of the radiator. In order to turn the radiator wrench, a pipe wrench is used.
- When tightening the nipple, it is important to ensure that it is simultaneously immersed inside the opposite battery sections. Upon completion of this procedure, three full turns are made using the radiator wrench. This helps ensure that the nipple is fixed as tightly as possible.
- At the next stage, the radiator key is moved to the other side of the heating device. The screwing procedure is carried out in the same order as with the lower part. An important condition: at the end of the process, the switched sections should stand as tightly as possible.
- Finally, side plugs and paronite gaskets are installed on the battery. For these purposes you will need a pipe wrench. It is important to ensure that they are screwed in as tightly as possible to create a good seal. This will ensure that no water will seep through the joint. This is the last operation in expanding the heating system battery.
How do you add sections?
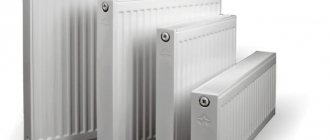
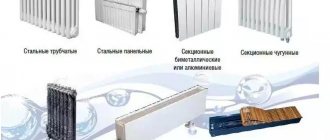
After you have experimentally determined that the reason for the cool temperature in the house is not a clogged radiator, you should find a store near your home (so that you don’t have to travel far away and thereby waste your time) that sells heating equipment. You need to buy the same sections that your radiator is equipped with - made of cast iron, aluminum, or bimetallic .
It should not happen that you select inappropriate sections - because of such an error, you simply will not be able to add them, that is, the money spent will be thrown away, so be careful. The procedure for increasing sections is carried out in the same sequence of actions for all types of heating radiators.
Read more: If the heir dies before accepting the inheritance
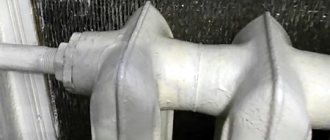
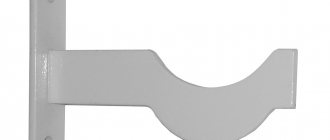
To join sections, you need a connecting nut - nipple
Let's proceed directly to increasing the number of sections. The first step is to unscrew the fitting using a radiator wrench on the side to which you plan to add one or more elements. After you have unscrewed the fitting, a nipple (connecting nut) is placed in the area where the sections join. The following important feature must be taken into account: the threads at different ends of the nipple are different, and in order to correctly install new sections you must follow the following rules:
- The right side of the nipple should be directed towards the direction where the connection to the new element will be made;
- Accordingly, the left one is towards the already present sections of the heating radiator.
In order to prevent further leakage of the battery, you should put intersection gaskets on the nipple (they can be rubber, paranitic, or gel). At the same time, they must be put on carefully and carefully - this will guarantee that the gasket will be positioned as evenly as possible, without unwanted distortions. Next you need to tighten the thread. This action should also be carried out without sudden movements, in a leisurely rhythm, and carefully. If you want to build a high-quality heating radiator, then there can be no rush.
To prevent leakage, an intersection gasket is required
Damage to metal threads is extremely undesirable - this may result in not the most harmless problems, the solution of which will require you to additionally spend your own time and financial resources.
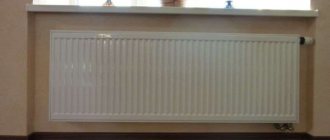
The enlarged radiator must be placed back on the bracket and the connection to the central heating pipe restored. To do this, you need to arm yourself with a wrench of the appropriate diameter and tow, which is necessary for wrapping the pipe threads when screwing the radiator.
It’s not difficult to add sections to a heating radiator; you don’t need to work in a team of heating installers for 10 years. But this process cannot be done without a serious approach, the availability of basic tools and the removal of your personal time. However, you can resort to the second option for solving the problem of insufficient heating of the room - becoming a client of a company providing such services, whose employees will do everything themselves, quickly and efficiently.
The boiler room smokes from the heat, but the house is still cold? What is the reason for this situation? Perhaps your cast iron batteries are simply not able to cope with the load, which especially increases during severe frosts? How to increase the efficiency of a heating battery? In this case, there is a way out - moving the heating radiators and expanding them. After all, it is not necessary to replace radiators; you can simply move them to more optimal conditions and increase the missing number of sections.
Additional recommendations
Installation of taps is not a mandatory procedure and is optional. In cases where increasing the power of the heating device will require installation on one or several additional sections, the instructions described above are used for this. This also applies to working with other types of radiators, since adding a section to aluminum radiators is no different.
The main thing is to follow the given sequence of operations and not to rush. Bimetallic radiators are connected as tightly as possible. This will guarantee that everything will be done correctly, and the heating of the house will receive the necessary increase.
What are the criteria for choosing radiators for an apartment?
When the weaknesses of central heating are already known, you can imagine what criteria good batteries should meet:
- For radiators, the pressure declared by the manufacturer must be greater than the pressure in the heating system. Let's look at the numbers as an example. In five-story buildings of the old layout, this indicator is no more than 5-8 atmospheres. Modern multi-storey buildings are heated under pressure up to 15 atmospheres;
- We will separately highlight the ability to resist water hammer. Because it is difficult to protect yourself from pressure changes when you are in an apartment, it is better to prevent this in advance. By the way, if you often hear noise and humming in the batteries, it is better to contact your utility service, as this may be causing problems with the pressure;
- The water quality in the old system is poor, so the batteries must adequately withstand its chemical attack without deforming. It is necessary to install radiators with a special coating on the inside or chemically neutral material for the walls. Their thickness should be such that sand particles and small stones do not rub it;
- When choosing suitable radiators for an apartment, it is important to remember their main function - to heat. It is better to choose radiators with high heat output;
- The appearance of the radiators also plays a role. It’s unlikely that anyone will like the old and scary cast-iron appliances of incomprehensible shape that used to stand in every corner. Batteries should look harmonious in the apartment;
- lifetime. There is nothing to comment here. The less time you have to bother with installing these large and expensive devices, the more profitable it is for the owners.
We recommend: Which central heating batteries to choose?