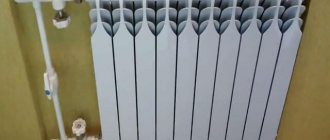
How the chimney works
A brick chimney consists of several parts located inside and outside the room. The walls of the pipe in contact with the ceilings must be thickened as much as possible. This is required by fire safety regulations. Extending beyond the roof, the wall bricks must cover the hole in the roof.
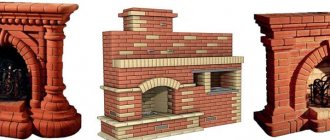
There are three types of design - simplified, classic single and extended with ventilation holes.
The layouts of all brick chimneys are approximately the same. Let's look at the basic, classic one:
- Metal cap (umbrella). Manufactured in various types and forms. Designed to protect against the penetration of precipitation, dust and dirt into the pipe. Attached to the protruding parts of the head.
- Header. Consists of protruding bricks. Protects the pipe neck from drops flowing down the protective umbrella.
- Neck of pipeline.
- Waterproofed otter surface. Designed to remove sediments that have fallen on the neck. Most often it is insulated with a cement layer.
- Otter. Part of a pipe with thickened walls. It is located where the chimney passes through the roof. Thicker walls are regulated by fire safety rules; they protect the insulation and other flammable layers of the roofing cake from overheating.
- Roof;
- Lathing;
- Rafter system;
- Riser. Located in the attic.
- Fluff. Part of the pipe is similar in principle to the otter. It has the same thick walls that protect the ceiling between the living space and the attic from overheating. Sometimes, instead of fluff, a metal box filled with bulk non-flammable materials (sand, etc.) is mounted. The thickness of this protective layer is 100-150mm.
- Overlap;
- Insulation. Most often made from asbestos. Serves to protect wooden floor beams from overheating;
- Smoke damper (valve). Allows you to regulate the removal of combustion products.
- The neck of the pipe connecting the stove to the chimney.
Do-it-yourself chimney for a stove: different installation options
A chimney for a stove can be built with your own hands if a diagram of its laying is at hand, and the home craftsman himself has at least minimal skills in working as a mason. The construction of this department requires no less serious approach than the construction of the furnace itself, since the efficiency of heating, the safety of those living in the house, and the overall service life of the entire heating structure will depend on the quality of its masonry.
Do-it-yourself chimney for a stove
When working on a chimney, you must remember that its internal surfaces must be as neat and smooth as the external ones, since this factor directly affects the creation of good draft.
Types of brick chimney pipes
Chimney pipes are divided into types depending on their installation location relative to the stove itself. So, they are root, mounted and wall.
Stove with a top-type chimney pipe
- The most common design of a brick chimney is the captive one. It is installed directly on top of the heating device and is its continuation. Such chimneys are often installed during the construction of a heating or sauna stove.
Chimney of basic design
- The second most popular is the root chimney. This type of pipe is distinguished by the fact that it is installed next to the furnace or is included in its structure and is placed on one of its sides.
Main pipes can be installed for both brick and cast iron stoves. In addition, one main structure is often used for several heating devices. For example, in a two or three-story house, one chimney is passed through all floors and stoves are connected to it. If you plan to use a pipe in this way, then in this case, an accurate calculation of its parameters must be made, otherwise there will be no normal draft, which means that the efficiency of the stoves will decrease and the risk of combustion products entering the premises will increase.
Wall type pipe
- The wall pipe is built into capital internal or external walls. But, in the latter case, the walls of the chimney will have to be very well insulated, since due to the large difference in external and internal temperatures, condensation will actively collect inside the channel, which will significantly worsen the operation of the stove, reducing draft and contributing to the rapid overgrowing of the chimney with soot.
It should be noted that although this structure is identified as a separate type, it can be either root or mounted.
Brick chimney design
The chimney has several sections. To understand its fundamental design, we can take as an example the structure of the mounted pipe, since most often this is what design engineers choose when drawing up furnace layout diagrams.
So, the design of the mounted pipe with its passage through the attic floor and rafter system includes the following sections and elements:
Schematic diagram of a typical brick chimney
1 – Metal cap or umbrella. It can have various forms, but its function is always to protect the internal space of the chimney from the penetration of various types of precipitation, as well as dust and dirt.
2 – The head of the pipe consists of bricks protruding outward, which will protect the neck of the structure from raindrops that will flow down the protective cap. The metal umbrella is also attached to the protruding parts of the head.
3 – Pipe neck.
4 – A cemented or otherwise waterproofed inclined surface of the otter, designed to drain water that gets onto the neck of the pipe.
5 – Otter. This part of the structure has thicker walls than the pipe neck. The otter should be located where the chimney passes through the rafter system and roof. The thick walls of the otter will protect the flammable materials of the sheathing under the roof from overheating.
6 – Roofing material.
7 – Lathing of the rafter system.
8 – Rafters.
9 – Pipe riser. This department is located in the attic of the house.
10 – Fluff. This part of the chimney begins under the ceiling inside the house, passes through the attic floor and ends in the attic, slightly above or flush with the floor beams. The fluff, like the otter, has thicker walls than the neck and riser of the pipe. The increased thickness also protects wooden beams and other combustible attic or interfloor materials from overheating.
It should be noted that in some cases, instead of fluff, a metal box is installed in its place around the pipe, filled with non-combustible materials, such as sand, vermiculite or expanded clay. The function of this layer, which has a thickness of 100÷150 mm, is also to protect combustible floor materials from overheating.
11 – Floor beams.
12 - Insulation, which is most often made from asbestos, is in any case necessary to create fire safety, since the walls of the chimney will come into contact with the wood of the floor beams and other materials that make up the floor and ceiling.
13 – Smoke damper, located indoors, in the upper part of the pipe, which allows you to regulate the intensity of the exhaust flows of heated air and combustion products.
14 – Pipe neck, which starts at the top of the furnace - the roof.
Calculations of chimney pipe parameters
The principle of operation of the chimney system is the movement of air masses from the combustion chamber to the exit to the street, that is, from the lower point to the upper. This process occurs through the creation of draft, which occurs due to changes in temperature and pressure. It is thanks to all these factors that the chimney system functions normally.
To create optimal aerodynamic processes, the size of the pipe channel must correspond to the power of the furnace, which, in turn, largely depends on the size of the firebox. The surfaces of the internal chimney space must have smooth walls along which air flows will slide freely without turbulence, and due to this no backdraft will be created. That is why quite often an insert made of a round ceramic pipe is built into a square brick chimney, which has an absolutely smooth surface and no internal corners.
Sectional size
In connection with the mentioned factors, it is necessary to very carefully calculate the internal size of the chimney, taking into account its length, since the larger this parameter, the higher the draft in the pipe.
Of great importance for creating normal draft and high-quality functioning of the heating device is the correspondence of the parameters of the chimney passage and the power of the boiler, as well as the size and number of channels provided for by the design and passing inside the stove.
If the parameters of the internal dimensions of the chimney in cross-section exceed the calculated value, this will lead to rapid cooling of the heated air in it and the formation of condensation, and therefore a decrease in draft. In this case, the necessary balance will be disrupted, and the flows cooling in the upper part of the pipe may return down, creating smoke in the room.
The size of the chimney opening is calculated as follows:
- The size of the chimney of a fireplace with an open firebox approximately corresponds to the proportions of 1:10 (chimney cross-section (f) / firebox window area (F)). This formula generally applies to both square or rectangular and cylindrical pipe types, but not directly, but taking into account the cross-sectional shape of the channel and the overall height of the chimney.
- The size of the chimney of a stove with a closed combustion chamber has a proportion of 1:1.5. In the case when the heat transfer of a heating structure is less than 300 kcal/hour, the cross-section usually has a size of 130×130 mm or half a brick (not less). When making calculations, it must be taken into account that the cross-sectional size of the chimney should not be smaller than the inlet opening of the ash-blower.
When calculating a fireplace chimney, you can use the following table.
| Pipe height N, m | 5 | 6 | 7 | 8 | 9 | 10 | 11 | |
| f/f ratio in % | ||||||||
| Pipe section | Round | 11.2 | 10.5 | 10 | 9.5 | 9.1 | 8.7 | 8.9 |
| Square | 12.4 | 11.6 | 11 | 10.5 | 10.1 | 9.7 | 9.4 | |
| Rectangular | 13.2 | 12.3 | 11.7 | 11.2 | 10.6 | 10.2 | 9.8 | |
Pay attention to the direct dependence of the chimney cross-section not only on the parameters of the firebox, but also on the height of the pipe. Probably, sometimes when making calculations it will be more expedient to start from this parameter. For example, a pipe 11 meters high on a one-story country house would look completely ridiculous.
The same dependence, but more accurately presented in graph form.
Graph of the relationship between pipe height, channel cross-section and firebox size
Let’s say you need to calculate the cross-section of a chimney pipe for a fireplace with a firebox, the window dimensions of which are 500×700 mm, that is, the total area is 0.35 m² . It is assumed that a pipe with a total height of 7 meters is allowed on the building.
- Let's look at the graphical diagram:
— for a round chimney cross-section, the optimal ratio is f / F = 9.9% ;
- for square - 11,1%;
- for rectangular - 11,7%.
- It is easy to calculate the optimal cross-sectional area of the chimney channel:
- circle: 0.35 × 0.099 = 0.0346 m² ;
- square: 0.35 × 0.11 = 0.0385 m² ;
- rectangle: 0.35 × 0.117 = 0.041 m² .
- Now, using the simplest geometric formulas, it is easy to reduce the areas to linear dimensions:
— round pipe diameter: d = 2×√S/π = 2×√0.0346/3.14 ≈ 0.209 m = 210 mm .
- side of a square pipe: a = √S = √0.0385 ≈ 0.196 m = 196 mm .
- the rectangle can have different options - for example 0.130 × 0.315 m or 130 × 315 mm .
The calculation will be much simpler if you use the calculator below, which already contains all the mentioned dependencies.
Calculator for calculating the linear parameters of the chimney cross-section
Go to calculations
Of course, these dimensions are obtained as a guide, and are usually “tied” to standard pipe diameters or brick sizes.
Chimney height
The height of the pipe was already mentioned above, but there the calculation was based on its already known value. What should be the optimal height?
To calculate the height of the chimney, you also need to take into account several factors. Hot air passing through the internal channels of the stove and chimney immediately cools down when leaving it, which means that the longer it stays inside the channels, the longer the heat will be retained in the stove.
The correctly selected pipe height helps to normalize draft and at the same time, to retain heat inside the structure for a longer period of time. So, if the pipe is raised a little higher than required by calculations, then the draft may increase to such an extent that the heat will not stay in the stove for a long time, which means that it will not have time to warm up and transfer heat to the rooms. In this regard, you will have to constantly add fuel, which will make the operation of the stove extremely uneconomical. Well, a pipe that is too low can lead to the creation of a reverse draft system inside, which will cause carbon monoxide to enter the living rooms. The same phenomenon can occur if the cross-section of the internal chimney channel does not correspond to its height.
According to existing rules, the height of the pipe (or rather, the vertical distance from the grate to the mouth of the chimney) cannot be less than 5 meters.
The height of the chimney above the roof is usually calculated separately, taking into account such design parameters of the house structure as the angle of the roof slope, the thickness of the roof covering and the distance between the chimney and the roof ridge. All calculations are carried out without taking into account the height of the protective umbrella (cap) covering the pipe from above.
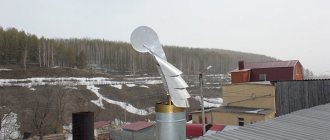
If the chimney pipe is installed incorrectly on the roof, turbulence of warm air will appear at the outlet, which will significantly reduce draft. Therefore, the chimney must be raised above the roof plane, taking into account certain rules that relate to the level of its outlet relative to the ridge line:
Diagram of the correct location of the pipe relative to the roof ridge
- If the pipe exits through the roof at a distance of up to 1500 mm from the ridge, then its height above it must be at least 500 mm.
- If the pipe extends above the roof at a distance of 1500÷3000 mm from the ridge, then it must be raised to its level.
- In the case when the chimney pipe passes through the roof at a distance of more than 3000 mm from the ridge, its upper edge should be on a conventional line drawn at an angle of 10˚ from the horizontal from the top point of the ridge.
However, no matter how far the chimney pipe is located from the ridge, it must rise above the roof by at least 500 mm. This also applies to flat roofs.
It should be noted that a chimney is a serious engineering structure, and it is quite difficult to independently provide for all the nuances of its construction. Therefore, in order for the oven to function properly, it is recommended to use the services of a specialist, computer programs or ready-made diagrams. Typically, craftsmen post their development plans, which already indicate the optimal dimensions of the chimney channels. And there should be no amateurism in such matters.
Find out several possible options for how to make a chimney for a solid fuel boiler from our new article.
How to choose the “right” brick for laying a chimney?
In order for the constructed pipe to last a long time, and the brick not to be destroyed by temperature changes and the influence of external natural influences, you need to choose this material correctly. In addition, reliable brickwork must ensure complete fire safety for combustible materials surrounding the chimney.
If the brick is of poor quality, the pipe is unlikely to last long
According to its main characteristics, the brick must be solid, fire-resistant and fired.
For the construction of a chimney, the brick is selected according to its grade, which is determined by the level of firing, and is divided into three categories:
Separation of fired ceramic bricks by grade
- Grade I is a moderately burned building material.
High-quality, well-burnt brick of the first grade has the following characteristics:
— The color is bright red or with a slight yellow tint.
— Good clay density.
— Smooth ribs without signs of crumbling and smooth surfaces without scoring.
— When you tap a high-quality brick with a hammer, it should produce a fairly ringing sound.
- Grade II - unburned brick, can be characterized as follows:
— The color is pale orange, unsaturated.
— Low frost resistance, density and heat capacity.
— High porosity.
— When tapped, this brick makes a dull short sound.
— There may be small scuffs on the surfaces of second-grade bricks, and its ribs may have crumbled areas.
- Grade III - burnt brick. This material has the following characteristic features:
- Has a dark deep red, even brown color.
- Not frost-resistant.
— The structure of the brick is dense, but porous.
— High thermal conductivity.
— Strong in compression, but fragile and poorly withstand other loads.
— Its ribs may be crumbled, and its surfaces may be chipped.
— The sound when tapped is very sonorous.
From the presented characteristics we can conclude that first grade brick marked M150÷200 is suitable for the chimney pipe. It is recommended to completely exclude the unburned material from the chimney masonry, and the burned material can be used for foundation work during the construction of the main pipe.
Before using brick for masonry, some stove makers soak it in water, while others use it dry. Dry brick will absorb moisture from the mortar, which will make the masonry less durable, and the laid soaked material will take longer to dry. Therefore, each master chooses his own technology and the most convenient method of work for himself.
Find out how to make a chimney for a potbelly stove yourself from a new article on our portal.
Making masonry mortar
It is very important to choose not only the right brick for the construction of the chimney, but also the mortar for its laying, since the seams of this structure must be absolutely sealed and resistant to external influences.
Differences in solutions depending on the masonry area
This diagram shows the zones of the furnace structure, by which you can determine which solution is used in each of them.
Different masonry mortars can be used in different sections of the furnace.
Since only the chimney masonry is being considered, it is necessary to decide on the mortar used in zones numbered 7 to 11. If the stove design includes a main-type pipe, then zone No. 3 is also subject to consideration.
- So, zone No. 3 is the first two rows of a basic type chimney, which are laid on a concrete foundation and are located under the finished floor. Since these rows are the basis for the masonry of the entire chimney structure, they must have sufficient strength and resistance to high loads. Therefore, for their installation, a sand-cement mortar is used, which is mixed in proportions of 3:1 or 4:1. Some stove makers prefer to add ½ part of lime to it, which will make the mixture more plastic.
- Zone No. 7 is the first two rows of the shell pipe, which are located immediately on top of the furnace. This area is called the source of the chimney; the temperature in it reaches 355÷400 degrees. The source is laid on a clay-sand mixture.
- Zone No. 8 - the fluff of the chimney pipe is located in the living room, right under the ceiling, before the structure passes through the attic floor. Sometimes this structural element can cover the passage itself, but ends in the attic. The temperature in this area can also reach 355÷400 degrees, so the masonry is also made using clay-sand mortar.
- Zone No. 9. For this area, you can use sand or expanded clay, as well as clay-sand mortar. This zone of the pipe is called cutting and serves to protect the flammable materials of the ceiling from overheating. To create a groove, a metal box is constructed around the pipe and then filled with one of the selected materials. Another cutting option is to thicken the pipe walls in this place.
- Zone No. 10 - the neck of the pipe is located in the attic and faces the street, therefore it experiences heavy loads from temperature changes and the influence of external factors. For this section of the pipe, a sand-clay solution with the addition of cement is most often used.
- Zone No. 11 - the chimney head is laid out from the same mortar as the neck of the pipe, or simply using a cement-sand mixture.
Composition of masonry kiln mortars
Materials for solutions must be well cleaned of various impurities. Clay is taken with medium fat content, sand is washed and sifted, lime must be slaked. Dry clay and sand are cleaned by sifting through a sieve made from a mesh with cells of 1×1 mm. Clay can also be cleaned after it has been soaked by rubbing it through the same sieve. This cleaning method is faster and more effective.
An approximate recipe for various solutions is given in the table:
| Types of solutions | Clay mortar | Mortar | Cement mortar |
| Materials used | Material consumption in parts | ||
| Sand | 4 | 2,5 | 3-4 |
| Fireclay clay | 1 | — | — |
| Regular clay | 1 | — | — |
| Lime | — | 1 | — |
| Cement M400 | — | 0,5 | 1 |
Since clay-sand mortar is the main one for laying a chimney, its preparation is worth considering in more detail.
The durability of the structure and the safety of its operation depend on the quality of the solution.
Before mixing the solution, the purified clay must be prepared. It is soaked and mixed well until smooth; it should sit and swell, absorbing water. This process will take 12÷14 hours. The soaked mixture is stirred periodically and water is added to it if necessary. At the final stages of soaking and mixing, sand is added to the clay according to the proportions. Mixing a regular clay solution is carried out in proportions 1:2, 1:3 or 1:4 - this parameter depends on the fat content of the clay; the fatter it is, the more parts of sand are added to it.
It is recommended to test different proportions of the solution - make prototypes - balls or ropes, and see which one will be the most stable after drying. Based on the results of such an “experiment”, it will be possible to choose the optimal ratio of ingredients.
The solution should have a uniform consistency, without lumps or inclusions, be plastic and easily slide off a clean metal spatula.
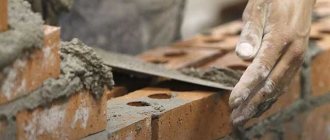
The masonry mixture is applied to the brick in a layer 8÷9 mm thick, and when pressed with the top brick, a seam of 6÷7 mm should form.
Chimney laying
The laying of the head pipe begins from the roof of the furnace, and the main chimney - from the foundation, which is laid out according to the same principle as the foundation for a heating structure.
It should be noted that the arrangement of the chimney is not as complicated as the layout of the stove itself, so it will be easy to understand.
Different versions of chimneys may differ in the number of rows and design features. Masonry is always done with bandaged rows.
Below in the tables we will consider one of the options for laying a mounted chimney, as the most common, with its passage through the attic floor and through the roof.
The order of laying the chimney
- Stage one is the construction of a chimney pipe from the roof of the stove to the roof.
| Illustration | Brief description of the operation performed |
| The first two rows of the chimney neck, each of which consists of five bricks, must be made carefully and perfectly evenly, as they set the direction and evenness of the remaining rows of the structure. | |
| All rows of the chimney neck are laid out in the same way. The number of rows in each case may be different, but this part of the pipe must be completed two rows before passing through the attic floor. | |
| Next comes the fluffing of the chimney. It can also consist of a different number of rows - from two to four. Each row of fluff is placed with a protrusion outwards of 30÷35 mm, resulting in a stepped structure that expands towards the ceiling. Despite the fact that this section of the pipe expands to the outside, the internal chimney channel remains in its original dimensions. | |
| In the picture presented, you can see the section of the pipe neck from above to the fluff. | |
| Shown here is the first row of fluff, which does not reach the surface of the attic floor by one row. It already consists of 6 solid bricks, two halves (the brick is divided transversely), 2 halves (the brick is divided lengthwise) and 2 quarters. | |
| The next row, also included in the fluff, brings the chimney to the level of the finished floor of the attic, and between the brick and the floor materials a gasket is made of non-combustible material (usually asbestos sheets cut into strips are used for this). This row consists of the same number of bricks as the previous one. | |
| The next row of fluff is the widest in cross-section, and its outermost bricks extend to the surface of the finished floor of the attic, approximately 30÷35 mm. This row consists of 12 whole bricks and 3 halves. | |
| 1 row of riser is laid on top of the fluff. Its length and width return to the original size of the pipe, and it is laid out from 5 bricks. | |
| Next, a hole is measured and cut in the roof through which the chimney will exit to the street. To accurately mark the hole for the passage of the pipe, you should use a plumb line. The hole is cut using the most convenient tool, for example, a jigsaw. | |
| When the opening for the passage is ready, the chimney riser is laid out completely, each row of which consists of five bricks. Strict control over the verticality of the masonry is mandatory. |
- Stage two - passing through the roof and the head of the pipe.
| Illustration | Brief description of the operation performed |
| The last row of the riser is laid half a brick above the bottom of the roof slope in a cut hole. Between the brickwork and the roofing material, as well as the sheathing, a gasket of asbestos strips is made. | |
| The next stage is the first row of the chimney section, called the "otter", which has an expanded size compared to the riser. The front of the row - the bricks move forward, blocking the underside of the passage hole. For this row you will need 5 whole bricks, 1 half, 1 part ¾ brick, 1 part - ¼ part brick, that is, one of the bricks can be divided into ¾ and ¼ parts. | |
| Second row "otter". The size of the external section of the pipe becomes larger due to its increase in the front part. The front two bricks move forward and to the sides 30÷40 mm above the previous row. For this stage, 5 whole bricks were used, 3 halves and one brick was divided into ¼ and ¾ parts. | |
| The next two rows are laid out according to the configuration of the previous one, but with the bricks tied together. | |
| The fourth row of “otters” is placed with a protrusion at the rear of the section - it hangs over the roof and covers the joint between the brick and the roofing material. For this row, 8 solid bricks are used, 2 parts - ¾ bricks and ¾ bricks divided into two parts lengthwise. | |
| Next, the first row of the chimney neck is laid out. The row consists of five bricks, which are shifted inside the masonry by 80÷90 mm, that is, everything returns to the original perimeter of the outer section. Next, in the same order, with the rows bandaged, the neck of the chimney rises to the required height, taking into account the fact that the head, consisting of two rows, will also be laid out. | |
| The next stage is the first row of the head. It is laid out with a protrusion outward of 30–40 mm, and thus will be one of the protective elements of the pipe neck from precipitation. The row consists of 5 solid bricks, 1 part ¾ brick, 2 parts ¼ brick, 6 halves of bricks cut lengthwise. | |
| The final row of the head, consisting of 5 bricks, is laid out with an inward shift by the same 30÷40 mm. The protrusion of the previous row is covered with concrete mortar with a slope towards the outside. A cap will be attached to this protrusion and to the last row to prevent precipitation and debris from entering the chimney channel. | |
| From the outside, the chimney pipe structure passing through the attic floor, rafter system and roofing material will ultimately look something like this. |
The gap between the pipe and the roofing must be sealed.
After laying the pipe itself, waterproofing must be installed around it on the roof, which will hermetically seal the joints between the walls of the chimney and the roofing material. One of the options for this passage design is shown in the attached video:
Video: How to insulate the passage of a pipe through an “ondulin” roof
In conclusion, it must be said that laying the chimney itself is quite doable even for a beginner, but when working at height, all safety measures must be taken into account. Of course, it is better to build a chimney together with a reliable assistant who can not only give sensible advice on masonry, but also provide the necessary insurance.
Video: Demonstration of basic techniques for laying a brick pipe
Principle of operation
The basic principle of operation of the chimney is based on the difference in air temperatures inside the pipe and outside. This difference creates cravings. The higher the pipe and the temperature difference, the greater the draft. Because The density of cold air is greater than that of warm air, which creates a pressure difference at the base of the house and the top of the chimney. This difference ensures the flow of cold air into the house. Thus, the stove not only heats the house, but also creates natural ventilation.
The draft depends on the cross-sectional area of the channel and the height of the pipe. For example, to create good draft in a fireplace, the cross-section of the chimney must be at least 1/10 of the area of the inlet.
At the same time, a pipe that is too wide reduces traction. Therefore, it would be better to increase its height. For stoves and fireplaces, the optimal pipe height is 5 m from the level of the grate.
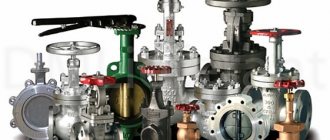
Types and designs
What kind of brick is needed for a chimney?
Only red fired bricks are suitable for chimney installations. The use of silicate is prohibited due to its instability to high temperatures.
It is impossible to save on bricks; this is fraught with the destruction of the entire structure and large expenses for its alteration.
Red brick has its own characteristics and is divided into 3 grades:
- The first grade is the optimal option for a chimney. It is characterized by the highest clay density, low porosity, smooth edges and even edges. Frost-resistant. When tapped, it produces a moderately ringing sound. Color from scarlet to orange.
- The second grade (unburnt) is acceptable for use. It has a pale red or pinkish color and responds dully when tapped. The brick is quite porous, the ribs can be crumbled. It can be used in a chimney installation, but subject to additional processing.
- The third grade is burnt and not suitable for laying pipelines. Dark red, fragile, sonorous. Easily splits under the influence of temperature differences and mechanical stress.
A higher cost option is fireclay brick. More often used in the construction of fireboxes and fireplaces rather than exhaust pipes. It is a derivative of special fireclay (fireproof), mixed with quartz. Withstands temperatures up to 900C.
Advantages and disadvantages
Like any design solution, a brick chimney has its advantages and disadvantages.
Pros:
- Resistance to high flue gas temperatures;
- Brick retains heat for a long time;
- Low cost of material;
- Aesthetic appearance, style.
Minuses:
- There are turbulences in the corners of the chimney;
- Soot lingers on rough walls;
- Large weight of the structure and, accordingly, increased load on the foundation.
The service life of such a chimney
The service life of brick chimneys is short. In a good version, this is 7-12 years.
The lifespan of a pipeline can be increased by protection from the outside and inside, care and regular cleaning.
Make it yourself or order it
Tips for choosing
At the beginning of the 20th century, when gas and electric heating were unavailable, stone and brick stoves were widespread. There were many good styling professionals, much more than there are now.
If you decide to order a fireplace or stove and seek the help of a specialist, be sure to pay attention to his professionalism. To do this, it would be a good idea to look at the documents confirming his qualifications and familiarize himself with the portfolio of work. A poorly constructed chimney is life-threatening. Insufficient draft will lead to the formation of dangerous carbon monoxide, which kills more than one and a half million people every year. In addition, the occurrence of backdraft can lead to fire. Even if a disaster can be avoided, the chimney will still have to be rebuilt, and this is a double expense.
Therefore, do not skimp on a good master. But it doesn’t make sense to overpay, for example, for fireclay bricks recommended by many layers. Regular red - can withstand temperatures up to 800C, and the price is almost 2 times cheaper.
If you decide to make a chimney yourself, carefully read all the requirements of building codes and fire safety.
I will provide all the necessary ones below. In addition, you should accurately calculate the dimensions, draw up a drawing, read all the necessary literature and watch a couple of dozen videos on the topic.
The chimney can be of 3 types:
- Mounted. Here the oven serves as the base. The minimum thickness of the furnace walls is 2 bricks.
- Root. Located on a separate foundation. The smoke outlet pipe of the boiler or stove is connected to the chimney through a connecting transfer hose.
- Wall. It is a channel in a load-bearing wall.
Whatever chimney you choose, I personally recommend that when choosing to install it yourself, do not neglect the advice and supervision of a specialist. I repeat - an incorrectly laid chimney will inevitably lead to tragedy.
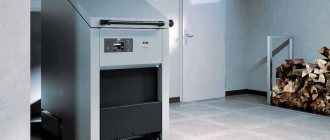
By the way, for a metal stove you don’t need a brick pipe - an ordinary iron one is enough.
Building regulations
The installation of chimneys for private houses and baths is regulated by the following building codes:
- SP 7.13130.2013 “Fire safety requirements”;
- SNiP 41-01-2003 - “Air conditioning, ventilation, heating”;
- VDPO - “Rules for production work, repair of smoke ducts and furnaces.”
Fire safety requirements for chimneys
The fire safety requirements for chimneys come down to the following main points.
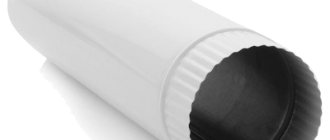
- The wall thickness of the outlet pipe must be at least 120mm;
- Between the inner layer of the roofing pie and the chimney, a fire-prevention retreat must be provided - at least 130 mm;
- When using combustible insulation in the attic floor structure, it is necessary to organize protection in the form of sand backfill;
- The fluff must end at least 70 mm from the upper and lower boundaries of the overlap;
- The distance from the inner surface of the hot chimney to the combustible ceiling structures (fireproof cutting) must be 500 mm or more;
- The walls of the furnace retreat from the combustible structural elements by at least 250 mm;
- The distance between the upper edge of the furnace and the roof slab is 350 mm for intermittently fired furnaces and 1 m for continuous furnaces. This condition applies to a stove made of three rows of bricks. If there are 2 rows, the distances need to be increased by one and a half times;
- You cannot connect two heat sources to one chimney system.
Traction force
The traction force is ensured by the correctly selected pipe cross-section and its height. The cross-section of smoke ducts made of brick is calculated based on the power of the heating device.
The height of the chimney pipe is calculated using special programs and formulas, but there is one rule - the elevation of the chimney above the ridge should be less than 500 mm (if the distance from the chimney to the ridge is less than 3 m).
In a vertical brick chimney, draft is generated by convection.
A prerequisite for the occurrence of an upward flow is the temperature difference between the ambient air and the exhaust combustion products: the greater it is, the stronger the thrust.
Therefore, for the normal functioning of the chimney, it is important to take care of its insulation. I’ll tell you how to arrange the insulation a little later.
Types of chimneys
Chimney pipes made of brick can be of two types: root and mounted. In each case, one of them is selected for construction, the one that is suitable for a particular furnace.
- Main chimneys differ from mounted chimneys in that they are not built as a continuation of the stove structure, but autonomously, next to the place where the stove will be installed, and then connected to it with a pipe.
Typical root chimney
This chimney structure is suitable for cast iron and brick heating devices, and even two or three stoves can be connected to one main chimney. Naturally, in this case, its internal cross-section must correspond to the necessary parameters for a certain number of heating devices connected to it.
If a main chimney is installed, to which a pipe from a cast-iron stove or gas-powered boiler will be connected, then it may be necessary to install a metal pipe inside the chimney duct.
The main chimney is installed on a foundation separate from the common building and stove. The depth of the foundation pit should be at least 30-50 centimeters, depending on the height and width of the chimney, and its perimeter should be 12-15 centimeters larger than the base of the chimney structure.
- The chimney pipe is a continuation of the stove design and is an integral part of it. Such a pipe is intended to remove combustion waste only for one furnace, of which it is a continuation.
Overhead type chimney
Making and installing a chimney with your own hands
Before you start assembling the chimney with your own hands, you need to familiarize yourself with the ready-made drawings and draw up your own according to your calculated dimensions. I will attach approximate drawings and diagrams for clarity.
Drawing and diagrams
Fig.1 Fluffing device:
Fig. 2. Connection diagram of the stove and chimney:
Calculation of the height of a brick pipe
For normal traction, it is necessary to correctly calculate the height of the pipe.
The optimal length from the grate is at least 5 m. This parameter varies depending on the cross-section of the pipe.
The recommended pipe height on a roof made of non-combustible materials is 0.15 m, on a roof made of combustible materials - 0.5 m.
Another calculation option is to start from the height of the ridge (as indicated in SNiP). Let me remind you that if the pipe is located at a distance of up to 1.5 m from the ridge, its height should not be less than 0.5 m above it, if further, it can be level with the ridge or higher.
If the required distance exceeds 3 m, the height of the pipeline outlet is calculated using the following method: a conditional line is drawn from the top of the ridge along the roof slope with a downward slope of 10 degrees relative to the horizontal. Such calculations must be made on the drawing.
Calculation of the chimney cross-section
Let us summarize the data on the dependence of the chimney cross-section on the power of the heating device in a table:
| Power, kWt) | Pipe cross-section dimensions (mm) |
| <3,5 | 140×140 |
| 3,5-5,2 | 140×200 |
| 5,2-7 | 200×270 |
| >7 | 270×270 |
If the furnace power is unknown, it can be approximately calculated using the formula:
W=Vt*0.63*0.8*E/t
Where:
- W – heat generator power, kW;
- Vt – firebox volume, m3;
- 0.63 – furnace load factor;
- 0.8 – fuel combustion coefficient;
- E – calorific value of fuel, kW*h/m3. Depends on the type of wood and the moisture content of the wood;
| Wood species | Calorific value E, at wood moisture content | ||
| 12% | 25% | 50% | |
| Poplar | 1856 | 1448 | 636 |
| Spruce | 2088 | 1625 | 715 |
| Pine | 2413 | 1882 | 826 |
| Birch | 3016 | 2352 | 1033 |
| Oak | 3758 | 2932 | 1287 |
- T is the burning time of one load of fuel.
This formula only applies to stoves and does not apply to fireplaces.
Chimney laying
There is no fundamental difference between the laying of the solid furnace and chimneys. It is carried out on clay-sand mortar using the same tools - a furnace hammer-pick, trowel and plumb line. However, elements such as fluff and otter are laid out using a large number of brick parts measuring 1/8, 1/4, 1/2 and 3/4 of the whole.
To avoid chopping and cleaving, which are accompanied by clouds of brick dust and rarely give the desired result, you should use a grinder with a diamond wheel for ceramics. This guarantees the accuracy of the work, eliminates tedious work and a lot of useless brickwork.
Solution
For masonry up to the roof level, a mixture of sand and clay is used, since it has a coefficient of linear expansion similar to brick, which is a certain guarantee against the appearance of cracks.
Pure clay used as a binder can be either oily or lean. In some places there are deposits where the proportional ratio of the amount of clay to sand is optimal by nature: one to three or four.
When the volumetric part of the clay increases, the solution cracks after drying, and when it decreases, it crumbles. To determine the optimal ratio of volumetric parts, you need to knead the finished solution in your fingers. It should not be noticeably slippery or rough like sandpaper.
The excavated clay is soaked in an iron container for 3–4 days. The result should be a homogeneous clay pulp without stones, similar in consistency to liquid sour cream.
The sand taken from the floodplains of streams and rivers is very fine and dusty. It is not suitable for masonry. It is better to use one that consists of grains of 0.8–1 mm. It feels rough to the touch.
Clay and sand are mixed in volumetric parts in a ratio of one to three or four. Water is added gradually, in small portions. The finished solution should leave marks on the trowel (but not stick to it) and should not drain from it.
To avoid errors in proportions, it is better to buy a ready-made dry clay-sand masonry mixture. Please note that those marked “fireproof” are not suitable for masonry.
Brick
Red solid burnt brick is used.
Its edges should be smooth, without cracks, and the sound produced when it is lightly struck with a furnace hammer should be clear.
The standard size used for masonry is length 250, width 125 and height 75 mm.
Laying the internal chimney
It begins immediately after the damper is installed and the furnace roof is completed. The masonry techniques are the same - applying a layer of mortar, laying the brick, “shaking” it with your hand and lightly tapping it with a pick. Verticality and horizontality are checked after laying each row. They finish it four brick heights before the ceiling.
How to choose an expansion tank for a closed heating system? Do you want to know how to quickly and inexpensively make a reliable chimney from asbestos? Read here.
Find out how to make a septic tank from concrete rings with your own hands from this article:
https://klimatlab.com/kanalizaciya/septiki/iz-betonnyx-kolec-svoimi-rukami-sxema.html
Laying fluff
The expansion of the thickness of the chimney walls is carried out to comply with the requirement that combustible structures be located at a distance of 250 mm “from the smoke”. The usual thickness of the chimney walls is 125 mm. To double it, you need to fold four rows, each of which moves outward by 1/8 of the width of the brick relative to the bottom one - just the amount that allows the brick to lie without flipping over. The principle of masonry for all three sizes is the same:
- The inner surface (toward the smoke) of the first row is laid out in 1/8 sections. The gaps between the outer bricks are filled in 1/4 sections.
- In the second row, the parts increase, respectively, to 1/4 and 1/2.
- The third row uses 1/2 and 3/4 pieces.
- The outer belt of the fourth row of fluff is laid out with whole bricks.
Having reached the ceiling, it is placed, observing the dressing of the seams, another two or three rows higher. A gap of 2–3 cm is left between the ceiling and it to eliminate pressure from the structure on the masonry. It is covered with mineral wool slabs. Laying up to the roof is carried out in the usual manner - with ligation of vertical seams and control of verticality.
Otter clutch
It begins after the edge of the chimney brick has risen above the roof. It is carried out outside, in compliance with all safety measures when working at height. You can use cement mortar. They start it from the edge that is lower along the slope. The distance from the smoke on each row is equal to 1/8 of the width of the brick. There should be a total of six rows in the otter. After it they put a neck - the usual continuation of the chimney. The gaps between the roof and the chimney are covered with a “collar” made of sheet roofing steel.
Head masonry
This is a chimney deflector that prevents smoke from clogging into the chimney due to air turbulence.
It is laid out in two rows, moving the first from the smoke by 1/8 of the brick, and the second by 1/2.
Its protrusions can be used to hook the clamps of the metal cap, which prevents precipitation from entering the pipe.
Installation features
The simplest option for installation is a mounted chimney. How to lay out a pipe with your own hands? Let's consider the method of laying a classic chimney for a sauna stove:
- We calculate the parameters of the chimney using one of the methods given above;
The standard channel cross-section for a sauna stove is 250x120mm, which is exactly the size of a red brick; in addition, you will need half bricks. They can be bought or cut off;
The mortar is laid with a thickness of no more than 1 cm, preferably a clay composition with the addition of cement;
- We prepare everything necessary - bricks, mortar, tools;
- Take measurements for fluff, gate and otter;
- Laying should begin from the stove, checking each row with a building level. Periodically clean the channel of excess solution;
- Advice - after laying the first two or three rows of bricks, fasten ropes at the corners of the future chimney and stretch them to the ceiling (strictly vertically). They are used to control the position of the chimney;
- It is necessary to secure the frame at the installation site of the gate valve;
- Continue laying the brick until it is fluffy. Before installing the fluff, it is necessary to count the number of its rows. In one row, the diameter of the channel increases by ¼ of the width of the brick. The brick terminals must be tightly attached to the floor beams, there should be no gaps between them, otherwise the chimney will wobble
- The fluff should be placed according to the diagram (see above, Fig. 1). It can be changed based on your size;
- After laying the fluff, we continue laying the chimney;
- We begin to lay the otter from the underside of the roof; the increase in the cross-section of the chimney when laying the otter should take into account the slope of the roof slope, gradually;
- Advice - to increase stability, metal plates should be embedded in the otter;
- If necessary, trim the ends of the bricks;
- Head device. To do this, we increase the outer perimeter by a quarter of a brick;
- Finish row. We install a bird net in it. We fasten the protective cap on top with dowels.
Phased construction of the pipe
There are clear instructions for constructing a chimney. When constructing yourself, it is recommended to follow all the rules and use pre-prepared diagrams.
Preparatory stage
To perform the work efficiently, careful preparation is necessary. At this stage, you should familiarize yourself with possible drawings and diagrams of brick structures and choose the best option. At this stage, you can reflect all the characteristics of the future system in the drawing. The design of a brick chimney for a fireplace has some features that depend on the type of stove itself. In models heated with wood, there is enough brickwork. But for models connected to gas, a metal pipe should be placed inside the device.
You will need at least a sheet of steel
Preliminary work includes laying a rectangular foundation. It should not exceed 40 centimeters in height. It is made no more than 20 centimeters in width. Made from concrete or brick using any of the available methods:
- The formwork is installed according to the required dimensions, and the finished concrete composition is poured into it.
- According to preliminary markings, solid fire-resistant bricks are laid. Usually the brand “M200” and other products with higher performance are used.
For subsequent installation work, equipment preparation will be required . When installing a chimney for a fireplace you will need:
- fire brick;
- special solution;
- tool;
- materials for thermal insulation;
- sheet steel;
- power tool.
The solution is prepared from cement, water, fine river sand, and clay. It is advisable to include all the necessary devices in the list of working tools: trowel, plumb line, level, etc.
Main stage of work
Before laying bricks, you should determine the cross-section of the future chimney. It should be taken into account that the smoke will move in a spiral as it moves towards the exit. Due to this feature, it is recommended to make round channels. But it is very difficult to build such a structure from brick.
It makes more sense to lay out a square chimney, the size of which depends on the fireplace portal. A portal is an external design with a recess for installing the main device - a fireplace. The external device can be open or closed.
A closed-type portal is laid out in the shape of a rectangle 15x25 cm. An open portal has the shape of a square with a size of 25x25 cm. The laying begins with the arrangement of a mounted pipe and moves from top to bottom. It is imperative to adhere to the dressing of seams between rows. They should not exceed 1.5 cm in thickness. These parameters must be maintained throughout the entire working process.
The mounted pipe is erected up to the ceiling on the roof (a distance of at least 6 rows must be maintained from the ceiling). The surface inside the structure is plastered so that smoke can move out freely. At the same time, you should not lay it in a thick layer, narrowing the passage.
If a chimney is built near a wall, metal pins are used for additional fastening. One end is fixed in the wall, the other in the brickwork at a distance of 30 cm from each other.
After laying the last row, check the vertical and horizontal of the building. Only after this is it permissible to proceed to the most difficult moment in construction - laying the fluff, seal and riser.
It is possible to make a chimney correctly for a fireplace with the safest installation of the fluff. The walls of this device must be at least one brick thick in length. By moving the bricks by ¼ in each row, the structure is gradually expanded.
To simplify the work, in some cases a concrete box is used instead of brickwork. The internal space of the device is filled with sand, pebbles, and expanded clay. It is erected around the chimney pipe as follows:
- They install formwork that rises 10 cm above the ceiling. Its fastenings must be reliable. The presence of cracks in the structure should also be excluded.
- To facilitate dismantling work, the formwork is covered from the inside with a mixture of sand and clay. In this case, the boards will not stick to the concrete.
- After completing the preparatory work, they proceed to reinforcement. It looks like a rigid connection of brickwork with metal rods.
- It is better to make the working solution from high-quality cement. Filler and sand are added to it, mixed and poured. The reinforcement must be hidden under cement.
- The formwork is dismantled after the cement has completely dried.
Work should be done diligently. After removing the formwork, a flat surface should remain. This is necessary for high-quality and easy brick laying of the fluff.
For maximum protection of the ceiling, it is necessary to make a steel edging. Glass wool, previously soaked in a clay solution, is placed in the gap in the ceiling. Insulating material is laid on the sides.
When the fluff is ready, the construction of the riser continues. Its size is similar to the mounted pipe. The only difference is plastering, which is carried out on both sides at once: internal and external. To preserve the integrity of the pipe in winter, it is wrapped in heat-resistant insulating raw materials.
A roof is mounted on the roof and the pipe is slightly expanded. Before installing the roof and waterproofing, a galvanized metal casing is made around the perimeter of the pipe. It will protect the roof from the flow of natural precipitation into the room.
Final phase
At the last stage of construction, the neck of the structure is equipped. Its structure is similar to a riser. Its height depends on the degree of distance from the ridge. Next, they begin to build the head. Its structure is similar to fluff. Upon completion of the work, the craftsmen advise installing a weather vane and cap.
Frequent errors and problems during installation
The main mistakes made when laying a chimney yourself.
- Choosing low-quality bricks;
- The seams are too thick;
- Incorrect composition of the solution;
- Incorrect calculation of the height of the chimney;
- Failure to maintain uniformity when laying the channel;
- Failure to comply with fire safety requirements listed above.
Due to errors in installation, turbulence, loss of channel tightness, and poor traction occur. All this leads to a deterioration in the performance properties of the chimney.
Maintenance and cleaning
During operation, soot deposits form on the pipe walls, which must be removed. Professionals recommend cleaning the chimney at least 2 times a year - at the beginning and at the end of the heating season.
There are several cleaning methods:
- Traditional methods
Periodic burning of aspen wood and potato peelings helps to blow away all the soot from the walls of the chimney;
- Chemical method
A special chimney-sweeping log is impregnated with chemical compounds that interact with deposits in the pipe and contribute to their destruction;
- Mechanical cleaning
The most effective method. For mechanical cleaning, you can invite a professional with special equipment, or you can try cleaning it yourself using a brush. Cleaning occurs not only from the roof, but also from below, through the cleaning doors.
Expert advice
Sometimes starting a fire can be difficult. One of the reasons is the presence of condensate, which impairs the movement of gases.
If the chimney is not insulated, heat transfer from hot gases to the environment is observed. When there is a significant difference in temperature inside and outside the chimney, a “dew point” occurs. At this point, the condensate vapor is converted to liquid. This liquid destroys the chimney.
Therefore, it is recommended to insulate the chimney pipe. In this case, all combustion products come out only in a gaseous state.
How to insulate
The easiest way to insulate the outside of brickwork is plaster finishing. To do this, a special mesh is put on the pipe, onto which several layers of plaster are applied. Practice shows that the lifespan of a smoke exhaust protected in this way increases by 2-3 times.
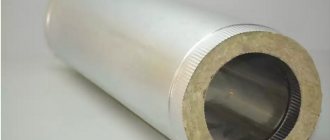
In addition, materials with a low heat transfer coefficient are used for insulation - mineral wool, glass wool, basalt fiber.
In recent years, polystyrene concrete has become popular for insulation. It can be used to make a protective casing for a chimney of any shape.
Some would-be craftsmen line the chimney with insulation without installing a metal casing, and cover the entire structure with foil on top. Such a system is fundamentally wrong and will do more harm than good.
Disadvantages of a brick chimney
The latest models of gas boiler operate on the principle of economical consumption of resources. The heating gas is turned on when the temperature sensor is triggered, reaching the set temperature, and turns off. The chimney cools down and condensation forms in it. Natural gas contains various microelements in small quantities. When reacting with water, combustion products form solutions of hydrochloric, nitric and sulfuric acids.
An aggressive environment is formed inside the channel, which leads to rapid destruction of the brick and cracking of the seams. Every 5 years the pipe must be repaired. The gas service has many requirements for such chimneys, and inspectors are very demanding at the time the facility is put into operation. Low cost is a significant, but the only advantage of mono-brick chimneys. It is possible to repurpose an existing duct into a chimney for a gas boiler only if special liners made of steel or ceramics are used.
Many builders by “brick chimney” mean combinations of brick with stainless steel, ceramics or asbestos cement. Outwardly, it looks like wells made of stone, and liners made of other materials are not visible. Such systems almost completely eliminate the disadvantages of monolithic stone structures, but are significantly less expensive.