Creating an optimal ambient temperature for living is simply necessary for comfortable living in the house. Today there are many ways to heat a living space.
One of the most effective and economical installations is the installation of a wall-mounted gas boiler. Gas heating will significantly save the family budget. Its installation will not require much labor or special equipment, and the use of such equipment does not cause any great difficulties.
Is it possible to install the equipment yourself?
Installing a wall-mounted gas boiler is not the easiest task. The safety of the residents of the house directly depends on the correctness and quality of the settings. Therefore, the requirements for the installation of a gas heat generator are regulated by strict standards, in accordance with the legislative framework of Russia.
As a result, installing a wall-mounted gas boiler is a very difficult task, and often beyond the capabilities of a beginner. Special knowledge is required on how to properly install and connect the equipment so that it works properly and is safe.
Features of installing boilers in apartment buildings
To create an autonomous heating system, it is necessary to install a gas boiler in an apartment building, the requirements for it are almost the same. For autonomous systems of apartment buildings, turbocharged boilers with a closed combustion chamber are selected. References to SNiP, which prohibits the installation of boiler houses in multi-storey buildings, do not stand up to criticism.
SNiP was developed back in the last century. Subject to the appropriate technical requirements for the premises for the installation of modern gas equipment, boilers for autonomous heating can be installed. After all, modern insulated combustion chambers of boilers ensure safety and comfort in the home.
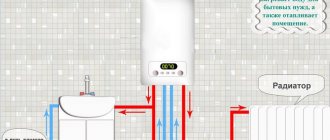
If permission has been received to create an autonomous heating system in an apartment building, then the most rational solution would be to install a double-circuit gas boiler in the apartment to provide hot water. The apartment was connected to central heating, which means that when installing a separate heating system, you will need to disconnect from it and install a closed autonomous system. This means that you will need to install heating radiators, connect them with pipelines, which are connected to the installed boiler.
Before connecting the circuit to the boiler, it is necessary, and without fail, to pressure test the system with air or liquid pressure. For a new system, the pressure must exceed the operating pressure by 2 times. In principle, connecting a gas boiler to the heating system does not matter; it is carried out after testing, but connecting to the gas main and starting the boiler can only be carried out by licensed gas service workers.
The first time, after starting the autonomous heating, you need to monitor and make sure that the boiler and its automation are working correctly. When the set coolant temperature is reached, the boiler should automatically turn off. If this does not happen, then it makes no sense to ask why the gas boiler does not turn off. A serious malfunction has occurred. Either the control unit has failed or the sensor is faulty. In this case, you need to call specialists who are qualified to repair gas boilers.
Initial work
Before starting repair work to put the equipment into operation, it is necessary to collect a number of documents allowing such work to be carried out:
- Contract for gas supply at home.
- A diagram of the heating system and technical specifications with equipment settings, approved by the relevant authorities.
- Official consent of the gas inspector to carry out the work.
It often happens that setting up a gas boiler in a private house takes less time and effort than preparing documentation and putting it into operation.
You have JavaScript disabled.
1. Until now, mandatory clauses of standardization documents included in the List of National Standards and Codes of Practice are in effect, as a result of which, on a mandatory basis, compliance with the requirements of the “Technical Regulations on the Safety of Buildings and Structures” is ensured, including clause 6.25 of the Code of Practice SP 89.13330.2012 Boiler installations, as stated in paragraph 6 of the Order of the Ministry of Construction of Russia dated 02/10/2017 No. 86/pr “On amendments to some orders of the Ministry of Construction and Housing and Communal Services of the Russian Federation”:
“Clause 2 of the order of the Ministry of Construction of Russia dated December 16, 2021 No. 944/pr “On approval of SP 89.13330 “SNiP P-35-76 Boiler installations” should be stated as follows:
"2. From the moment of entry into force of SP 89.13330 “SNiP II-35-76 Boiler installations”, SP 89.13330.2012 “SNiP II-35-76 Boiler installations”, approved by order of the Ministry of Regional Development of the Russian Federation dated June 30, 2012 No. 281, with the exception of paragraphs SP 89.13330.2012 “SNiP II-35-76 Boiler installations” included in the List of national standards and codes of practice (parts of such standards and codes of practice), as a result of which application on a mandatory basis ensures compliance with the requirements of the Federal Law “ Technical Regulations on the Safety of Buildings and Structures", approved by Decree of the Government of the Russian Federation of December 26, 2014 No. 1521 (hereinafter referred to as the List), until appropriate changes are made to the List "".
Thus, the amended provisions of paragraphs of SP 89.13330.2016 Boiler installations that comply with the provisions of the mandatory paragraphs of SP 89.13330.2012 can be applied on a voluntary basis in agreement with the customer, provided that these provisions do not reduce the requirements of the mandatory paragraphs.
Considering the above, the comment in question received from the customer is legitimate.
2. At the same time, please take into account that the draft new Decree of the Government of the Russian Federation “On approval of the List of national standards and sets of rules (parts of such standards and sets of rules), as a result of which application on a mandatory basis ensures compliance with the requirements of the federal law “Technical Regulations on the Safety of Buildings and Structures” (see information at:). At the same time, clause 6.25 of SP 89.13330.2016 is included in the above draft List.
Step-by-step installation of equipment
Before starting installation work, you should remove all packaging elements and check that the unit is complete. The presence of all necessary parts can be checked according to the list in the attached operating instructions.
If any elements are missing, you should immediately replace the heat generator from the supplier.
Photo from source https://avtovelomoto.by
- Carefully inspect the appearance of the boiler itself, as well as each element for installing the system. There should be no dents or signs of ongoing repair work on the equipment.
- Check all the performance characteristics specified in the data sheet with those on the unit itself.
- Before installation, it is worth flushing all existing pipes, since debris, dust or packaging elements may remain in them. Heating lines should also be cleaned.
To install a wall-mounted boiler in a wooden house, double-circuit appliances with a closed heating system are most often used. Therefore, it is worth describing in detail the installation work of just such equipment.
Stage 1. Installation of the wall mounting system
To properly hang the unit on the wall, you must use special brackets. They must support the weight of the boiler and its equipment, and, at the same time, keep it in one level position, avoiding tilts and distortions. Usually they are already included with the heating heat generator. Fasteners for strengthening them must be selected in accordance with the characteristics of the wall material.
Special markings must be applied to the wall, which will indicate the exact location of each element of heating equipment. This is done using a special paper stencil, which should be included with the equipment. It will help you mark the exact locations for the holes for the fasteners.
After the brackets are securely fastened to the wall, the boiler itself can be hung on them. For heating, in addition to the gas boiler itself, you will need to install pipes for supplying coolant.
Stage 2. Installation of pipes for the heating system
Since the heating system may vary, the number of connected pipes may vary. But, in any case, you first need to remove the plugs from the heating pipes.
To protect the boiler from dirt particles getting inside along with the water coming from the well (from the central water supply), it is worth connecting the return inlet with a strainer. If the tap water is too hard, you need to consider additional equipment to prevent scale from accumulating on the walls of the heating system. Otherwise, the heating boiler will serve for a much shorter period.
All connections must be made in strict accordance with all rules and regulations. It is imperative to reliably seal each fastener, not only for safety, but also to save gas. The sealant can be paint, tow, or modern materials for sealing threads.
Experts also advise installing shut-off valves, both on the supply and return side.
This will greatly simplify equipment repair if any malfunction occurs. Also, the presence of taps will help correct the airing of radiator batteries.
Stage 3. Connection to the water circuit
Work on connecting water is the same as when installing heating pipes. They differ only in the diameter of the pipes and the use of taps.
The cold water supply must be equipped with a filter to prevent excess particles from entering the heat generator, which can damage all equipment.
Stage 4. Launch of the gas pipeline
The launch of a wall-mounted heat generator can only be carried out by an inspector from a gas supply organization with permission, because any mistake at this stage can turn out to be very disastrous. Before setting up the gas line and putting the boiler into operation, the correct connection is checked again by a specialist.
Before starting the boiler, he will make sure that the installation standards for the gas boiler are met. The first launch is also carried out with it.
Stage 5. Connecting to the electricity network
This is only relevant for units with a closed chamber, since they run on electricity. Usually a standard three-wire circuit is sufficient. Experts advise connecting the boiler to electricity only with the help of a stabilizer, which will protect the system from power surges and will not allow the equipment to fail.
We recommend: How to choose a stabilizer and what it is needed for
Stage 6. Connection to the chimney
It is quite simple to connect equipment with a closed combustion chamber to the chimney. For this purpose, special coaxial pipes are prepared. If the boiler is installed in an apartment building, it must be connected to a common chimney.
When installing an open gas boiler in a private house, it is necessary to have an individual chimney. The device is connected to it using a pipe of a certain cross-section. If the chimney has been previously used, it must be thoroughly cleaned of soot and possible debris. The pipe should be installed at a slight angle towards the boiler.
Requirements for the chimney device
The rules for installing a gas boiler in a private house are supplemented by the rules for installing a chimney if the unit has an open combustion chamber. The following requirements apply to the chimney installation:
- The pipe cannot have more than 3 turns.
- The section connecting the boiler pipe and the chimney has a length of no more than 25 cm.
- The diameter of the pipe must correspond to the power of the unit.
- The edge of the chimney is placed at least 50 cm above the ridge of the roof.
- The hole for the pipe to pass through the ceiling is made larger than the diameter of the chimney. Fire-resistant material is placed between it and the ceiling material.
- To ensure the collection of condensate and soot during cleaning, a condensate collector should be provided at the bottom of the pipe.
When installing a gas boiler with your own hands, it is important to comply with all the requirements for the placement of a specific model of the unit. Otherwise, the gas supply company will not give permission to operate incorrectly installed equipment.
Placement of the heat generator, room requirements
For the room in which gas equipment will be located, there are strict requirements :
- It is not permitted to install a gas-fired heating unit in the bathroom or living area of the house. It is allowed to place the equipment in the kitchen or other non-residential premises. Installation on any floor of the building is allowed. But an external extension or even a separate boiler room is best suited for gas equipment.
- It is allowed to install a heating system only in rooms with a ceiling height of at least two meters and an area of at least 7.5 sq.m.
- Be sure to have windows facing the street.
- It is necessary to consider the supply and exhaust ventilation of the room. If the heat generator is installed in the kitchen, then a window for ventilation is suitable.
- The panel of the suspended boiler must be located at a distance of at least 125 cm from walls or other objects.
- In the kitchen it is allowed to install a gas unit with a power of up to 60 kW, in extensions and corridors - up to 150 kW. There is no maximum power for an outdoor boiler room.
General requirements for installing a gas unit
The first standard that needs to be taken into account when choosing a gas boiler is whether the power of the device matches the area of the heated room. Optimal performance is calculated using special formulas.
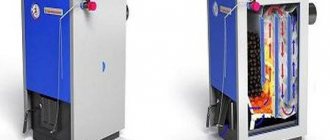
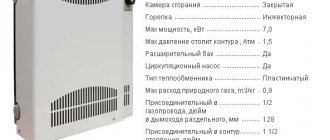
There are models of gas boilers with different characteristics: floor-mounted, wall-mounted, with open or closed combustion chambers.
To install units with an open firebox (atmospheric), a full-fledged chimney is required, so such models are mainly used for heating private houses. Boilers with an open chamber may only be installed in a separate, specially equipped room - a boiler room or furnace room.
A gas device with a closed firebox (turbocharged) only needs to connect a coaxial chimney to exhaust smoke. It consists of two pipes and simultaneously ensures the removal of smoke and the flow of air masses to the burner device. Such a unit can be installed in any non-residential premises, for example, a kitchen, hallway or bathroom. The main thing is that it meets all the requirements of SNiP. However, if your device with a closed combustion chamber has a power of more than 60 kW, then you will also have to look for a separate room for it - a boiler room.
…
Note! For an apartment in an apartment building, the installation of gas devices with a total capacity of up to 150 kW is allowed.
Norms and rules for installing a wall-mounted gas boiler
Since any little things during the installation of a heating system can lead to serious consequences, the law prescribes strict rules for the installation of gas equipment. They relate to the location of the boiler indoors, the decoration of the walls and the installation of the heating system itself.
At what height should a gas boiler be hung on the wall?
There are also instructions on what height to hang a gas boiler on the wall. The minimum installation height for the boiler is 80 cm from the floor. The optimal height of the structure is 1 - 1.2 m above the floor surface.
Fire safety when installing a mounted boiler
Installation of a wall-mounted gas boiler in a wooden house requires compliance with strict fire safety rules:
It is prohibited to install a gas system with an open combustion chamber in the basement of a house.
- Closed heat generators can be installed in any non-residential room of the house.
- To install a boiler in an attic, good thermal insulation is necessary.
- The boiler room must be fenced with fireproof partitions.
- Doors must open outwards.
- It is advisable to equip the premises with a fire alarm.
How and with what to finish the walls behind a gas boiler
All surfaces, including the floor, ceiling and walls, must be lined with non-combustible materials. These can be asbestos slabs covered with stainless or galvanized steel. The same rules apply to floor-standing heat generators.
In a wooden house, the wall must be covered with a basalt seal, the thickness of which must be at least 50 mm. From the outside, such insulation is covered with steel sheets.
Where to put
It is allowed to install a wall-mounted gas boiler in non-residential rooms of the house or in a separate boiler room. Usually a corridor or kitchen is chosen for this. Only a heat generator with a closed combustion chamber can be installed in the basement.
The safest option is to install a gas wall-mounted boiler in an extension or a separate boiler room.
Requirements for kitchens in which a gas-fired boiler is installed
If the boiler is installed in the kitchen, then a prerequisite is the presence of a large window facing the street, as well as a ventilation system.
The area of the room must exceed 7.5 sq.m. The kitchen should not be used as a living room. A door is required.
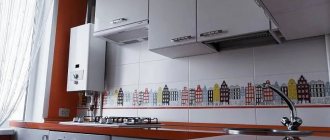
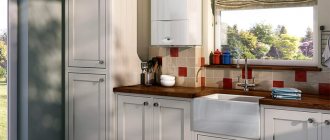
The boiler can be mounted in a special box, which will be disguised as one of the cabinets. But this option is not possible in all cases. Another installation option is to decorate the boiler with a decorative panel made of non-combustible materials.
How to attach boiler rooms
Attached boiler rooms are usually located in an isolated room in a separate extension to the house or even stand-alone. This option for arranging gas equipment is the safest. In addition, in a separate extension it is allowed to install a boiler of any power, while inside a residential building the power of gas equipment is strictly limited.
A separate boiler room is connected to the living quarters using utilities. They are connected to heating mains, gas and water supply, and electricity.
Read more: Outdoor gas boilers, installation requirements
Rules for installing gas boilers
A floor-standing boiler was installed according to the rules. Everyone knows that gas boilers in the same model range differ in the installation method.
There are two groups here - floor and wall units. Their difference is not only that they are mounted differently, but also in different technical characteristics. They differ especially from each other in power. Floor-standing units are more powerful, while wall-mounted units are low-power. Hence their overall dimensions. Therefore, wall structures are most often installed in apartments, and floor structures are installed in private housing construction.
Requirements for floor-standing units:
- Organization of a separate room where a through hole for air flow is installed in the front door, or a window with a window is installed. The ideal solution is to install a ventilation system where air is removed from the room through a hole in the ceiling.
- Installation of a sealed chimney for a floor-standing boiler. Very often, if a high-power gas boiler is used, a double chimney is installed like a pipe in a pipe. This provides a 100% guarantee of the absolute tightness of the chimney structure.
- The boiler room itself should be spacious with free access to the heating unit for maintenance and repair work. The boiler room must be provided with water supply and sewerage.
- Since floor-standing models have significant weight, a durable floor made of non-combustible materials must be constructed under them. This could be a concrete screed, stone, paving stones, ceramic tiles, etc.
- The front door must meet certain dimensions. The minimum door width is 80 cm. SNiP also determines the minimum dimensions of the room for the boiler room. But life makes its own demands, so the optimal dimensions of the furnace room for the lowest-power floor-standing units are as follows: an area of 4 m², a ceiling height of at least 2.5 m.
- All electrical wiring for the floor-standing unit must be of a hidden type. A separate distribution panel must be installed in the boiler room.
- The walls are finished only with non-combustible materials - plaster, facing bricks, ceramic tiles and so on. It is prohibited to store flammable substances in the boiler room. Do not install a chimney exhaust or ventilation air intake nearby. Both systems should be located in different parts of the room.
Requirements for wall-mounted units
Minimum distance requirements
With this option everything is much simpler. Being installed in the kitchen, it is provided with sewerage, water supply, ventilation, and a gas line. That is, installation and connection costs are reduced significantly, and the cost of the work performed is reduced.
But there are some requirements that must be taken into account:
- Firstly, installing a wall-mounted gas boiler is only possible on a solid wall that can support its weight. Plasterboard or plywood partitions are not suitable for this.
- If the walls have already been finished before installing the gas appliance, and flammable materials were used, then a sheet of non-combustible material with a thickness of at least 3 mm must be installed under the boiler.
- There are minimum distances from the installed gas boiler to the supporting structures of the building. To the walls and ceiling - 0.5 m, to the floor - 0.8 m.
It is prohibited to connect gas boilers with your own hands. This is especially true for the gas pipeline. This has its own requirements, the main one of which is having permission to perform this type of work. If you have it, then there is no problem - you can do everything yourself.
You can adjust the boiler yourself, but we recommend entrusting the first adjustment to a professional
Here it is important to carry out everything in full compliance with the requirements specified in the instructions for the gas boiler
