Why is thermal insulation needed?
The role of the thermal insulation material is that, due to its poor thermal conductivity, the transfer of energy through the layer of material is difficult. Thus, you can not only preserve the heat that the fireplace produces, but also protect the structural elements of the house from high temperatures.
Chimney insulation serves several purposes.
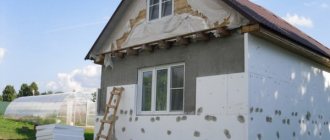
- At the external location of the pipe, intense heat exchange occurs with the cold air of the street space. A huge part of the amount of heat is released into the atmosphere, but could be used to heat the room. If you reduce this share, you will achieve higher efficiency indicators. The solution to this issue will be insulation, which is applied on top of the walls of the chimney.
- Combustion products that are emitted through the chimney contain carbon dioxide and water vapor. The temperature of all this gas exceeds a hundred degrees. Upon contact with the chimney walls, which have cooled from the external environment, condensation forms on the surface of the latter. Acids, which are a combustion product, are mixed into it. The result is a chemically active environment, leading to the destruction of the walls. The appearance of condensation can only be avoided by increasing the temperature of the pipe itself, that is, by providing it with high-quality insulation.
- In places where the chimney pipe passes through the ceiling or roof, contact of materials necessarily occurs. In the case of wooden buildings, this situation is a fire hazard. But an additional function of insulation will be to protect the ceiling surfaces.
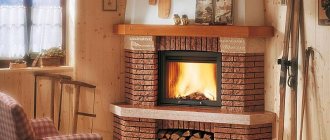
Corner placement option
Internal insulation of fireplaces implies the localization of energy inside the firebox for the purpose of its directed transmission. The fireplace should not emit heat in all directions, especially if it is installed near a wall. It should warm those sitting directly in front of the fireplace. Special reflectors for fireplaces are installed inside the firebox and serve as a screen from infrared radiation. As a result, all the heat escapes through the combustion hole into the room.
Reliable thermal insulation for stoves and fireplaces means protecting the walls of the building from the negative effects of temperature. When the fireplace is located close to the wall, a heat-protective layer is installed, since high temperatures can lead to destruction of the brickwork of the wall or fire if the building is wooden.
The need for thermal insulation
The feasibility of insulation is due to several reasons.
- The thermal insulation of the chimney prevents its rapid cooling. Accordingly, the heat in the house is maintained for a longer period of time;
- thermal insulation prevents heating of the home structure;
- Perhaps the most compelling reason is the accumulation of condensate in an uninsulated chimney pipe, the impact of which destroys the chimney structure. This problem applies not only to stove heating systems, but also to modern gas boilers.
During operation of the stove or fireplace, oxygen vapor accumulates in the chimney. As the ambient temperature decreases, its amount increases. It should be understood that condensation is by no means simple dampness, but in fact a very aggressive substance, which is a mixture of moisture and acids.
Condensation can lead to serious damage to both the heating system and individual structural elements of the house, reducing the effectiveness of facade insulation to zero. But, of course, due to condensation, the materials used to create the chimney are destroyed first.
- if the work on insulating the chimney pipe with your own hands is carried out at a high professional level, you will have to clean the toxic gas exhaust system less often, because less soot will be deposited on its walls;
Good to know! It is allowed to insulate not the entire pipe.
In some cases, it is possible to partially insulate the pipe, paying attention only to problem areas
As for thermal insulation of an iron chimney pipe with your own hands, here you need to listen to the recommendations of professionals.
- it is mandatory to insulate the outer part;
- It is also advisable to insulate the area between the roof and the attic floor. Although the attic is warmer than outside, in a cold winter the process of moisture condensation can begin there;
- It is worthwhile to insulate the pipe in the house itself, unless taking into account fire safety requirements. In addition, the risk of getting burned is minimized.
Requirements for thermal insulation materials
At its core, a fireplace is the same stove with an open firebox and chimney, equipped with decorations. These products do not have any other design features, therefore the approach to their installation and equipment is the same. Thermal insulation, accordingly, is carried out separately for the firebox and for the chimney and must meet the following requirements:
- Low thermal conductivity
- Environmental friendliness
- High fire resistance
- Durability
- Maximum permissible heating temperature
The materials must retain the listed properties in full throughout their entire service life.
Requirements for a metal chimney
Before insulating the chimney, you need to familiarize yourself with the basic standards and requirements for it:
- The pipe must have a height of at least five meters. Only in this way can you be sure that the traction will not function worse over time;
- The distance between the ceiling and the pipe must be at least 300 millimeters;
- If materials such as roofing felt, slate, or ondulin (flammable) were used as finishing materials for the roof, the pipe must be equipped with a special spark arrester.
Sealing metal pipes
Non-combustible chimney insulation
Important: when carrying out insulation with your own hands, the optimal and safe distance between the ceiling and the stove should be at least 1-2 meters.
Overview of the thermal insulation materials market
The following will provide comparative characteristics of the materials available for free sale.
Rockwool Firebats
Due to its attractive price and high availability, it is the most popular product in the field of application in question. Composition: 100% stone (gabbro-basalt) wool. Available in two types: uncoated and with aluminum foil on one side. The maximum permissible temperature on the foil side is +500°C, on the cotton side +750°C. Slab size 1000*600*30 mm, density 100 kg/m3.
The thermal conductivity coefficient at +300°C is 0.088 W/m*K. The option without foil is not flammable, with foil the flammability class is G1. When choosing this material, it is very important to calculate the peak temperature of the firebox, since overheating may cause the foil to peel off and an unpleasant odor to spread throughout the room along with microparticles of cotton wool fibers. Insulator slabs are highly flexible and therefore are mounted in a rigid metal frame.
Vermiculite
A natural mineral from the hydromica group, the layered structure of which forms multi-colored threads when heated. Fire retardant materials are produced from it by pressing. In addition to fireboxes, it is used in the aviation and automotive industries, as well as in nuclear energy as a reflector and absorber of gamma radiation. The material is presented in two products on the market:
- VermixFireproof. Country of origin - Russia, thermal conductivity coefficient at +300°C - 0.18 W/m*K, plate size 600*600*30 mm, density 300 kg/m3, permissible temperature +800°C. Among the advantages are ease of processing and installation; a rigid frame is not required. There are also disadvantages - the material is afraid of moisture.
- Skamolex is a vermiculite thermal insulator imported from Denmark. It is a symbiosis of refractory and decorative panels with various design solutions. Thermal conductivity at +200°C is 0.16 W/m*K, plate size 1000*610*25 mm, density 600 kg/m3, peak temperature +1100°C. Advantages: does not require subsequent finishing treatment - according to the “set it and forget it” principle, used for lining fireboxes. The downside is the high cost; depending on the region of the Russian Federation, the price of a slab can be 5 times higher than a slab of the same area Vermix Ogneupor.
Based on calcium silicate
The next series of thermal insulators is calcium silicate - an inorganic substance in the form of a calcium salt and metasilicon acid. The mineral is presented on the market in the following versions:
- Silca 250km. Imported from Germany. Slabs measuring 1000*625*40 are designed for use in stoves, fireplaces and brick chimneys. Density 250 kg/m3, thermal conductivity coefficient 0.09 W/m*K at +200°C, application temperature +1100°C. The structure of the board is not fibrous, it can act as both an insulator and a facing material, and is absolutely harmless to human health. The installation features do not include a metal frame. Suitable for thermal insulation of wooden walls in places where the firebox is installed.
- Promasil 950 ks is another product from Germany with a size of 1000*500*30 mm and a density of 245 kg/m3. Peak load is 900°C, thermal conductivity at +200°C is 0.10 W/m*K, which is insignificantly inferior to the previous insulator at half the cost. It is easy to install without a frame, the manufacturer guarantees environmental safety. The material is relatively new, there are very few practical reviews on its use, and construction specialists are confused by the low price compared to analogues.
- Scamotec 225 - sample from Denmark. Slab size 1000*610*30 mm, thermal conductivity coefficient 0.08 at +200°C, maximum application temperature +1000°C, easy to install without a frame, harmless to health, combines thermal insulation and decorative qualities, it can be coated with any fire-resistant paint. The cost is in the middle price segment.
- Isolrath 1000. Country of origin: Austria. Size 1000*610*30 mm, density 240 kg/m3, thermal conductivity 0.06 W/m*K at +200°C. Operating temperature up to +900°C, a frame for installation is also not needed. The manufacturer guarantees environmental and fire safety against the backdrop of high structural strength. It also belongs to the middle price segment.
Solid fuel stove: fire protection rules
It seems that one thing in the world will remain unchanged, even when everything in it changes: people will light the stoves. Neither electricity nor gas will be able to displace solid fuel stoves from our homes. Based on the experience of FORUMHOUSE users, today we will talk about fire protection of rooms in which a solid fuel stove is used.
Wood-burning stoves and fireplaces are real symbols of home comfort: firewood crackles in the firebox, soft warmth spreads throughout the house... But if you do not think through fire protection or frivolously save on it, the stove can become a source of danger to property and life. A fire can start due to one spark falling from the firebox, or an overheated wall. When we install a stove or fireplace, fire protection should be an “extremely important expense” and should not be skimped on under any circumstances.
Archi73FORUMHOUSE Member
I assure you that life is more expensive.
Therefore, conscientious manufacturers of stoves and fireplaces always write in their instructions that protection of the floor, walls and ceiling is necessary at the place where heating devices are installed.
Screen
To reduce the thermal radiation of a metal heating device, protective screens are made from sheets of cast iron or steel. The screen lowers the temperature of the hot stove to +100 degrees. The finished screen can be easily mounted at a distance of up to 50 mm to the stove wall.
Floor
The floor on which the TT stove is installed must be protected with a non-flammable and durable coating. Options for the base on which the stove is installed can be as follows:
Alexey TeleginForumHouse Member
- on asbestos cardboard 5 mm galvanized sheet;
- or over two layers of GVL - porcelain stoneware;
- stainless steel, etc.
How to determine the size of this fire retardant floor pad? Usually it is made so that on each side it protrudes 100 millimeters beyond the perimeter of the oven. A pre-furnace sheet must be installed in front of the stove, which will protect against sparks and embers falling out of the firebox. Depending on the size of the firebox, the size of the sheet can be small, 500x700 mm, or 400x640 mm, or protrude 100 mm beyond the firebox from the other side.
Nowadays, rarely does anyone make sheets the old fashioned way, by nailing a piece of tin to the floor. More often they buy ready-made beautiful sheets of polished stainless steel, and for the fireplace - copper or brass, decorated with artistic etching and patina.
The stove must be at least 100 millimeters from the floor.
Ceiling
For fire protection of the ceiling, you can use the same materials as for the floor, only the distances to the heating device change.
If we are talking about a stone stove (smoke exhaust pipe and the top of a heat-intensive stove, covered with three rows of masonry), then the ceiling should be at least 250 millimeters from the surface of the stove. If we are talking about a non-insulated metal stove (as most bathhouses are), then the minimum distance is 1200 millimeters. If the ceiling is protected and the stove has thermal insulation, then the distance is reduced to 800 mm.
The fire protection on the ceiling should be larger than the perimeter of the heating device - add 150 millimeters on each side to the perimeter of the stove surface.
Walls
For optimal fire protection, the solid fuel stove is placed at a safe distance from the wall, which must be protected from fire. The material and method of protecting the walls depends on the thickness of the furnace walls. Members of our portal use fire retardant impregnations, mastics, foaming compounds, etc. to treat walls. This type of fire protection requires frequent updating. But what is more in demand among FORUMHOUSE users is not surface treatment compounds, but materials for their protection: basalt fiber mats, foil fire protection, etc.
Fire-resistant boards are especially popular: vermiculite, supersil (thin boards designed for use in the defense industry and withstanding temperatures above + 1000 degrees), fiber cement panel, glass-magnesite sheet, gypsum fiber sheet (GVL), calcium silicate (superizol). Not all of these materials are equally good, but they can withstand long-term heating to high temperatures, conduct heat poorly and last a long time without losing strength.
And in bathhouses, some still use the old ancestral method: they decorate the walls with two layers of felt soaked in a clay solution.
Alexey Telegin
Such protection not only prevents fire, but also signals the danger of fire with the smell of a burnt feather.
Options and combinations
Most of these materials and methods can only be used under certain conditions, combining them with each other and observing a number of requirements. For example, we trim the walls with slabs of fire-retardant material of a certain thickness, and we install a protective screen on a metal stove, etc.
Here are the options for protecting walls that are used by members of our portal (in both cases, the stoves are located in the country, the walls are clapboard):
— The wall is treated with a fire retardant compound, an asbestos sheet (or similar) is installed on top, from the ceiling to the floor, and on the sides of the stove it protrudes 15 centimeters. On top is a sheet of plasterboard, and the “pie” is completed - tiles for beauty.
— Two layers of basalt cardboard are applied to the lining in a checkerboard pattern, with an overlap; mineralite is placed closely on it, and a roofing profiled sheet with a round cross-section is placed on it. The subtlety is that the sheet should have a gap of 5 centimeters from the floor for convention.
The combination of several methods of wall insulation makes the protection reliable. And vice versa.
RedstonFORUMHOUSE user
85% of fires occur precisely when several factors, individually, in general, are quite acceptable, come together at one point.
Redston gives the following example: according to flammability, flammable building materials are divided into groups, and, in particular, group B1 includes those that are difficult to ignite, for example, gypsum fiber board, which many use for fire protection.
Redston
Flammability group B1 means that you need to apply a power of 35 kW or more per square meter of surface. But the area of your stove is much smaller, and iron stoves sometimes get very hot. To ignite a piece of GVL with an area of 10x10 cm, you need only 350 watts! GVL has low thermal conductivity, which means that local heating will not be dissipated over its area. It will heat up at one point, and go!
The distance between the stove and the wall depends, first of all, on the type of stove. You need to keep in mind that no matter how you protect the walls, for metal stoves the distance must always be set with a margin..
Alexey Telegin
When standards are neglected or excessive reliance is placed on thermal insulation, fire occurs.
The distance between the wall and the outer surface of the stove is called a setback in the professional language of stove makers. It is a correctly made retreat that protects the wall from an accidental spark that can fall out of the door gap, and from overheating, which leads to ignition.
The table presented at FORUMHOUSE by Alexey Telegin shows the minimum permissible distances between the stove and the wall.
| Furnace wall thickness, mm | Retreat | Distance from the outer surface of the stove or smoke duct (pipe) to the wall (partition), mm | |
| not protected | protected | ||
| 120 | Open | 260 | 200 |
| 120 | Closed | 320 | 260 |
| 65 | Open | 320 | 260 |
| 65 | Closed | 500 | 380 |
If the oven is thin-walled and the wall surface is not protected, the distance should be 500 mm. If the stove is thick-walled, and you have protected the wall to the maximum, a distance of even 200 mm is allowed.
With an open setback, there is open space on all sides of the oven.
A closed setback is a structure that is closed on all or more sides. How it works can be understood from the figure below.
1. Furnace foundation. 2. Sealing layer. 3. Fireproof floor. 4. Wooden wall. 5. Shield made of boards. 6. Thermal insulation (asbestos or felt). 7. Brick “on edge”. 8. Oven. 9. Pre-furnace sheet.
If the stove (or chimney) “crashes” into some partitions - this, for example, often happens in a bathhouse, when the stove itself is in the steam room, and the firebox door is in another room, a retreat is also made between the stove and the partitions. The less protected the structures are, the greater this distance should be.
FORUMHOUSE member Kisha has a big old house. He wants to divide it into two rooms, and put a stove where the frame partitions intersect. Members of our portal advised him to lay out a brick-wide indentation right from the stove, and then attach partitions to it. It is even better if fireproof materials are included in the structure of the partitions.
Dmitry2791FORUMHOUSE member
For example, a metal profile with SML on it, flat slate, mineralite, etc. For sound insulation, fill the adjacent to the stove with basalt cardboard or basalt wool and disguise it with a metal threshold.
In general, when installing a stove or fireplace, it is recommended to carefully study the manufacturer’s instructions, which usually indicate both the amount of deviation and the recommended operating modes. If the distances are not indicated in the instructions, you need to study the SNiP, the link to which is provided by the certificate of conformity. Most often, the size of the indentations is given there, and even depending on the operating mode that you choose.
At FORUMHOUSE you can ask your questions to the stove maker and get professional advice on the rules and regulations for installing chimneys. Watch the video about a real Russian stove. Read our article, which will be a good help for those who are planning to lay out a fireplace with their own hands.
What material is used
All building materials that provide insulation and are suitable for use in a fireplace can be divided into separate groups. These include stone fibers and silica, superisol, mineralite, gypsum fiber, supersil and vermiculite.
- Stone fibers are obtained by pressing crumbs of gabbrodolerite and limestone. The resulting fibrous structure is formed into plates. One side of the plate is covered with foil, which is capable of reflecting radiation, because this type of heat propagation accounts for about half of the total energy. Such foil can withstand temperatures of several thousand degrees. This material is quite durable and moisture resistant. Able to provide all possible assistance in maintaining the integrity of the structure in the event of a fire. The most popular fiber brands: PAROC FPS 17, TECHNO T80, Rockwool.
Rockwool brand insulation
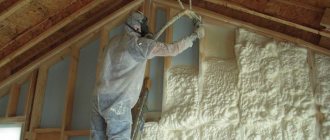
- The technology for using silica involves melting alumina and quartz sand. The resulting glassy mass is blown into fiber form. Fiber is already a heat-insulating material, but for ease of use it is produced in the form of slabs or rolls. This substance is flexible, which makes it easy to insulate surfaces that are not perfectly flat.
- Products based on calcium silicate have good thermal insulation properties. Superizol is one of the representatives of this class. Its porous structure not only improves technical performance, but also facilitates easy processing. Super-insulated slabs are used to insulate fireplace casings and chimneys. They are mounted with glue or self-tapping screws. The operating temperature of the material should not exceed 1200 °C degrees.
- Vermiculite slabs represent a pressed grain structure of the substance. This is a fairly rigid structure, thanks to which the surface of the slab is ready for decoration. They have a relatively high density, but are easy to saw and process. Characterized by their durability. Buyers are showing increased interest in the Thermax, GRENAR-ISOL and Scamol brands.
Panels made of fire-resistant material Superizol
Thermal insulation not only improves the efficiency of the fireplace, but also provides fire protection. It is important that the material remains safe for humans when heated. The requirements for building insulating materials are technical performance, environmental friendliness and ease of processing.
- Supersil is a flexible material. It comes in the form of a silica fabric with a foil-like layer. But such production is expensive in terms of cost, which affects the final price of fabric rolls.
- Gypsum fiber sheets are produced by mixing cellulose with gypsum and then pressing them. A distinctive feature of such sheets is that they can be used as a building material. Gypsum fiber does not tolerate deformation, therefore it is used only for insulating the fireplace body, walls and floor.
Materials for thermal insulation of fireplaces
Special thermal insulation for fireplaces is used to minimize heat loss in all parts of the fireplace: the chimney, the stove mass and the firebox itself. This allows you to increase the efficiency of heating equipment. Insulation of different parts of the fireplace has the following goals:
- Protects the chimney from the destructive effects of condensation that forms during a sudden change in temperature. The aggressive effect of condensate is due to the moisture content, various acids formed during combustion and carbon dioxide.
- Where the pipe passes through the ceiling, special care should be taken to comply with fire safety standards. If wooden building materials are used, special care should be taken to protect the surface of the ceiling.
- High-temperature insulation in fireplaces is used to create a directed flow of thermal energy to warm people sitting across from it. For these purposes, infrared reflectors are used, which are installed in the firebox itself.
- Protection of wall structures using a heat-protective layer. Otherwise, a brick wall can quickly become unusable due to a sharp temperature change, and a wooden wall can catch fire.
The building materials used for thermal insulation of the fireplace are represented by the following groups:
- containing stone fibers (Rockwool, TEXHO T80, PAROC FPS 17) – are produced in the form of slabs and have a foil coating on one of their sides, which allows them to withstand temperatures of several thousand degrees;
- based on silica obtained from quartz sand and alumina, produced in the form of flexible plates;
- Superizol - is made using calcium silicate and has good thermal insulation qualities, suitable for insulating fireplace bodies and their chimneys, attached with glue or self-tapping screws;
- Vermiculite – presented in the form of slabs (Scamol, Thermax), consists of compressed grains of the substance, is rigid, easy to saw, and has a surface suitable for finishing;
- Supersil - is a fabric made of silica with a layer of foil, has a high cost;
- gypsum fiber - obtained by mixing and pressing gypsum and cellulose, suitable only for insulating solid fireplaces, floors and walls, does not withstand loads and is deformed.
When choosing materials, it is important to make sure that they are environmentally safe so that they do not release toxic substances into the environment when heated.
Carrying out work
The technology for thermal insulation of a fireplace consists of a step-by-step solution to certain problems.
Setting tasks and solving them
- The required amount of material is calculated. For more efficient use, take into account the cutting and processing ability of the insulation boards or fabric.
- If the fireplace is located at a distance not exceeding 50 cm from the wall, then sheets of insulating fiber are attached to its walls.
- The degree of insulation can be increased using a multilayer structure.
- The chimney is insulated, regardless of what material it is made of.
The characteristics of modern insulating materials will help answer the question, how to properly insulate a fireplace? To insulate walls, it is advisable to use slabs, one side of which is covered with foil. The foil creates a protective screen, and the effectiveness of such protection is quite high. A negative quality is the unaesthetic appearance of slabs made of insulating material.
In wooden buildings, it is recommended to use several layers of insulation. To do this, a lathing is made of metal slats into which gypsum fiber boards are inserted. A wooden sheathing is mounted on top to secure sheets of fire-resistant plasterboard. The outside surface must be finished with tiles or artificial stone.
Several technologies are used to perform chimney thermal insulation. One of them is making a sandwich pipe. A box is made of metal, which has a larger diameter compared to the diameter of the chimney pipe. Mineral wool is laid along the walls of the box. Then a pipe of smaller diameter is inserted inside. When manufacturing the structure, it is necessary to provide for the option of wrapping the pipe in parts.
The brick pipe is insulated with plaster, which is applied in several layers on all sides. After the fourth layer, the outside of the pipe is lined with mineral wool slabs. They are fastened with self-tapping screws with large washers. The outside must be made of brick; it will give an aesthetic appearance to the pipe and protect the material from precipitation.
We produce stove insulation
Insulation methods depend on several factors. For example, if we talk about a chimney, then everything depends on the material and design features. Let's consider modern methods of insulating furnace structures.
Thermal insulation between the wall and the stove
Many home craftsmen are interested in thermal insulation of the stove from the wall. And even though the insulation of the stove is neglected at first, over time the effects of the stove’s heat on the adjacent wall become clear. And the only way to protect a wall from destruction is thermal insulation.
There are several options for this:
- Perhaps the simplest method, which is distinguished by its low price and ease of execution.
- Lay asbestos boards on the wall.
- Place foil on top of the plates, thus creating a reflector.
Insulation of the wall in the steam room.
Advice! This method is applicable when the stove is at a significant distance from the wall (50 cm or more). If the distance is less, then asbestos cannot be used, since when overheated it releases harmful substances.
Naturally, many will not like this method also for the reason that the foil wall does not have a very aesthetic appearance.
- The next method is more complex, but much more effective. The instructions include the following steps:
- Attach metal hangers to the wall for vertical sheathing.
- Wooden slats should be attached to the hangers, which should be 2-3 cm wider than the insulation boards.
- We lay mineral wool slabs between the slats.
- A reflector is nailed to the slats on top of the mineral wool.
Advice! Since mineral wool is afraid of water, it is advisable to use not ordinary foil, but a material with waterproofing properties, for example, penofol.
- We mount heat-resistant hot-rolled sheets onto the reflector.
- Any heat-resistant facing material can be mounted on top of plasterboard: mosaic, tile, stone, etc.
Wall insulation: 1. Mineral wool board; 2. Waterproofing; 3. Facing.
This creates reliable thermal insulation for the stove, as a result of which the wall will no longer heat up.
Thermal insulation of chimney
Thermal insulation of a chimney can be made with various materials, namely:
- Mineral wool insulation is one of the most popular materials these days. It has a number of unique positive characteristics, but is afraid of moisture, which is why a waterproofing layer is necessary when laying mineral wool.
- Glassy. Has properties similar to mineral wool.
- Brick. Whole or chipped bricks are very often used as insulation.
- Slag slabs or mortar.
These are the most suitable thermal insulation materials for stoves, which provide a truly high level of insulation.
As mentioned above, the insulation of a chimney depends on the material from which the pipe is made.
- Asbestos cement chimney.
- We clean the surface of the pipe from dirt and dust.
- We place the mineral wool in a steel casing that will be placed on the pipe. Such a casing can be made of roofing or galvanized iron. It consists of several parts, each of which does not exceed 1.5 meters in length, which makes compacting the insulating material easier.
Advice! The diameter of the casing should be 12 cm larger than the diameter of the pipe.
- We put the first part of the casing on the chimney, evenly distributing the insulation.
We place insulation tightly between the pipe and the casing.
- We put on the second part. The gaps between the two parts of the casing should be no more than 100 mm.
- We insulate the resulting structure to the very top.
- The upper part of the pipe is installed with a slight slope.
- If there is any free space left between the chimney and the casing, it should be sealed with cement mortar.
- Steel chimney. Modern steel chimneys are structures made of two pipes with different diameters. In this case, the smaller pipe is the chimney, on which a protective casing is placed. A thermal insulation layer is laid between the pipes.
- The smaller diameter pipe should be inserted into the larger diameter pipe.
- The space created between the two pipes must be filled with mineral or stone wool.
The space between the two pipes should be filled with insulation.
- Brick chimney. Thermal insulation for fireplaces and stoves whose chimneys are made of brick can be done in several ways:
- Plastering method. We attach a reinforced mesh to the pipe.
- Prepare a slag-lime solution. To do this, we use fine slag, lime and a small amount of cement.
- Apply the first layer of plaster to the chimney, 3-4 cm thick.
- Next, you should wait a while until the plaster dries.
- We apply the following layers, the thickness of which should be 5-7 cm. Ideally, it is enough to apply 3-4 layers.
Advice! For the first layer, the consistency of the solution should be more liquid than for subsequent layers.
- We whiten the pipe with lime or chalk paint.
This method of insulating a chimney pipe can reduce heat loss by an average of a quarter.
Chimney, insulated and covered with chalk paint.
- Carrying out complex insulation of chimneys. A more complex, but also more effective approach. Cut mineral wool to the size of the chimney.
- Secure the heat insulator to the pipe using metal tape or wire. Studs with washers are also suitable for fixation.
- Line the chimney with asbestos-cement slabs or bricks. The thickness of the facing slabs must be at least 4 centimeters.
- Plaster the surface.
This method of lining chimney pipes allows you to:
- Reduce heat loss by half.
- Increase the density of the chimney.
- Prevent the formation of condensation and, accordingly, the destruction of the chimney.
- Increase the level of safety when using heating systems.
The photo shows the stages of thermal insulation of a brick chimney for stoves and fireplaces.
How to do it yourself?
- First, the required number of thermal insulation boards is taken, which are cut to the size of the fireplace insert.
- After this, a special heat-resistant glue (mineral, cement-based) is applied, and the application should be carried out pointwise.
- When installing foil material, glue is applied to the non-foil part.
- After this, the slabs are mounted on the walls. Joints and other openings must be sealed with special heat-resistant aluminum tape, which can also be reinforced.
Fireproof wall coverings
To prevent spontaneous combustion of the walls adjacent to the furnaces, it is necessary to install special cladding made of non-combustible materials with thermal insulation properties.
Thermal insulation for furnaces in this case is carried out in two ways:
- For cladding, materials are used that have reflective properties and are resistant to high temperatures.
- The heat-insulating furnace casing is covered with a lining of heat-resistant tiles.
Good reflective qualities are shown by metal sheets covering non-flammable heat-insulating sheets. It is best to use stainless steel, since galvanized steel releases toxic substances when heated.
It is recommended to polish the outer surface of metal sheets, as this helps to better reflect thermal energy.
The following materials are used as thermal insulation:
- basalt cardboard;
- basalt wool;
- minerite;
- asbestos cardboard.
In accordance with SNiP 41-01-2003, installation of the casing is carried out in the following sequence:
- Installation of insulation with a ventilation gap of 2 to 3 cm. The thickness of the insulating material is no more than 2 cm and no less than 1 cm.
- Installation of metal sheet.
- Maintain a distance between the stove and the casing of at least 38 cm.
Ceramic bushings are used to attach materials to the wall: they allow the required gap to be maintained and are resistant to fire. If it is not possible to maintain the specified distance between the stove and the casing, then two layers of thermal insulation sheets should be used. For example, two sheets of mineralite are attached using ceramic bushings. The distance between them is 2-3 cm. The outer sheet is covered with stainless steel.
The design of a room or bathhouse does not always allow the installation of metal cladding. Often it will not fit into the interior of the room. In this case, you can resort to sheathing with heat-resistant tiles, which are attached using a special adhesive that is resistant to high temperatures. We list the suitable materials for cladding:
- terracotta tiles;
- porcelain stoneware;
- tiles;
- clinker tiles;
- Soapstone chlorite
When installing, follow the following rules:
- The ventilation gap between the wall and the fireproof sheet should be 2-3 cm.
- Fire-resistant tiles are attached to the installed sheet using special adhesive mixtures.
- The oven should be located no closer than 15 cm from the surface of the tile.
The following are suitable sheet fire-resistant materials for cladding with cladding:
- minerite;
- fireproof plasterboard containing fiberglass;
- glass-magnesium sheet.
The cladding will help not only to complement the design of the room and maintain a unified style, but also to reduce the permissible distance between the stove and the wall.
Materials and features of insulation
For home craftsmen who have decided to insulate a chimney with their own hands, the approach to implementing this idea depends on what the chimney pipe is made of. But in any case, it is necessary to ensure that the outlet of the smoke duct through the roof is sealed. The following types of thermal insulation for chimney pipes best cope with this task:
- mineral wool;
- kaolin (asbestos) boards;
- roll filters.
Mullite silica slabs are used for waterproofing. The advantages of this material include its ability to withstand significant temperature changes, flexibility, strength, and the fact that it does not ignite.
Stainless steel flue insulation. To prevent the roofing material from igniting due to exposure to high temperature furnace gases, the pipe outlet through the roof requires the use of additional safety measures. Contact of roof elements with the chimney is prohibited. The passage of the pipe through the roof is hidden using a metal collar, and the free space is filled with insulation for the chimney pipe made of non-combustible material.
Steel chimneys are most often insulated with fibrous materials, for example, mineral wool shells
For thermal insulation of a stainless steel chimney, glass wool, basalt wool or expanded clay are used. If the design of the furnace gas exhaust system has a round cross-section, a metal pipe is additionally used for thermal insulation.
In general, the procedure for insulating a stainless steel chimney looks very simple:
- A metal pipe is attached to the chimney. Its diameter should be 8-10 centimeters larger than that of the internal channel;
- The previously prepared insulation for the chimney pipes is placed in the space between these elements.
Insulation of a brick chimney. The centuries-old practice of creating chimneys from brick has developed a traditional approach to their insulation. It involves plastering with lime. The volume of the solution produced for this purpose should be enough to create a layer applied to each wall with a thickness of at least 30 millimeters. But there are also new technologies for do-it-yourself chimney thermal insulation. For example, the use of special thermal insulation boards performs this function even more effectively. They can be secured with wire or with the same solution.
Good to know! In any case, thermal insulation of the outer walls of the pipe leads to an increase in their density, which, in turn, increases the level of protection of the structure from destruction.
You can insulate a brick chimney by plastering the outer surface
If thermal insulation is correctly performed at the installation stage, the service life of the chimney will be increased. In addition, a chimney that is correctly insulated even with your own hands will reduce the level of costs required for its ongoing repairs.
Perform the insulation procedure in this order:
- prepare pieces of insulating material. Do this after taking measurements of each wall of the smoke duct;
- secure the previously prepared sections with mortar to the chimney wall;
- make cladding from asbestos-cement slabs or brickwork;
- additionally plaster the brickwork.
Insulation of asbestos-cement smoke duct. And in this case, each pipe wall must be covered on the outside with a layer of thermal insulation. To seal the chimney outlet through the roof, slag wool or other non-combustible material is used. The insulation is placed in the gap between the outer surface of the asbestos-cement pipe and the stainless steel protective casing.
For thermal insulation, perform the following sequence of measures:
- assemble a protective casing from separate parts. The height of each component should not be more than one to one and a half meters;
- put the casing on the chimney at the location of the chimney outlet through the attic floor;
- insulate the free space with insulating material (you can even use loose material, such as expanded clay, etc.);
- waterproof the outside of the chimney.
For some types of chimneys, insulation with bulk materials is used, which are placed between the inner and outer pipes
Protective screens for furnaces
The thermal insulation material used for stoves must not only prevent the possibility of fire, but also protect people from too harsh infrared radiation. Protective screens for fireplaces, as well as for sauna stoves, are ideally suited for these purposes. They can be made of metal or using brick or decorative stone.
The peculiarity of fireplace screens is that they are made exclusively of metal and can be built-in or mobile. Such designs prevent sparks and hot coals from entering the room, and also, when heated, contribute to the rapid and uniform heating of the air in the room. You can purchase a protective fence or make it yourself. Let's take a closer look at the features of furnace protective screens.
Brick protective screen
Along with insulation, the furnace is insulated using bricks. There are two options: constructing a protective wall and lining the furnace with bricks. In both cases, the brick is laid using an adhesive mixture or clay. The use of cement mortar is considered as a last resort. When lining the stove with brick, it is necessary to provide a gap of 3 to 10 cm, as well as ventilation holes at the bottom and top to ensure better convection and quick heating of the room.
Stainless steel casing
Thermal insulation of the furnace using stainless steel casing has several options. Based on orientation in space, front and side screens . The recommended distance from the oven to the screen is from 1 to 5 cm . Thanks to such structures, it is possible to reduce the intensity of thermal radiation from a metal furnace, since the outer surface of the protective screens warms up to 1000 C. In this case, it is possible to reduce the distance from the furnace to the wall to half a meter. Ease of installation and the presence of special legs that allow you to securely fasten the screens make their use especially attractive.
For finishing walls under a boiler
If the walls of the boiler room are wooden, then they need to be pre-treated with fire retardants. The wall behind the boiler must be covered with sheet metal . The remaining area is finished with sheets of plasterboard or glass-magnesium. Then the surface is plastered or covered with ceramic tiles.
Basalt with cladding
Basalt facing slabs look aesthetically pleasing and provide good fire protection. In addition, this material gives off heat for a long time after heating. You can use this material to cover both a brick screen and the wall itself on top of insulating sheets.
Fire safety cannot be treated negligently - the consequences of carelessness can be tragic. The modern building materials market allows you to choose an option according to your means and taste, while providing reliable protection against fire.
Tips from the pros
In order to increase the fire safety of the ceiling that crosses the chimney or chimney, install a decompression chamber by installing a heat-insulating board in a horizontal position.
It is preferable to provide 2 fan grilles in the box : one for the purpose of cooling the decompression chamber, and through the other, warm air will be transmitted throughout the room. Sheets of plasterboard are attached to the iron guides using self-tapping screws: they will be the basis for the decorative finishing of the fireplace.
How to insulate a chimney
Having protected the walls from the hot fireplace insert, proceed to insulating the pipe. For this, one of the following materials is used:
Chimney insulation
- mineral wool is the most popular and sought-after material, which is convenient and inexpensive to work with;
- glass wool - its properties are similar to mineral wool, but it is more difficult to work with;
- brick - the use of whole and chipped specimens is allowed;
- slag slabs - designed for insulation in unstable climatic zones.
If the fireplace and chimney are made of brick, then insulation is carried out quickly and with little financial loss. To do this, the surface is plastered using a reinforcing mesh. At the junction of the pipe and the roof, reinforce it - lay an additional layer of brick. This completes the thermal insulation.
It is much more difficult to work with round pipes made of metal and ceramics. These materials overheat strongly during operation of the fireplace, and accidental touching them will inevitably lead to severe burns. Therefore, be sure to take care of insulating such pipes. This is necessary to reduce heat loss and maintain the integrity of the pipe for a long time.
Thermal insulation is carried out with non-flammable materials of dense structure. Mineral wool is ideal and is used to wrap the pipe as the first layer. The second layer of insulation is reinforced on top - stainless steel sheets. They are wrapped around the chimney and sealed. Instead of stainless steel, plaster can be used.
The above method of thermal insulation increases the efficiency of the chimney, increases the service life of the structure and prevents overheating of nearby surfaces. If all the work is done correctly, then re-installation will be required after about 15 years with intensive use of the fireplace.
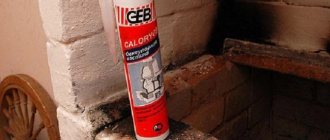
Heat resistant sealants
This type of sealing materials is produced on a silicate basis, which makes them stable at temperatures close to 1300-1500 °C. Some of them can even withstand temperatures of 1600 °C for a certain time.
In this case, they are dark gray or black in color and are called fire-resistant pipe sealants (the word “fire-resistant” is on the outside of the tube or package).
Some important rules when using heat-resistant sealants:
- Work with silicate sealing materials is carried out in the temperature range of +5 - +40 °C.
- The required sealing effect is achieved only in the case of rough and uneven surfaces. For this purpose, if necessary, the areas where the composition is applied are treated with abrasive materials.
- In addition, the surfaces should be degreased with acetone and then allowed to dry for 15-20 minutes.
- When the paste hardens in places where the sealant is applied, very strong and hard seams are obtained, so it is not recommended to use heat-resistant compounds for structures operating in vibration conditions.
- Traces of sealing material can be removed with a wet cloth or rag, but only before the material hardens. After hardening, this will require the use of mechanical force and some simple tools.
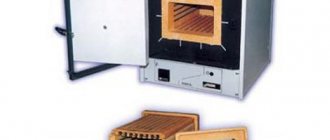
Materials and tools for assembling the structure
Before you start making a muffle furnace with your own hands, you need to acquire a set of tools. For work you will need:
- welding and electrodes;
- Bulgarian;
- nippers and scissors;
- respirator, glasses;
- steel or oven body;
- metal corner;
- galvanized mesh with a cell of 2 x 2 cm;
- door - ready-made or homemade;
- fireclay brick;
- fireproof mixture;
- heat-resistant silicone;
- perlite or basalt slab (roofing insulation 1 - 2 cm thick);
- nichrome wire 1 mm.
The thickness of the metal for the body should be 2 - 2.5 mm, since the final structure will be very heavy. For the same reason, if thin-walled household appliances are used, they need to be strengthened with a steel angle.
Those who intend to fire ceramics will not need temperatures above 800 ° C, so they can make a muffle from any porcelain or earthenware dish or an old flush cistern.
Refractory masonry
For a homemade muffle, it is not recommended to use clay, even fireclay. It does not conduct heat well enough, and to properly burn it, you need a temperature of 1900 °C, which cannot be achieved at home.
Brickwork will be much more reliable, but you need to take into account that the spiral located inside the oven will slowly evaporate, and these vapors will enter the product.
The process of making a fireproof chamber
So, when working with precious metals, it is better not to use homemade units.
So, you purchase fireclay bricks and a mortar mixture that is not afraid of heat.
Fitting and marking
This action must be performed in order to be able to cut a groove for the heater spiral in the muffle wall before starting masonry.
- The future side and rear walls of the refractory are laid out on a flat surface.
- The bricks are adjusted and trimmed (it is important not to forget about the thickness of the seams, 3 - 5 mm, they can be imitated by wire).
- After adjustment, the bricks are numbered, and markings are applied to their surface where the spiral will go (at this stage you need to make the spiral with your own hands).
- While wearing glasses and a respirator, grooves are cut using a grinder.
Decorating a stove with tiles is an expensive pleasure, but such decor brings unique sophistication to the design of the room. To save money, you can try making them yourself. Tiles for the stove: do-it-yourself production technology, read carefully.
You will find step-by-step instructions for assembling the Bubafonya stove here.
The Russian stove still remains relevant, and its construction is quite labor-intensive. But if you are not afraid of difficulties and you want to make a stove with your own hands, step-by-step construction instructions will help you: https://microklimat.pro/otopitelnoe-oborudovanie/pechi/russkie-svoimi-rukami.html. Let's consider the rules and stages of laying a stove.
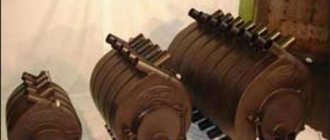
Making a spiral for a muffle furnace
You will need a base rod on which the wire will be wound. Its diameter should be approximately 5-6 mm and its surface smooth. When the spiral is ready, it is applied to the brick blank and marks are made according to the resulting dimensions.
Later, when the masonry is ready, the winding will need to be carefully placed in the grooves and secured with “staples” made of the same wire. The ends of the staples are sealed into the seams.
Spiral heating element of muffle furnace
The exit points of the spiral are located in the side or rear wall. It is more convenient to fix them on a ceramic plate. The switch is installed on the body, the spiral wires are connected to it. On one side it will have two contacts (“+” and “-”). If you make two separate circuits, you get three power levels of the device:
- Serial connection of two circuits.
- Only the lower spiral.
- Parallel connection of two circuits.
RCD and grounding are mandatory. In order not to burn the spiral the first time you connect it, you need to wait until the masonry mortar has completely dried.
Camera
A heat-resistant mixture is diluted (instructions can be read on the packaging). The bucket is filled with water. The brick will be dipped in it for 20 seconds before being placed.
First, the bottom of the muffle is laid out, then the walls are erected. The ceiling is laid with a vault, with interlocking bricks.
Another option is when the chamber is made of bricks placed vertically and in a circle. It should look like a pipe.
Grooves are also applied, and a bevel is made on the sides using a grinder.
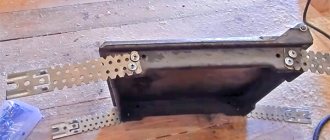
When a ready-made oven body is used, it is reinforced with corners, then basalt insulation is glued to the inner walls (with heat-resistant silicone or special glue). Then, already fitted, numbered bricks with a groove are placed from bottom to top. They need to be laid very tightly (the thickness of the seams is no more than 5 mm).
Thermocouple
It is imperative to control the degree of heating in a closed muffle, but doing this is much more difficult than, for example, in a blacksmith’s forge.
In high temperature conditions, only one type of sensor can work - a thermocouple (dissimilar conductive parts that are connected together).
Two ceramic tubes are made, from which two wires are brought out: one from aluminum, the other from a chromel alloy (or nickel and iron).
One end of the wires is twisted together. There is no need to weld, as the ends will soon burn anyway. They will need to be “bitten off” and the ends twisted again. The other ends are connected to a regular household tester.
Door
There is also a layer of fire-resistant brick on the door. To secure it, a steel corner is welded, which will support the masonry.
The door is removed and placed on a flat surface. A mesh is attached to it.
Cement is added to the solution and brick is laid.
The door must be securely locked during melting operations. You can equip it with a screw or wedge mechanism.
Hinges from household appliances may not withstand the load of a door with a brick layer. It is better to replace them with more powerful ones.
Seal
It is unacceptable that the door does not fit tightly to the body of the oven. She needs additional sealing.
You can use a heat-resistant rubber band (used on ovens). Or you can use the same silicone. The door in its contact areas is degreased, and a substance is applied to the oven itself to which silicone (any greasy lubricant) does not stick.
Silicone is applied in a thick layer to the edges of the door, and it closes. As a result, the seal will stick to the door, but the edge of the oven will remain clean.
The seal will burn out over time, so silicone should always be on hand to replace it.
Oven drying
The oven is placed in a dry, ventilated room with positive temperatures.
You can check the readiness of the oven by turning on the coils to the lowest power setting. A dry unit will not emit steam.